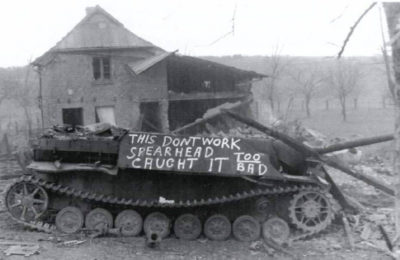


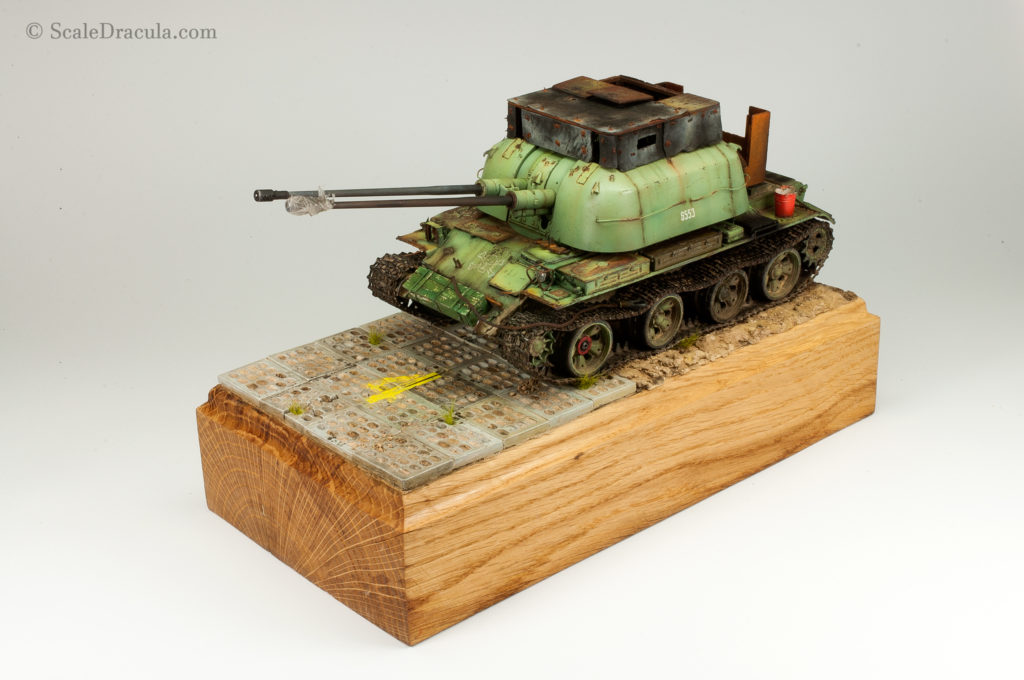

I’m going to show you how to build and paint a nice base for your model. It will be to be an urban environment base that will match the urban style tank tracks I already showed you in another SBS. And this particular base will be a home for my ZSU-57-2, so I can finally call this project finished. Enjoy!
Prepare an old picture frame, a chunk of styrofoam or a piece of cardboard you’ve probably got lying somewhere in your house. Any piece of flat material will do just fine…
Grab whatever you’ve prepared and THROW IT IN THE GARBAGE WHERE IT BELONGS!!! Seriously, throw it into the trash and never use it for your models!
Now that we have this issue solved, we can start the actual SBS.
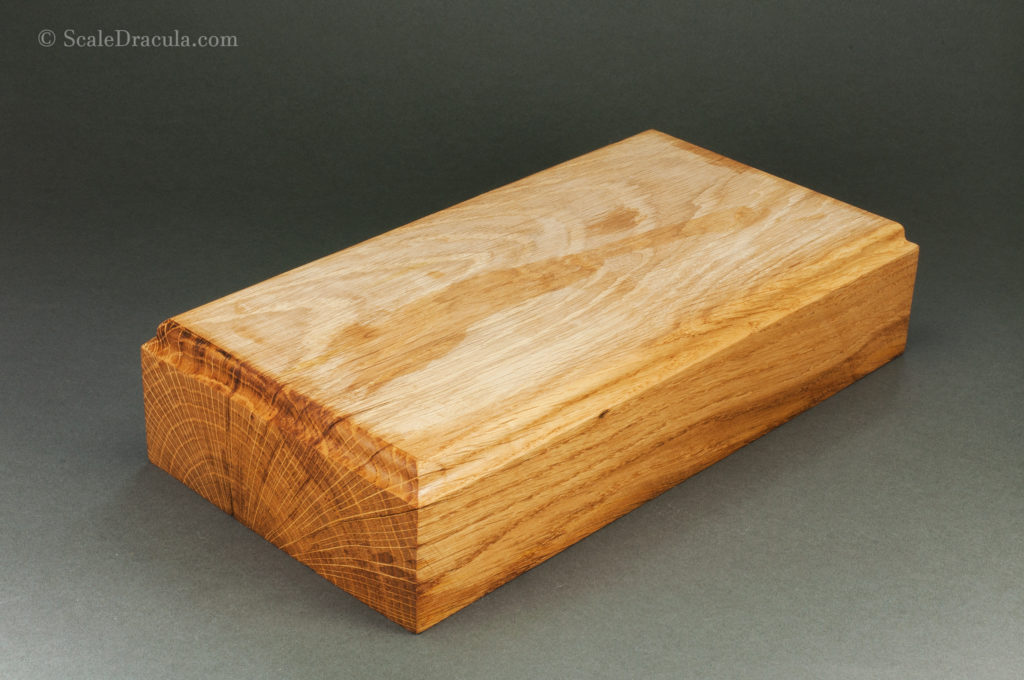
Find yourself a good quality base. You can buy one but it’s usually expensive. Or you can make it yourself.
Here’s what I did: I went to my brother-in-law’s workshop. We took an old piece of wood that was about to end up in his fireplace. We cut it, polished it and we trimmed the edges with a milling machine. The cost? A couple of beers for my brother-in-law.
After that, I finished the base with natural wood oil. A great way to bring out the beautiful structure of that oak.
In a plastic container prepare a mix for the terrain. Here are the ingredients:
-plaster
-microballons
-white PVA glue
-pigments
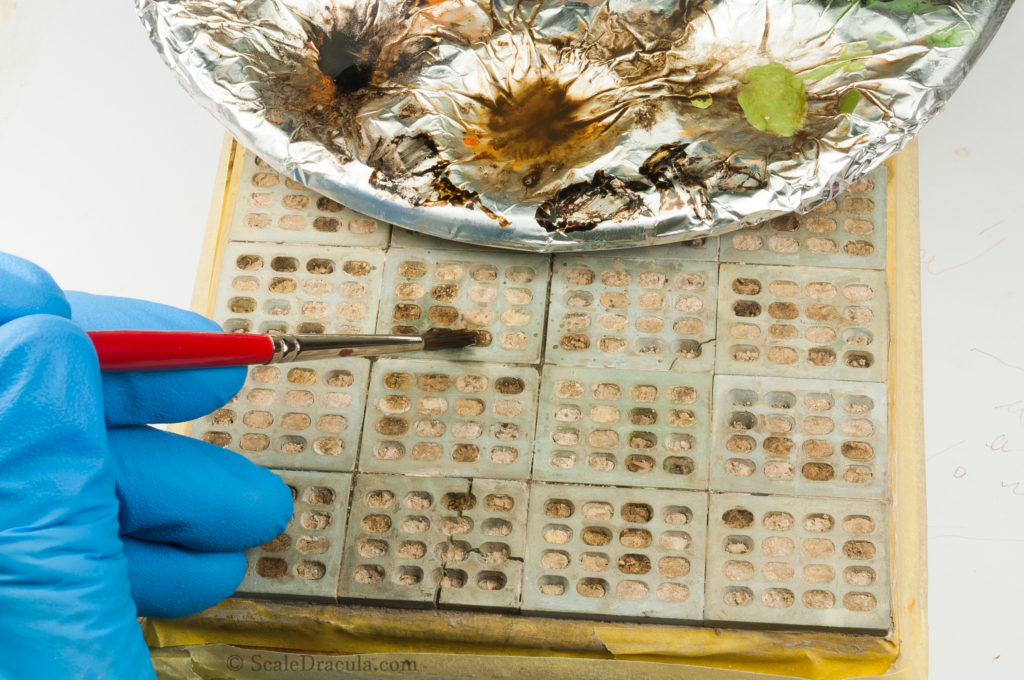
You may need to design something that will suggest the urban atmosphere of the base. It may be a part of asphalt road for example. I purchased some concrete panels from Eureka XXL.
Use a spatula to spread the paste over the base. Put the concrete panels on the top and press.
It’s a good idea to break some of the panels. Keep it interesting!
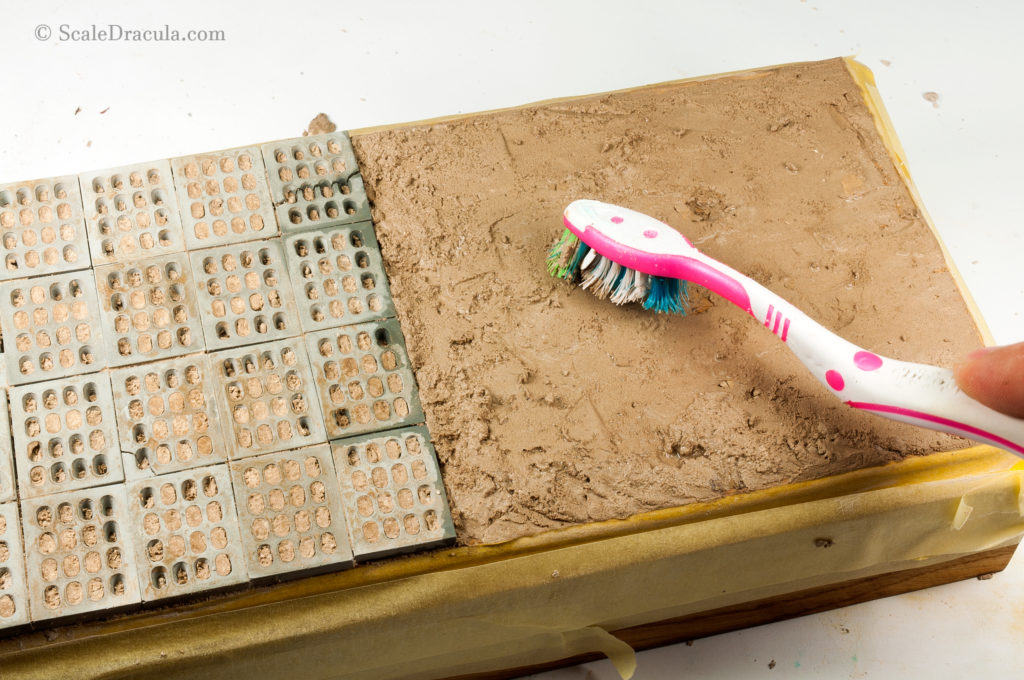
At this point the terrain will probably be smooth and boring. You can use an old toothbrush to make a more realistic texture
While the paste is still wet and workable, use a toothpick to shape it in a realistic way.
The panels are made of tinted plaster (at least I think so). You don’t need to paint them to get a realistic result. However, I recommend some filters to break the monotony of the grey colour.
Prepare a dark wash with a brown oil paint and white spirit. Distribute it on the terrain with a medium brush. Use different shades to make the effect random and realistic.
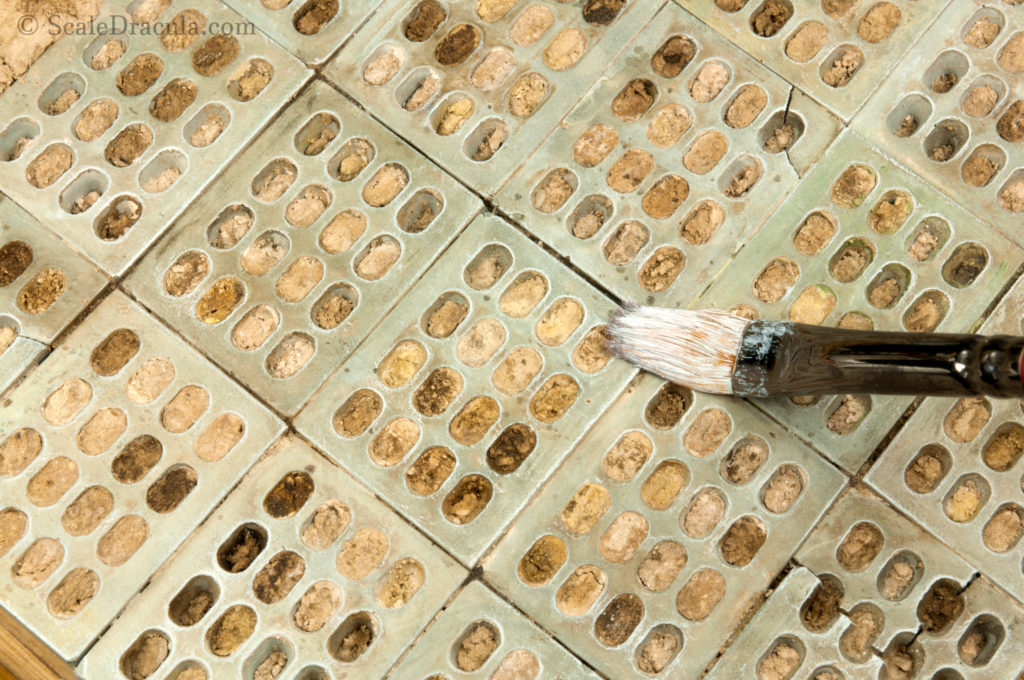
With a big flat brush dry-brush the edges of the concrete panels. A light grey paint will work perfectly here.
Remember that you need a thick, undiluted paint for the dry-brush technique.
Make some fuel stains with a dedicated enamel product. You can add a little bit of white spirit or dark oil paint to change the intensity of the effect.
You can make the fresh fuel product by yourself: mix enamel glossy varnish with some black and brown tones of oil paints.
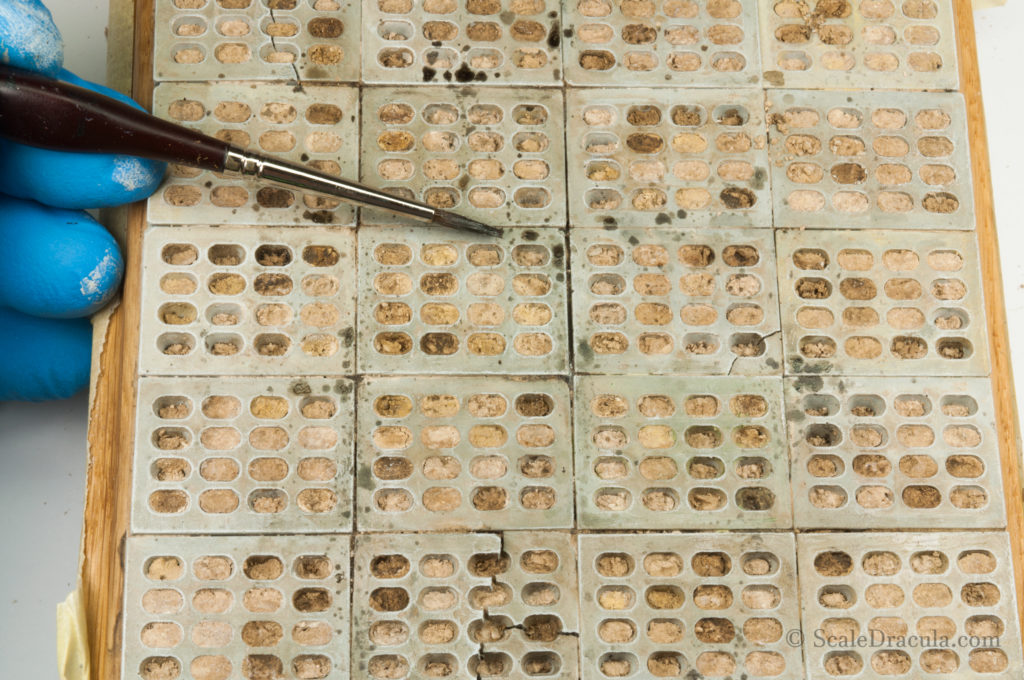
You probably have some dry remains of the paste you prepared earlier. Crush it into little clods of dirt and distribute then randomly on the base.
Fix the loose dirt with Sand&Gravel glue poured from a pipette.
After the glue dries, it can leave some nasty glossy marks. You can get rid of them by airbrushing matt varnish on top.
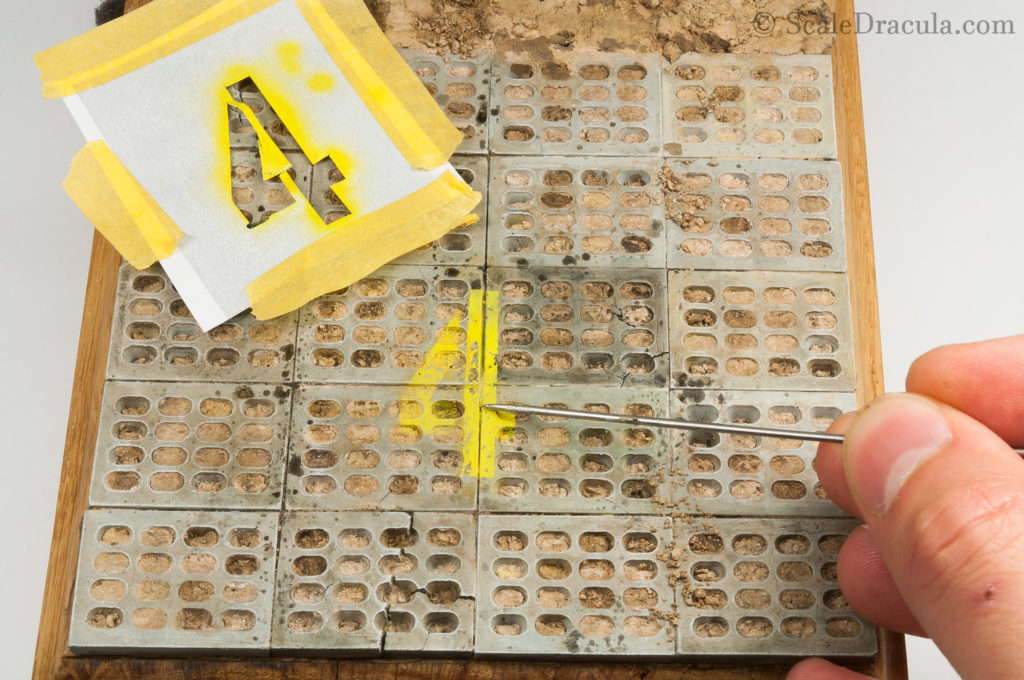
Do you feel you base could get a little bit more interesting?
Find some number templates in the Internet. It’s easy, they are all over the place.
Cut the number with a fresh blade of your hobby knife to get a simple mask.
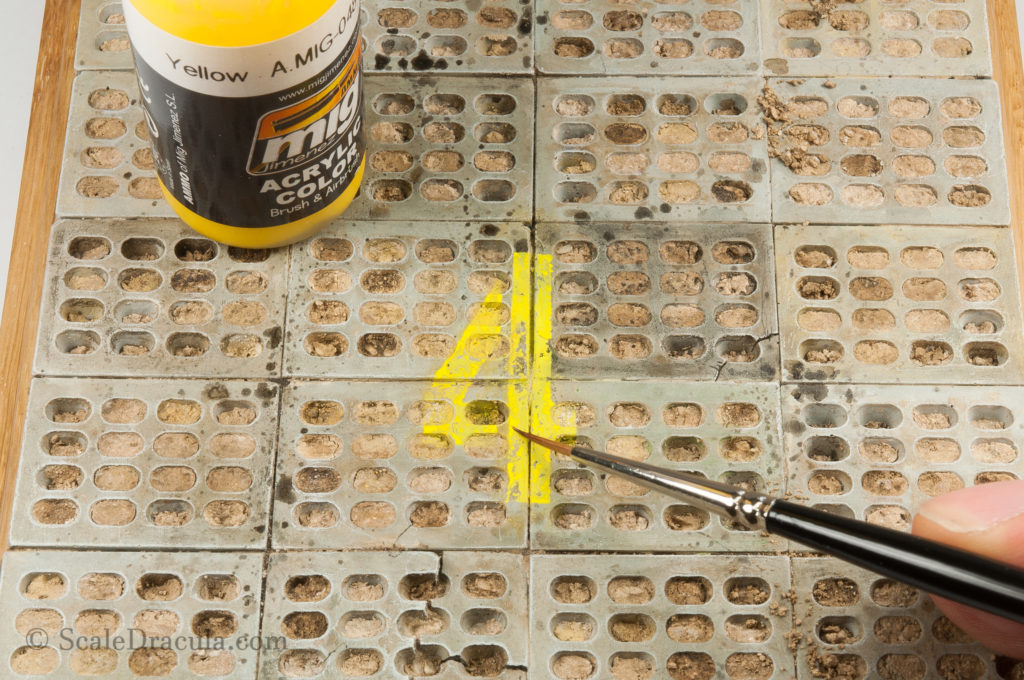
Spray some chipping product on the base. Then secure the template with masking tape and paint the number with the colour of your choice.
Moisten the fresh paint with water and let the chipping begin!
Most of the chipping fluid has probably soaked into the porous plaster so you may need to force it a little bit.
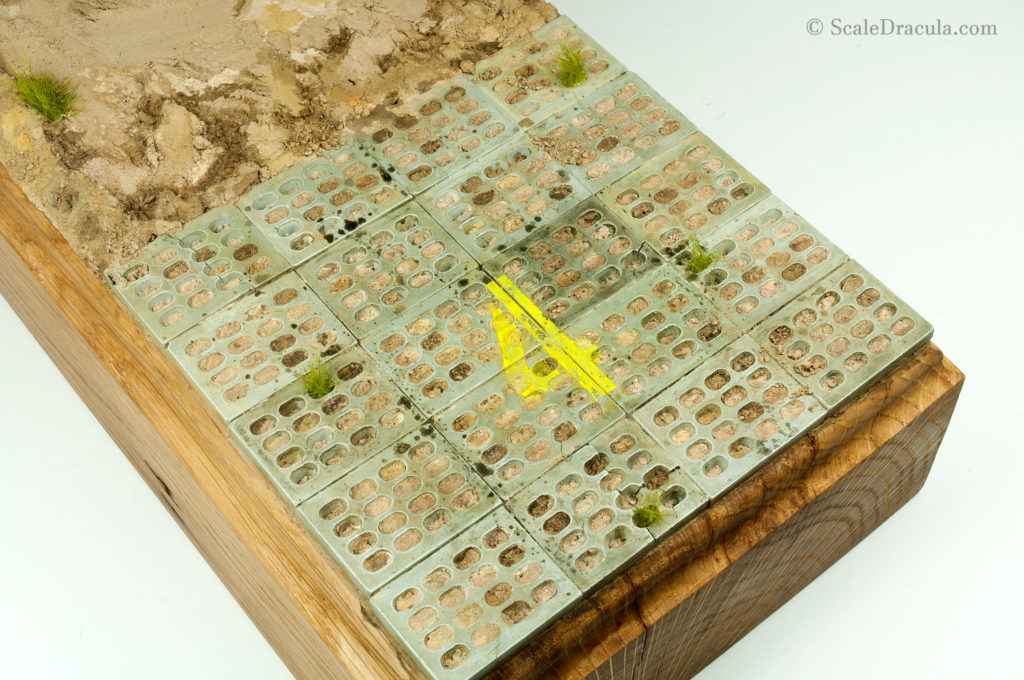
Create some more contrast by repainting the edges of the number.
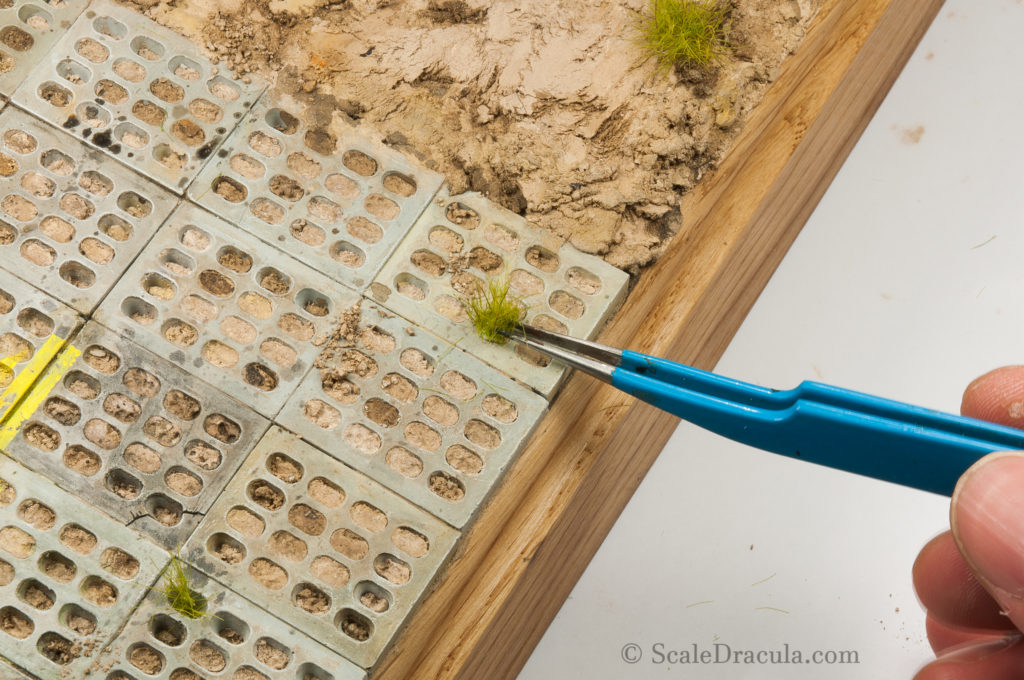
It’s never wrong to add some vegetation. Glue it in with a PVA glue.
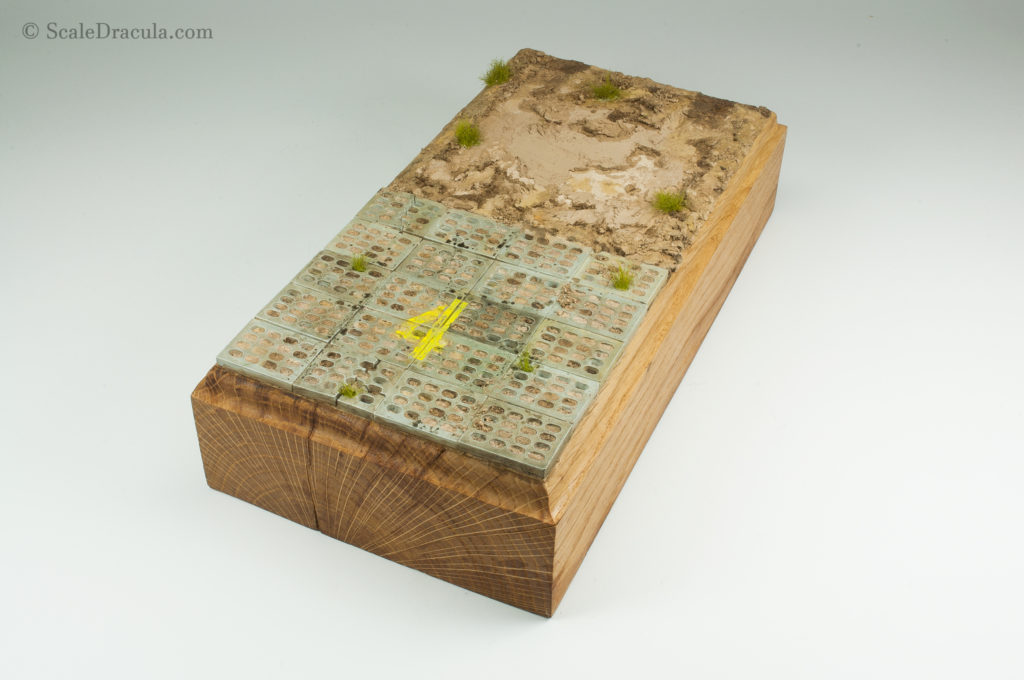
Ready! Enjoy your quality base.
OK, OK, before you get mad… I know that not all of you have wood lying around and a brother in law with a well equipped workshop. Let me just say it clearly: you can use ANYTHING you want for your bases. I don’t really care that much and it was a bit of a joke I did above. And I have nothing against styrofoam or whatever as long as it used with a good plan and dedication. I’ve seen fantastic bases made of styrofoam, but they were neatly cut, shaped and painted.
And on the other hand, I’ve seen many good models that were ruined by their sloppy, cheap-ass bases. You probably spend days, weeks, or even months building your perfect tank. Why not spend a couple of hours for a good base to put it on?
The bottom line is this: put some effort into your bases. I’m sure your tanks will thank you one day.
previous