Last time I finished painting the interior of my ZSU-57-2. I also glued the turret together and finally my model started to look like an actual tank. I really hate to use the glue after the painting. It’s a recipe for disaster. But I guess sometimes it’s inevitable… OK, painting the interior was just a warm-up, let’s see how will it go with the rest of the model.
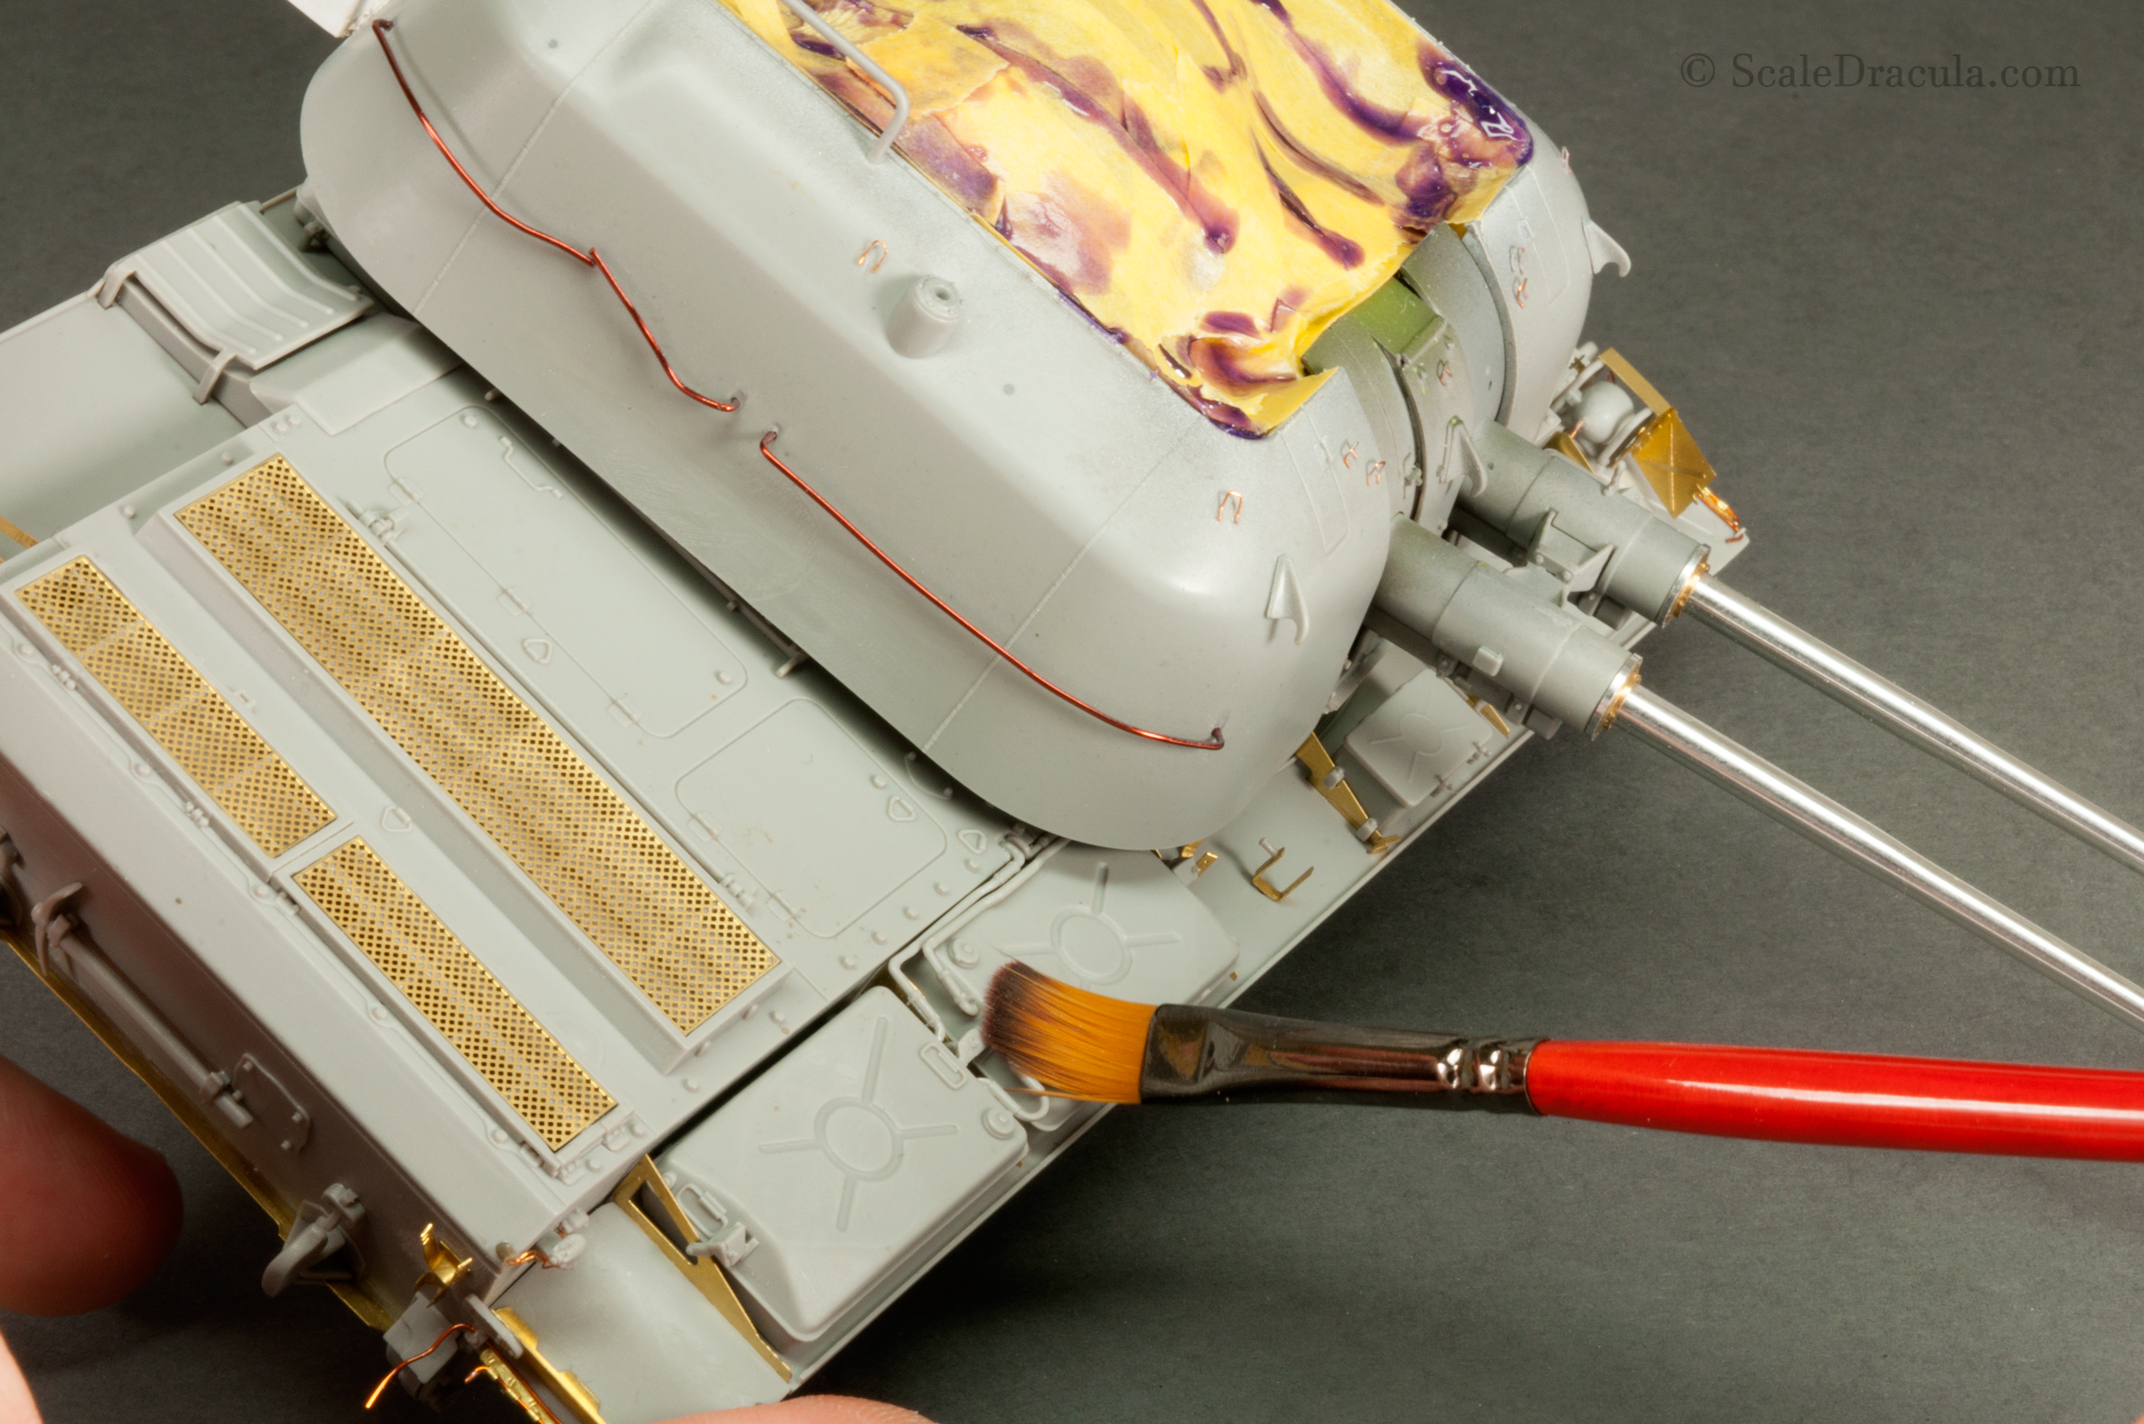
Before I even grabbed the airbrush I secured the open turret with Tamiya masking tape and Maskol. This is a critical step. I would hate to see any overspray on the finished interior so I put a lot of effort to make a durable cover.
Then I sprayed the model with isopropyl alcohol to get rid of grease and all kinds of dirt. A breathing mask is highly recommended while using IPA as it can really mess with your head and lungs.
After that, and just before priming, I swept the surface with a big flat brush to make sure there’s no dust or dirt on the model. I have a habit of doing so before every step of the painting. Is it really that important? YES. Am I a little bit psychotic? MAYBE.
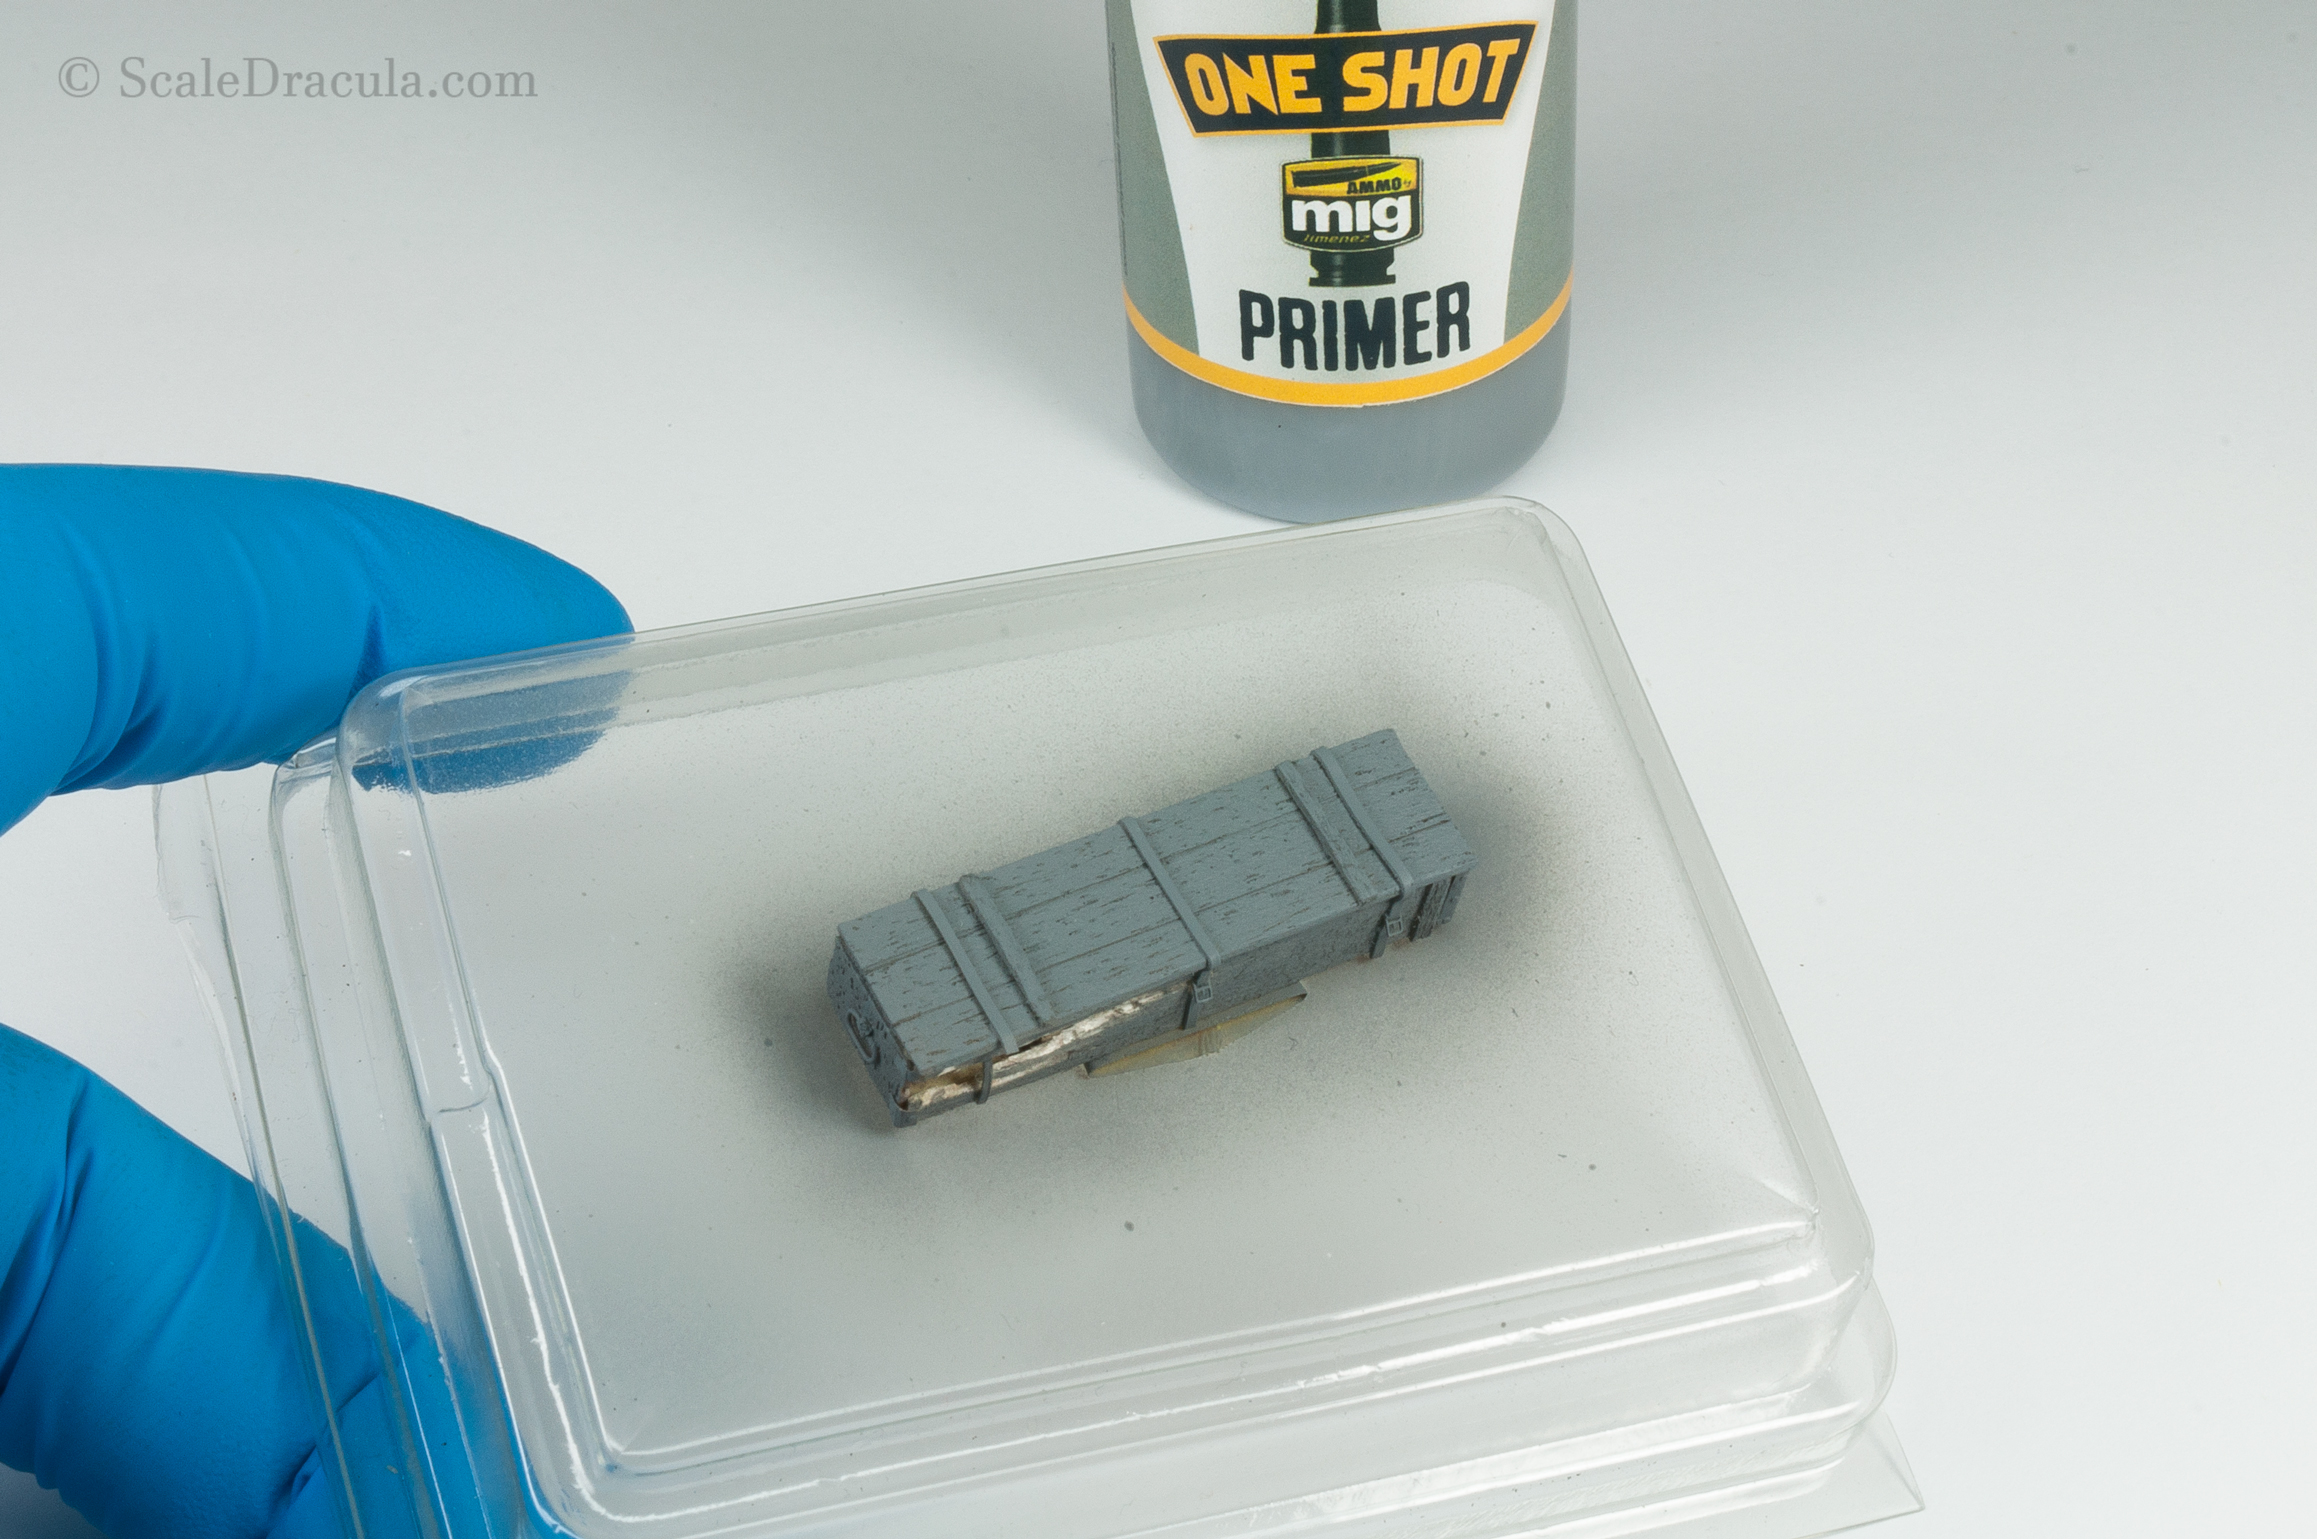
Finally the model gets its first layer of paint. I begin to like working with Ammo Mig One Shot primer. It flows nicely through the airbrush, has a great coverage and leaves a satin finish. The only thing I don’t get is the drip cap. It clogs easily and is hard to clean. What’s wrong with the standard eye dropper cap?
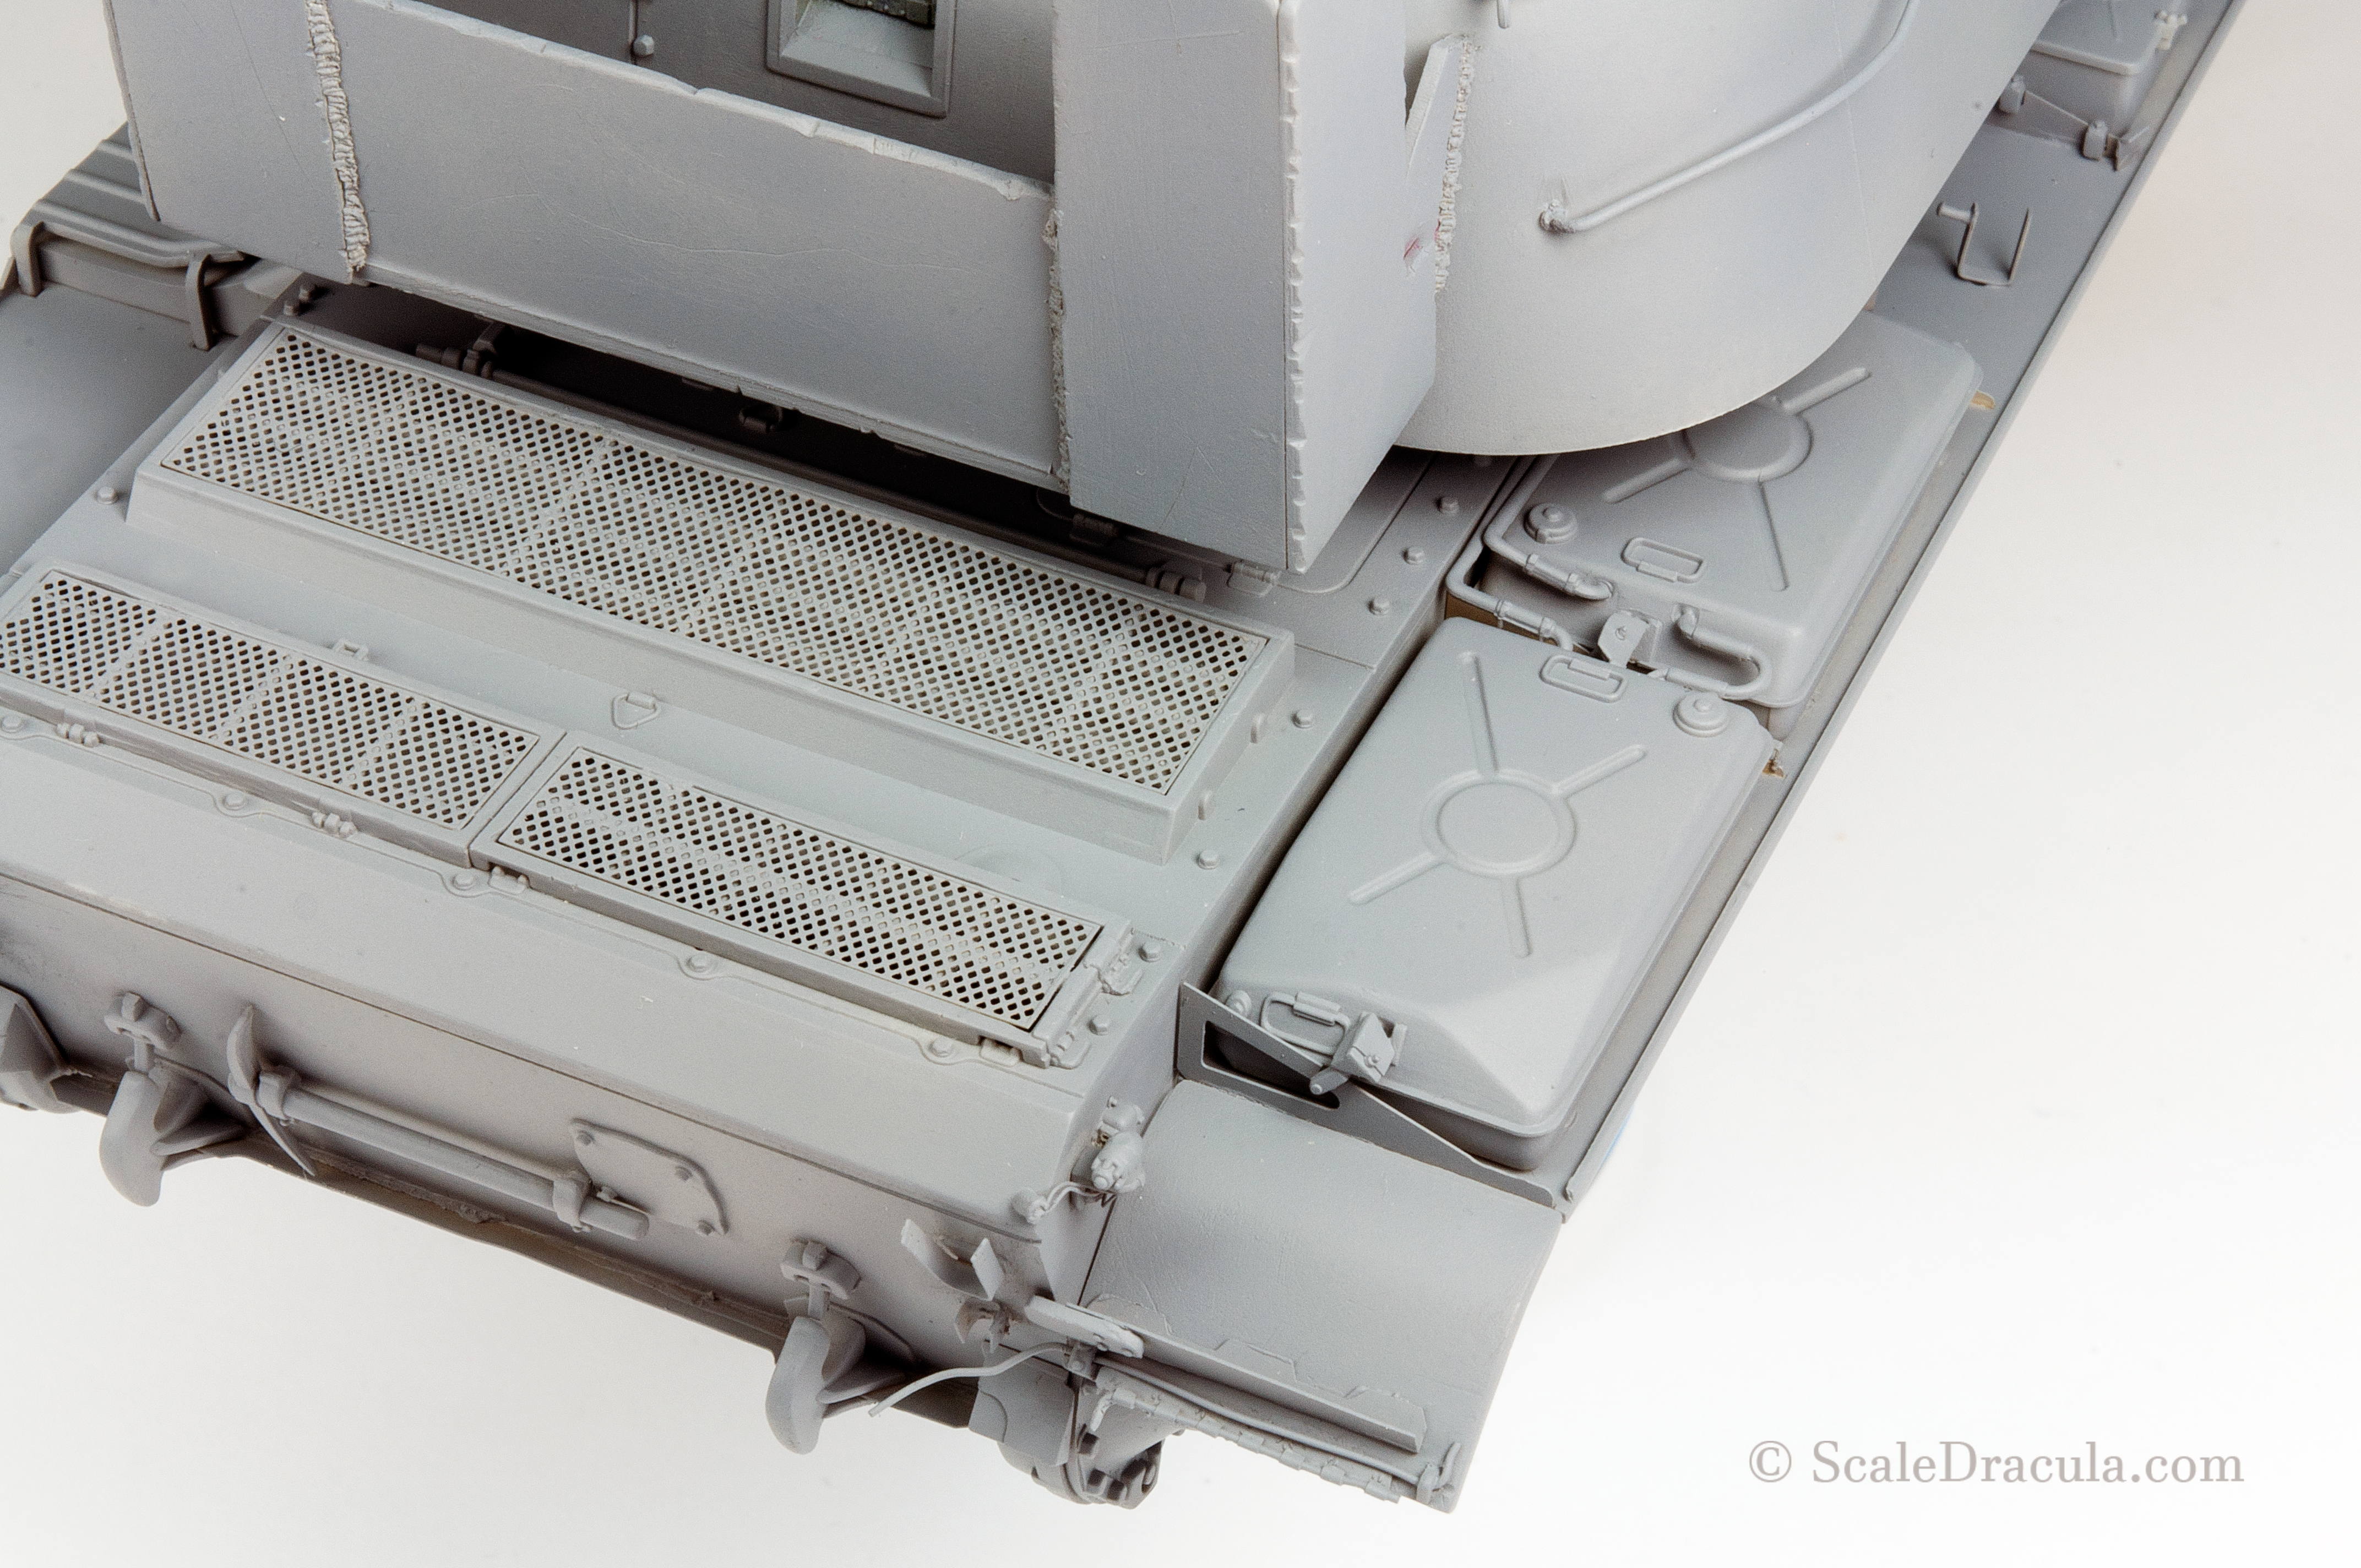
The surface looks nice and clean. I can’t stress enough how important it is to have this solid foundation for all the colours to come.
The wooden crate gets its layer of primer as well. As you can see veneer keeps its natural texture even after painting.
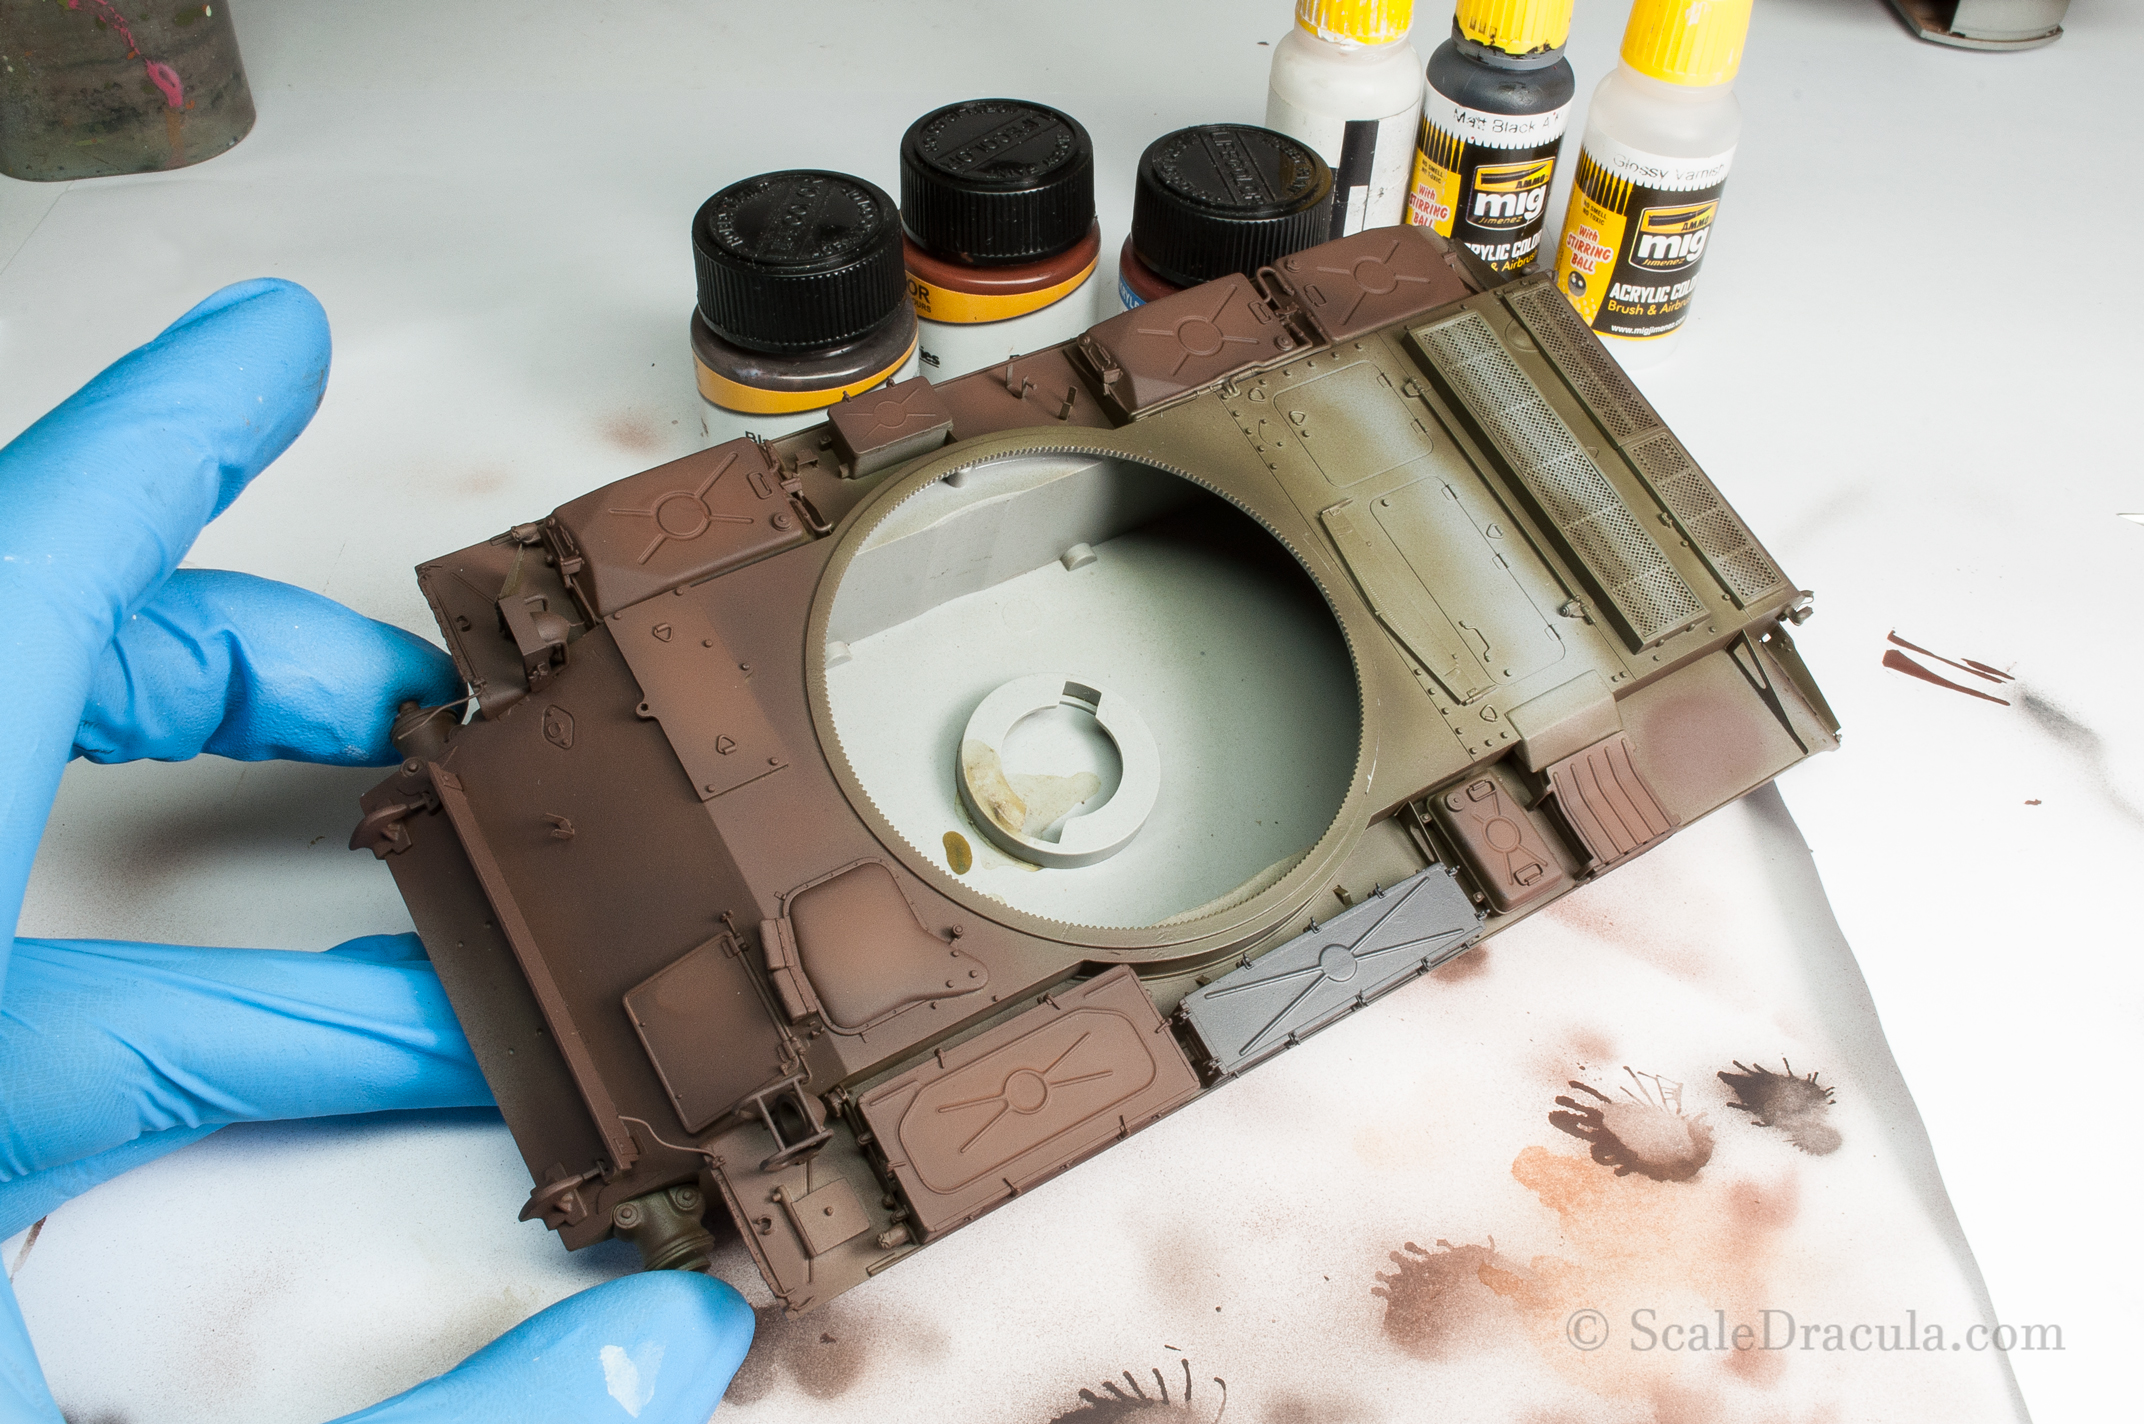
Next up is the Russian Dark Base green from Ammo’s 4BO set. You can call it a preshade but I just wanted to make sure the dark paint gets into every nook and cranny of the model.
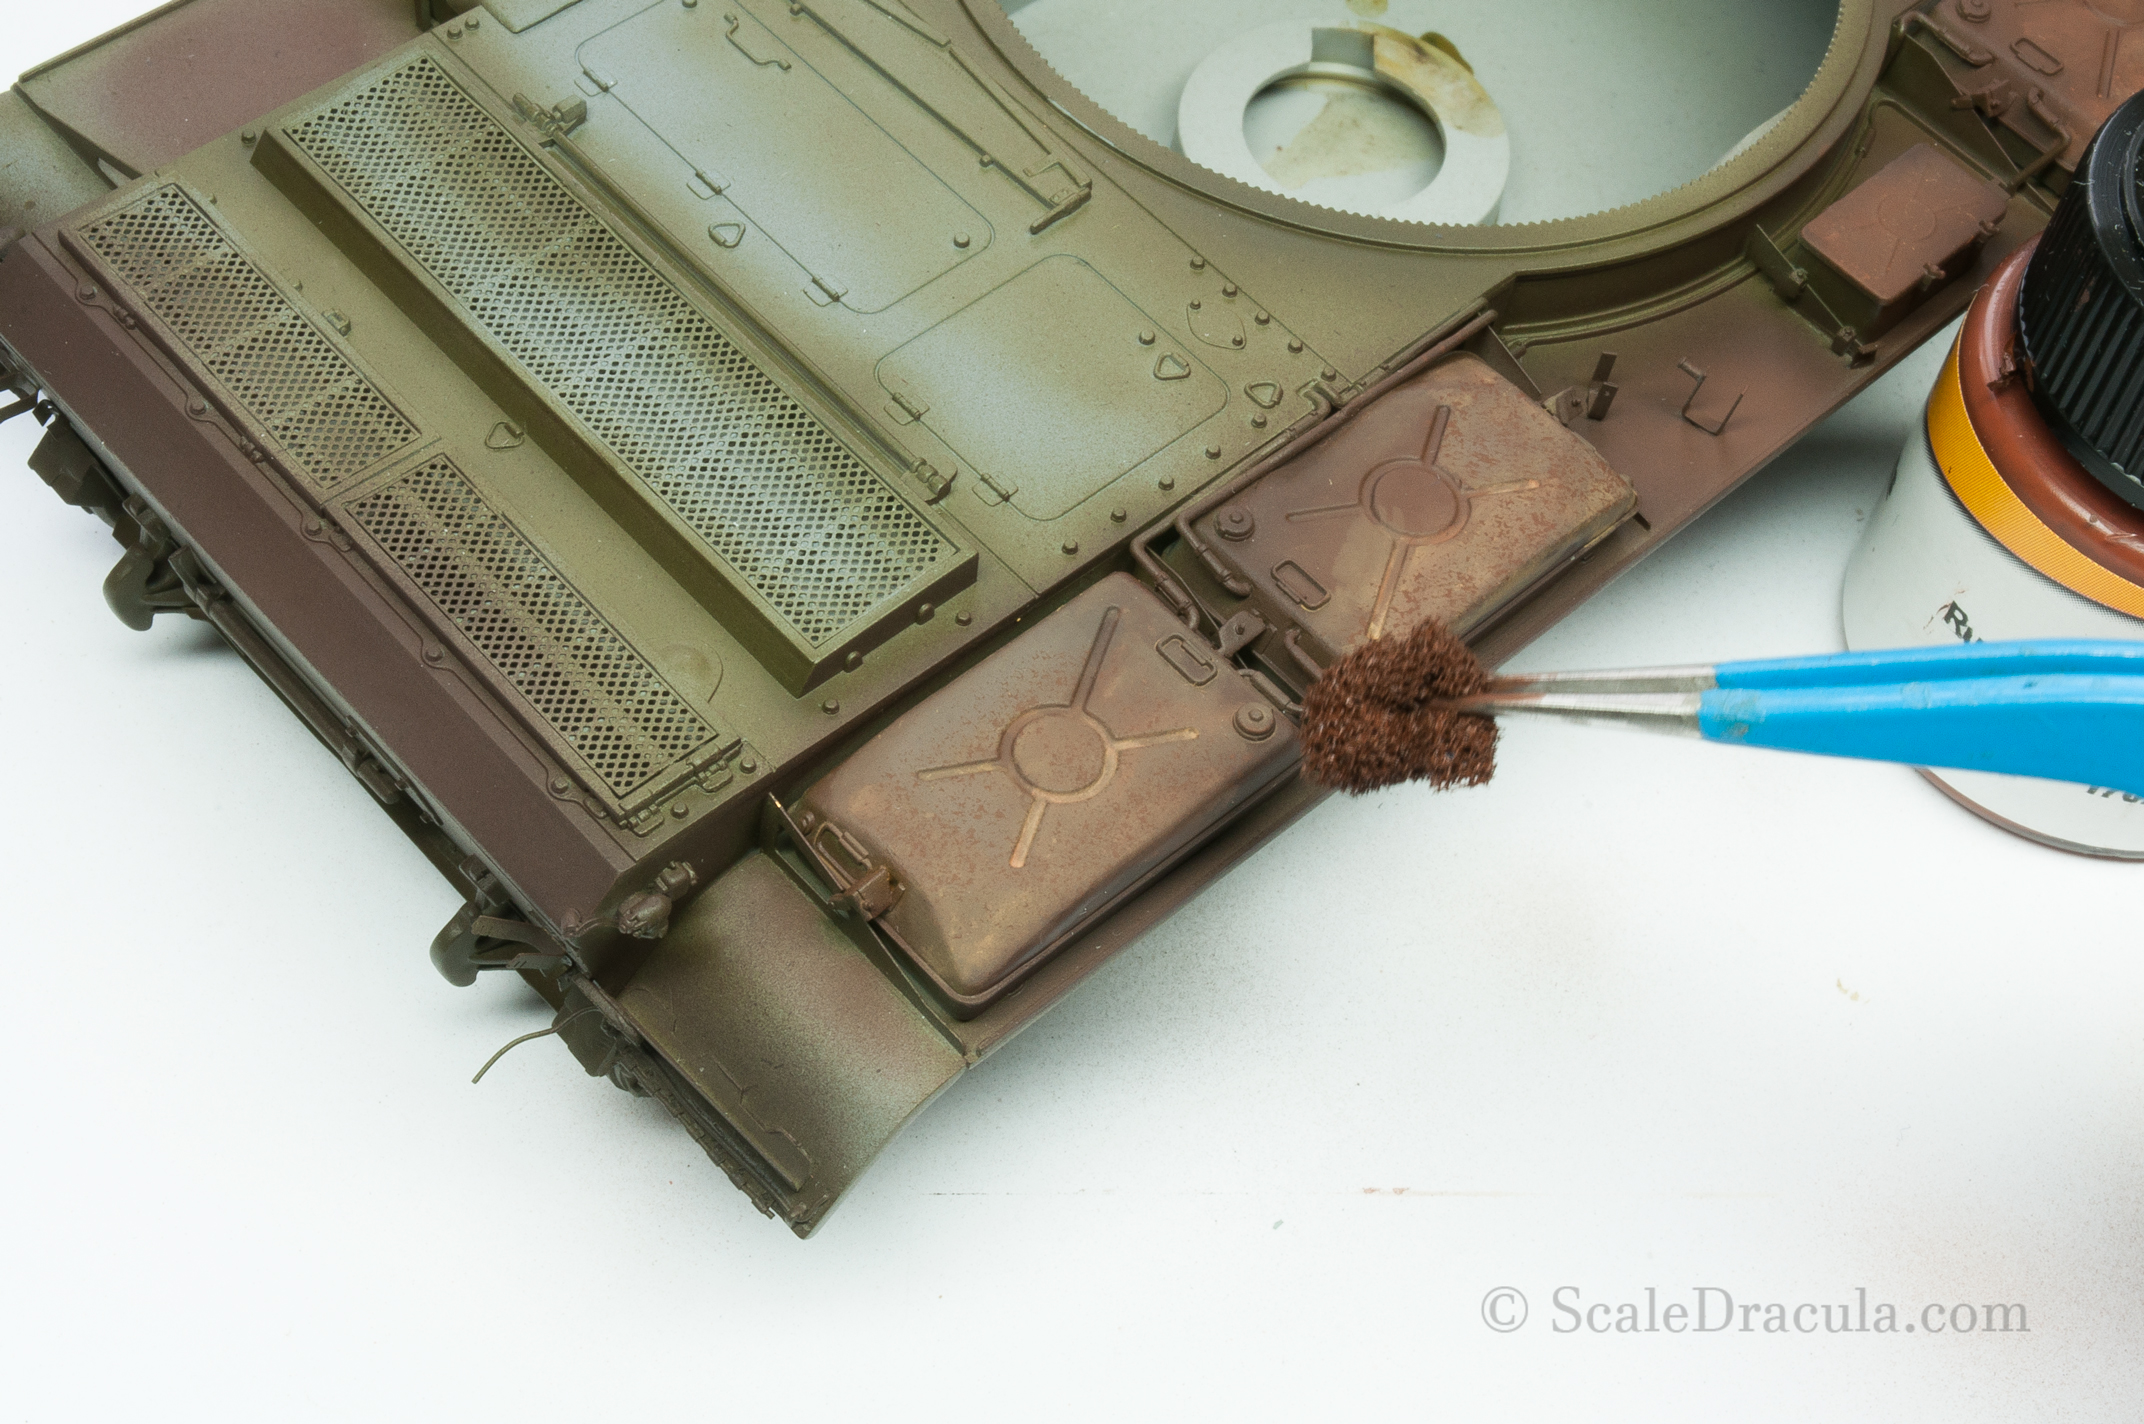
I start to work with Lifecolor paints to build up a solid rust colour for the chipping to come. I’ve mentioned before that I really like Lifecolor rust shades. They have a 100% matt finish and work great with each other.
I start with darker shades like Burned Rust and Rust Dark Shadow and I slowly build up some highlights. If you plan to do only some minor chips you don’t need this step, just paint the whole model in dark brown.
I decided to mess around a bit and train some techniques. I made a quick oil filter on the surface and then sponged some Lifecolor paint on top. The result is interesting, although it’s not going to be seen on the finished model.
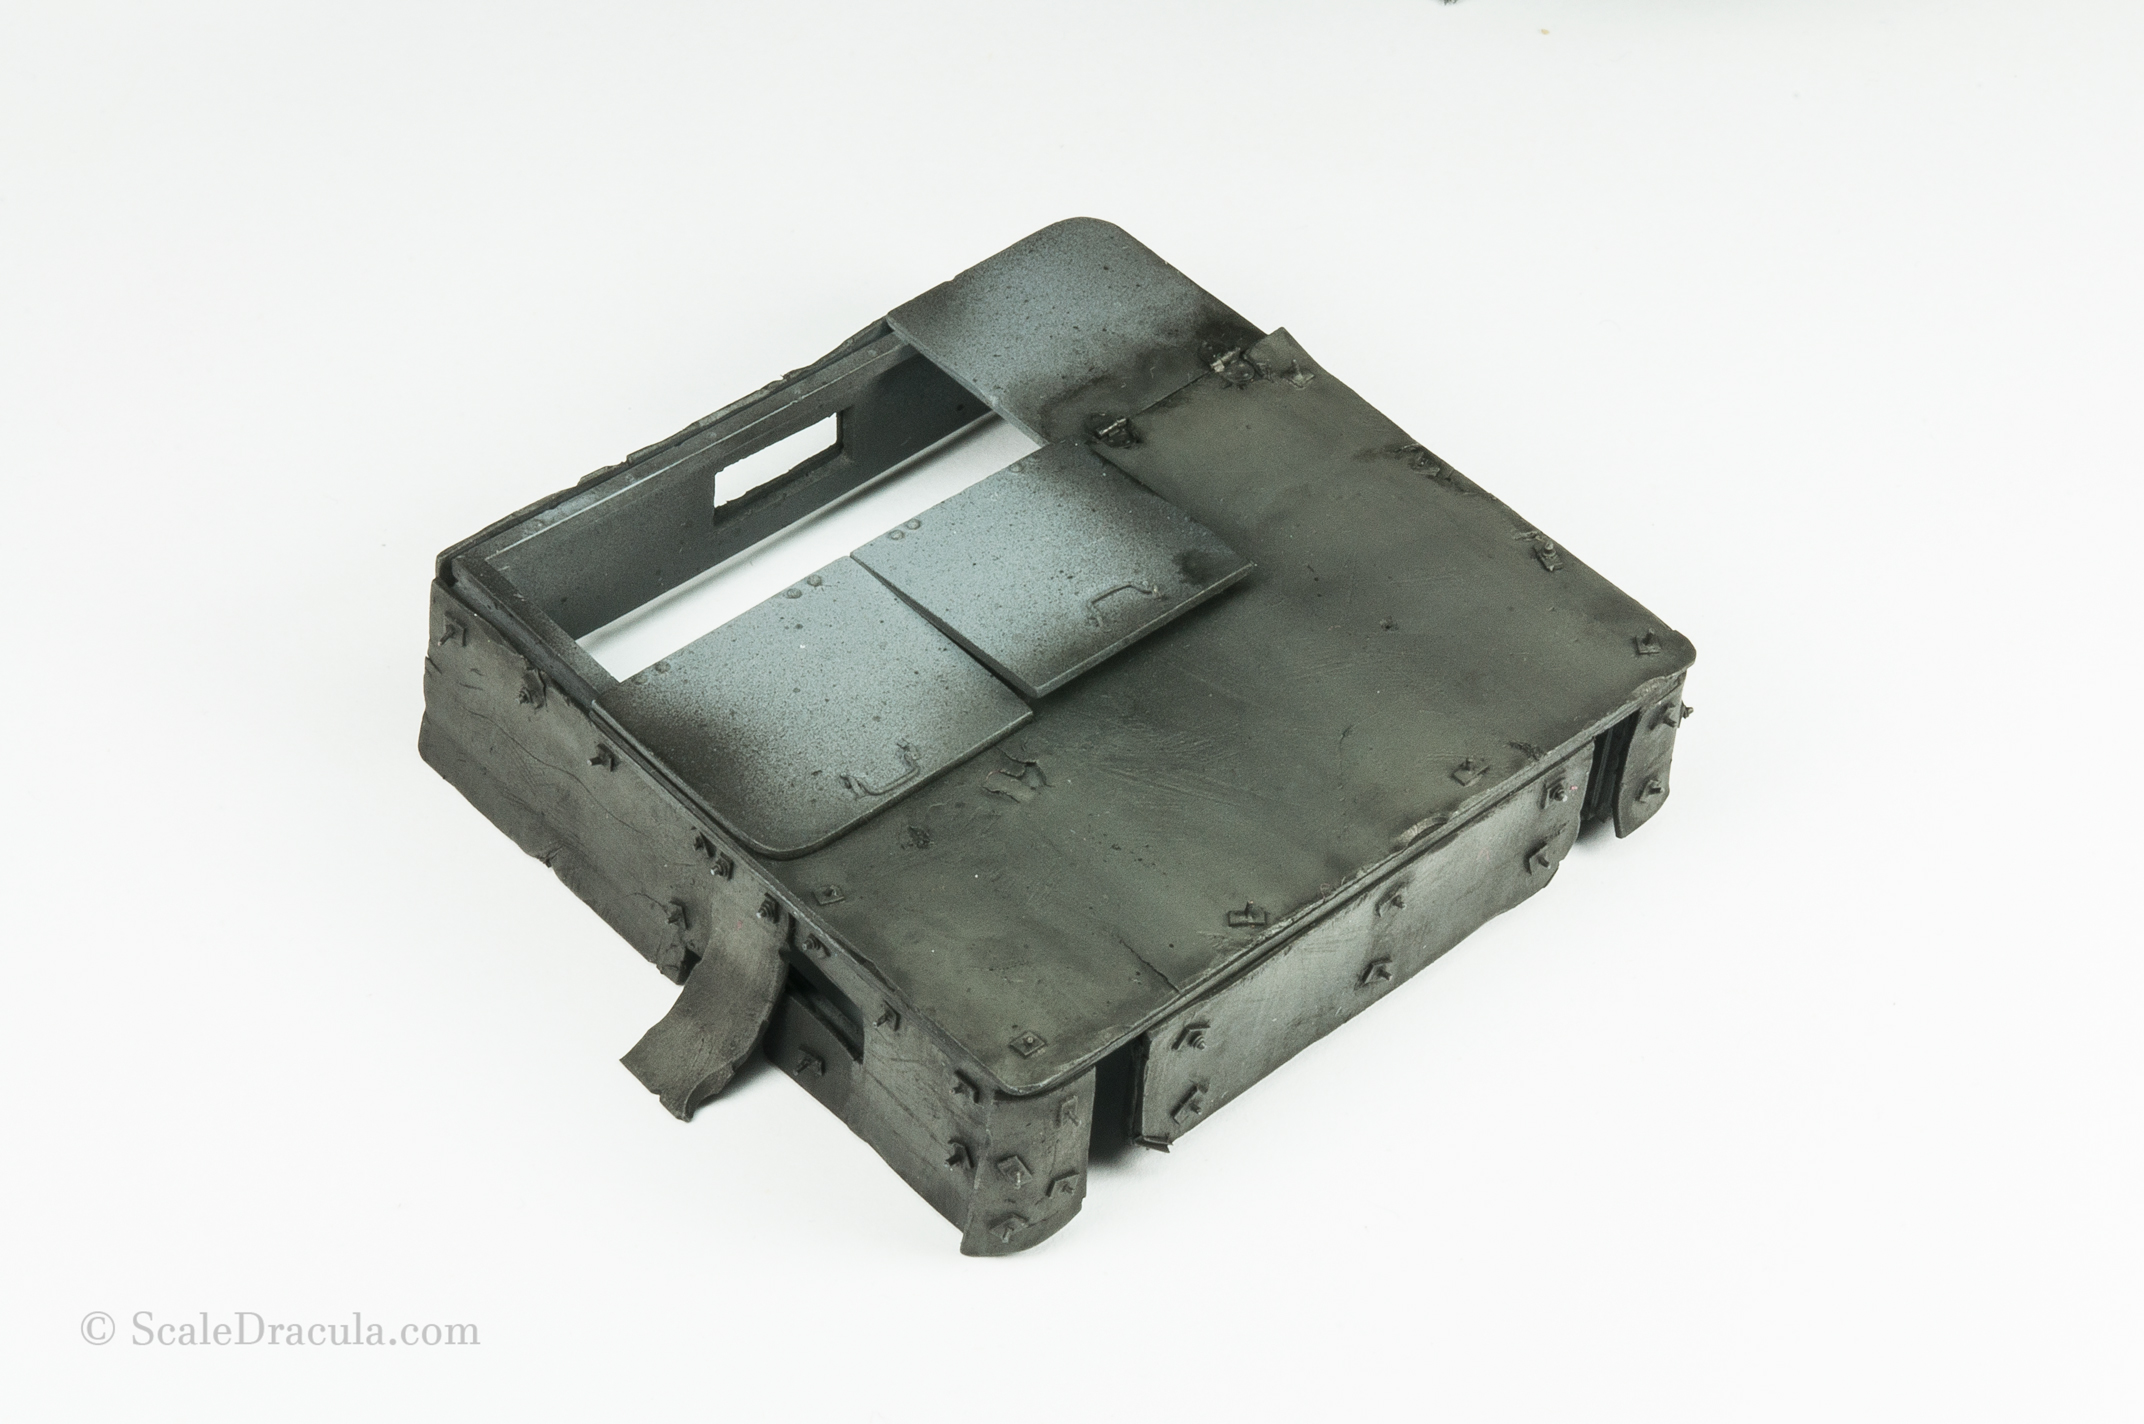
Meanwhile I also started to work on the superstructure. I painted it with Ammo Mig Matt Black and made a highlight with Rubber and Tires. Then I applied a black oil wash to sort of blend the colours together and create some shadow effect.
Here’s what I’ve got at this stage. Next step was to cover everything you see below with chipping fluid.
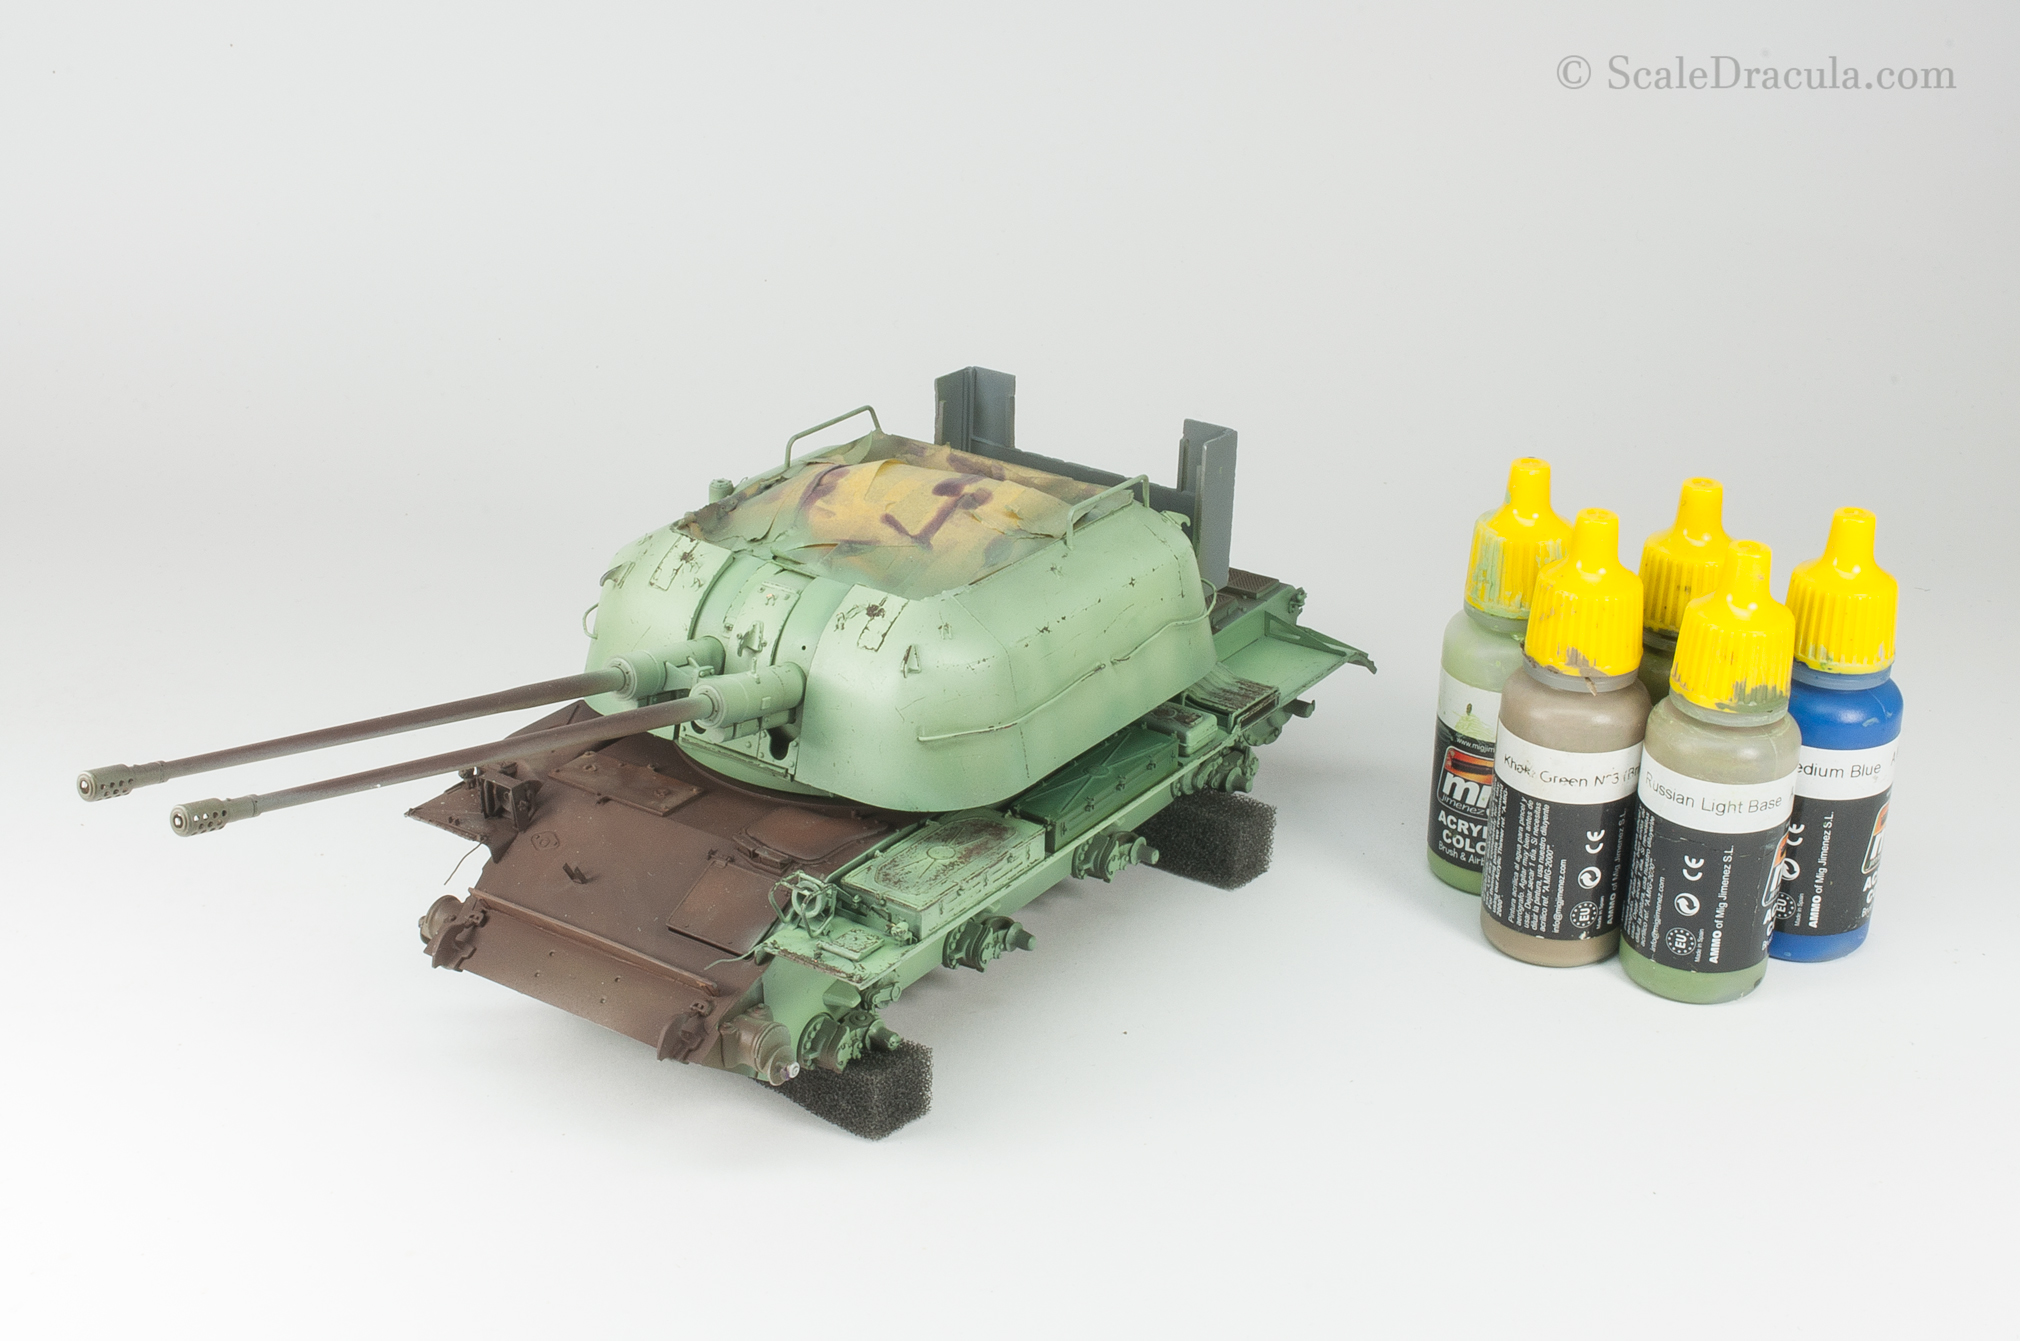
It’s high time to give this model some colour, isn’t it? There’s no Yugoslavian green shade in the palette of Ammo Mig that I usually paint with. So I decided to mix it myself. It took a lot of trial and error, but finally I got what I wanted. I used three shades of green, khaki green No. 3 and medium blue. Sorry, I can’t give you the exact ratio…
As you can see I don’t cover the whole model at once. I prefer to work on individual sections to keep better control over the process.
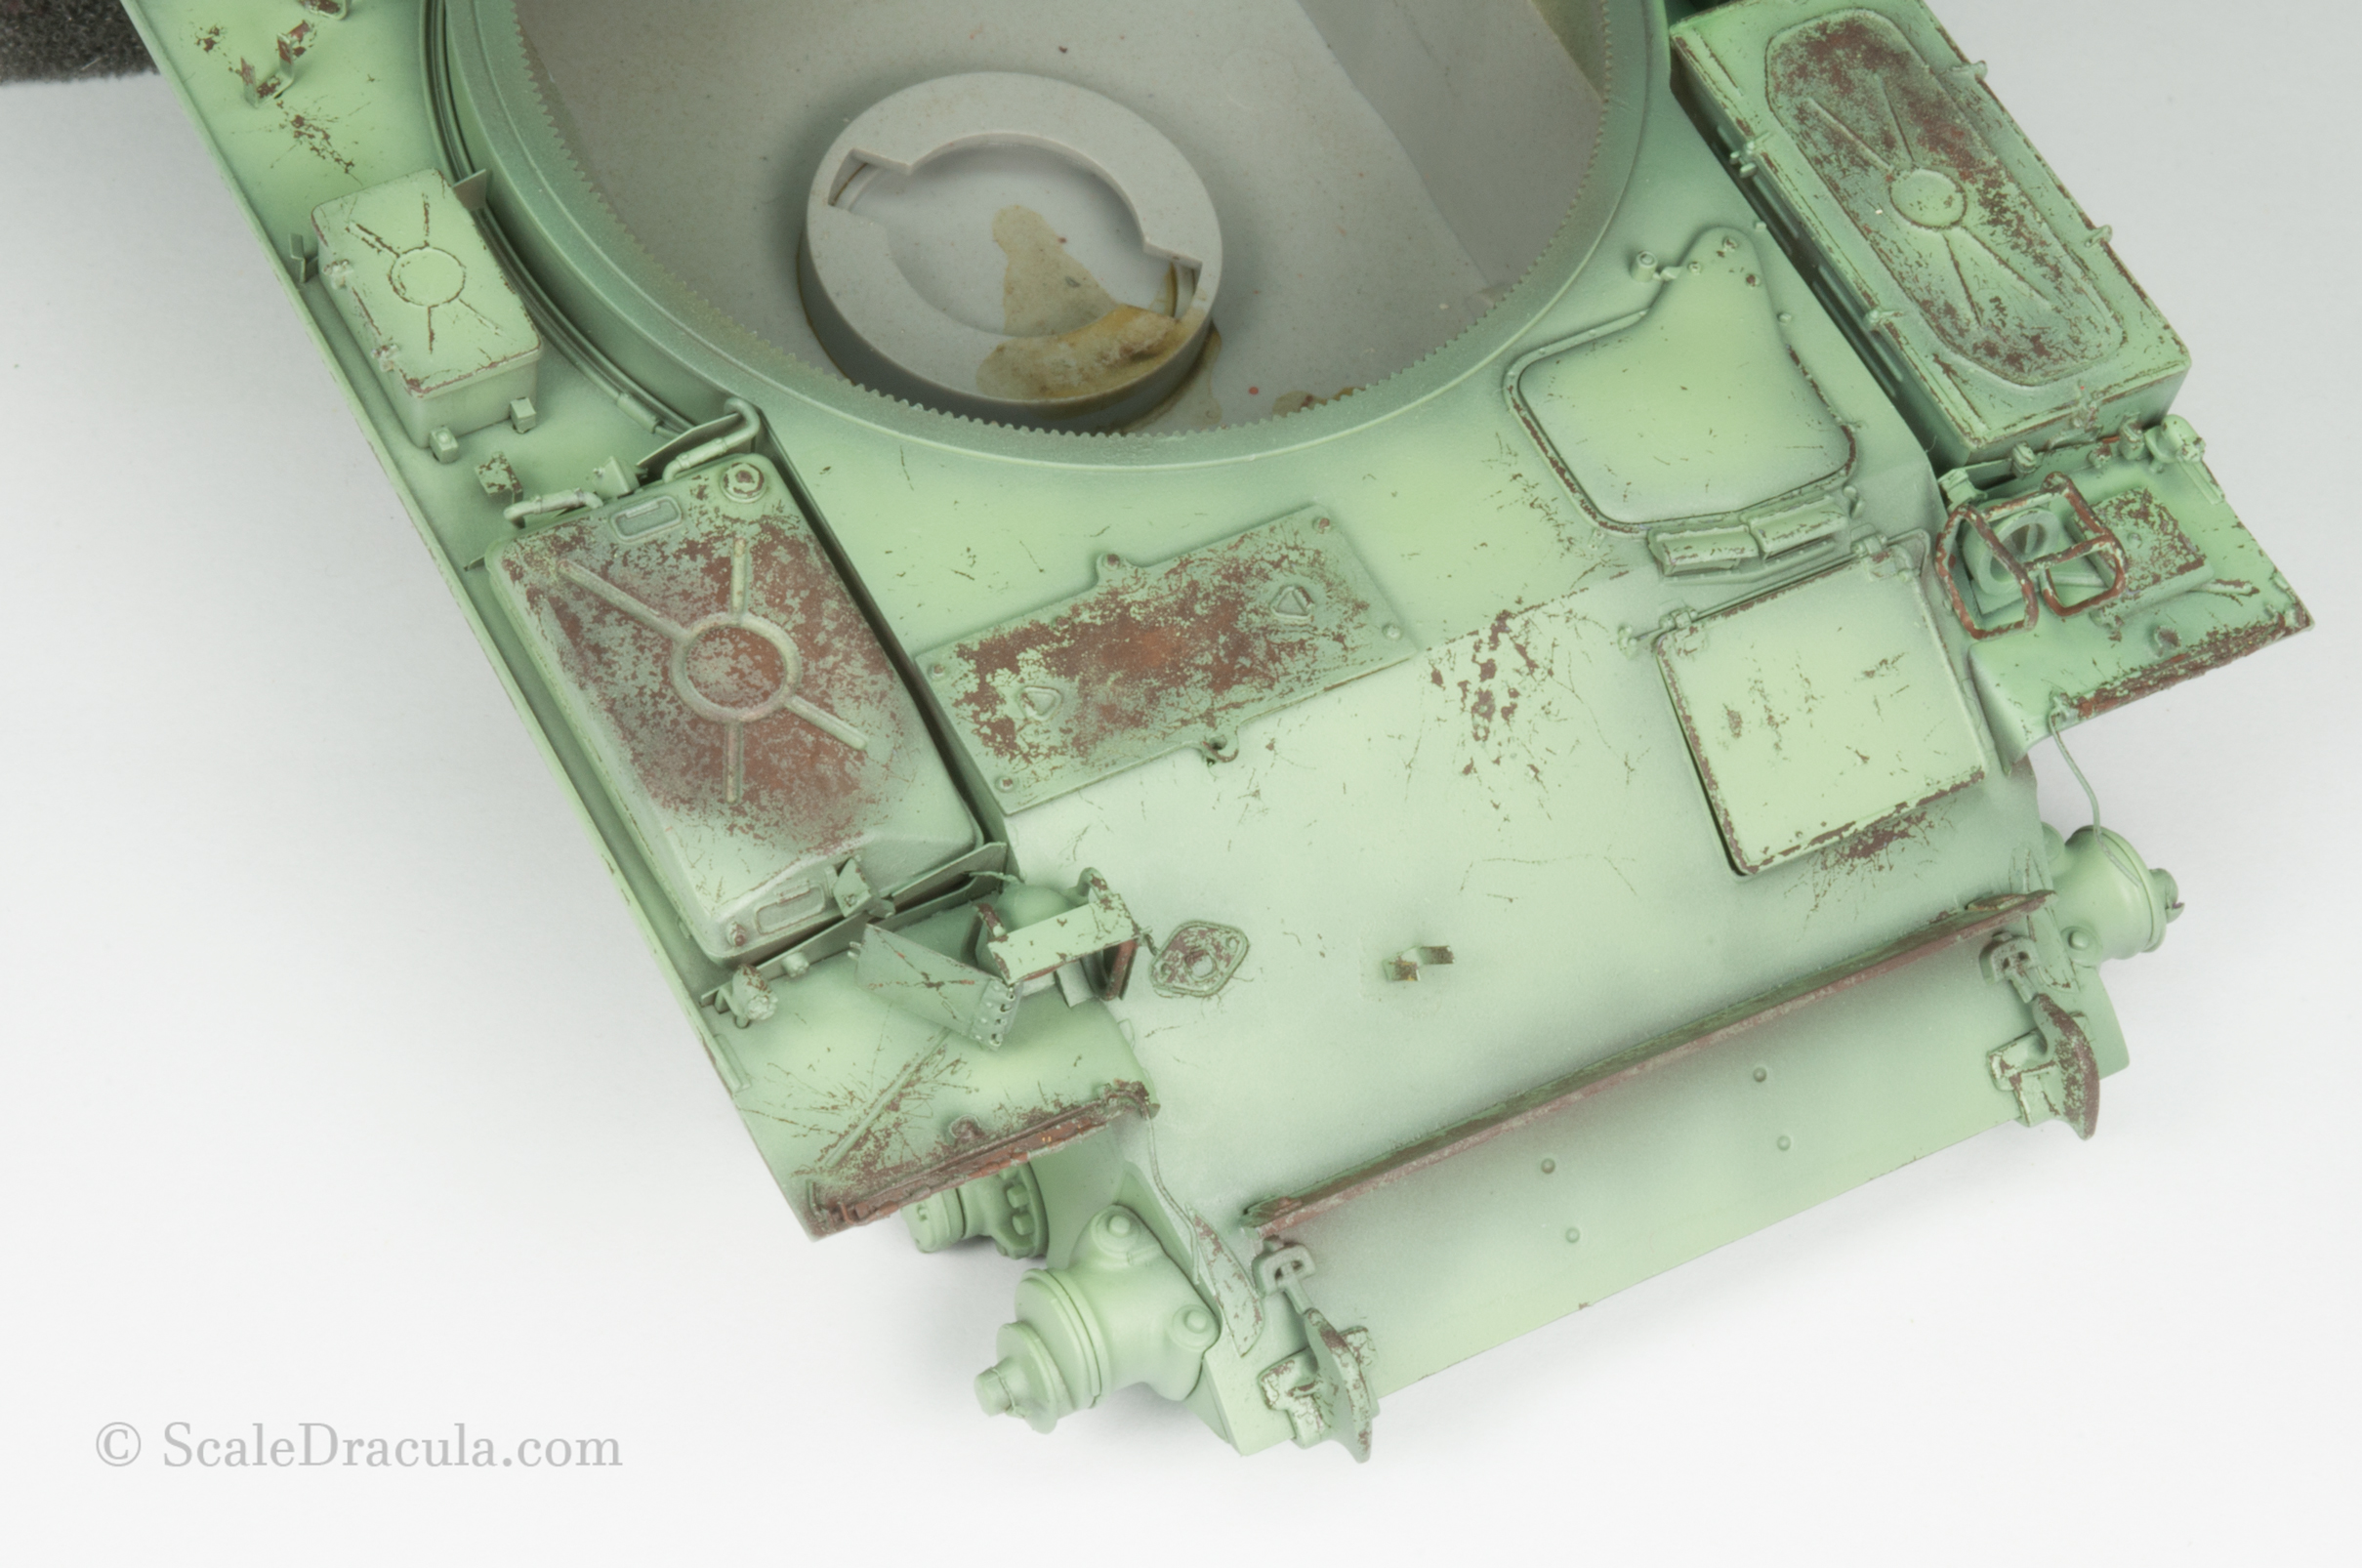
I usually prefer to make the chips as small as possible. Even if they are hardly visible, they create an interesting texture and break the monotony of the monochromatic surface. I add the bigger chips in the second stage trying to place them logically. Also, I plan ahead which areas will get some more aggressive treatment.
All in all, hairspray chipping is a pretty complex process. There’s lot of factors that affect each other and you really need to master them all to get a realistic effect. I will probably make a separate SBS dedicated to this technique only.
It goes without saying that in this particular project I tried to base the chipping on my reference historical photo.
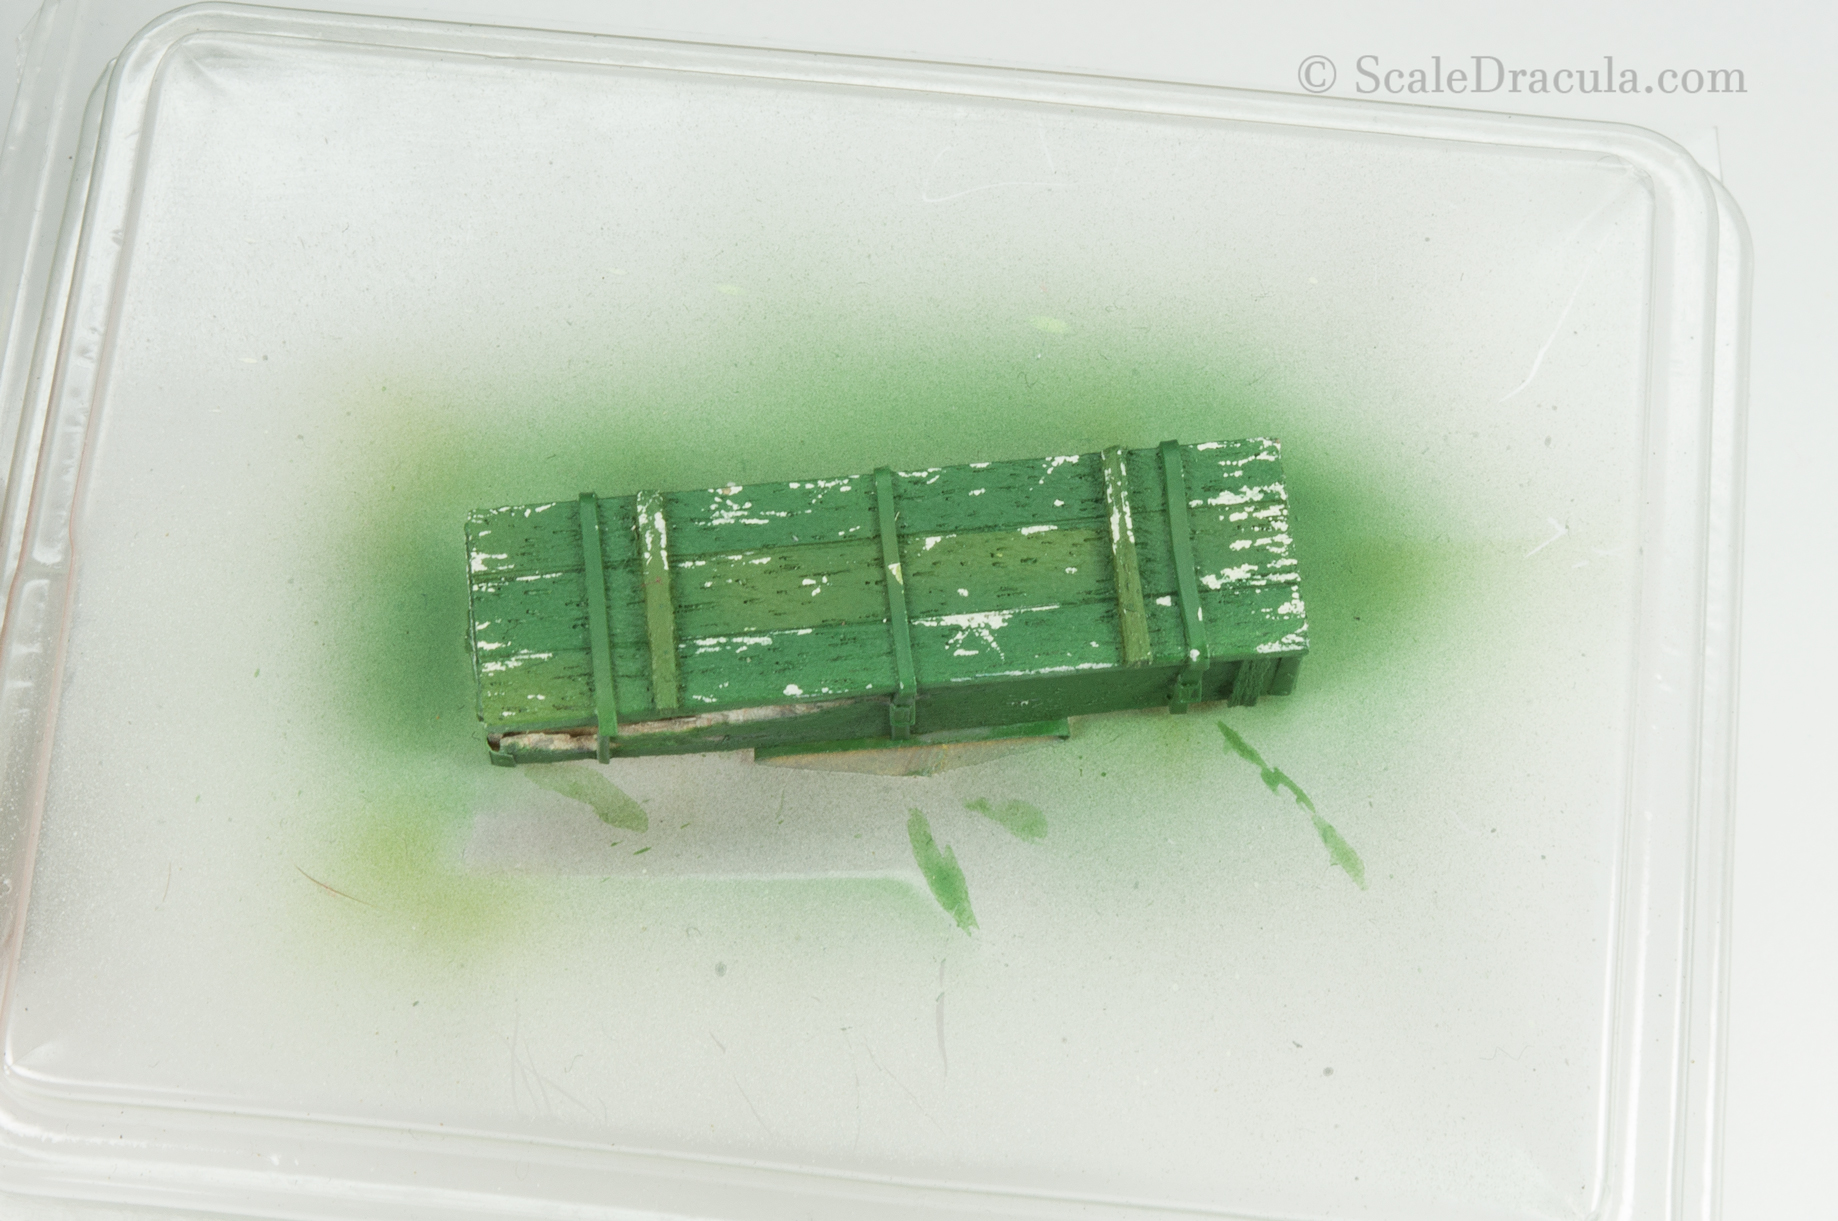
The ammo crate got its portion of chipping as well. The base paint is beige. On that I applied the chipping fluid and then dark green. Before chipping, I masked and highlighted some parts to make the surface faded and more interesting.
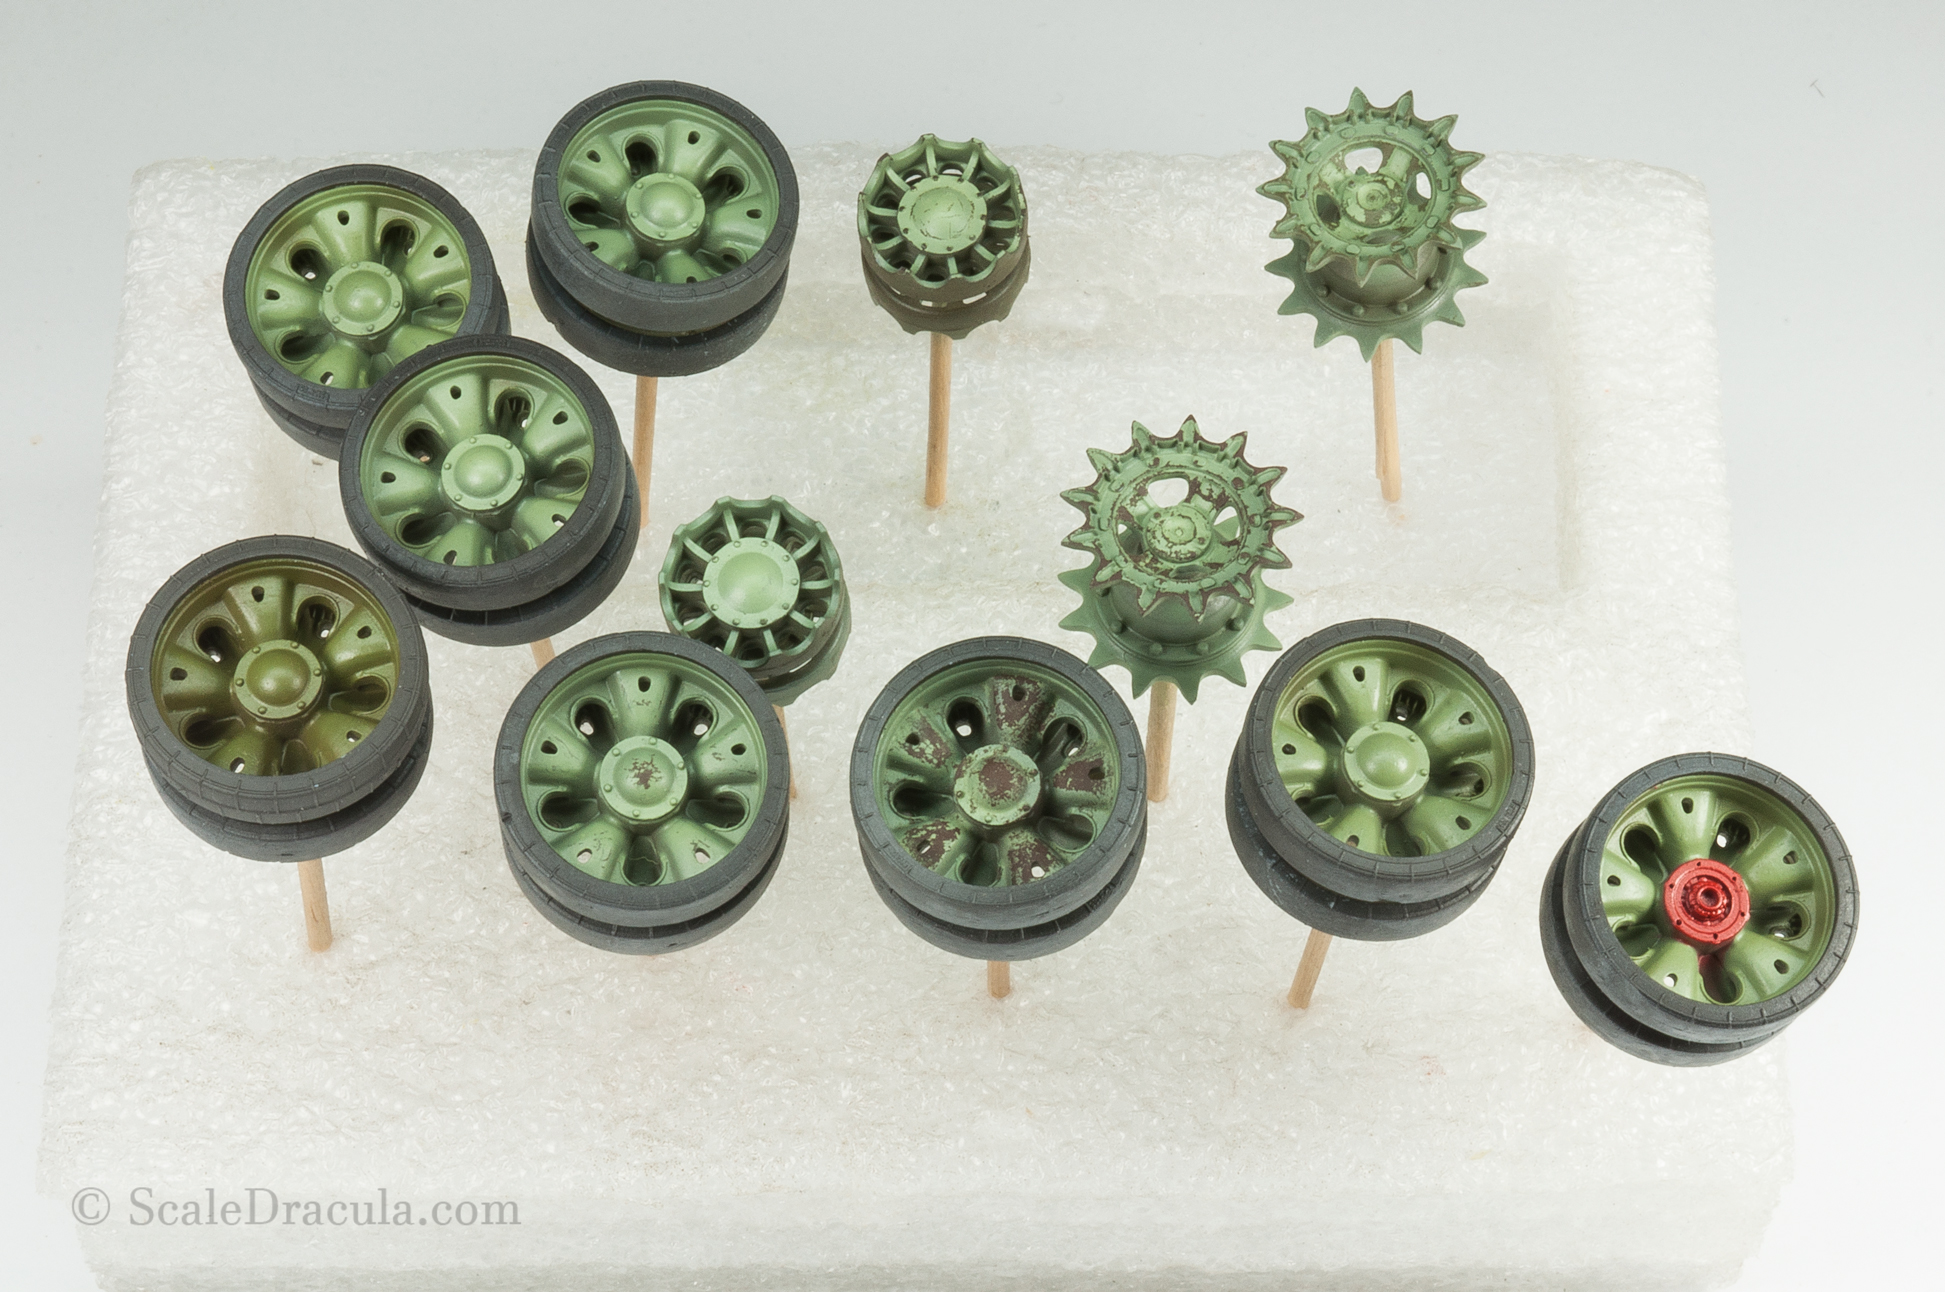
Then I started to work on the wheels. The process is the same as above. I used different colours to create an impression that some of the wheels were late replacements.
I’ve mentioned before that Takom did a good job separating the tyre from the wheel. But as far as I know you still need to paint this outer rim green.
Quick tip
The chipping fluid can be activated even after days. But for better control try to work on smaller areas and start chipping immediately when the top layer of paint is dry to the touch.
I continue my work with the rubber. Last time I base-painted it and I made a black wash. Now I cover the whole part with chipping fluid.
Generally speaking, when the rubber gets old it becomes lighter in colour and looses its natural satin sheen. I’ll try to recreate it now.
I spray unevenly a thin layer of medium grey.
When the paint is dry to the touch I begin to wipe the surface with a brush dipped in water.
A stiff brush with a trimmed tip helps to achieve a broad, random effect.
It’s never wrong to add some scratches. I moisten the surface with water and scrape the paint with an old airbrush needle.
Here’s what I’ve got after two layers of airbrushed paint. The second one was even lighter grey.
If you work fast, you don’t need to add chipping fluid between the layers. Some of this stuff is still there. And anyway, the paint is easy to remove with just the water when it is still fresh. I will come back to the rubber later to add some other shades and weathering.
The next step is to make the monochromatic finish a little bit richer. I would usually do it with an oil filter and a brush but this time I wanted to try something else.
I diluted some yellow and blue with Ammo Mig’s Transparator to get a low opacity paint. Then I sprayed it randomly on the model. The effect is really subtle. So subtle I didn’t actually manage to capture it on the photo. But it’s there. At least that’s what I’m telling myself.
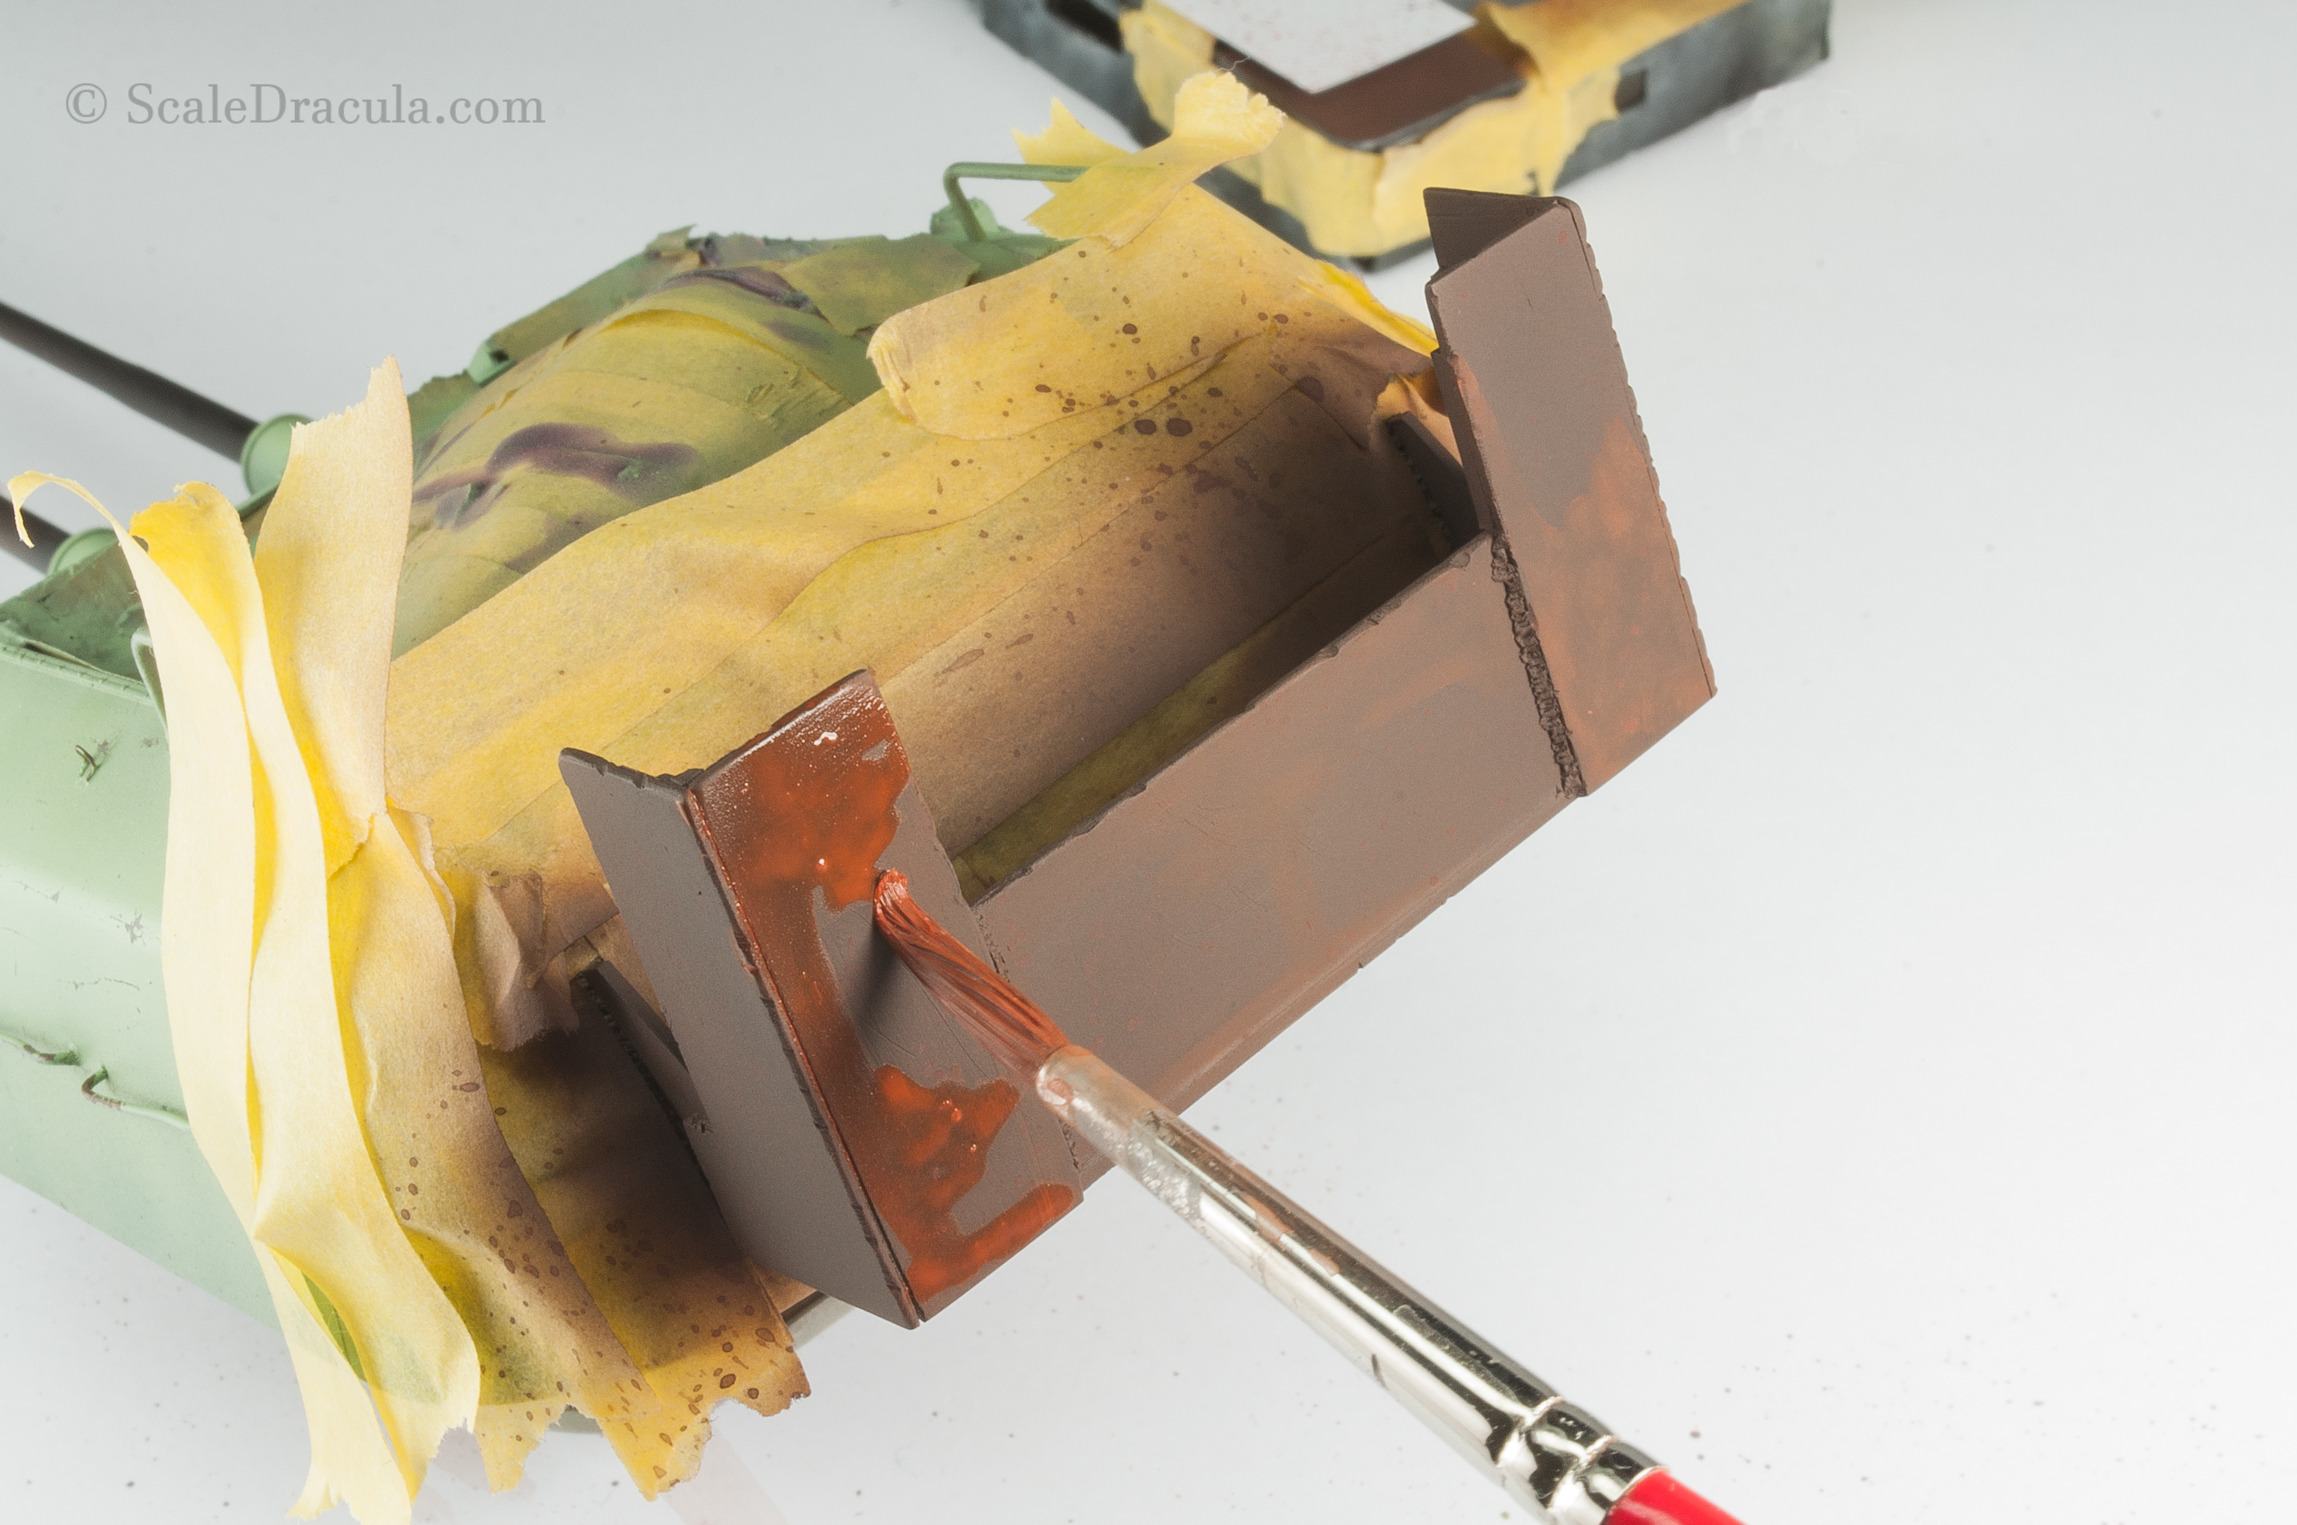
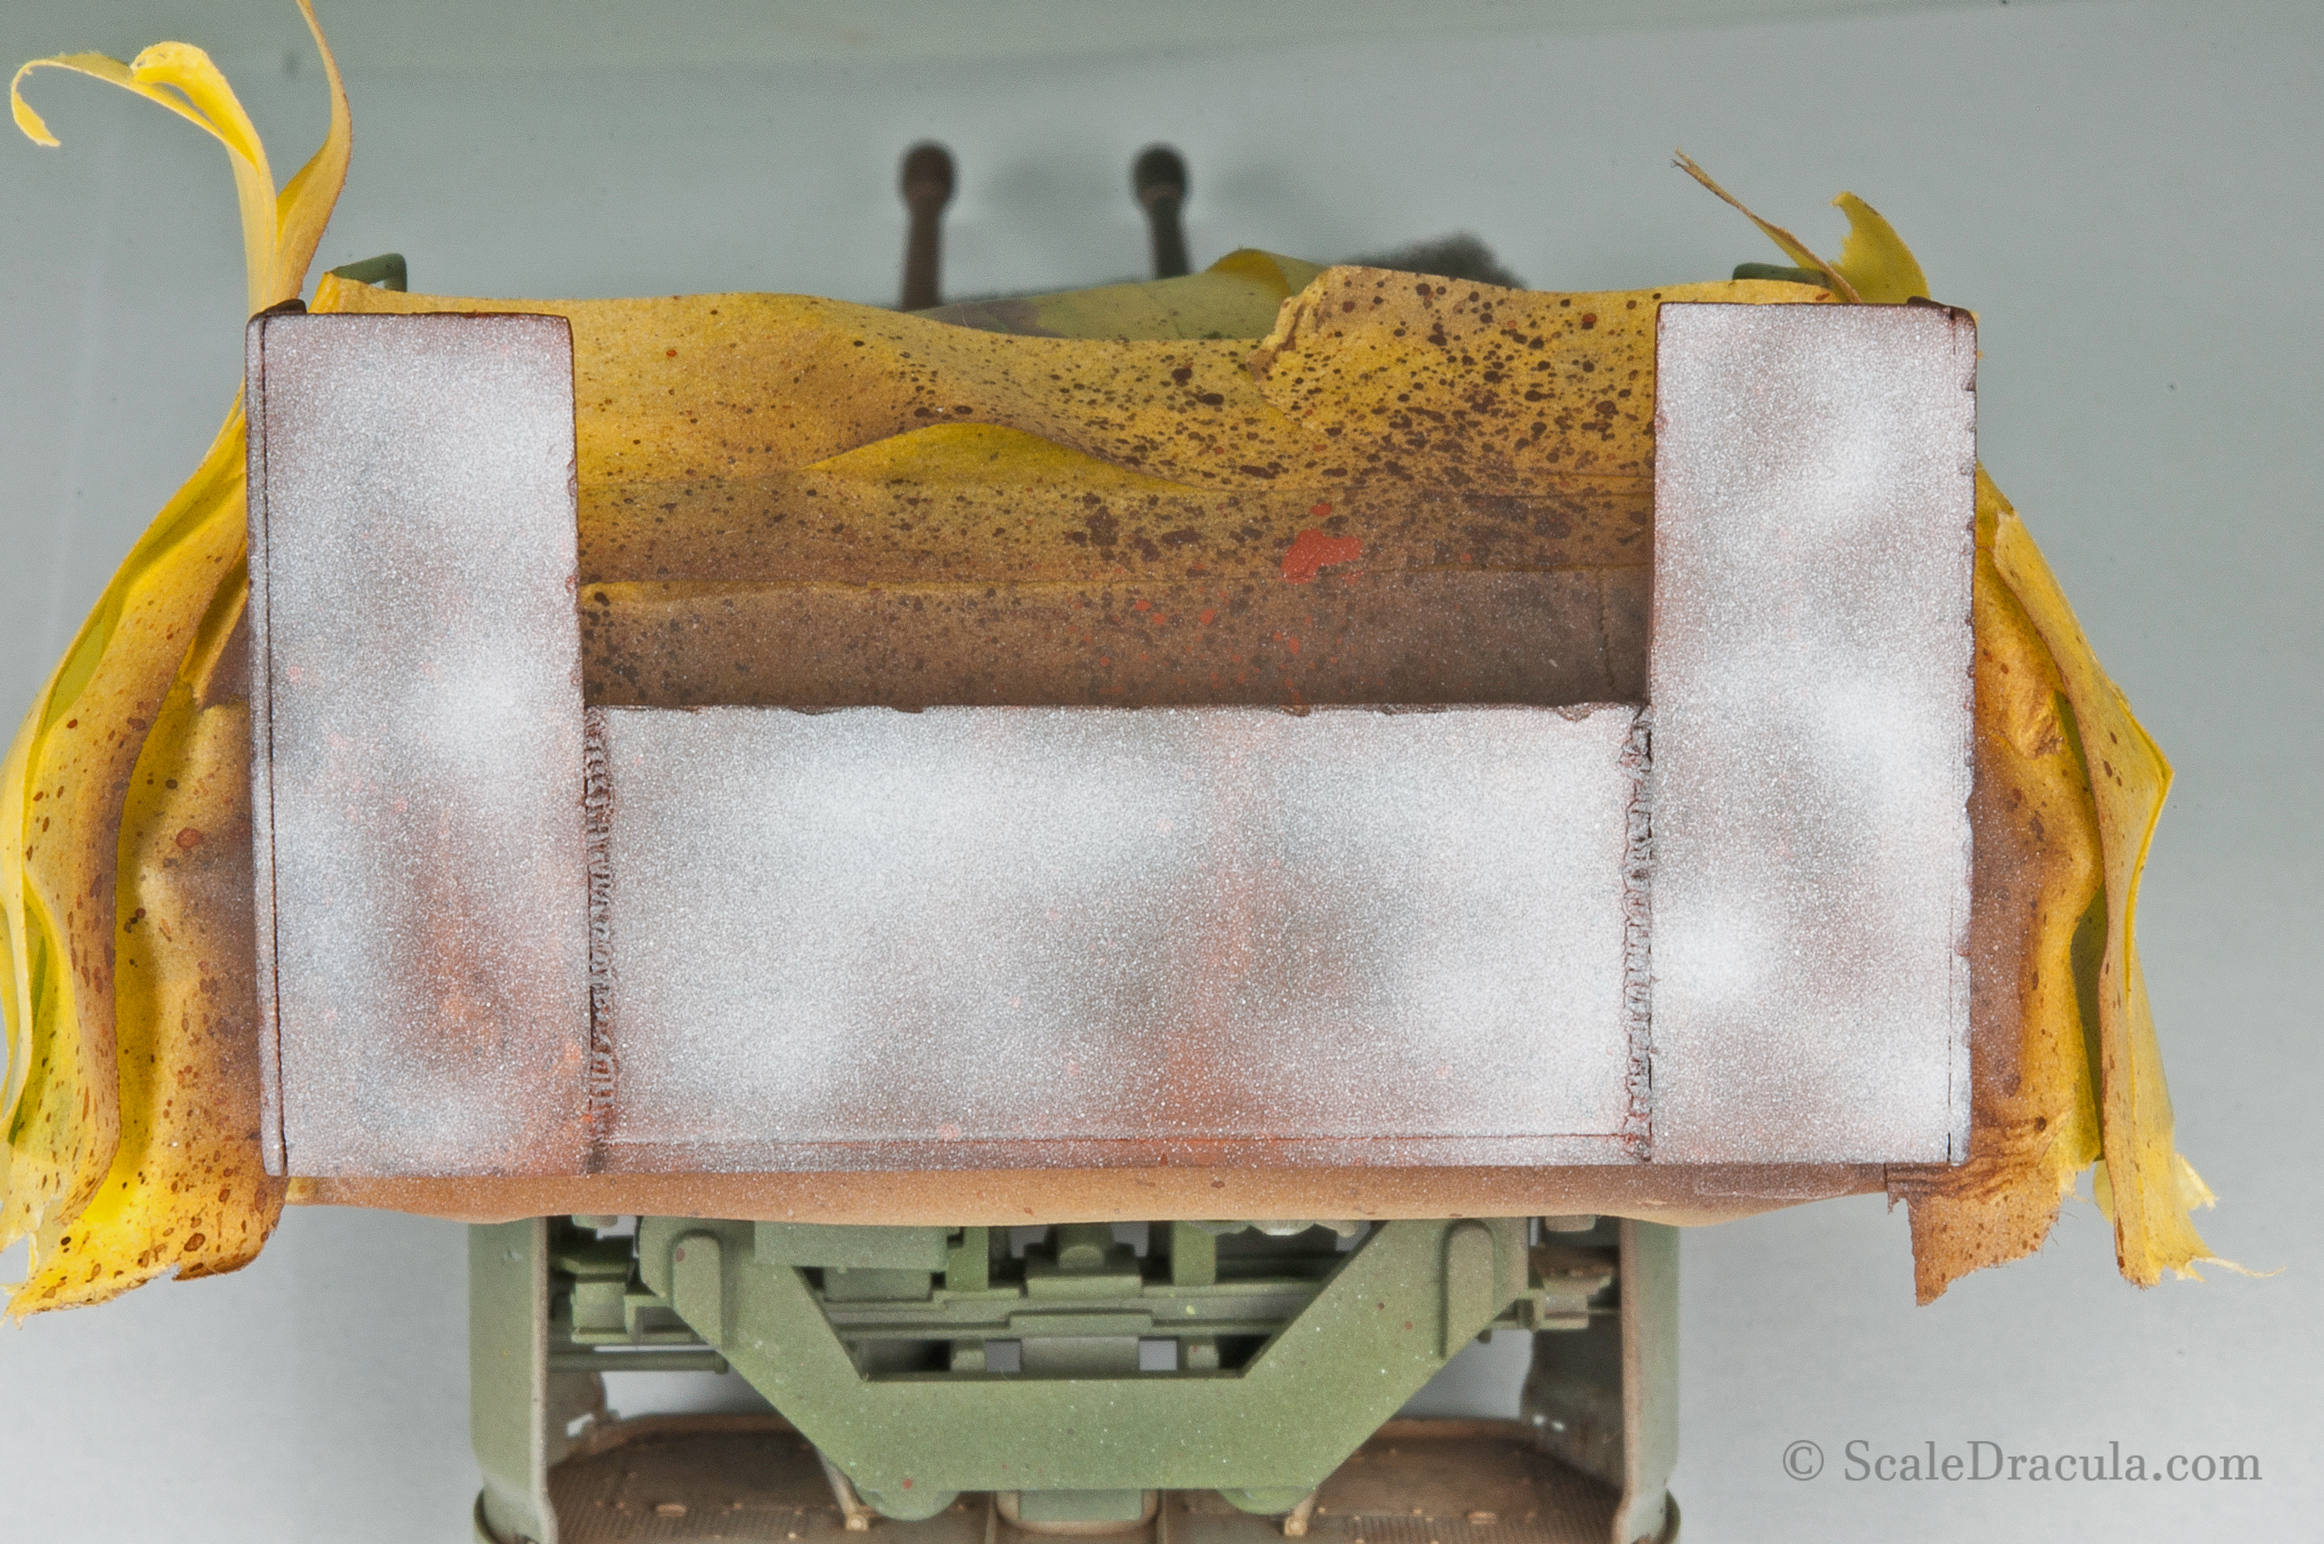
It’s finally time to paint the rust. I carefully mask all the areas with Tamiya tape. The overspray is the last thing you want to deal with at this point.
I airbrush the surface with some generic dark brown. I used a mix of Lifecolor paints, but any dark brown colour will do.
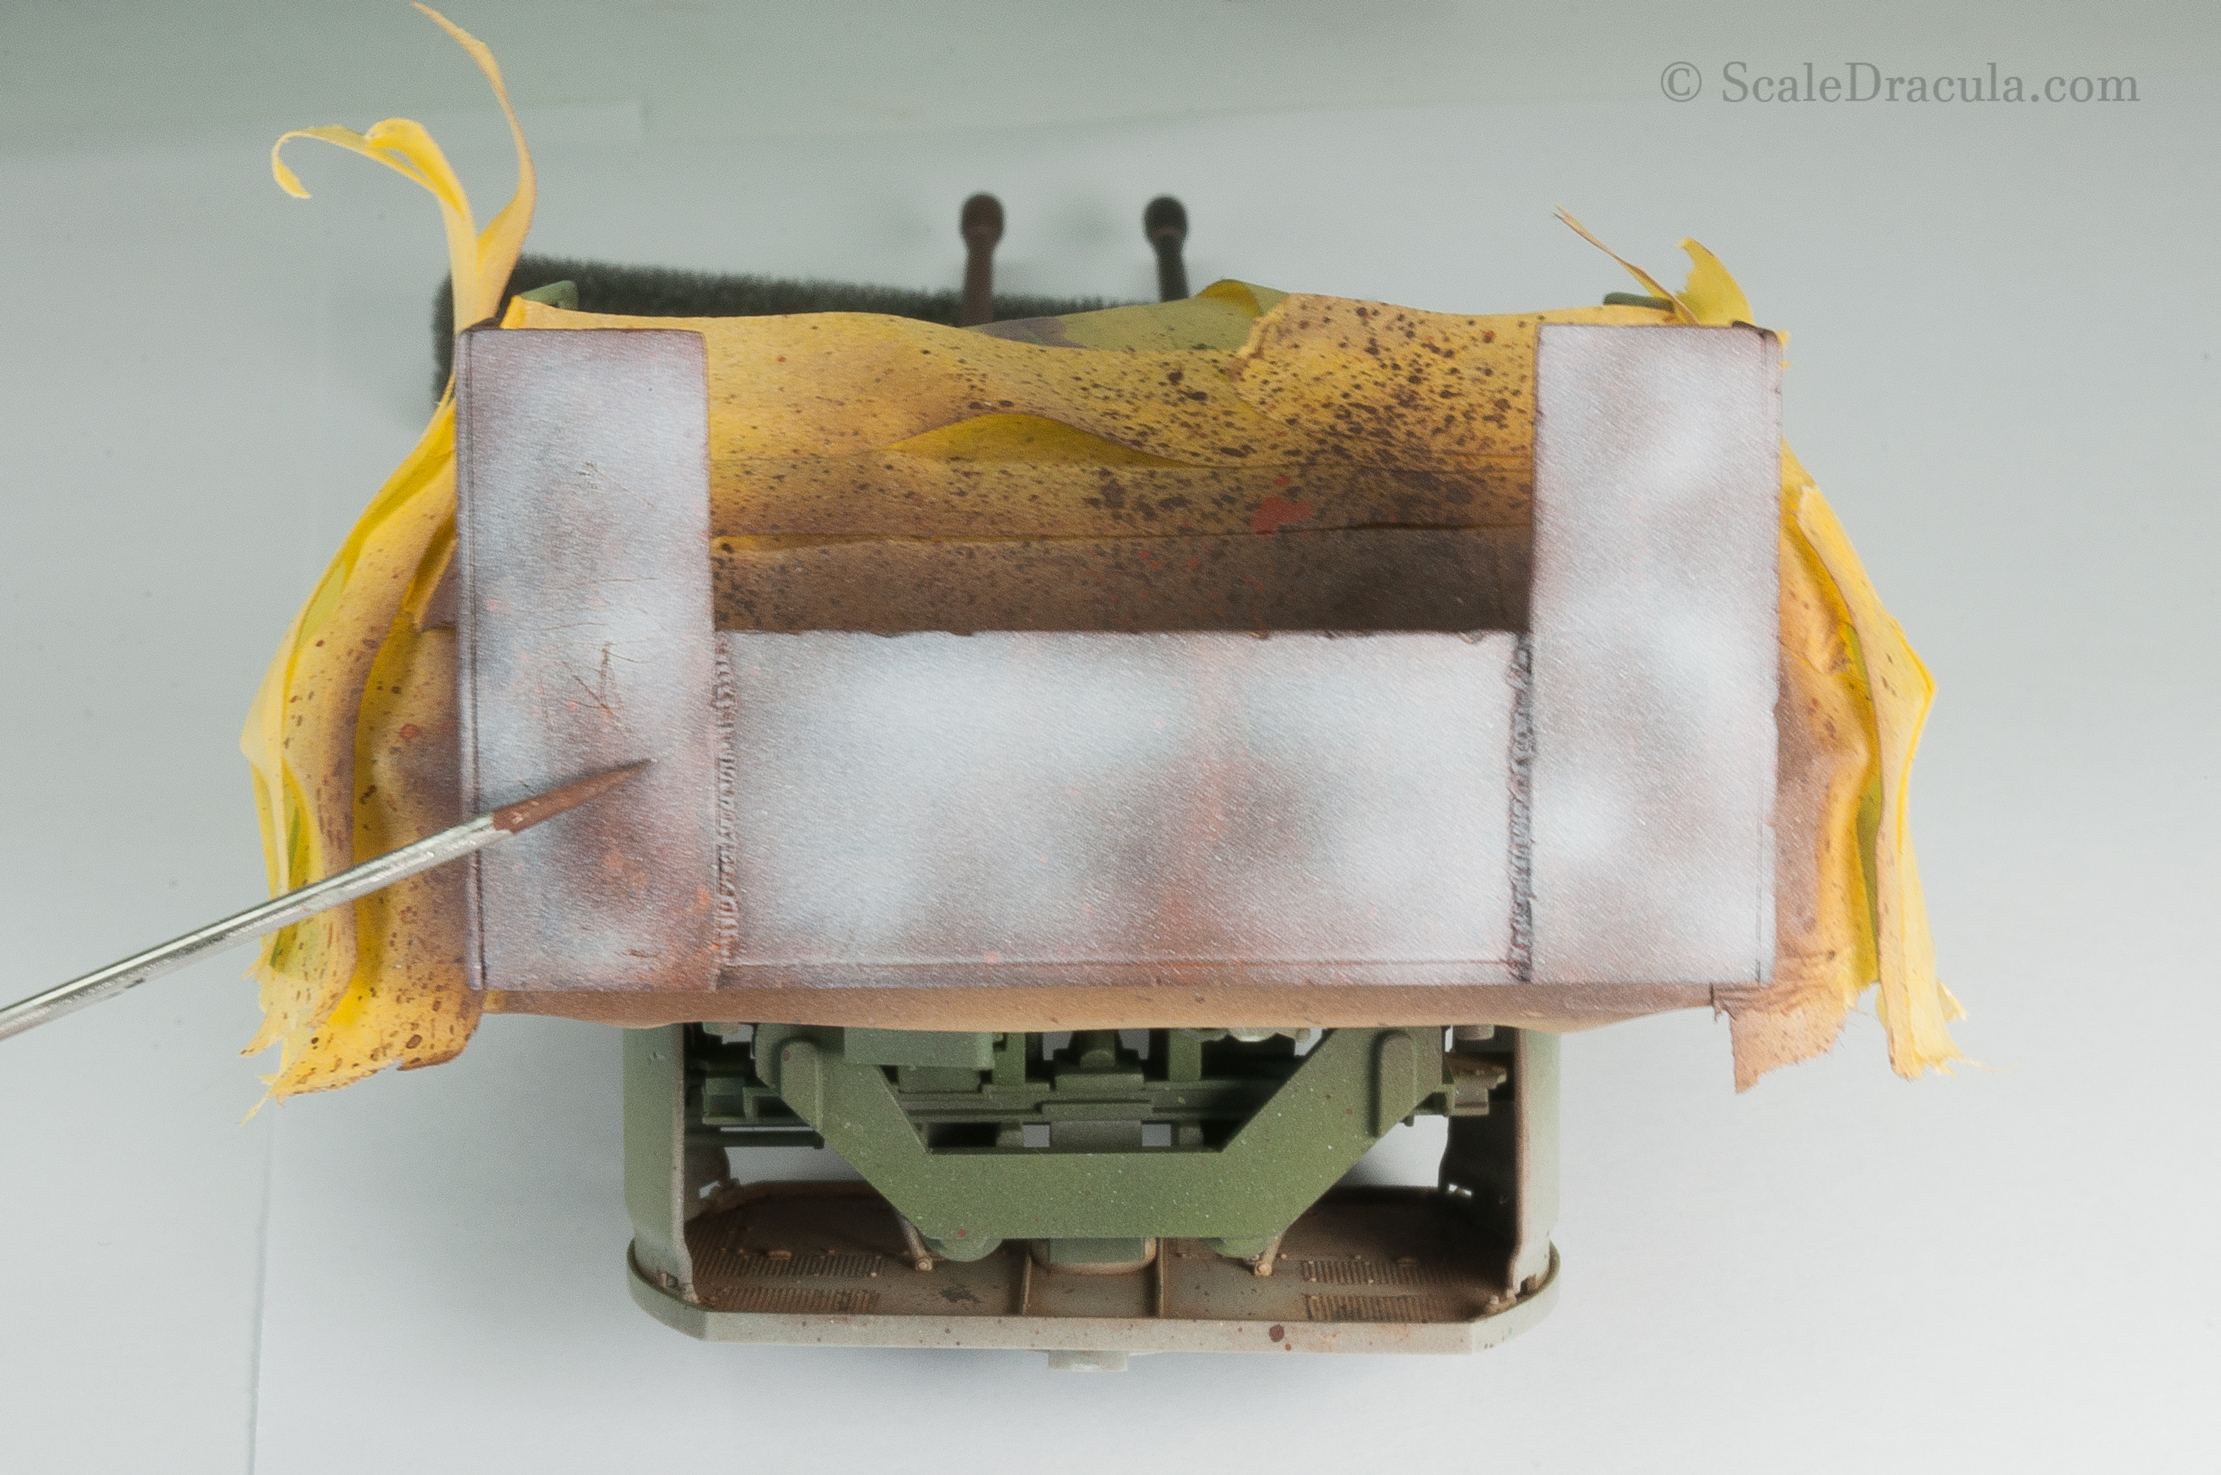
I switch to brush and I start with a simple mapping technique. A lighter shade of rust colour is diluted to low opacity. Then I paint irregular shapes on the surface.
Now I do some speckling Adam Wilder style. The colours aren’t important as long as they stay in the general rust palette. This step is to further break the monotony of the surface even before I get to the actual work.
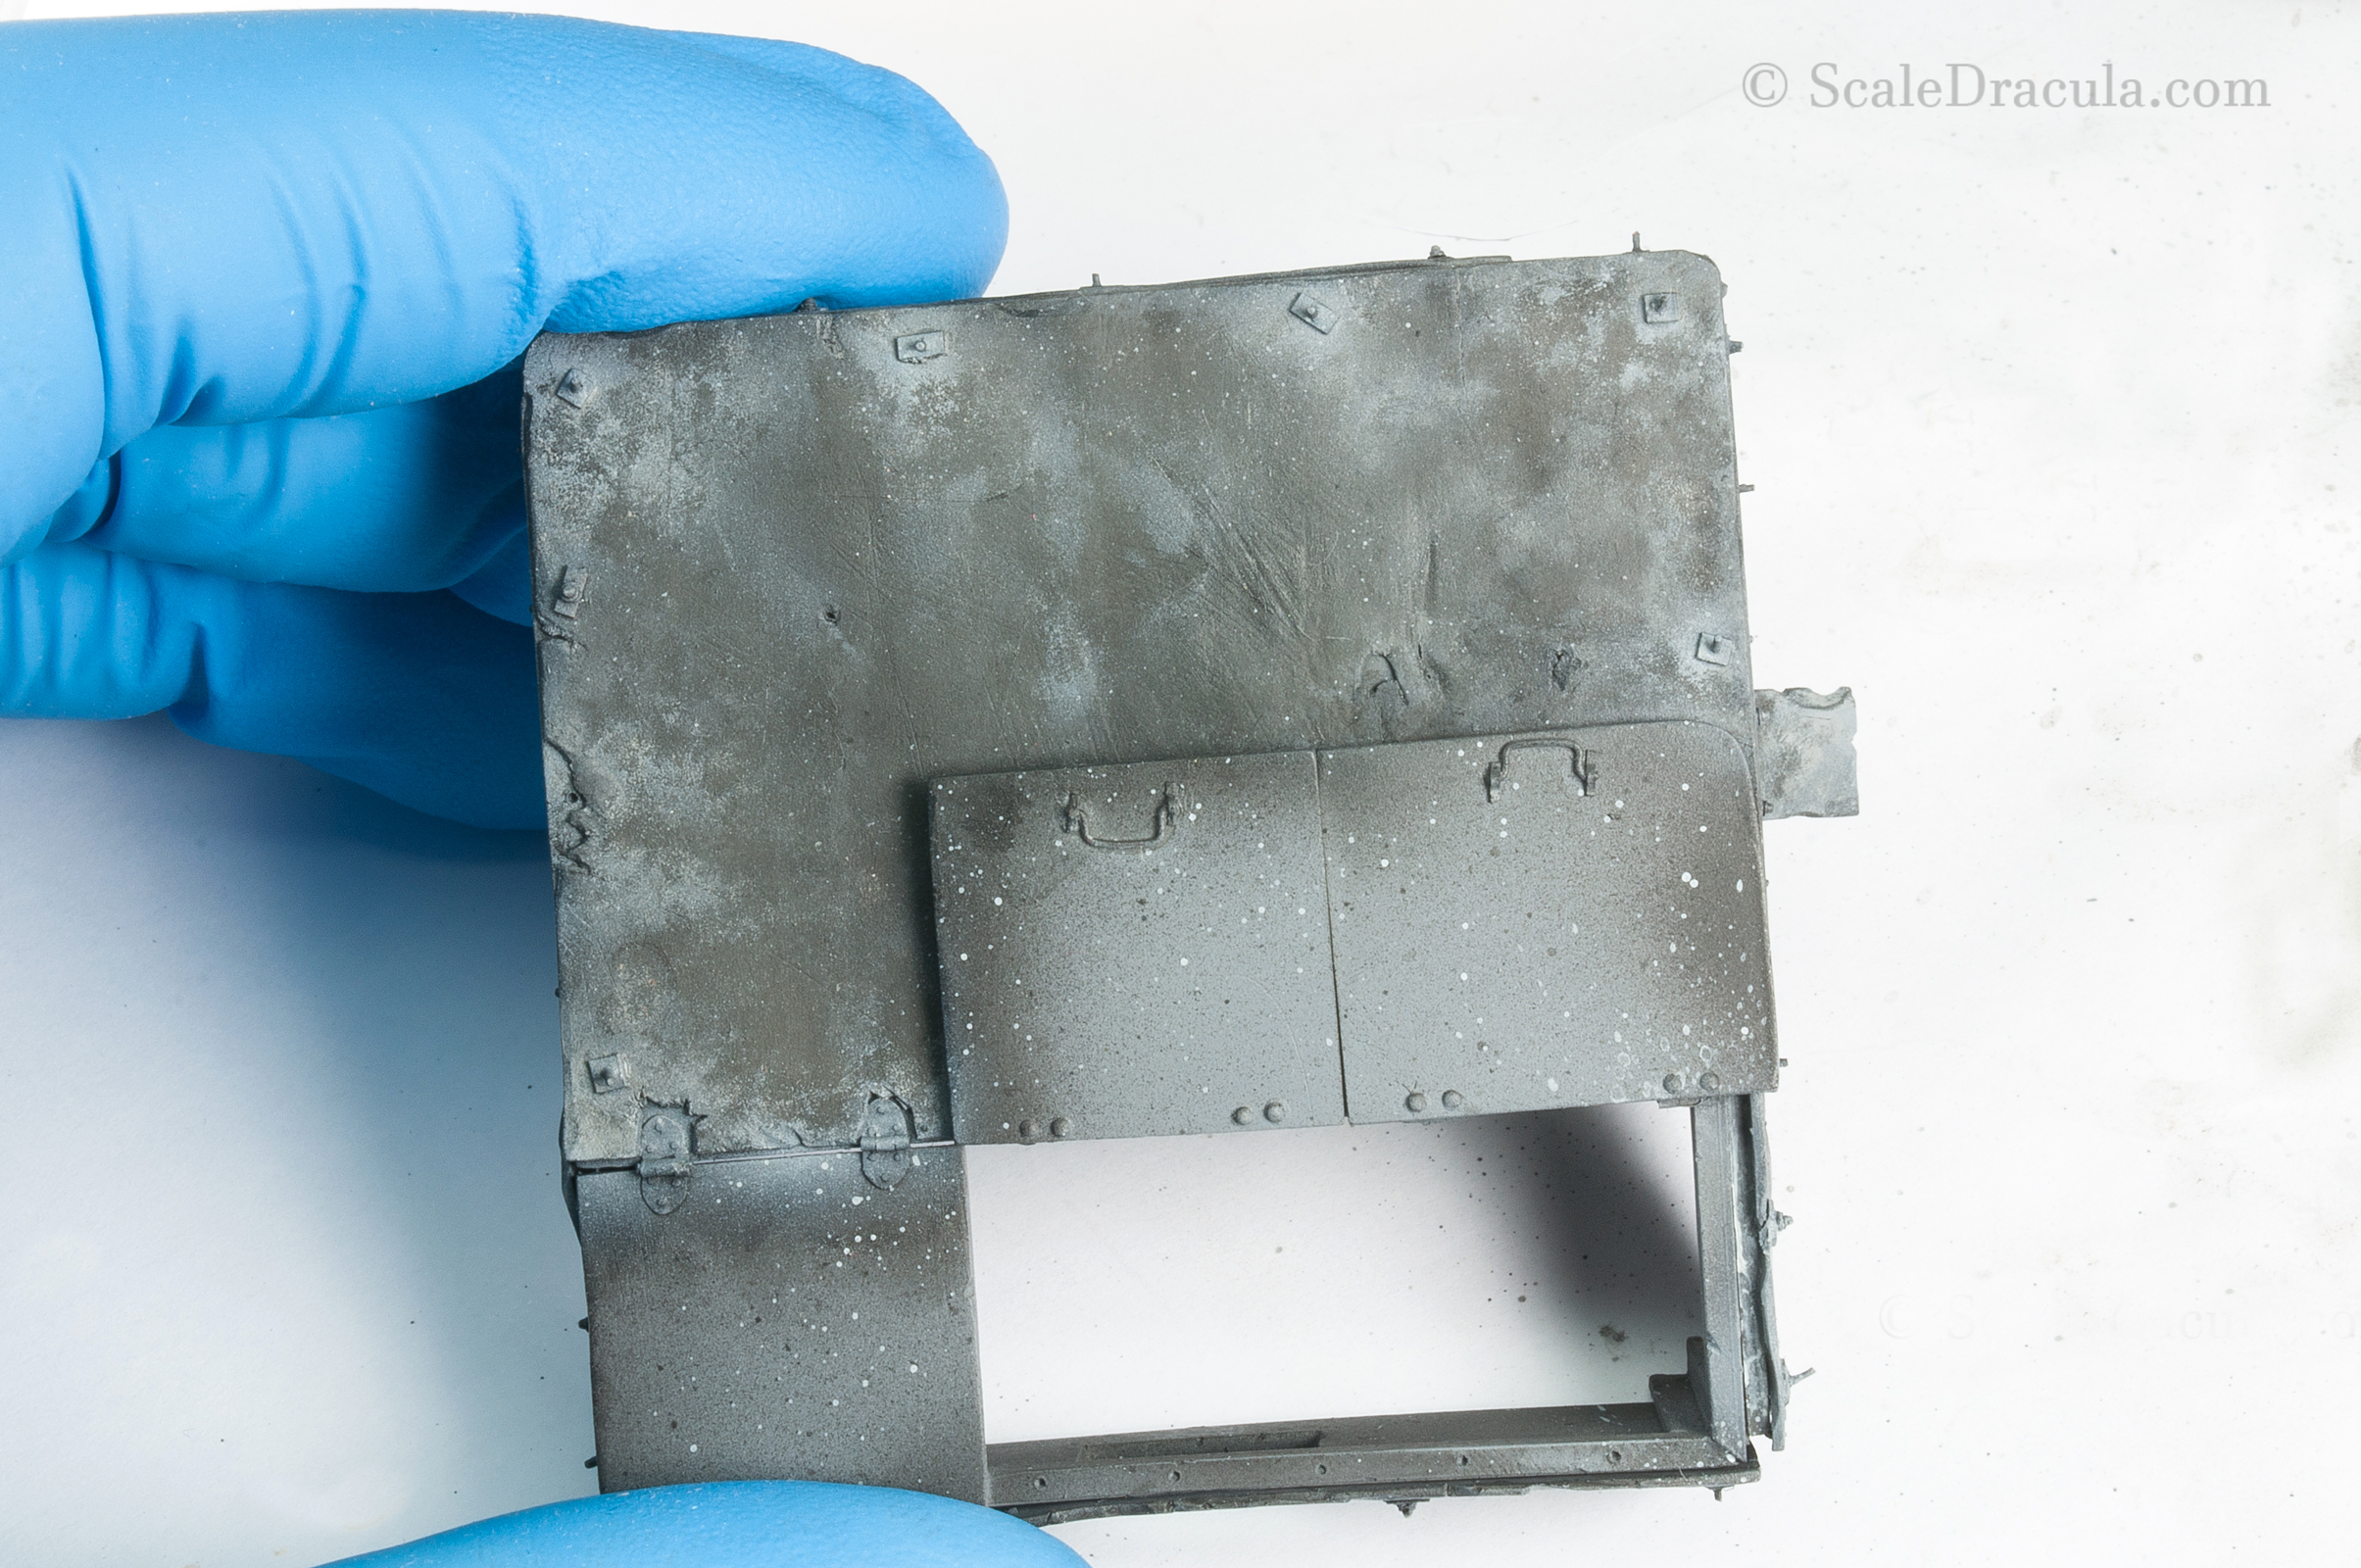
I covered the area with the chipping fluid and then sprayed a thin and uneven layer of medium grey. Don’t overdo this, the paint is supposed to be semi-transparent.
I moisten the surface with water and I start to scratch it with a couple of different tools.
Here’s what I’ve got after this stage. I made two different layers of chipping, with medium grey and light grey. The more layers you make, the more interesting the final result will be.
This is the bare metal base we’re going to build the rust on.
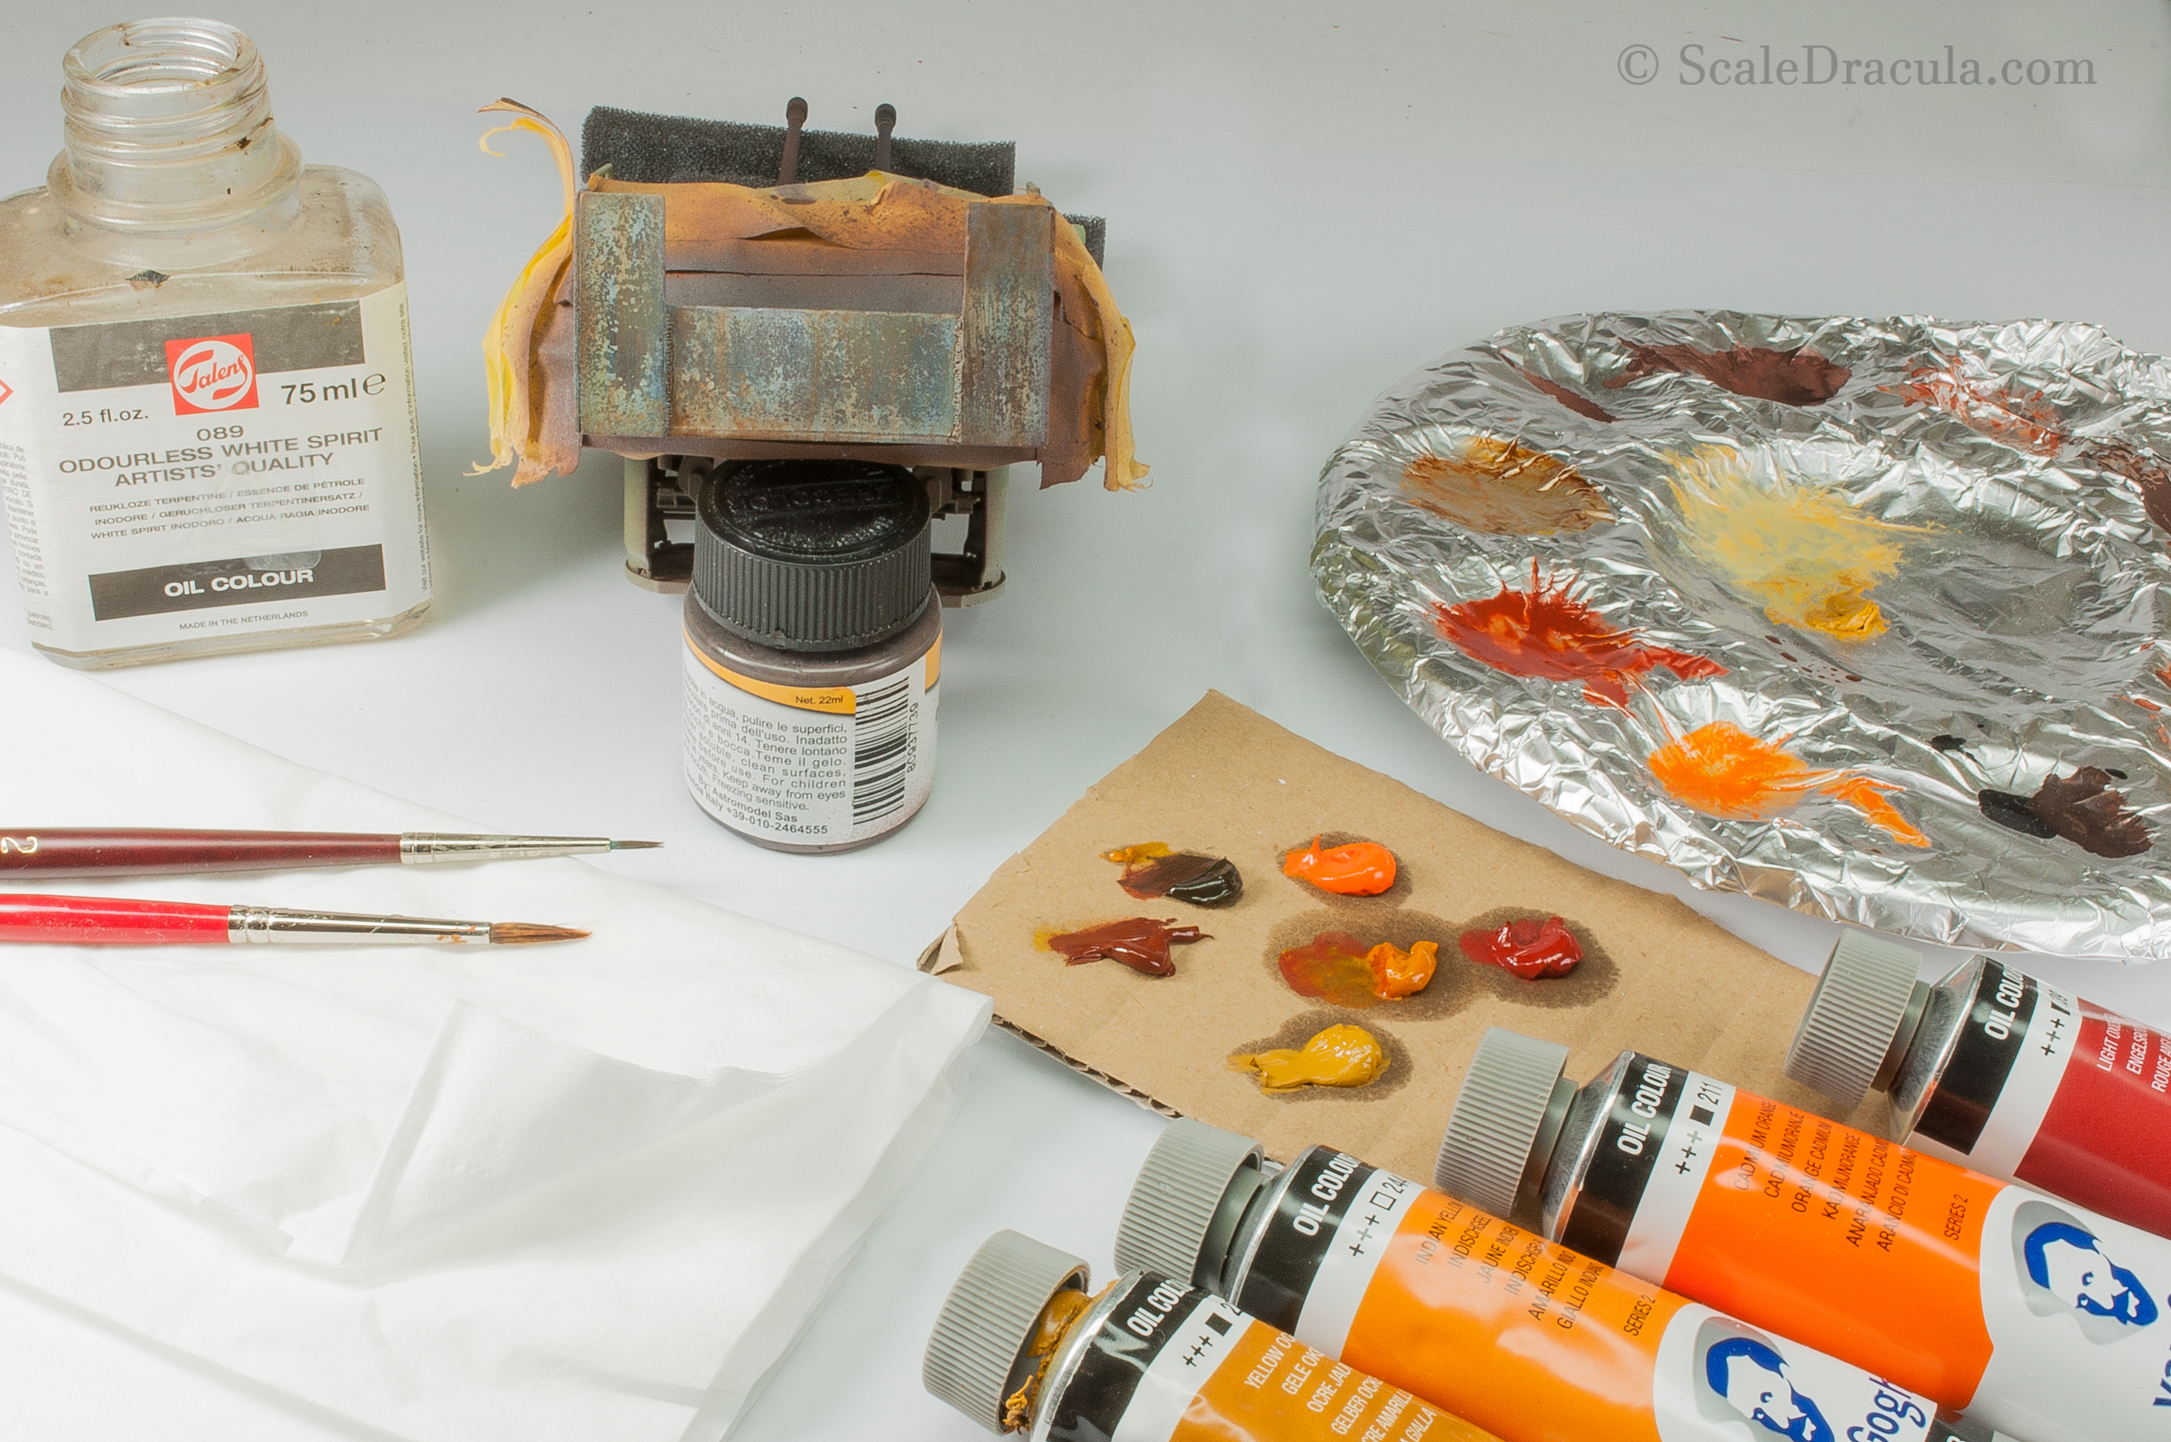
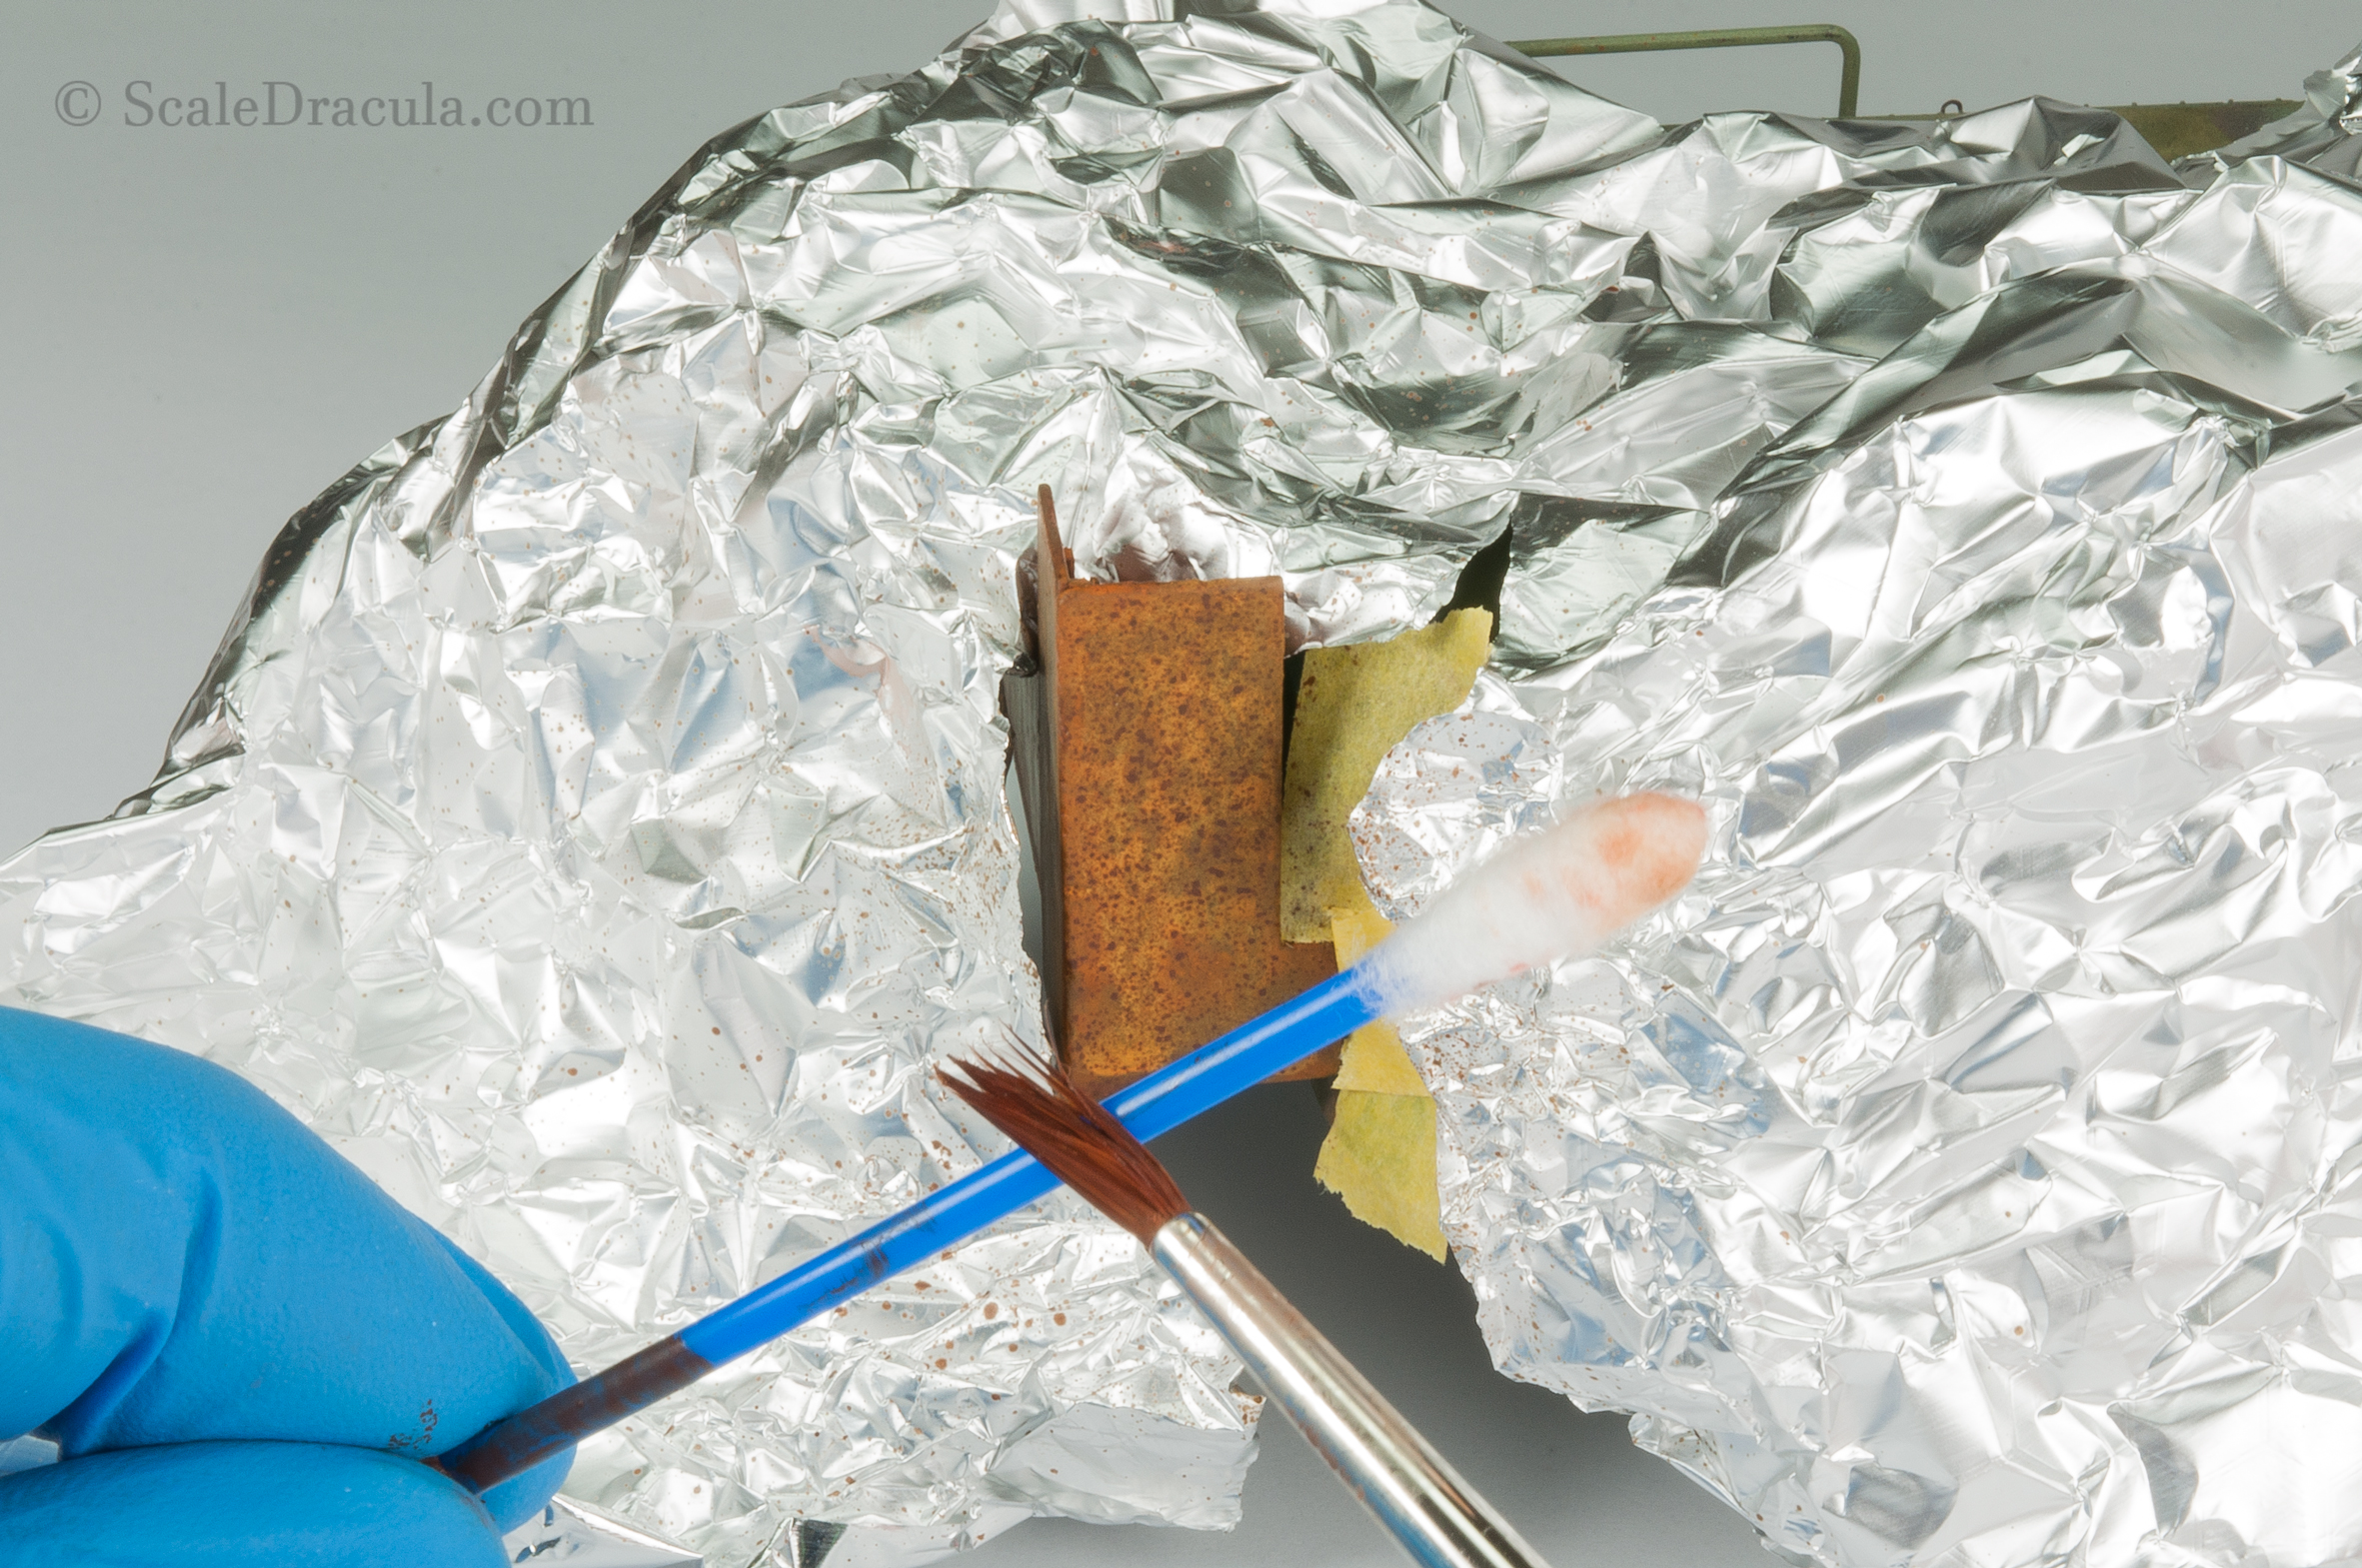
It’s time to put the oils on the front line. I’ve chosen a few rusty shades: yellow ochre, Indian yellow, cadmium orange and light oxide red.
Also notice that I use a piece of cardboard to soak off the linseed oil. This oil is basically the binder for the pigment and you don’t need it in our hobby unless you want to paint a Mona Lisa on a side of a tank.
The lack of linseed oil makes the paint dry much more faster.
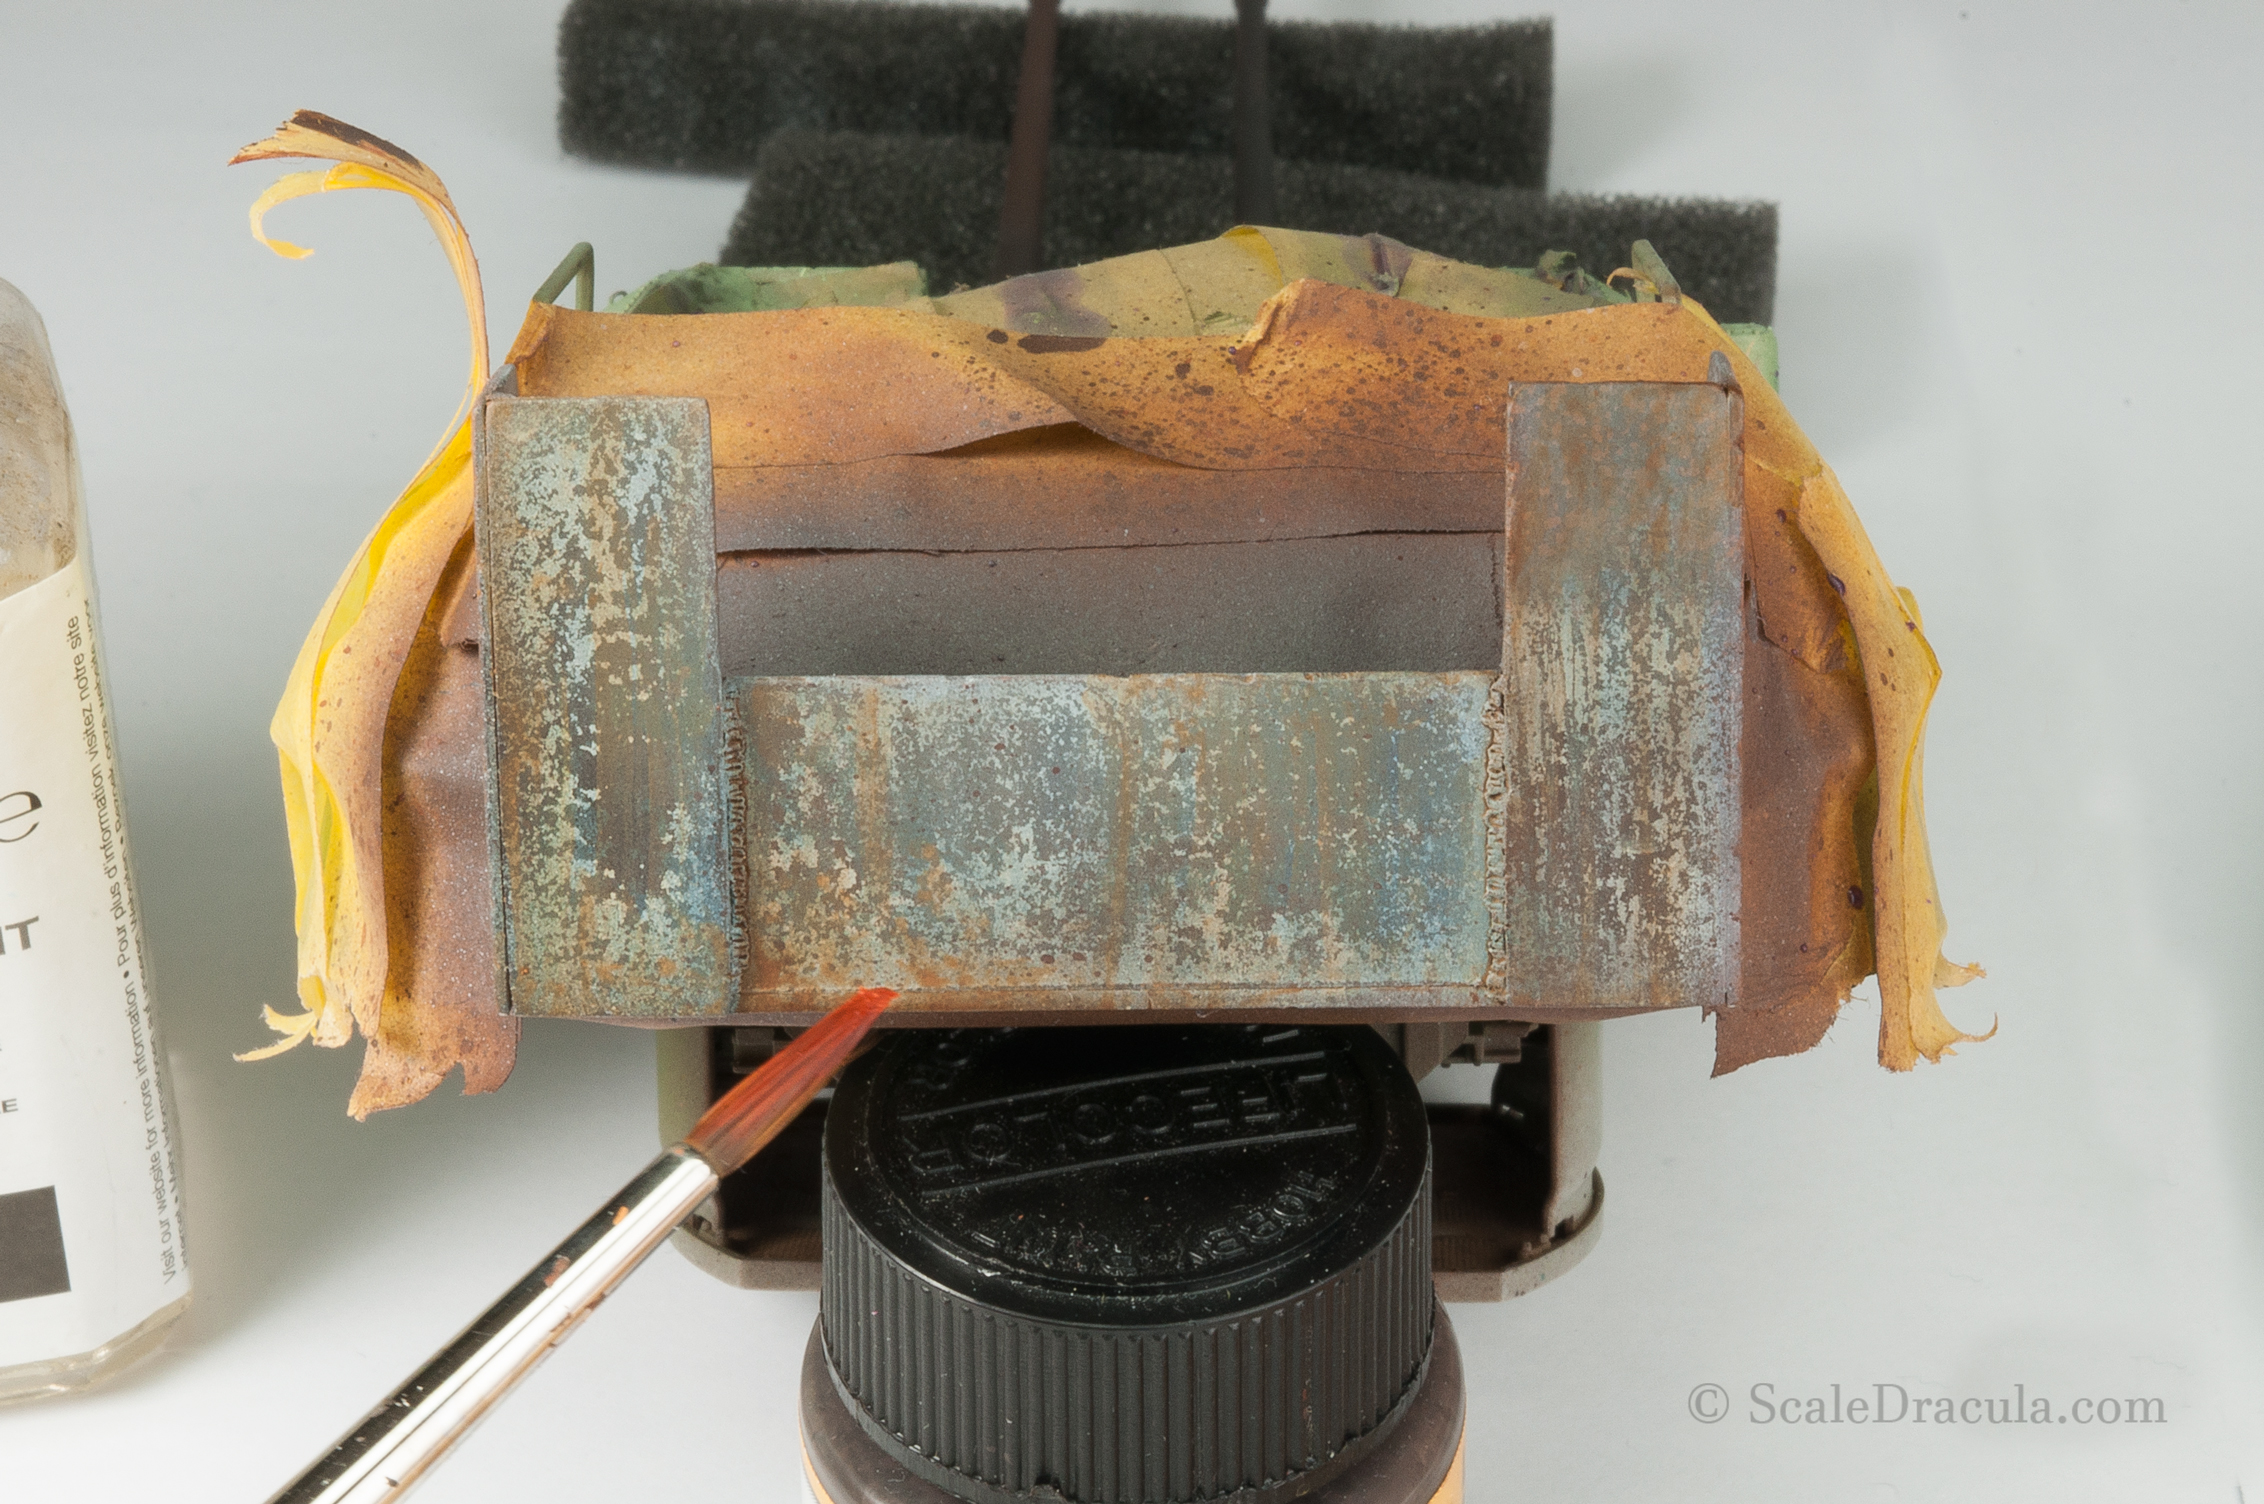
I do some streaks with various colours and then I blend them with white spirit. Make sure your brush is moisten, not soaking wet.
Also, it’s usually convenient to create contrast between the elements. It makes the whole effect much more credible.
Below you can see the result after a couple of painting sessions. I wasn’t in a hurry so I let the paint dry layer by layer.
It is possible to do it all in one go but you need to be careful not to destroy you previous work with the new layers. The oil paint dries pretty slowly and can remain active for days.
Observe how I concentrated the lighter shades of rust in the middle and at the bottom of the part. That’s the contrast I’ve mentioned earlier. I make sure that each of the elements of the structure is a little bit different. These are supposed to be some random scrapyard parts after all.
There’s a lot of randomness in how the rust builds up, but there’s also a certain logic to it. Combine those two and you’re the winner.
For the sides of the superstructure I’ve chosen a different technique. After the mapping I go directly to speckling. Crank it up to 11, use a lot of colours and the result will be very interesting.
I got so carried away with the oils I started to paint the hull as well. I planned to do it during the weathering stage, but what can you do?
I put a little of paint on the places that received some heavy chipping earlier. Then I blended it with white spirit.
Add additional colours until you’re satisfied with the effect. Again, contrasting colours will make the part more interesting.
It’s time to do the decals. I can’t say it’s my favourite part of the build. Actually, it’s somewhere at the bottom of the list…
I hate the decals so much that for a while I considered painting the markings free hand. But finally I realized it would even more annoying.
So here it goes… The decals…
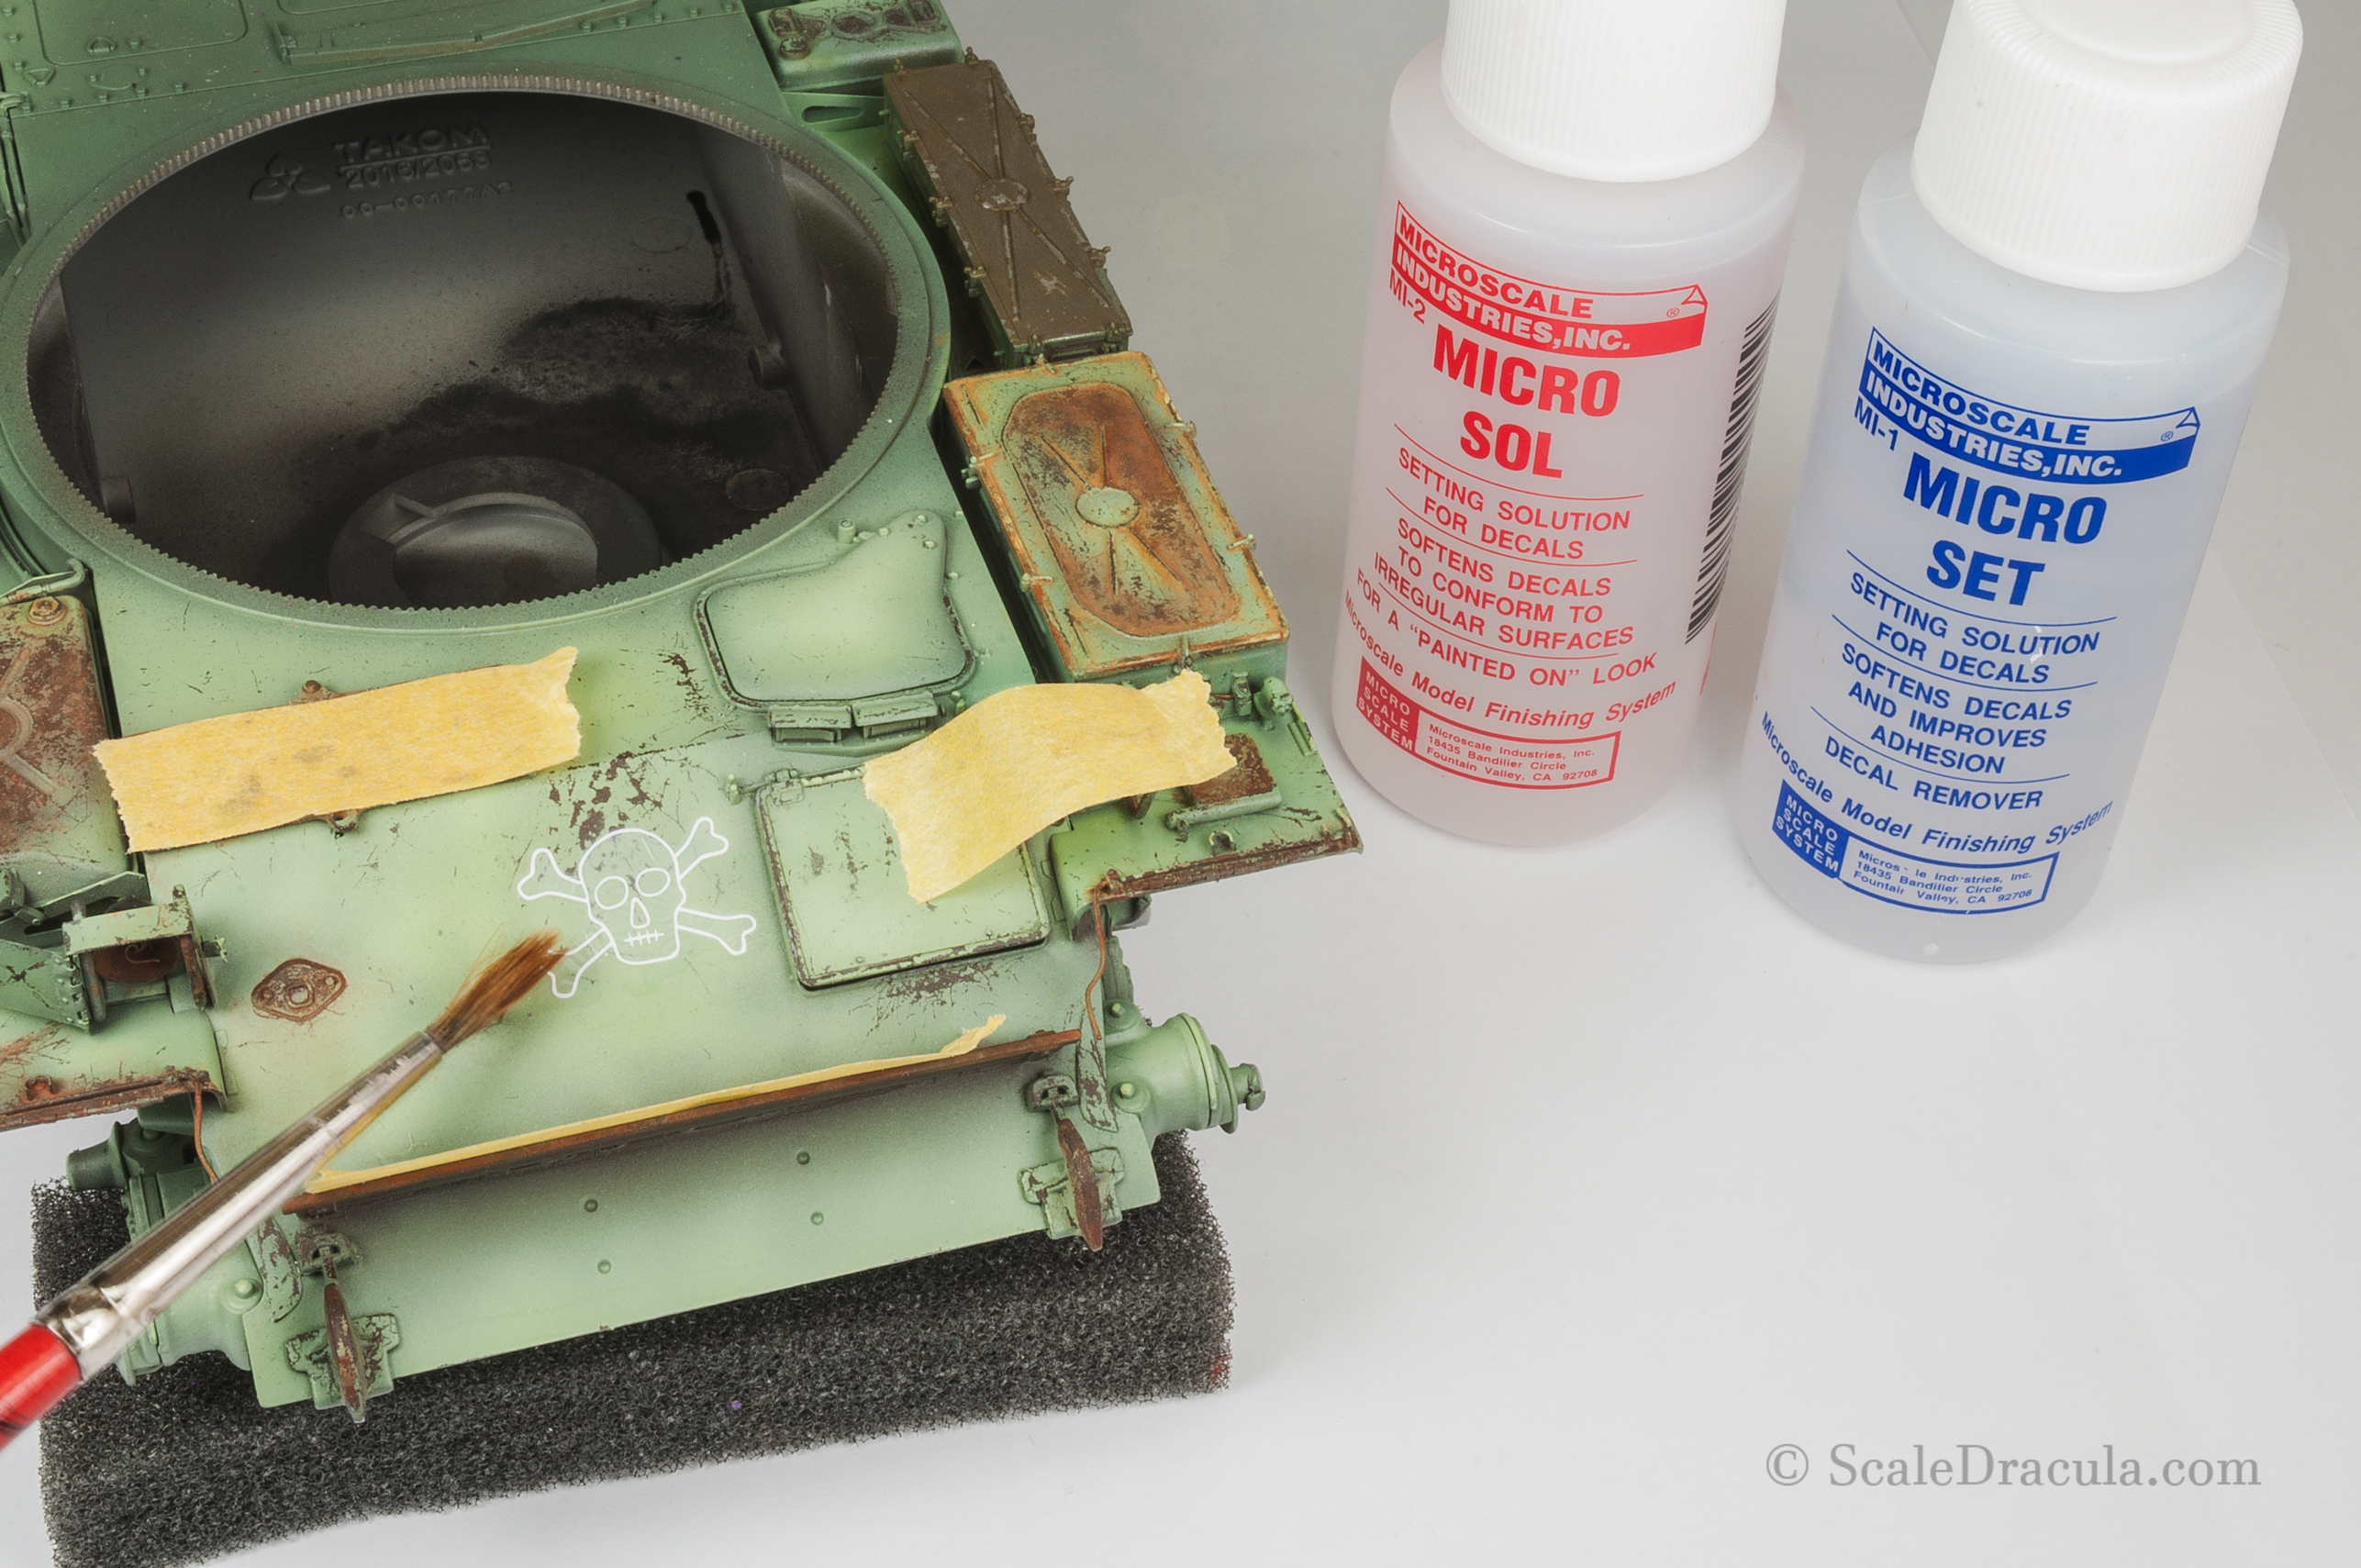
To prepare the surface I wipe off any real or imaginary dust with a big flat brush. Then I airbrush a layer of glossy varnish. Next I moisten the surface with Micro Set and I carefully place the decal on the model. Micro Set is meant to improve the adhesion of the decal and make it easier to move it around. And I must say it does its job pretty well.
When the decal is dry I put a little bit of Micro Sol on top. The surface I work on is perfectly plain so I’d say this step is optional here. Then the second layer of glossy varnish goes on top.
And here comes the most tedious part. To make sure the decal will look realistic you need to sand off its top layer. And you need to be careful with this. Too much sanding and you will scrap off your decal. Of course you also need to pay attention not to harm the paint around it. At the end I secure the decals with satin varnish.
So that’s the procedure. You do it all perfectly and maybe, just MAYBE you’ll get that ‘painted on’ result.
You see? That’s what bugs me the most in decals. I could use a stencil and just paint what is supposed to be painted in the first place. I wish it was always possible. 🙁
Quick tip
The decals are evil. Avoid using them at all cost. Dry transfers, stencils and free hand painting may be applied as alternative techniques.
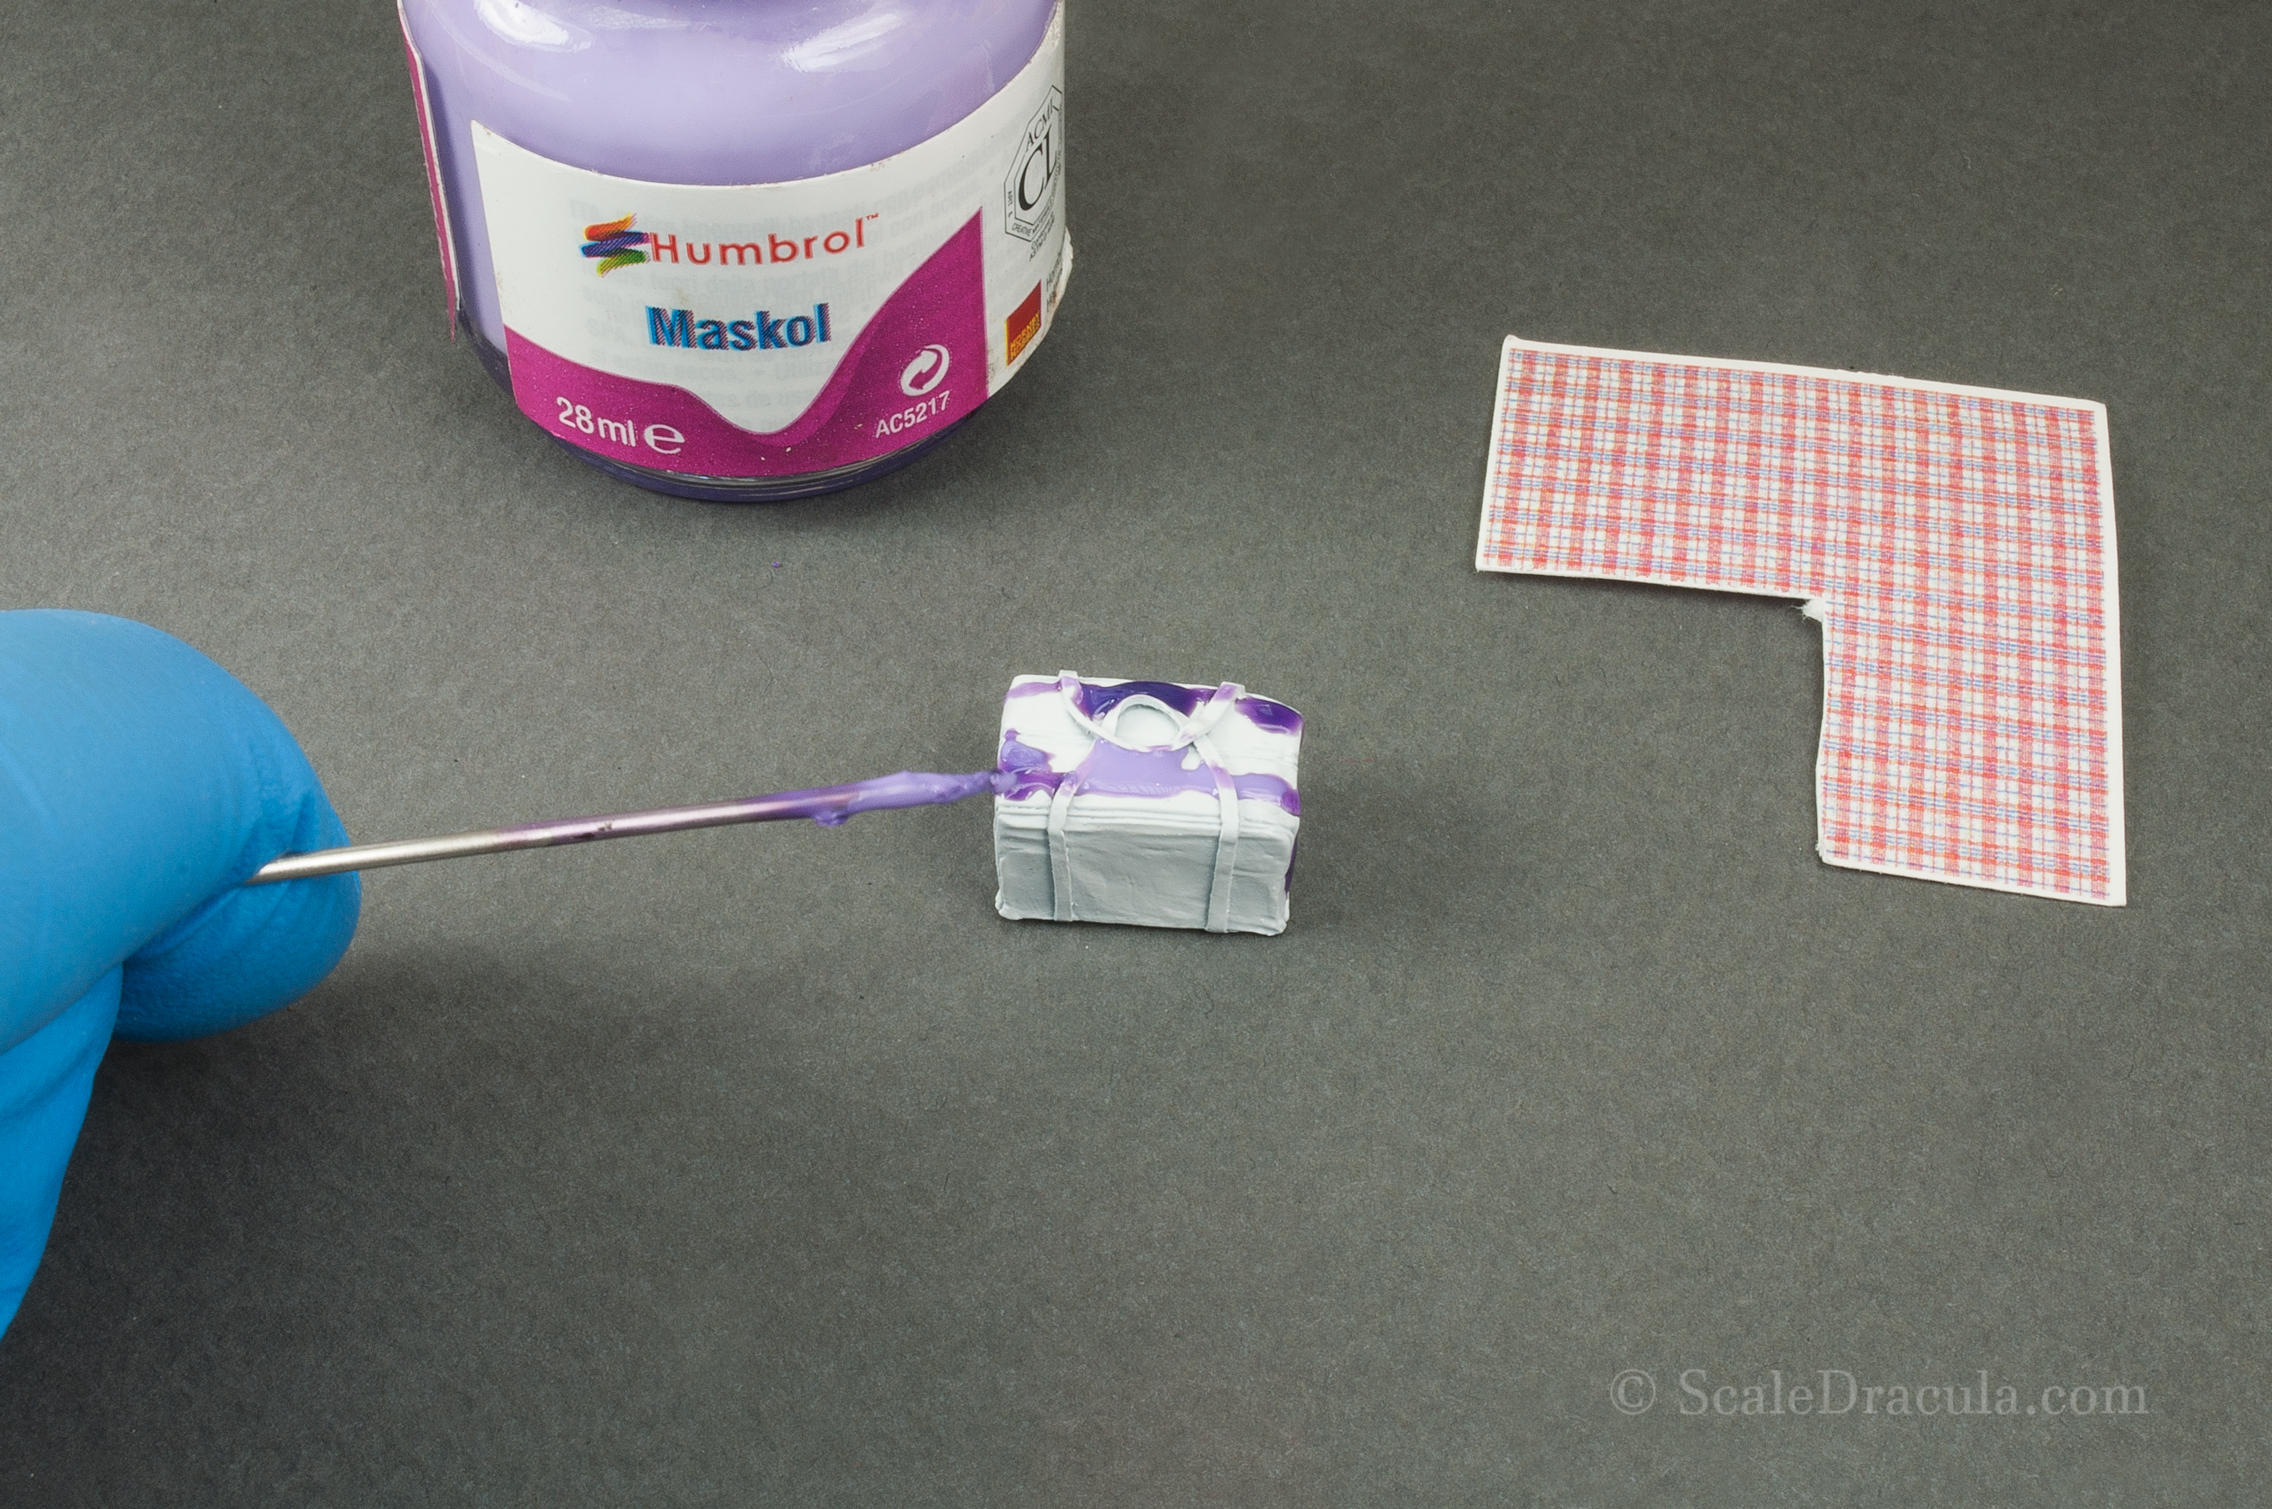
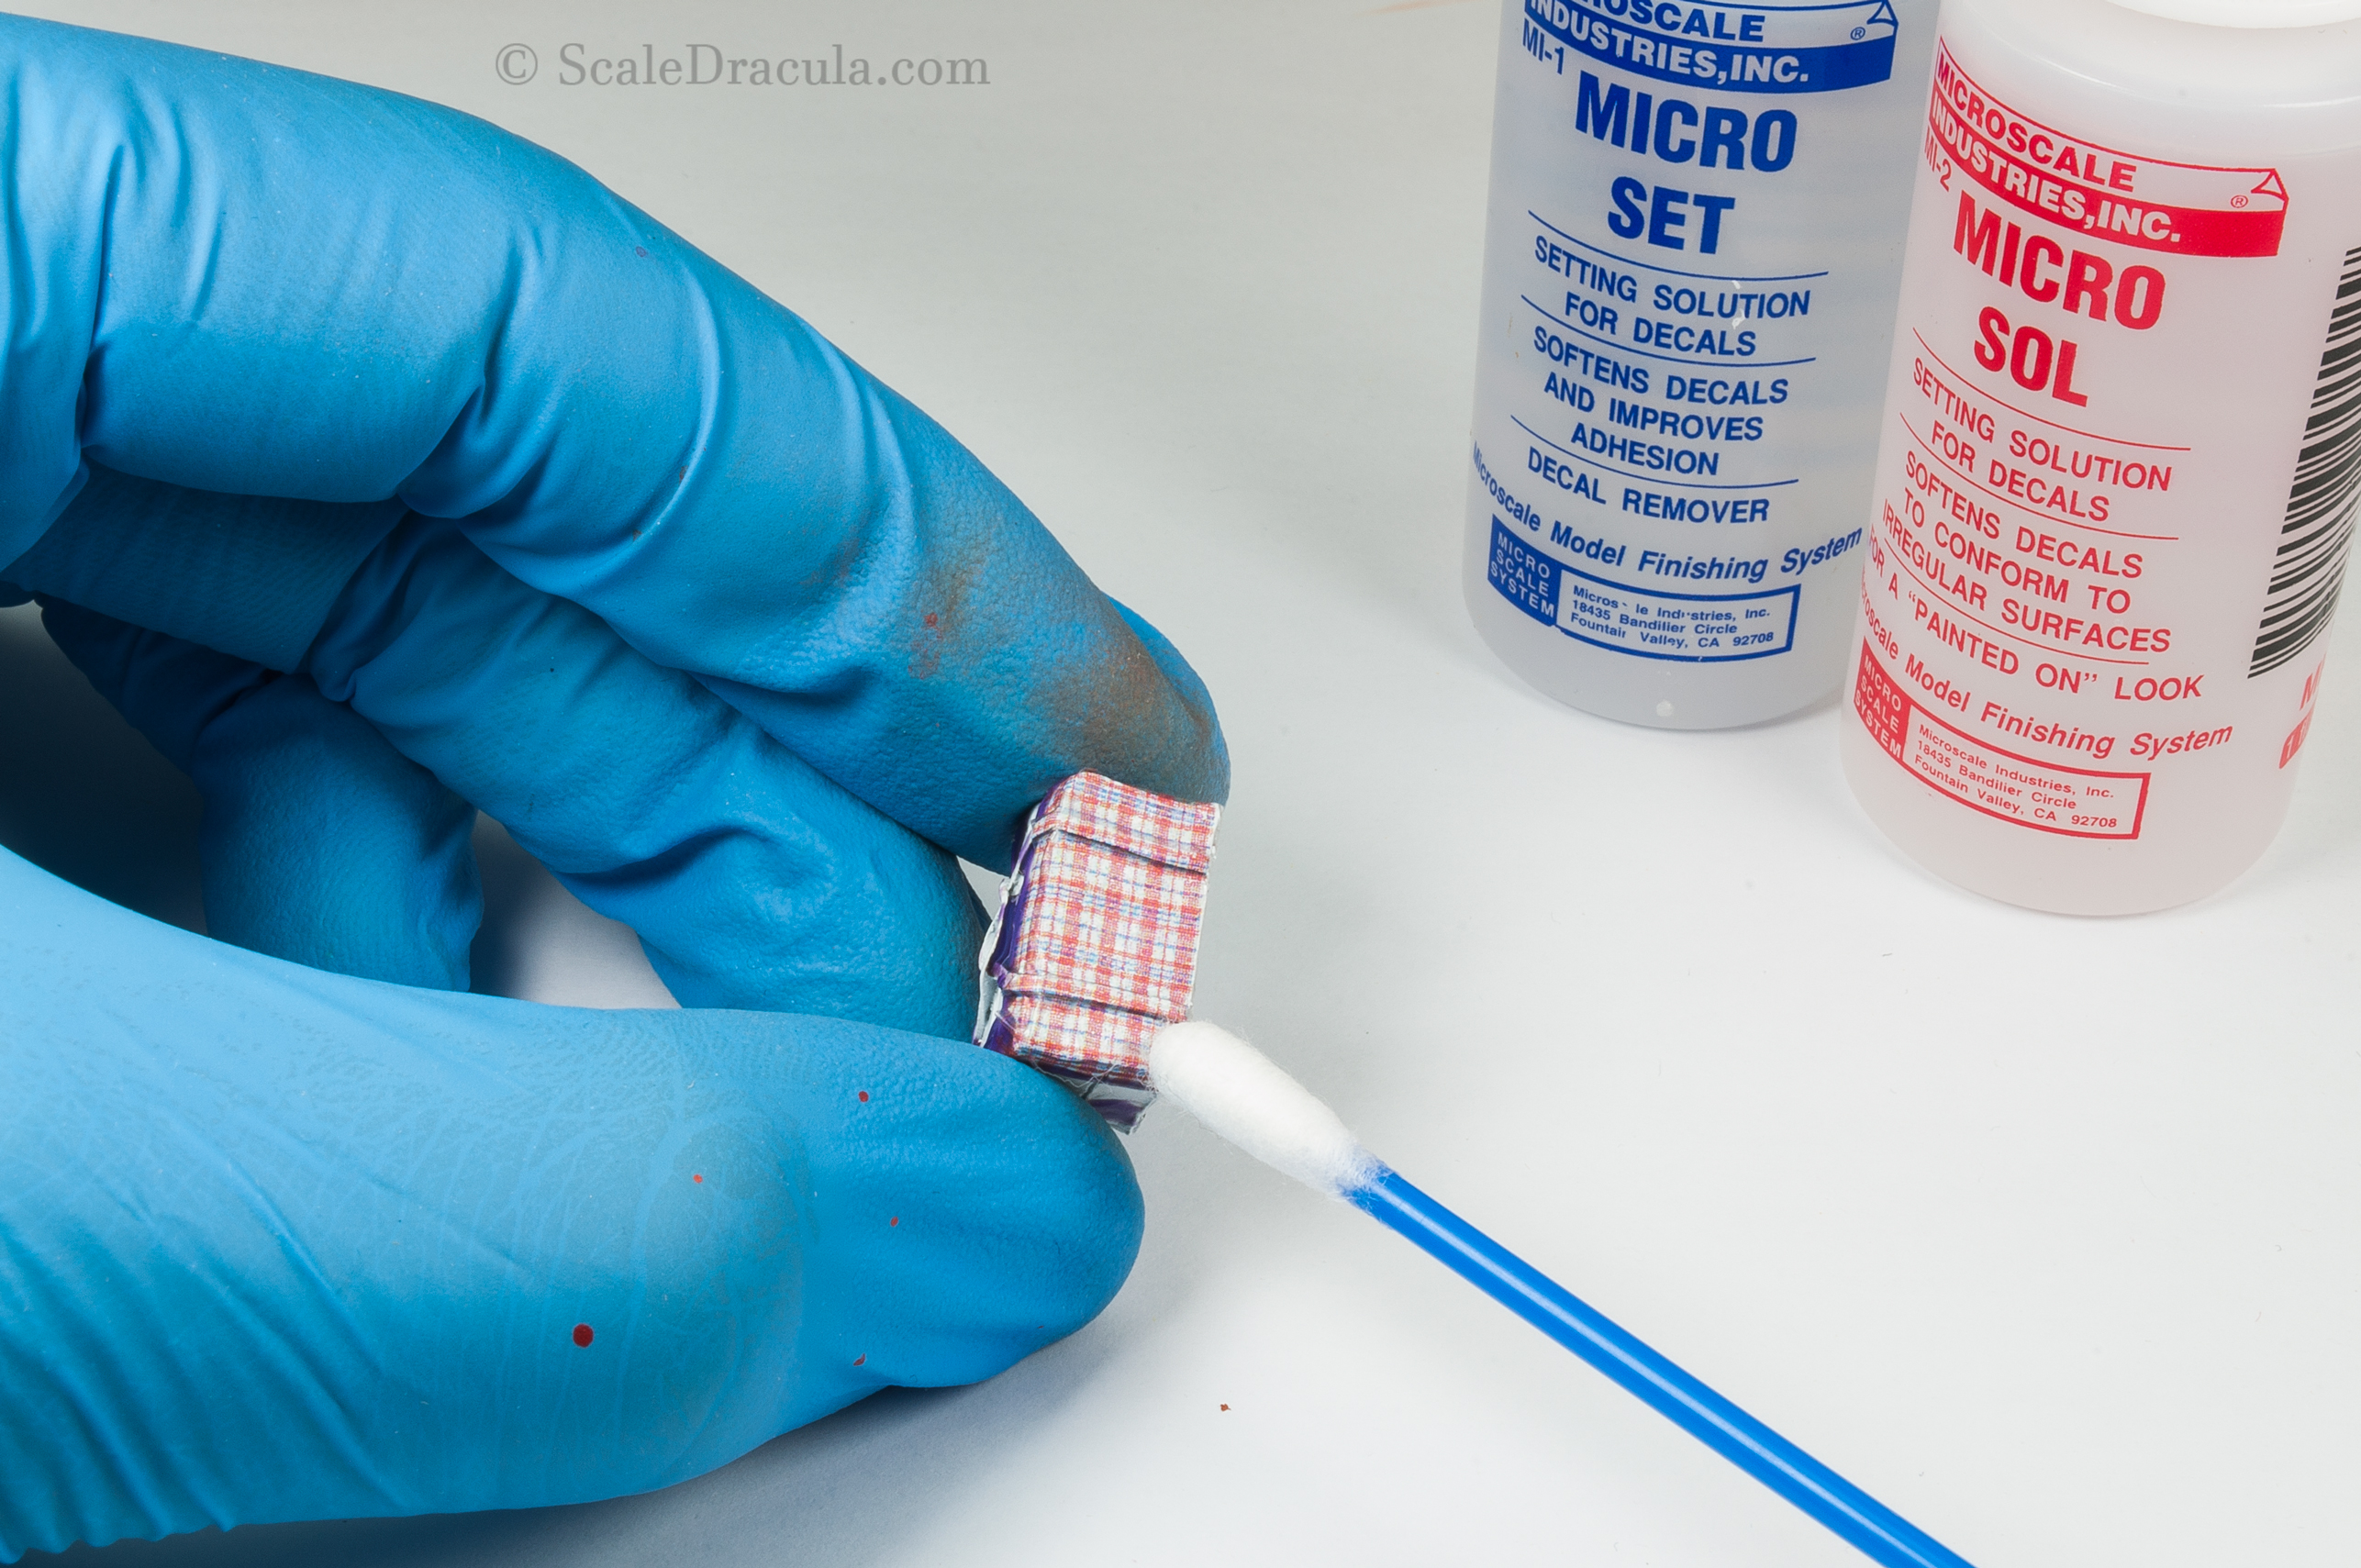
I also had to put the decals on the market bag I will add to my model. And if the previous job was ‘decal annoyance’ this is straight up ‘decal hell’.
To cover the entire bag you need to do each of the sides separately.
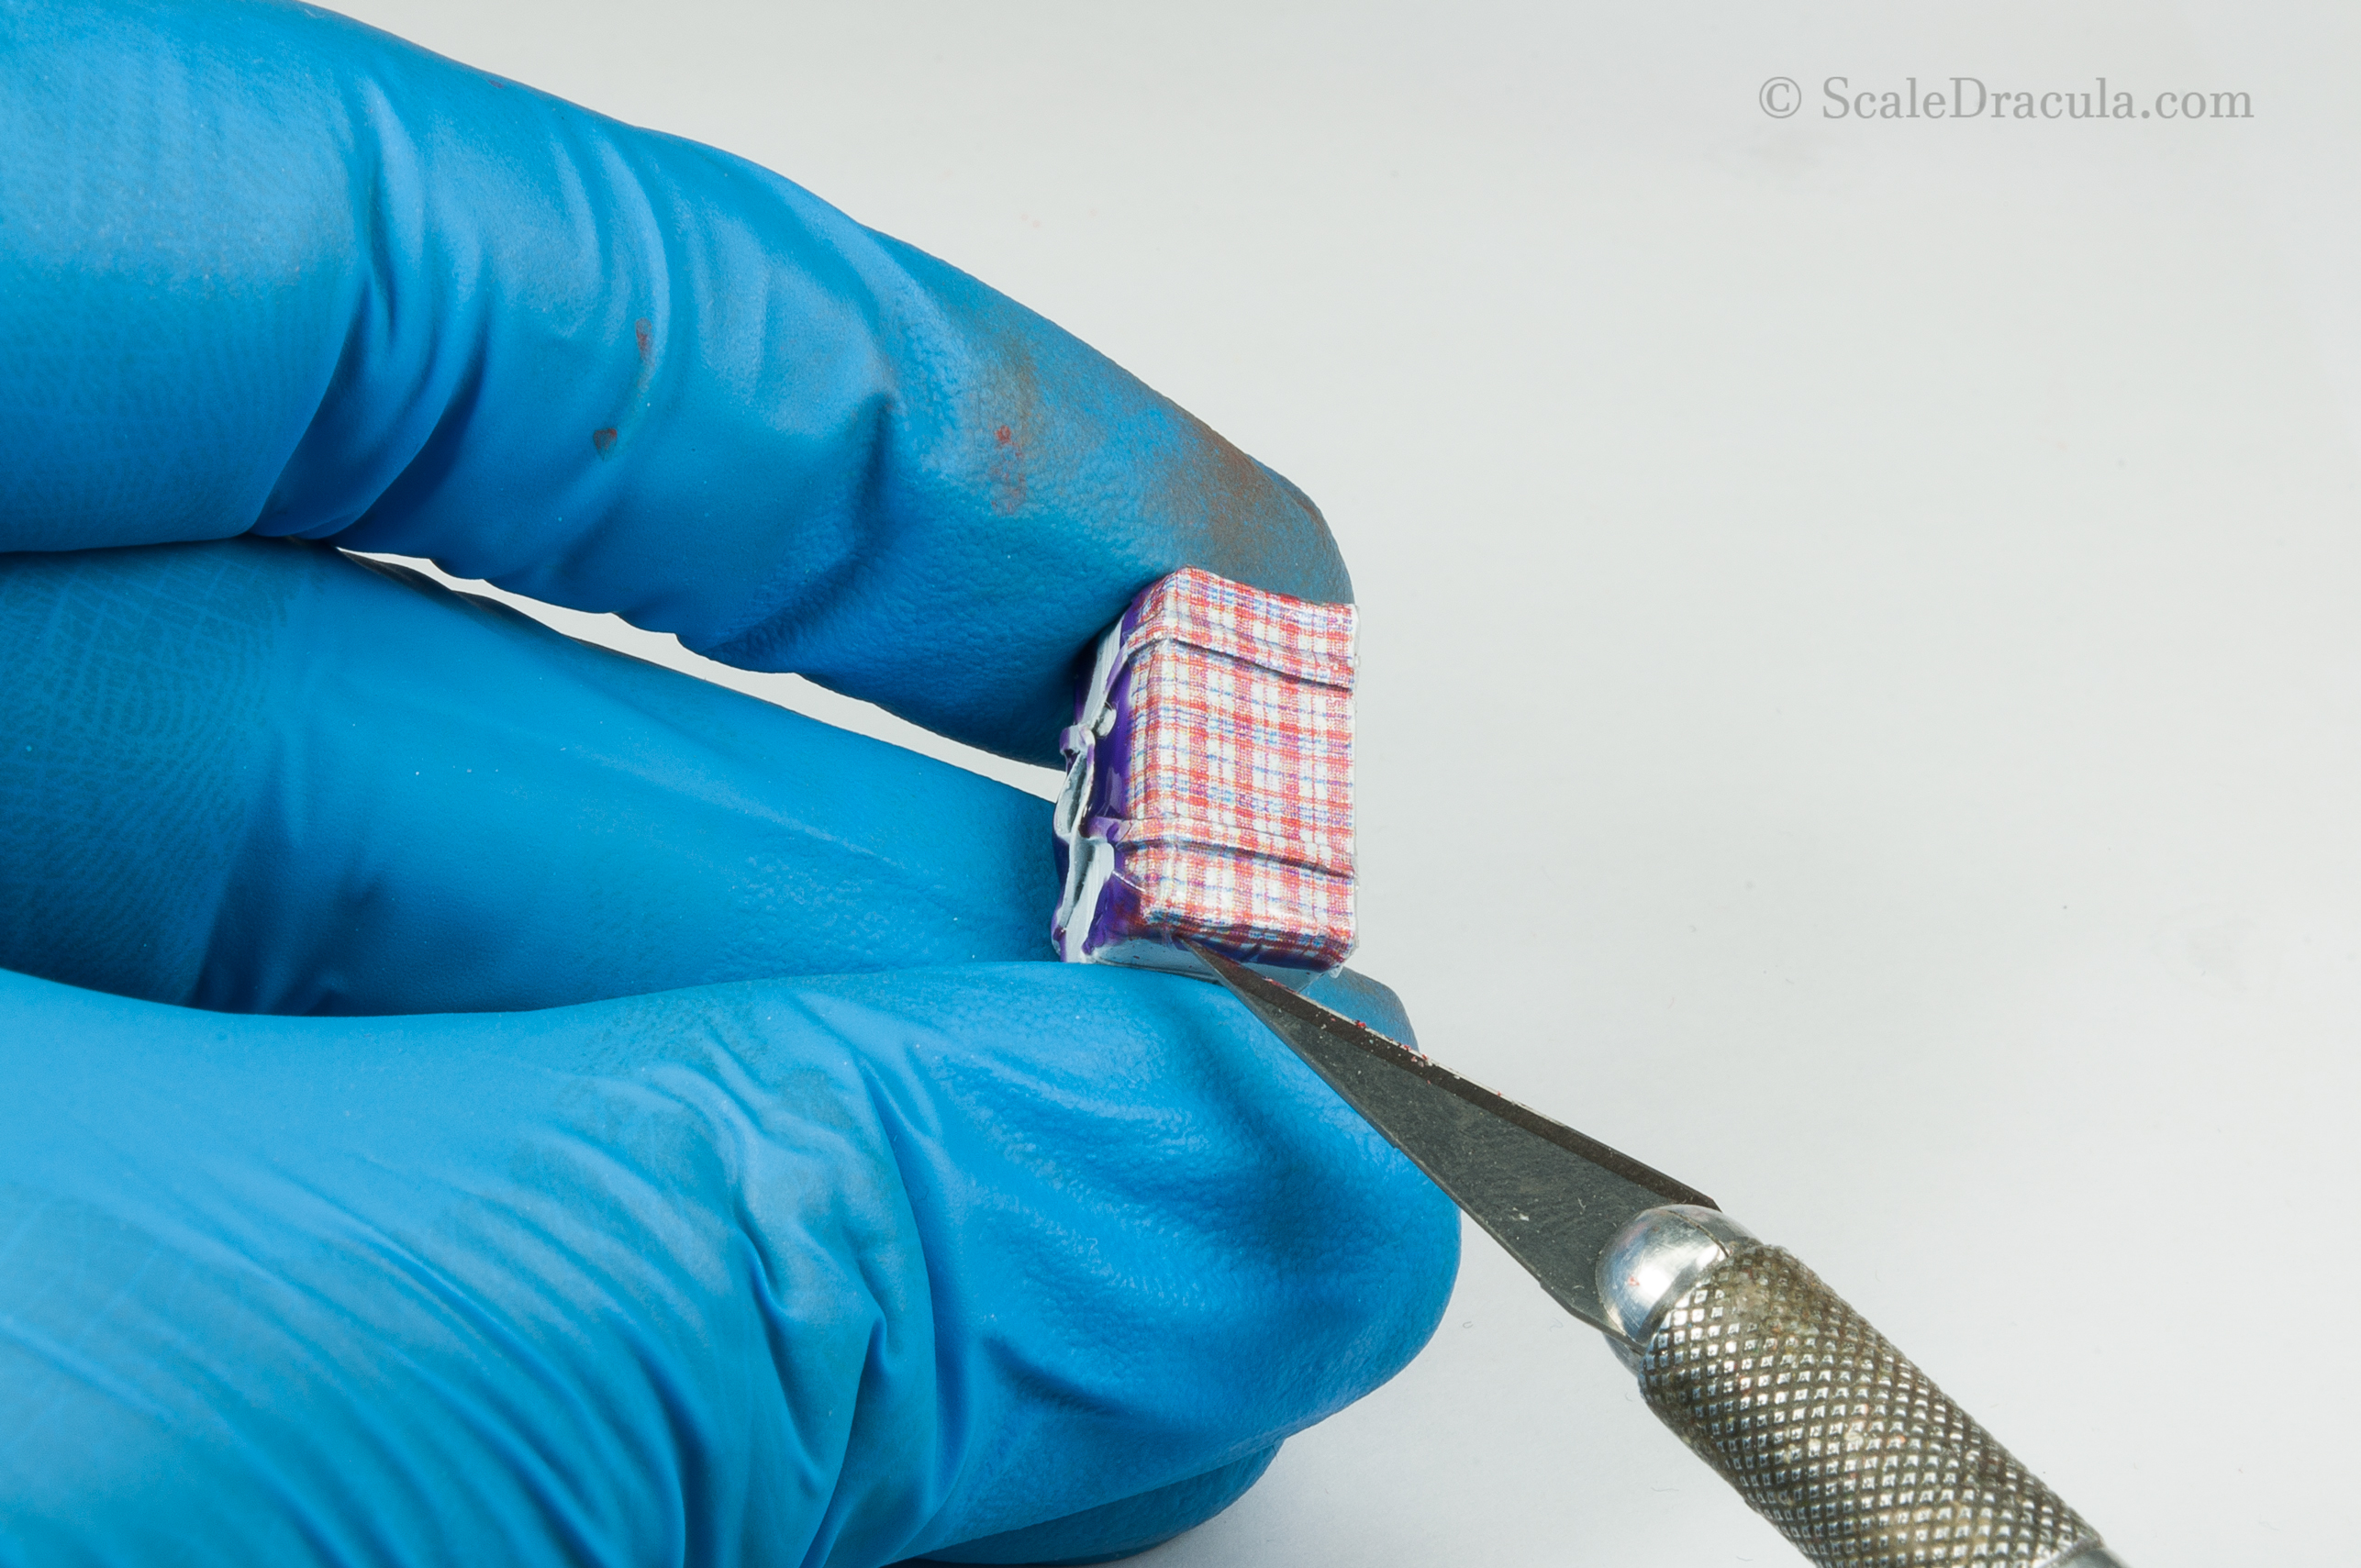
So here’s the procedure: you cut a piece of decal from the sheet, put it on the surface, then you cut the decal on the seam line and remove the excess. And then you proceed to the next side to do it all over again.
Long story short: I messed up. I either kept destroying the decal with my knife or I was unable to remove the exceeding part when the decal was already dry.
A couple of eternities later I finally started to use Maskol as a perimeter preventing the decal from adhering to the edges.
The cutting and removing the excess became much easier.
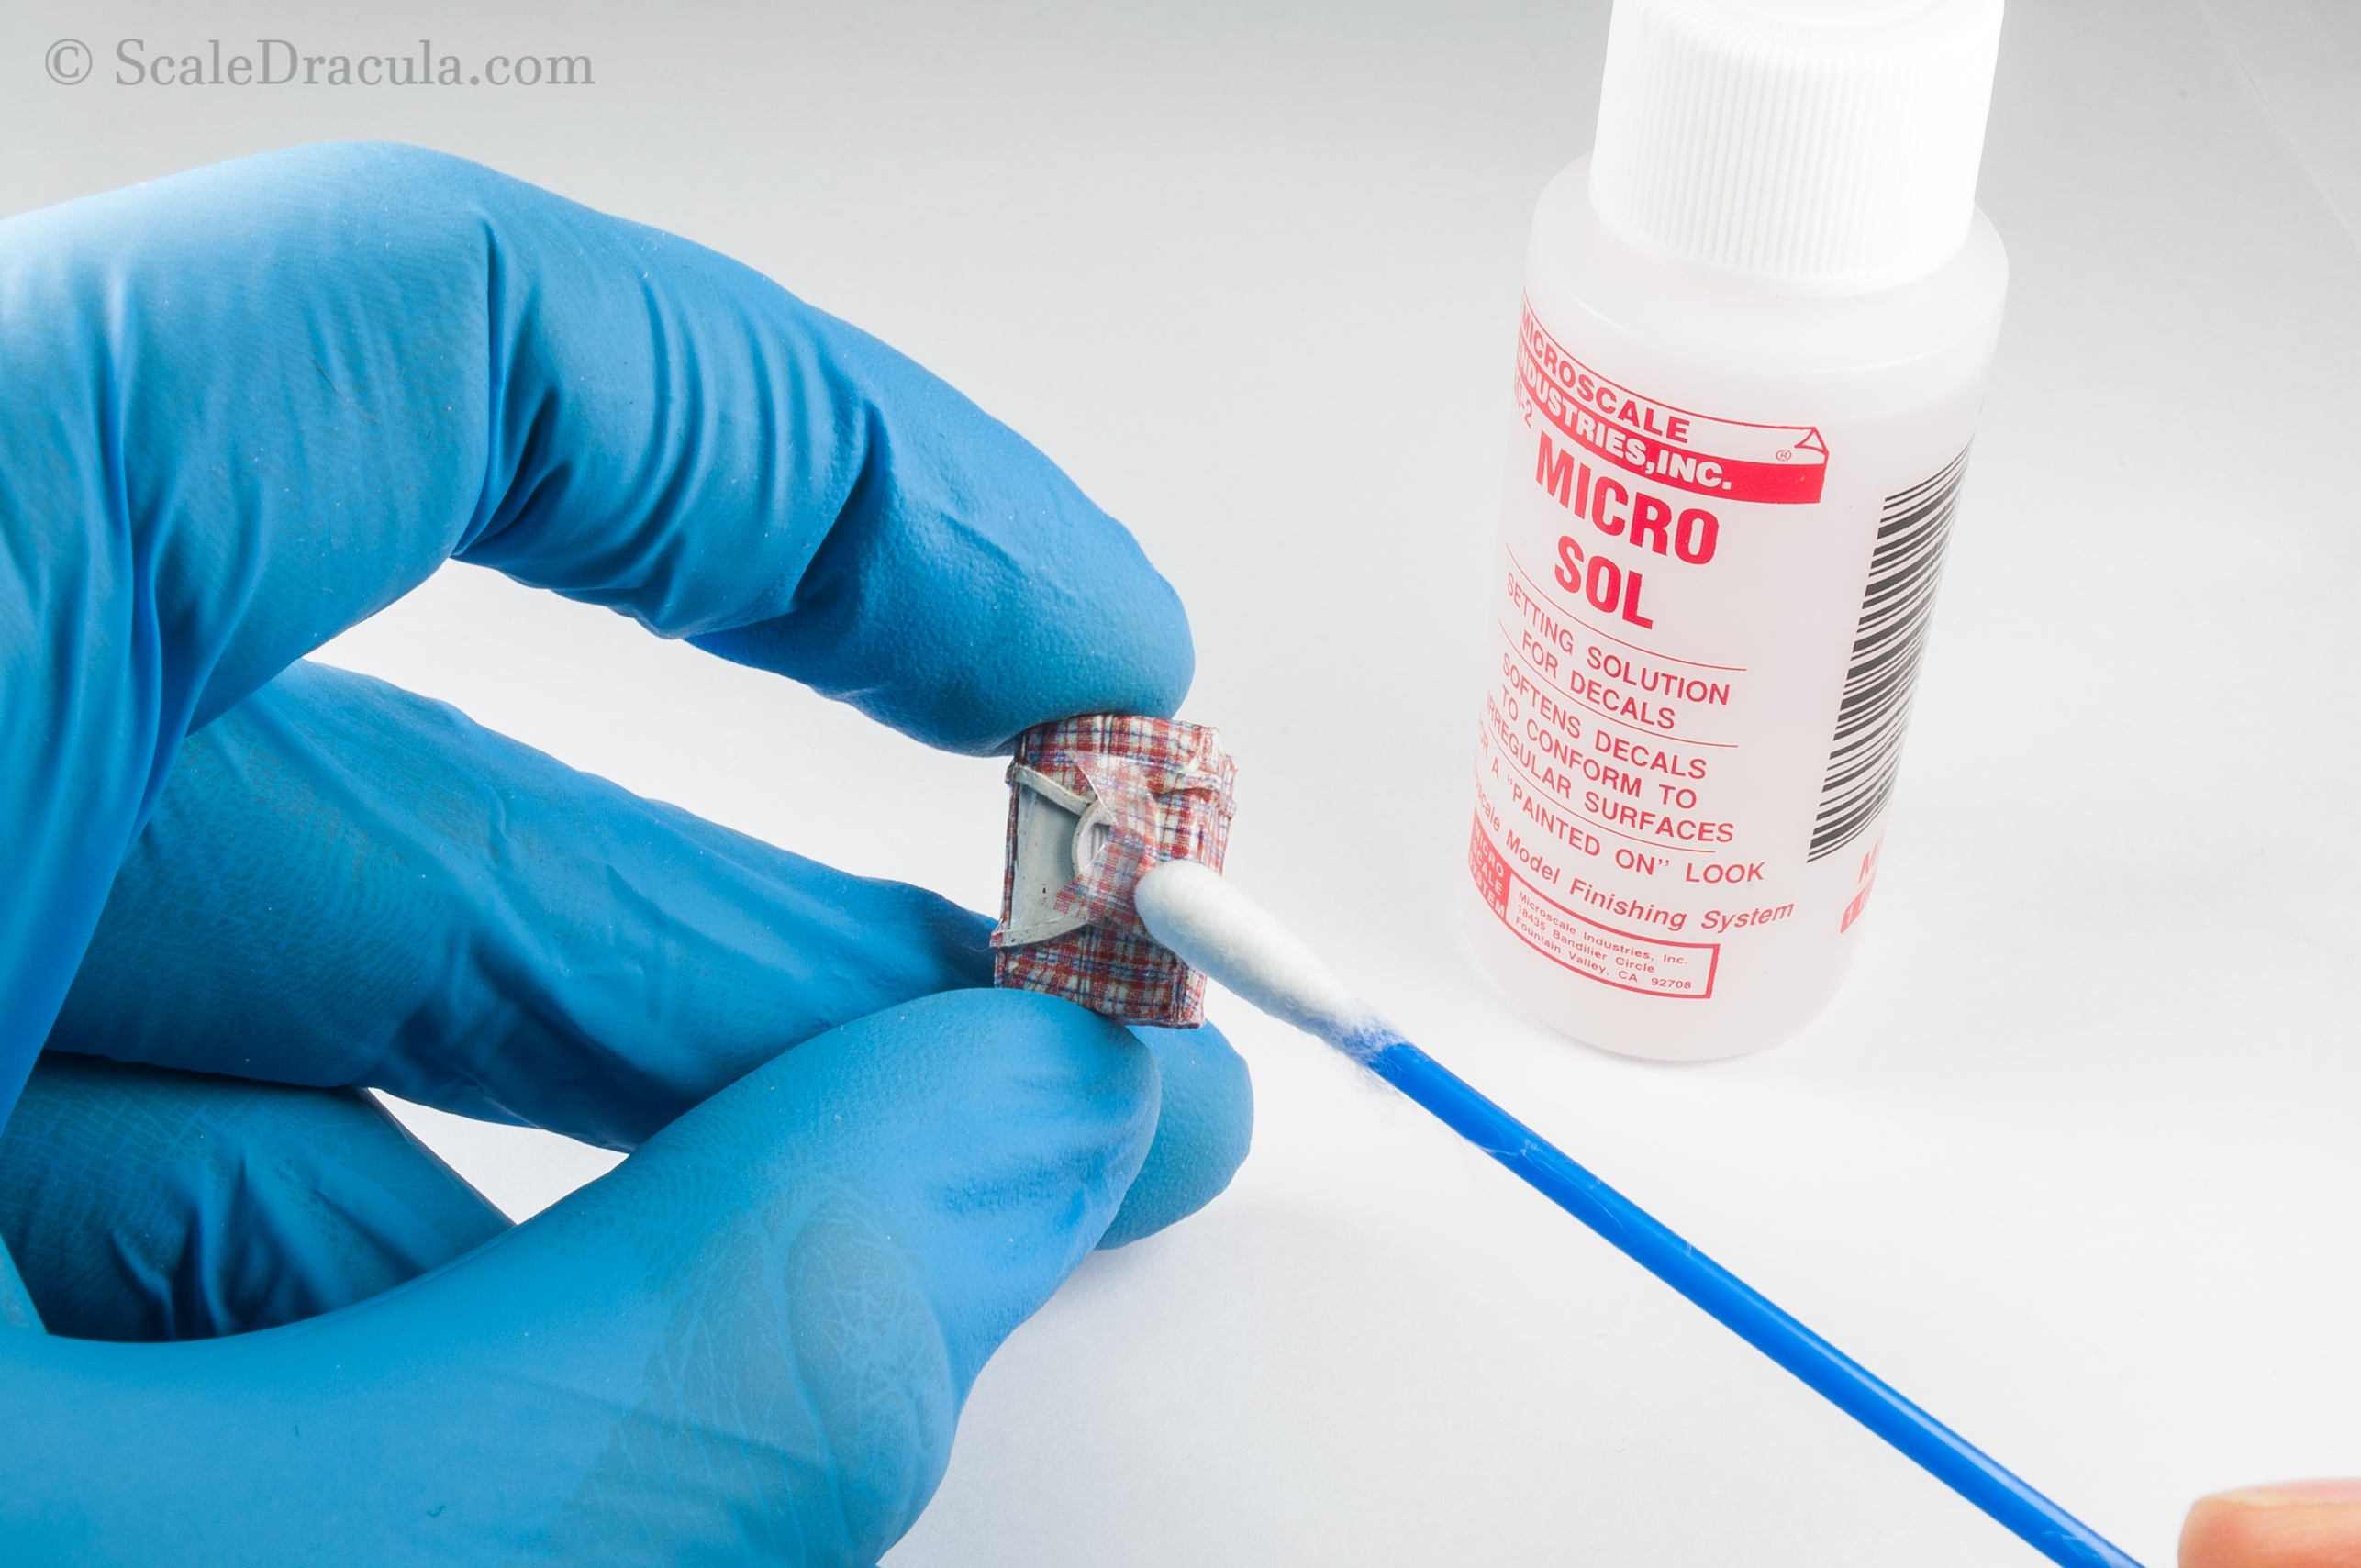
Also, here’s where Micro Sol came in handy. It’s main job is to soften the decal so it can adjust to any irregular shapes. And it works flawlessly. All you need to do is press the decal a little bit with a q-tip.
Working like this, I finally managed to pull that off.