Being an armour modeller for since I can remember, for a long time I didn’t even considered building anything out of this ‘serious warfare’ category. Cars, trains, motorcycles? I didn’t understand why people would like to get involved in such trivial and casual subjects. Why would you want to recreate a vehicle that you pass everyday on your parking lot? The machines of war always seemed much more exciting, because they were much more distant, both in time and space.
But well, recently I decided to pick an easy and quick project to test some new techniques. I was thinking about a small tank, Pzkfw. I or something, but I wasn’t really looking forward to assembling tracks, painting everything in German gray for a thousand time and so on… Why not try something fresh?
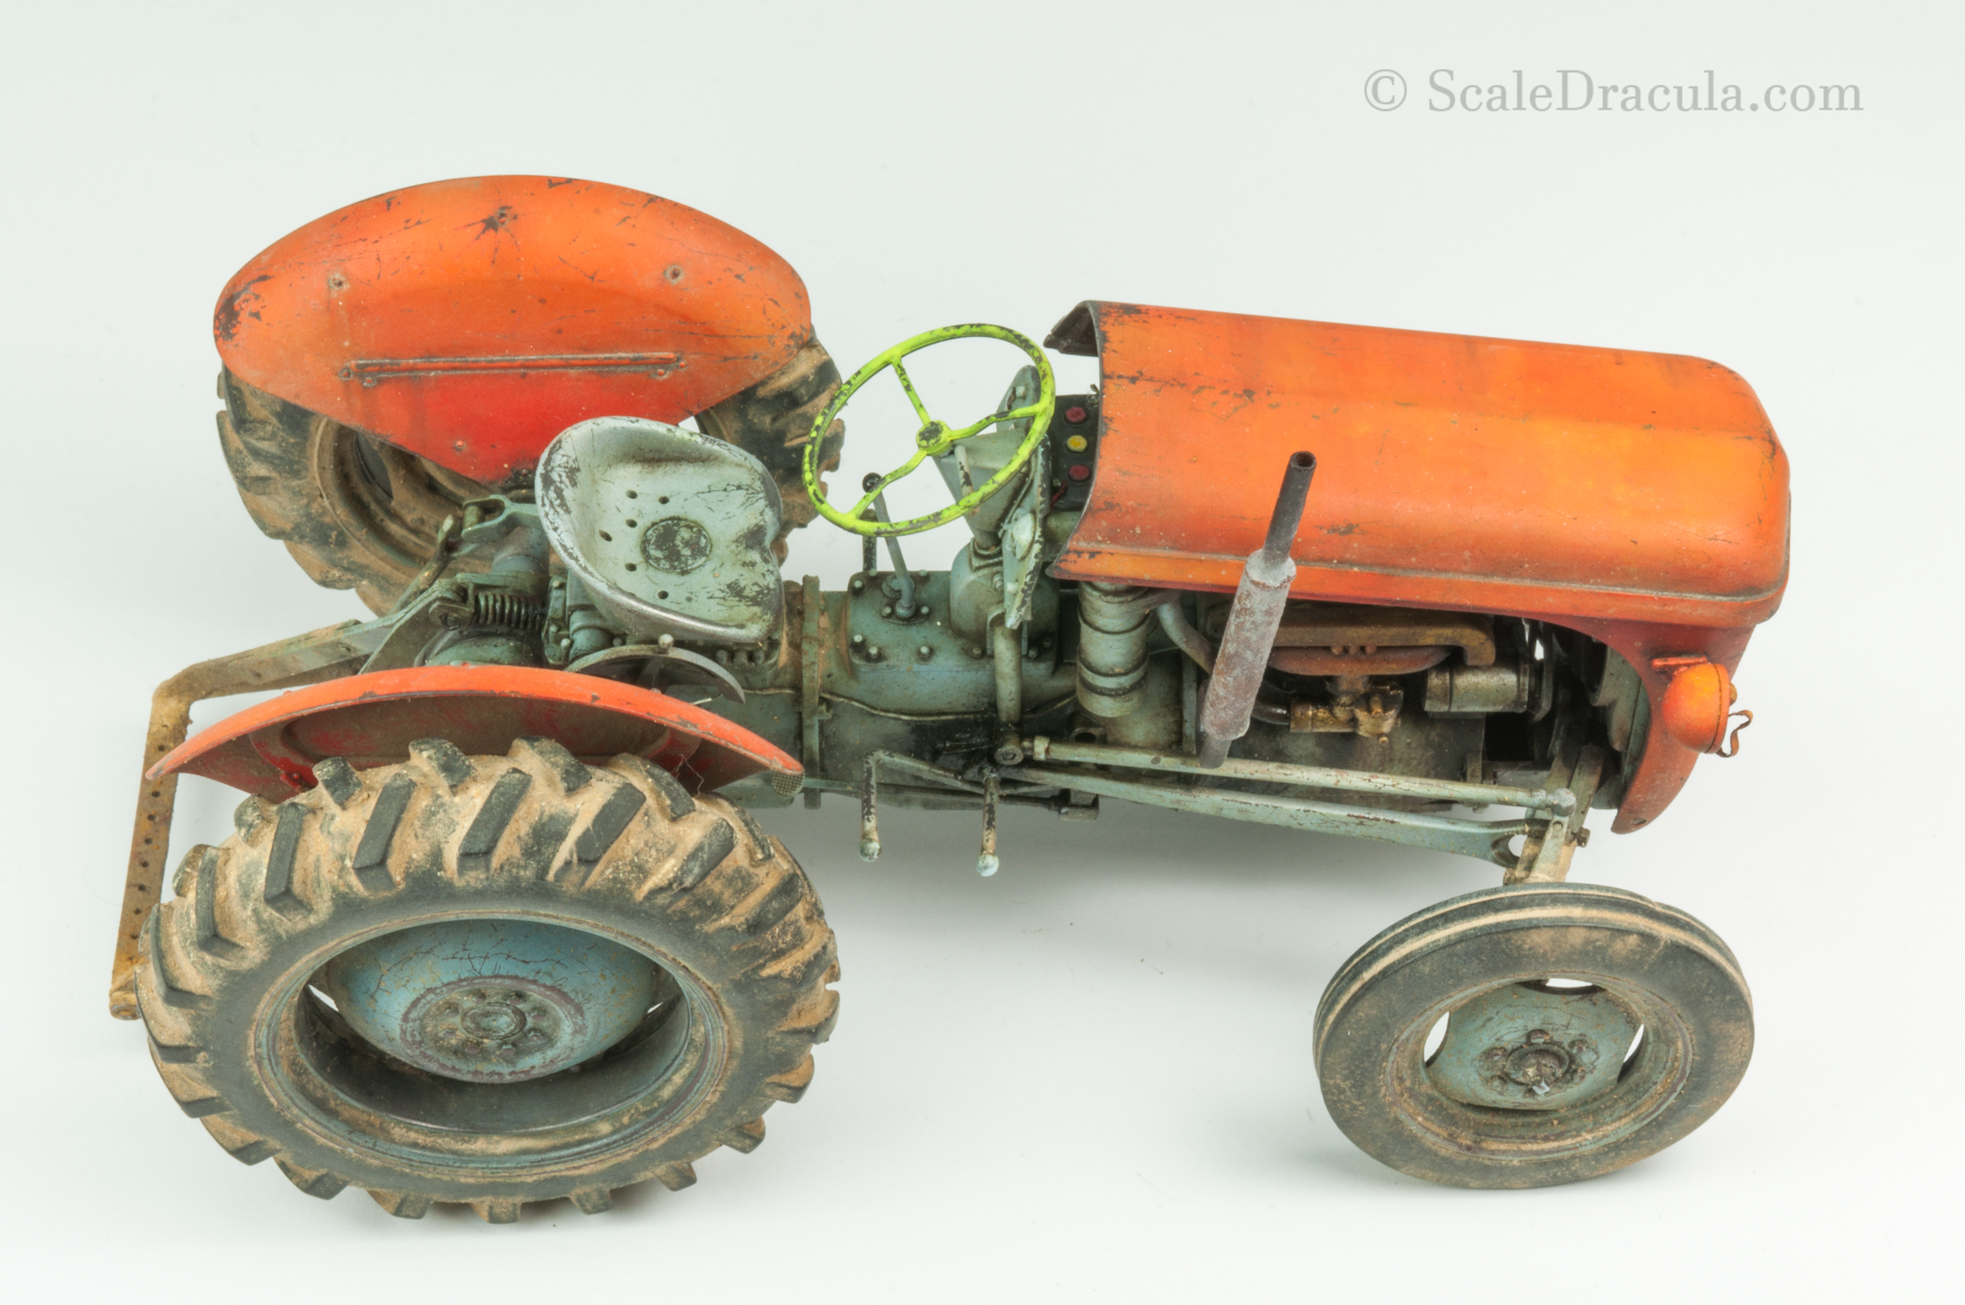
Then I accidentally run into this beauty:
Can you imagine anything less combat-ready than an agricultural tractor? But I was really up to try a new subject. ‘I can paint it whatever colour I like and I can weather the shit out of it too’- I figured.
The Construction
Heller’s model is a pretty simple and straight forward kit. No PE parts, no expensive add-ons- just you and some plastic sprues. Oh, and rubber tyres, which I really hate because it’s pretty hard to work with this material. But still, the details and overall design of the kit is pretty good. You’ll encounter some fragile parts along the way, so make sure to be careful (I wasn’t…).
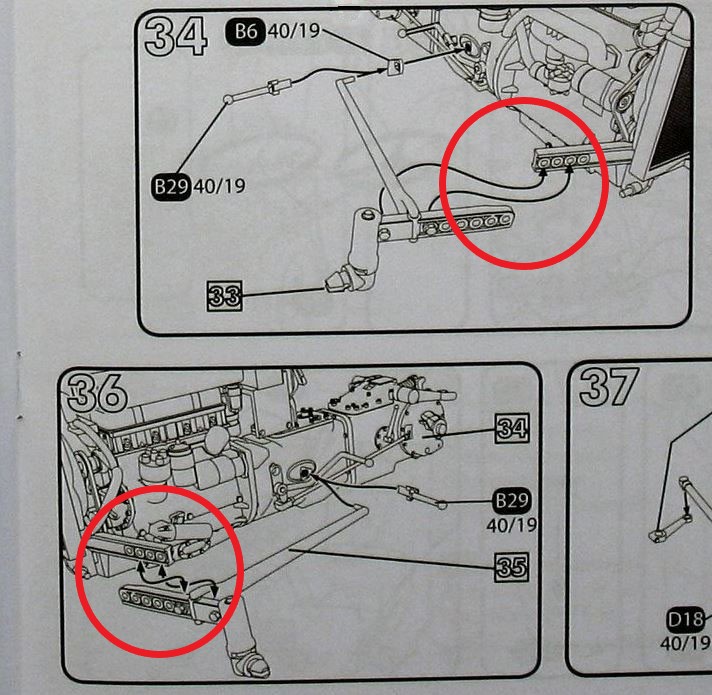
I should mention one problem in the manual though. Look at the step 34. There is no way that these parts can fit. NO WAY. I’m not sure what they were thinking, but to me it’s an obvious mistake. To make it work you need to cut off the tips of part 33 and part 34. Or somehow make some more space behind the radiator. I went for the first option. It looks pretty ugly at first but after the final assembly it will be unnoticeable.
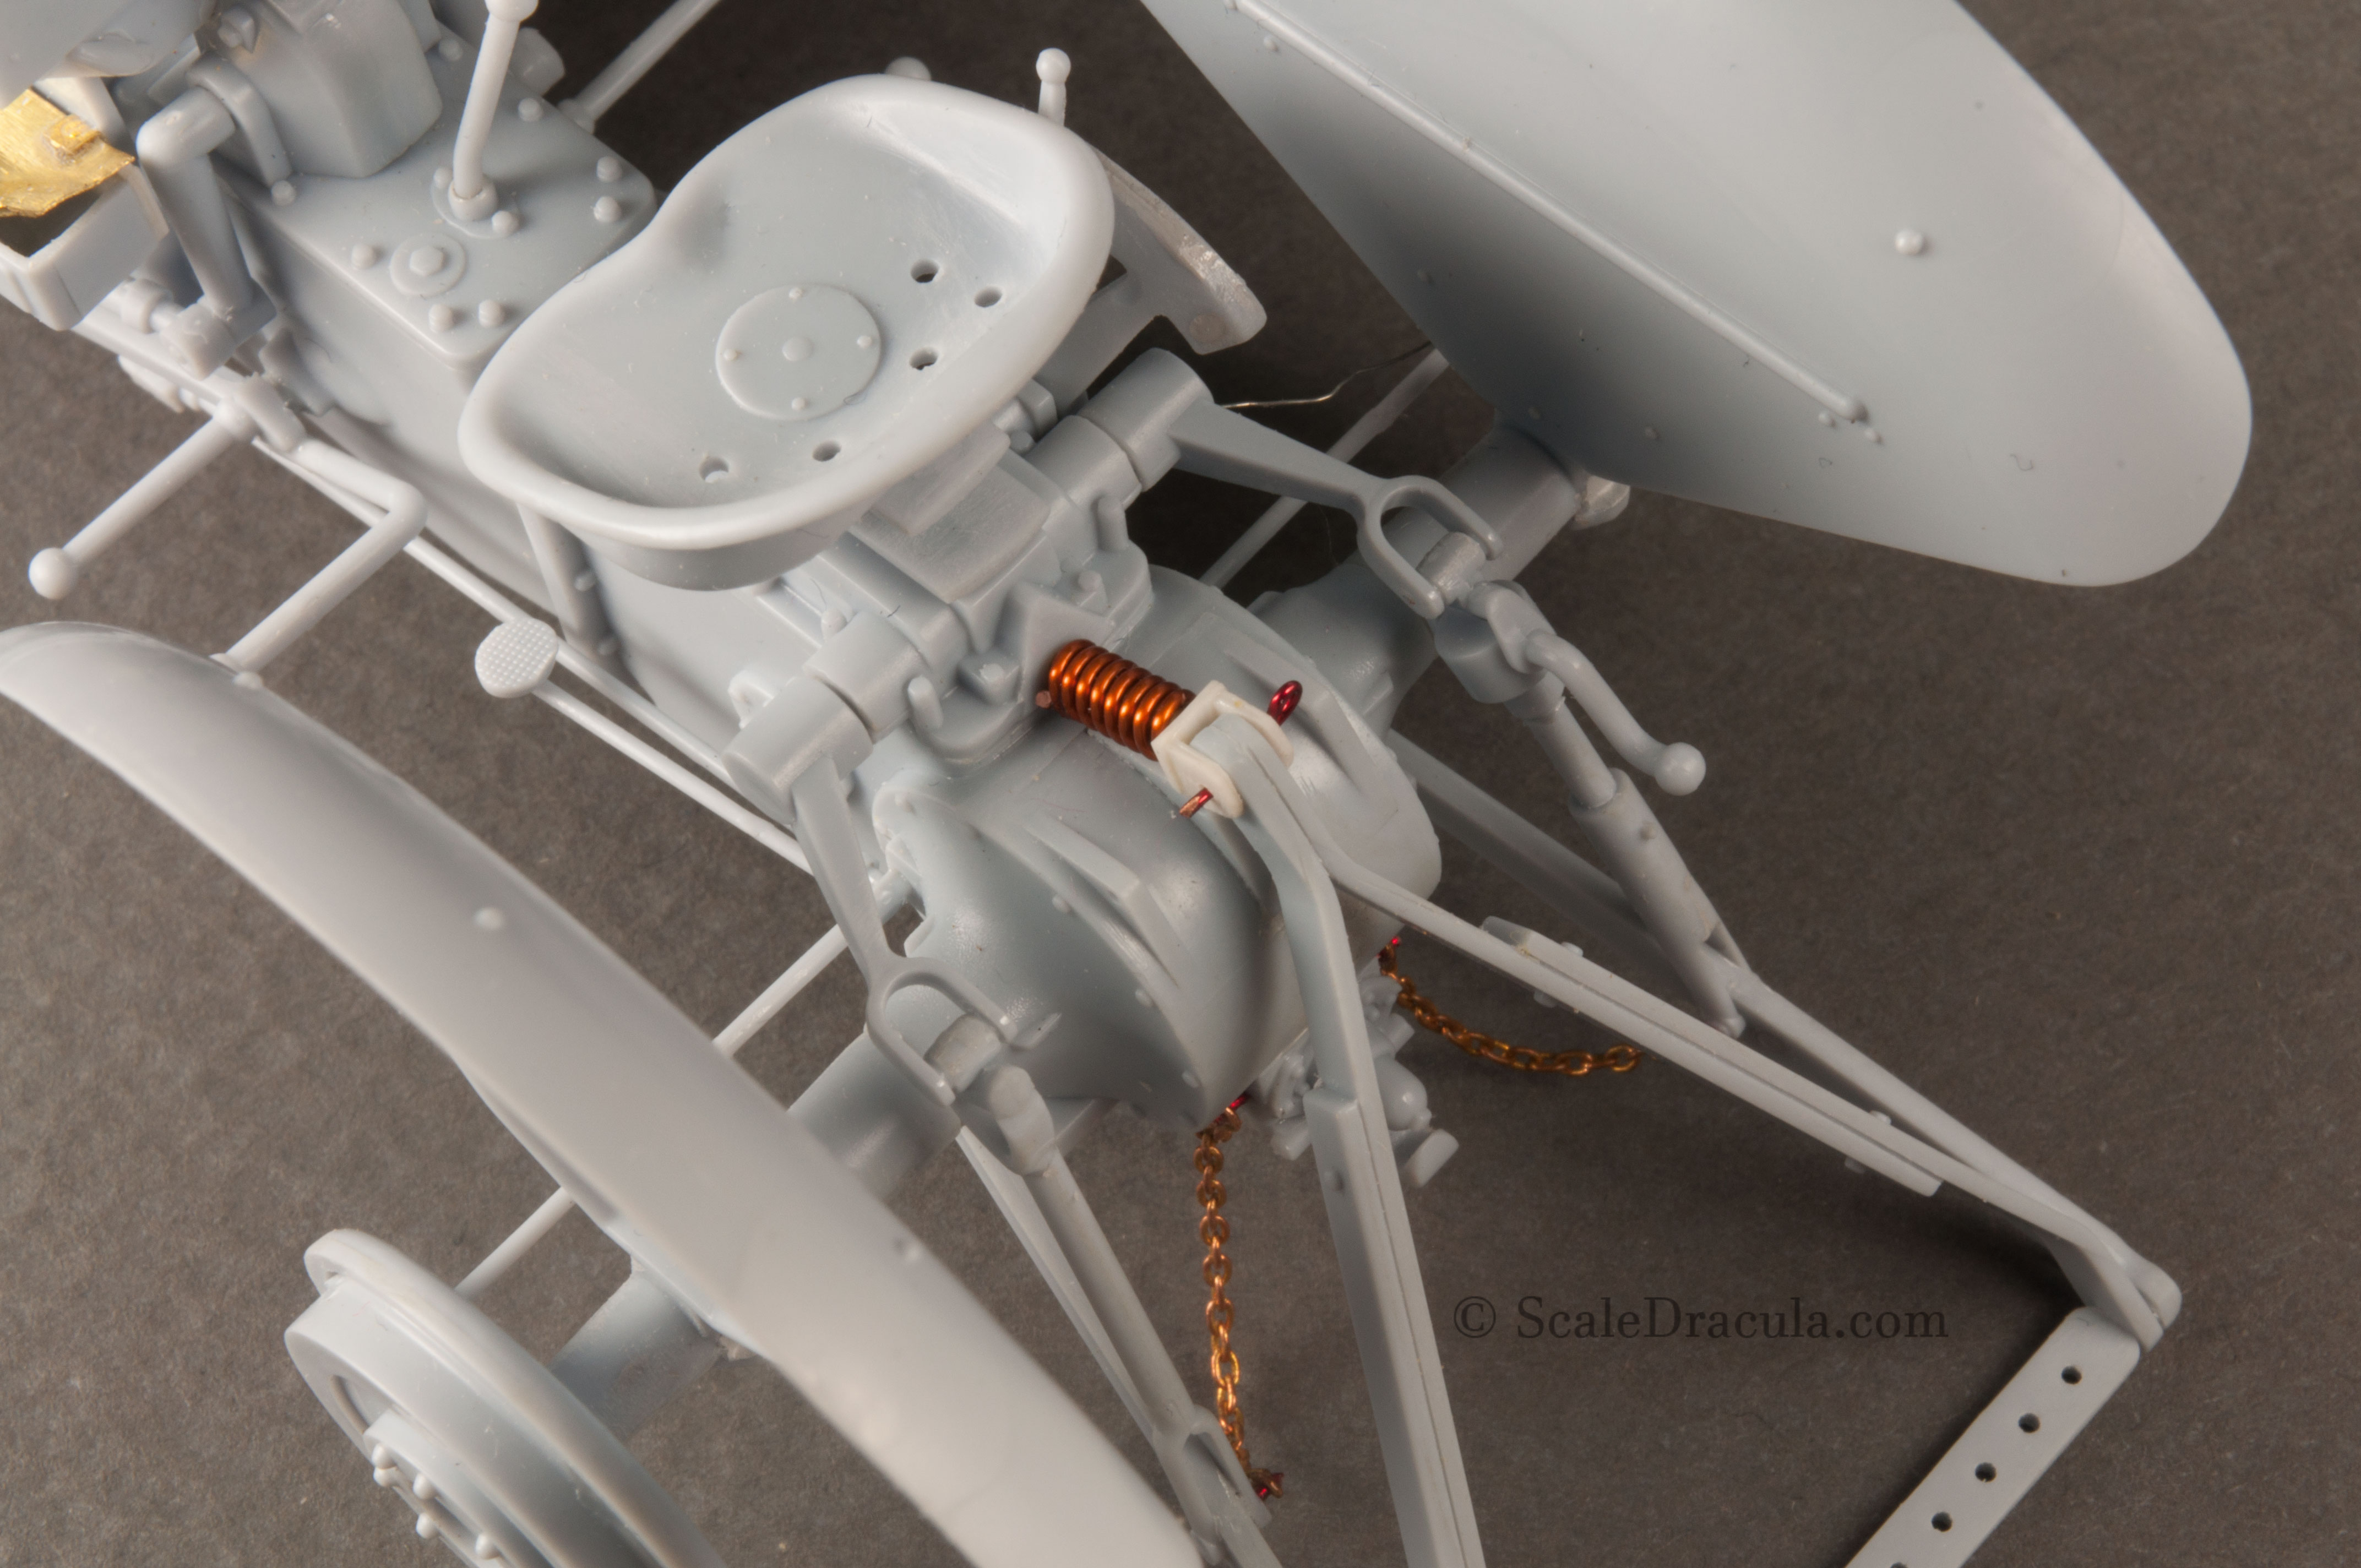
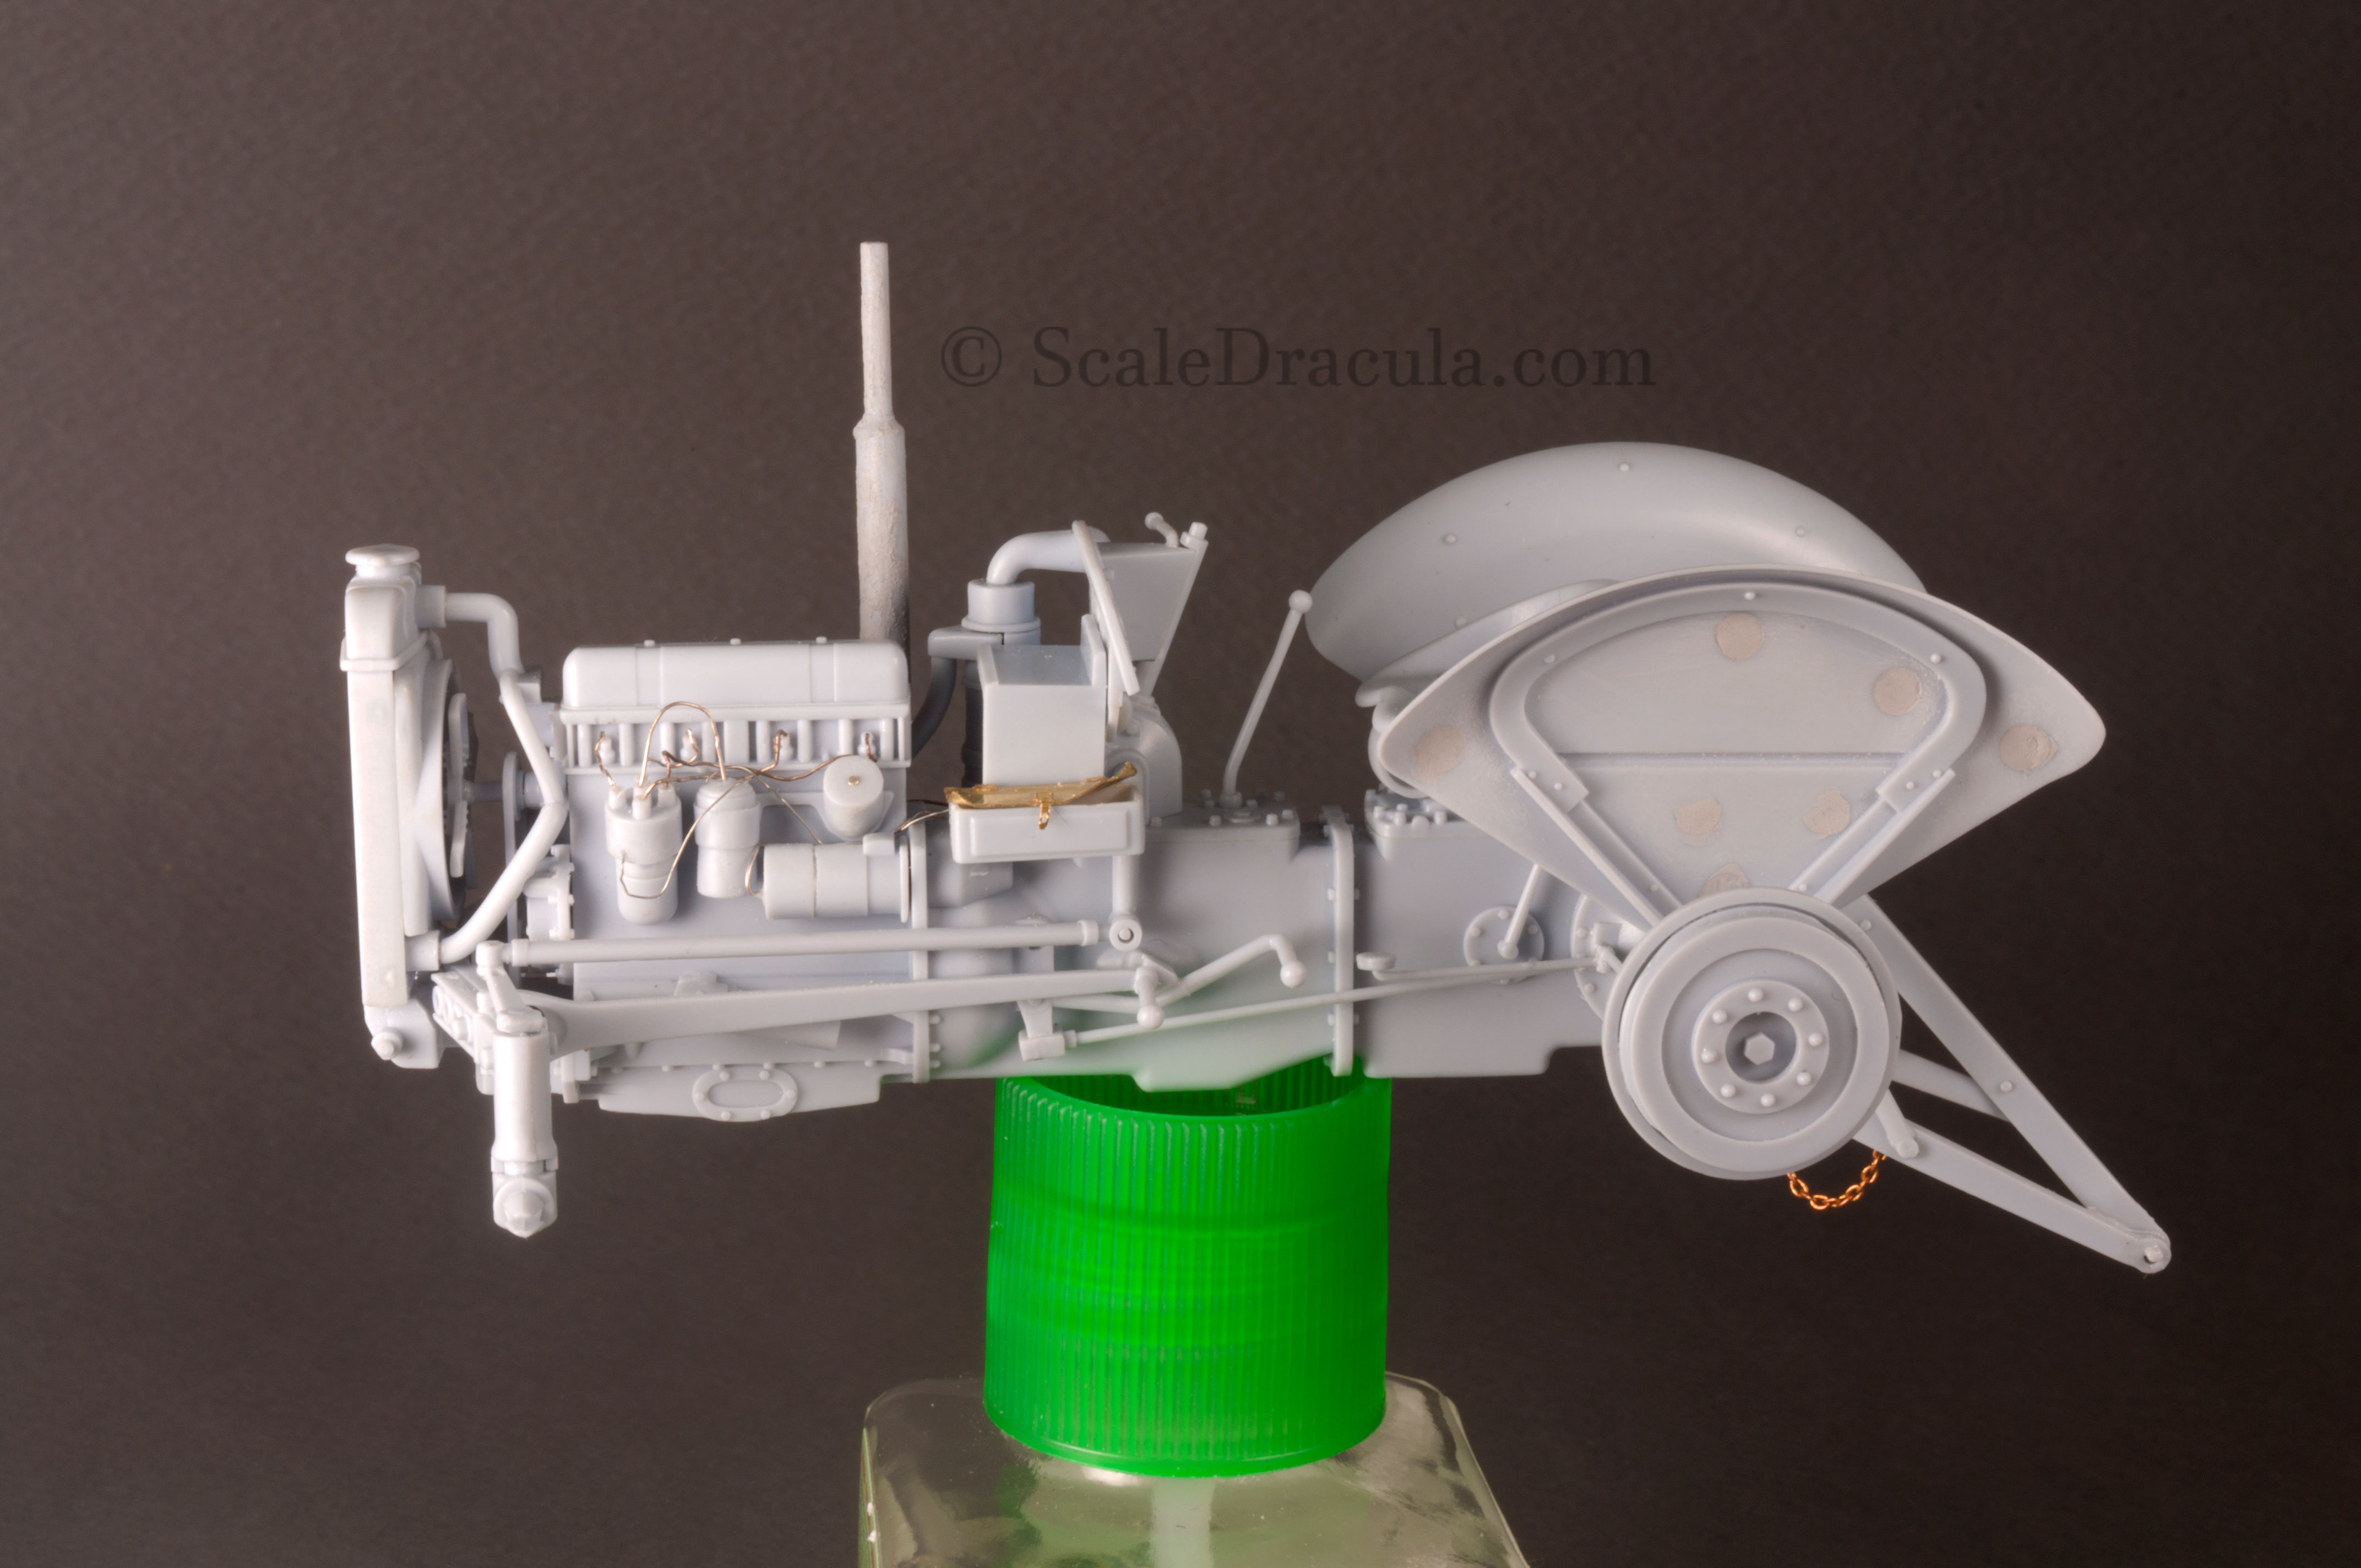
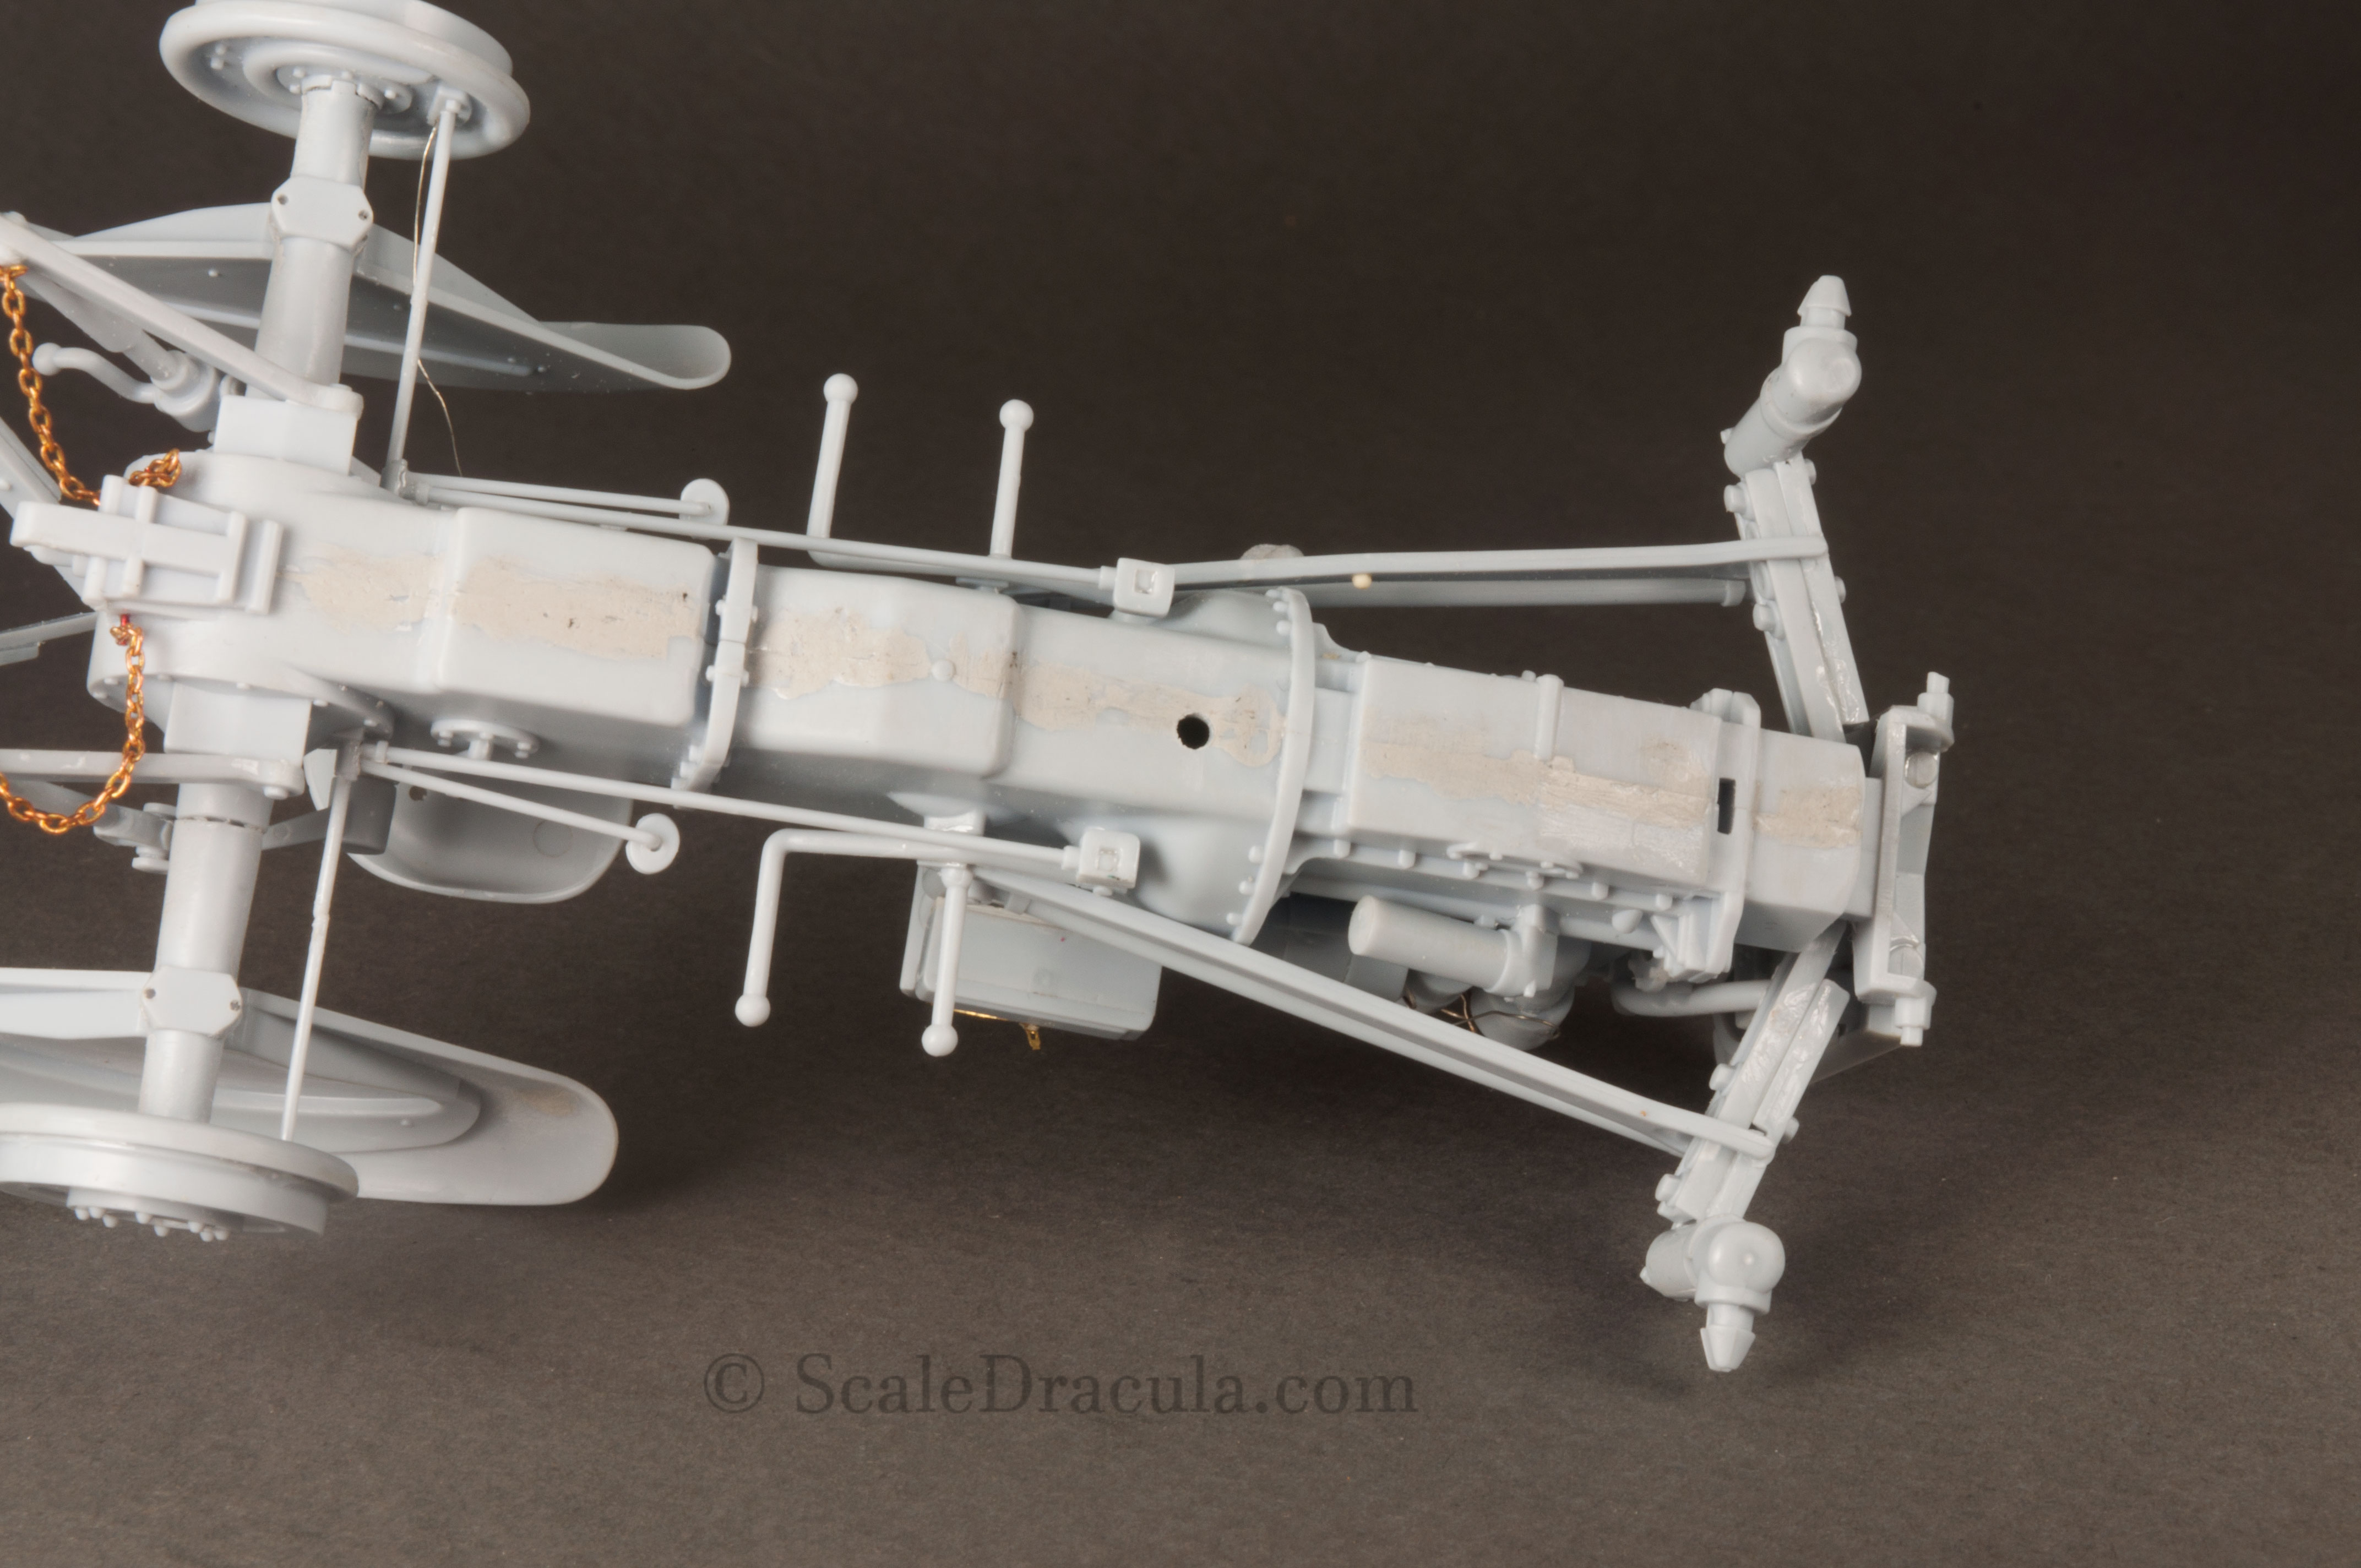
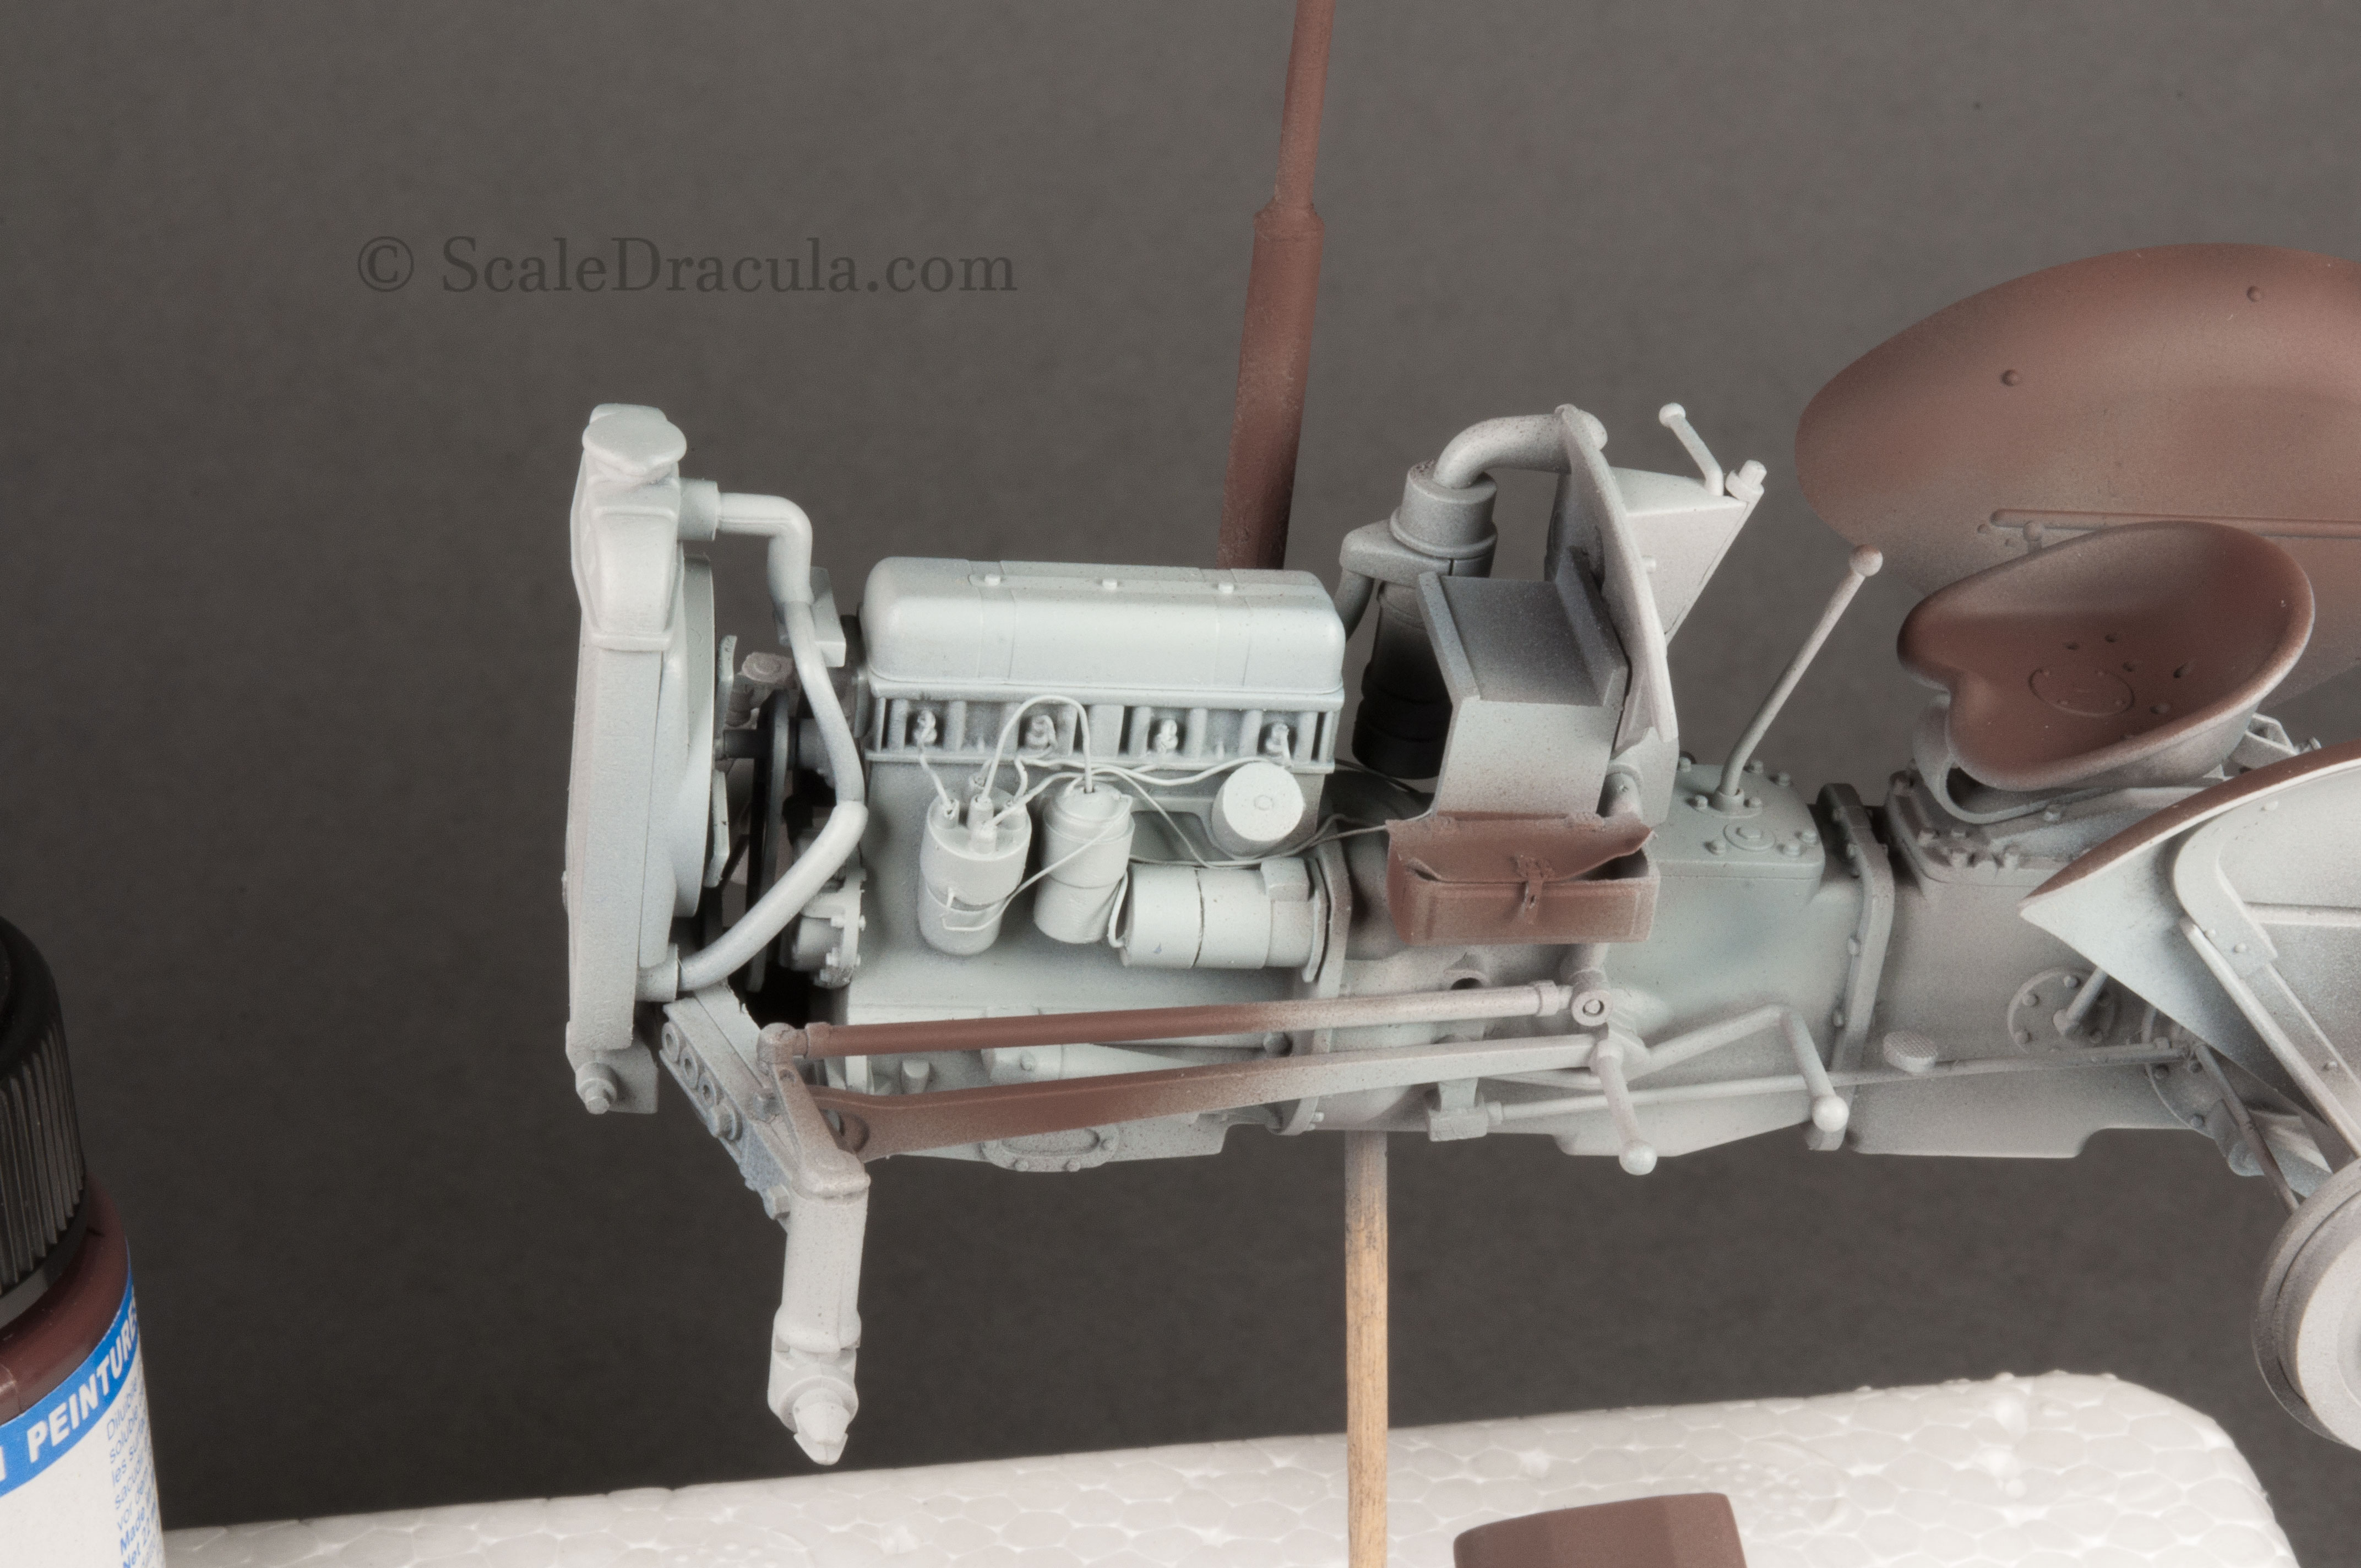
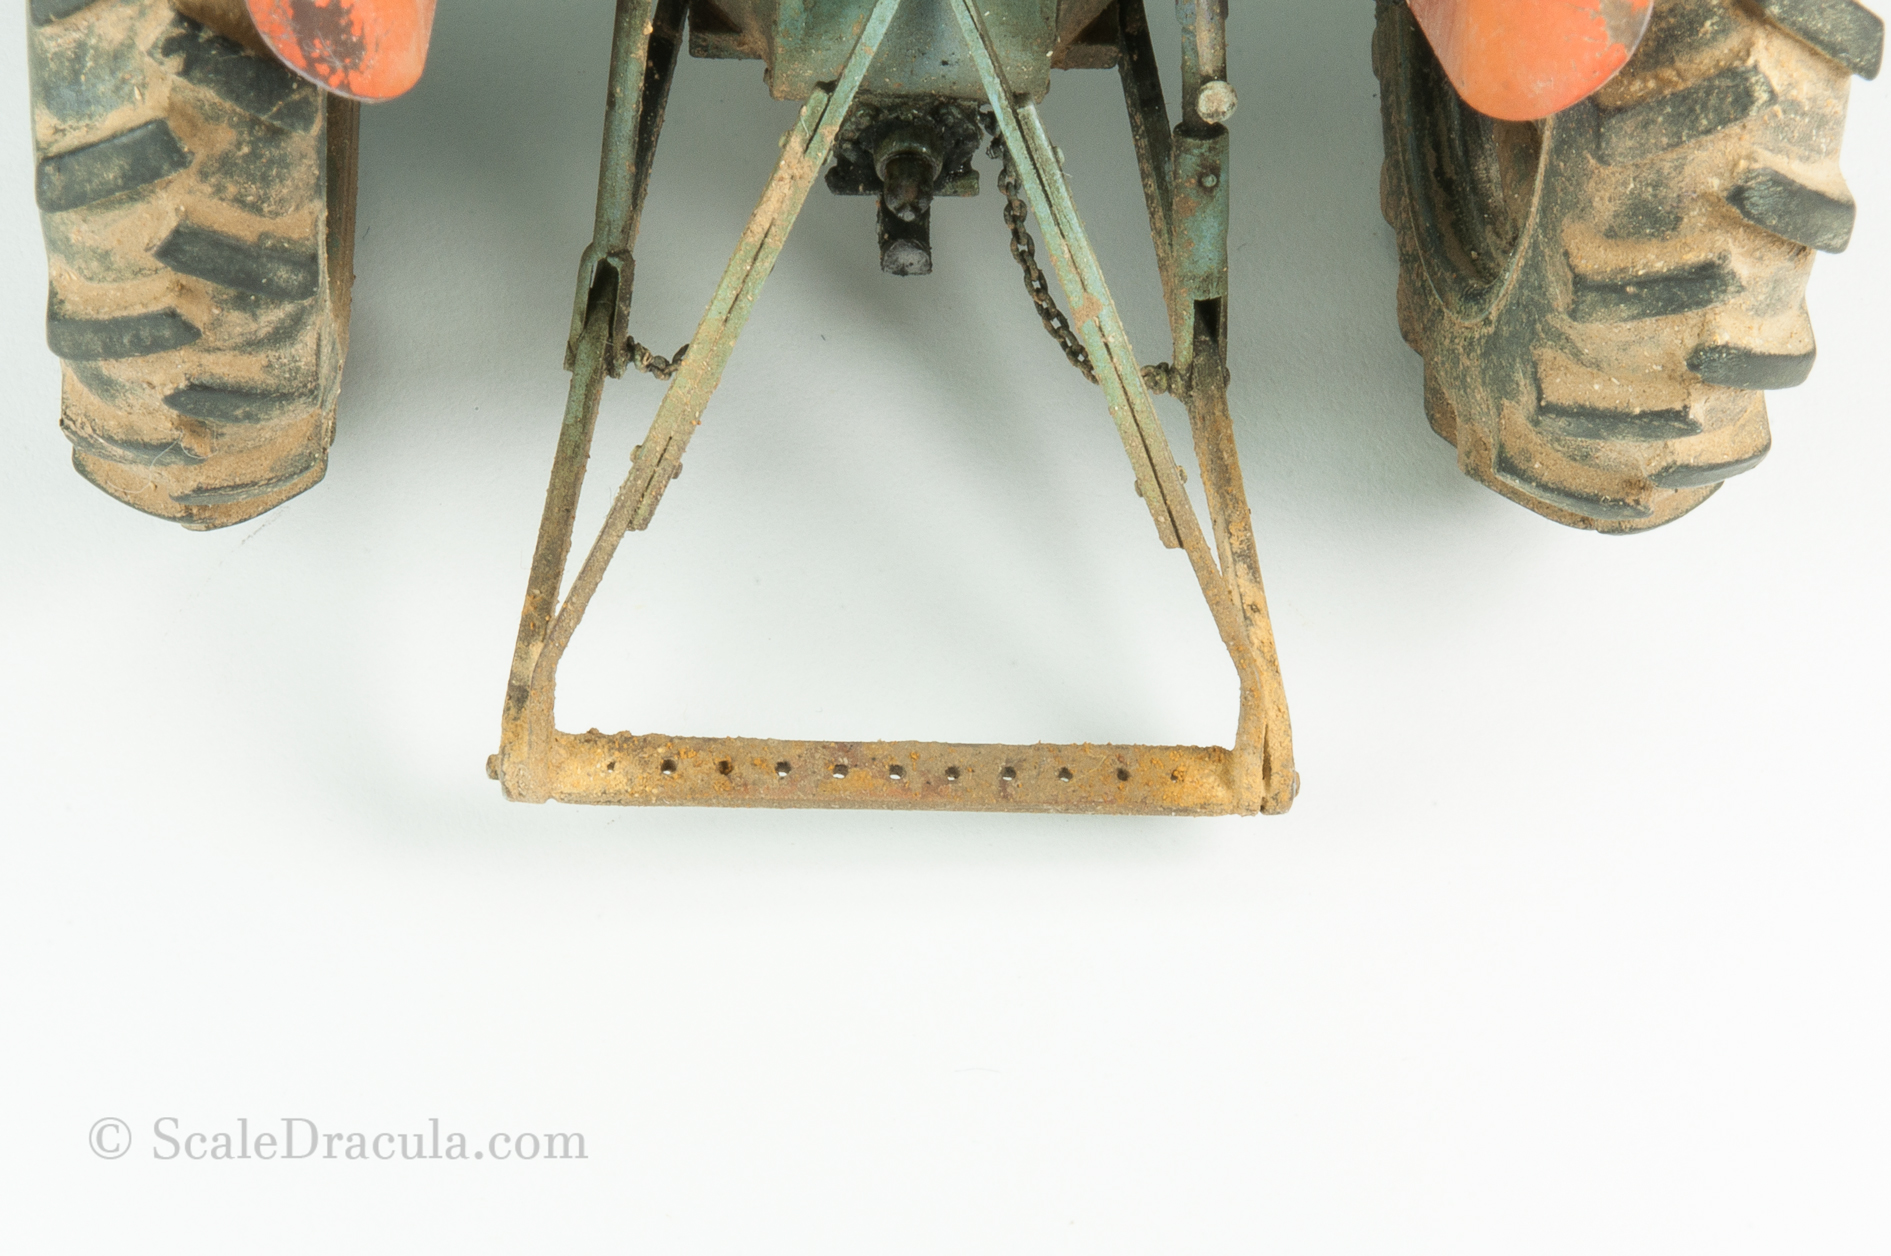
Other than that the construction is fast and easy. I wanted it to be a a quick project so I didn’t mess around to much. I’ve added some aftermarket chains in the back of the vehicle and I reconstructed the toolbox lid with some scavenged PE parts. The original spring in the back looked particulary ugly, so I replaced the whole part with thin plastic cards and copper wire.
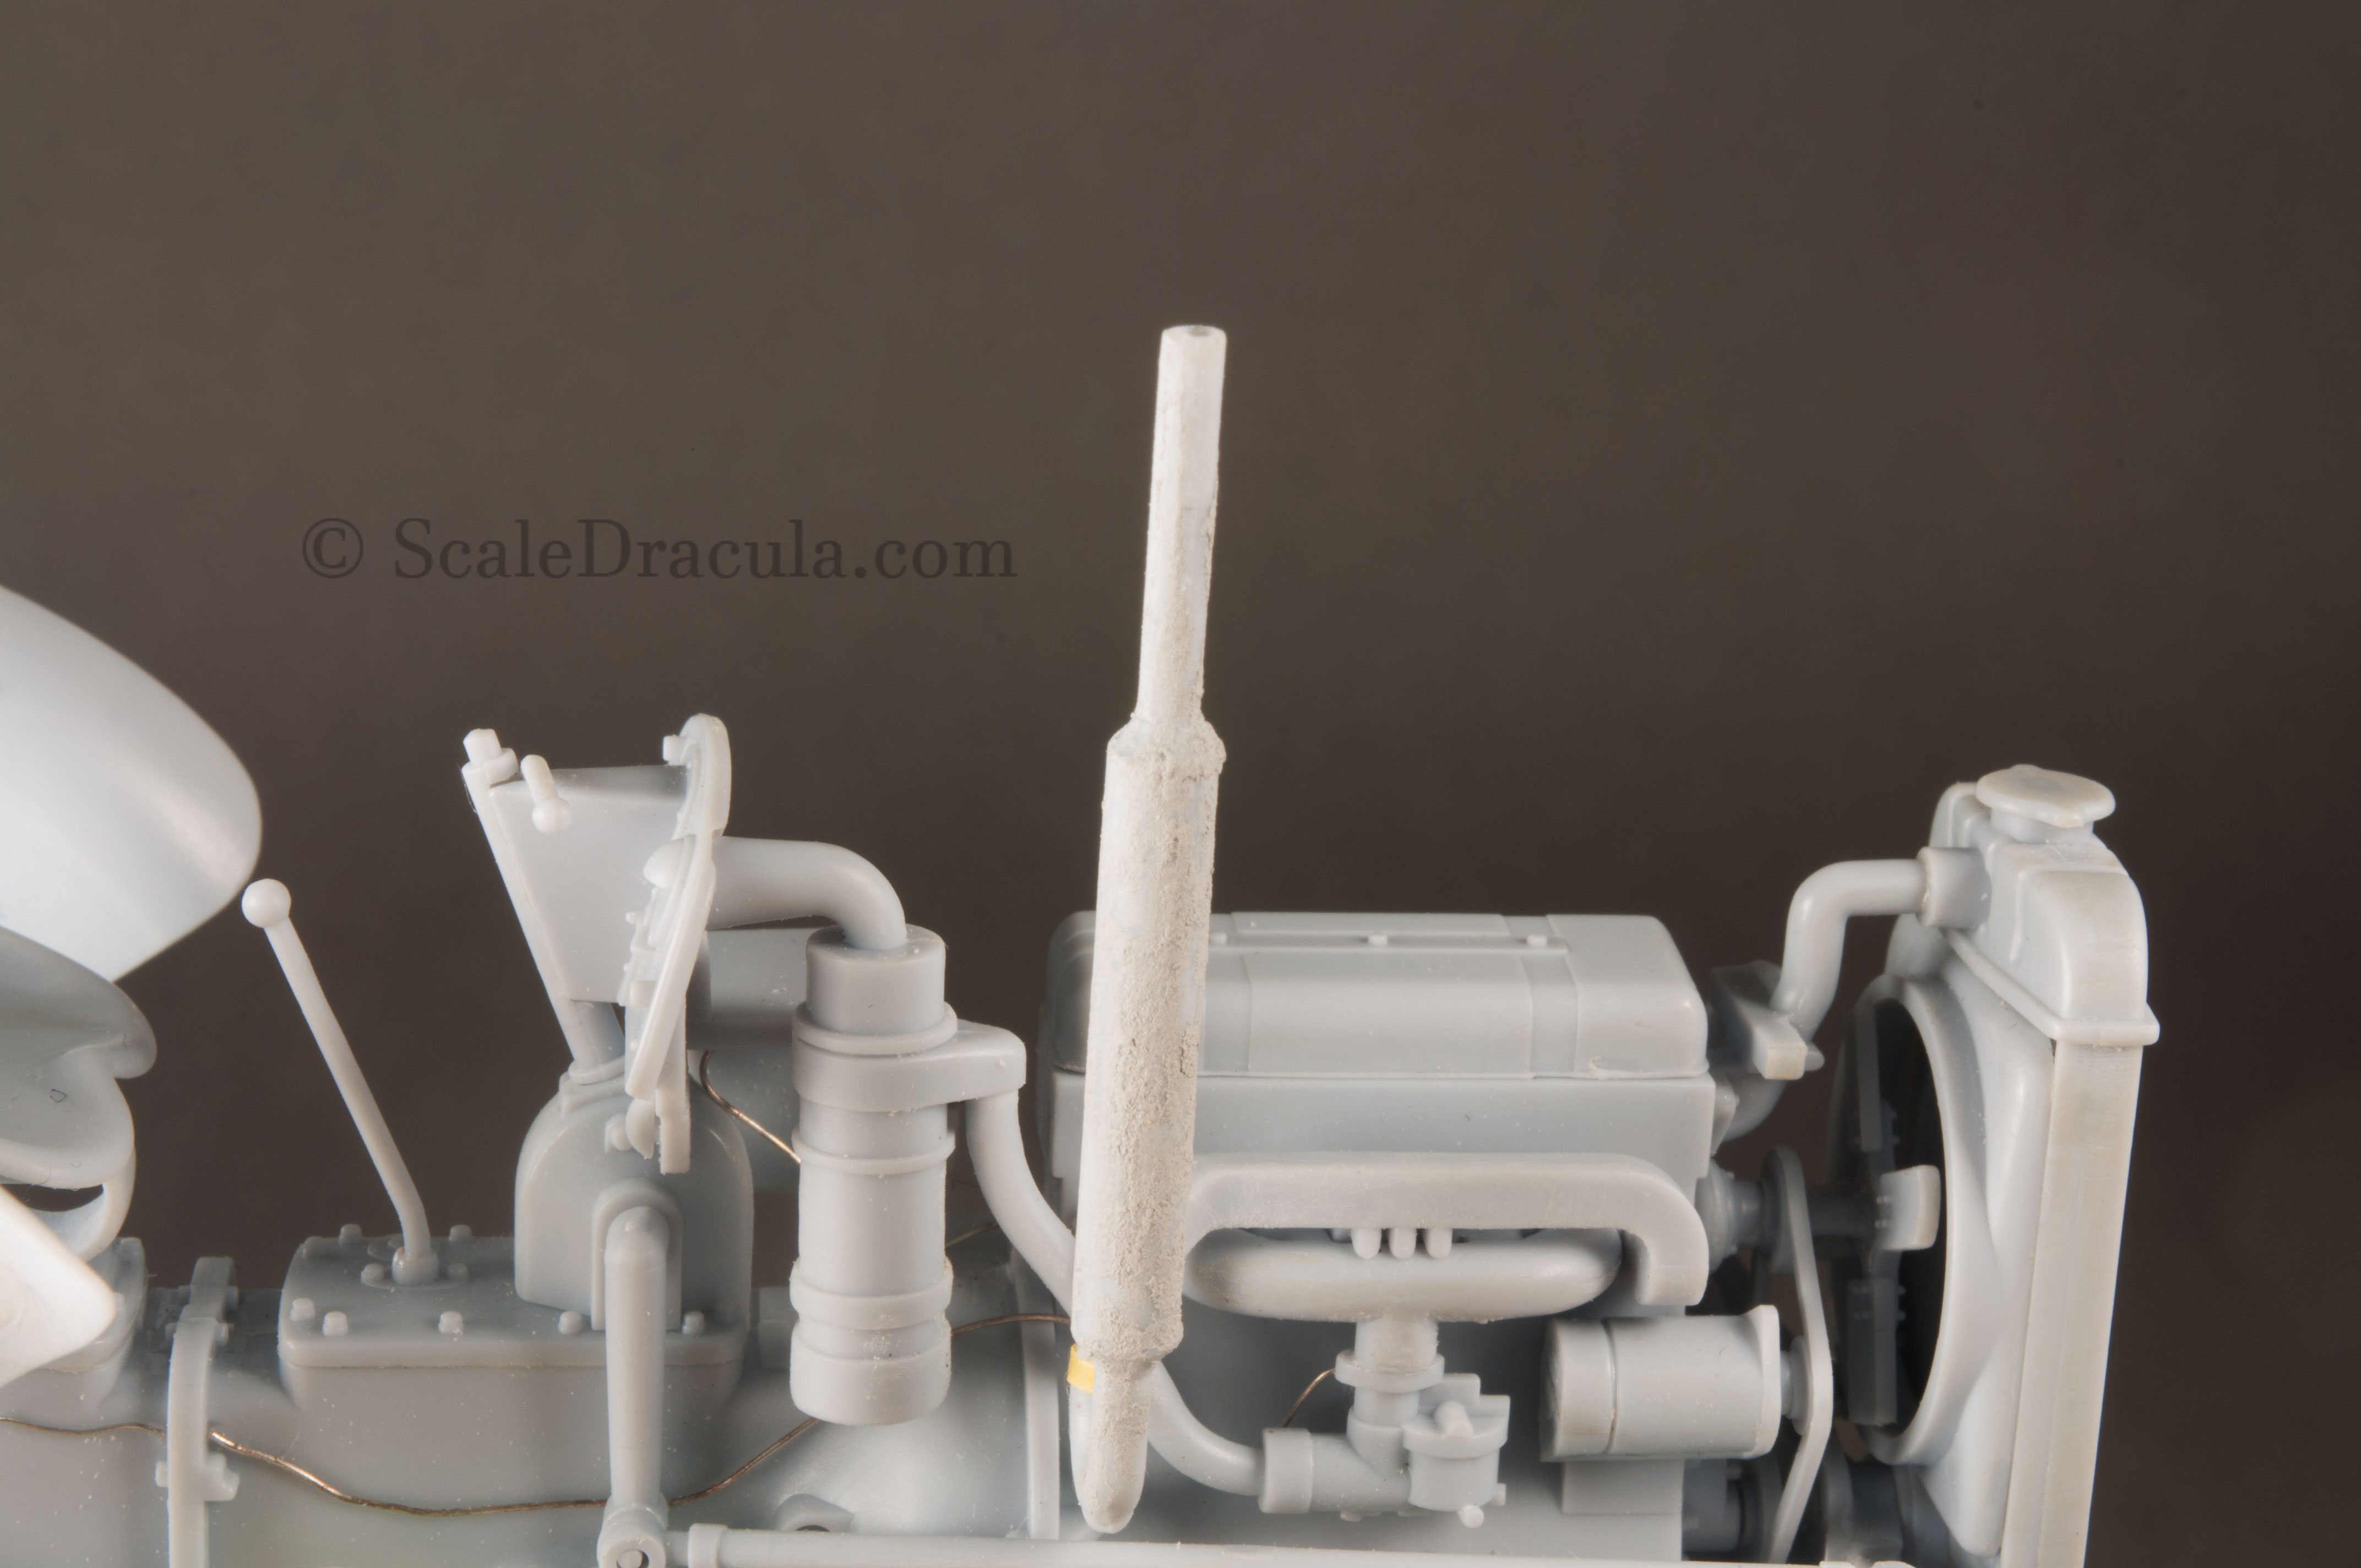
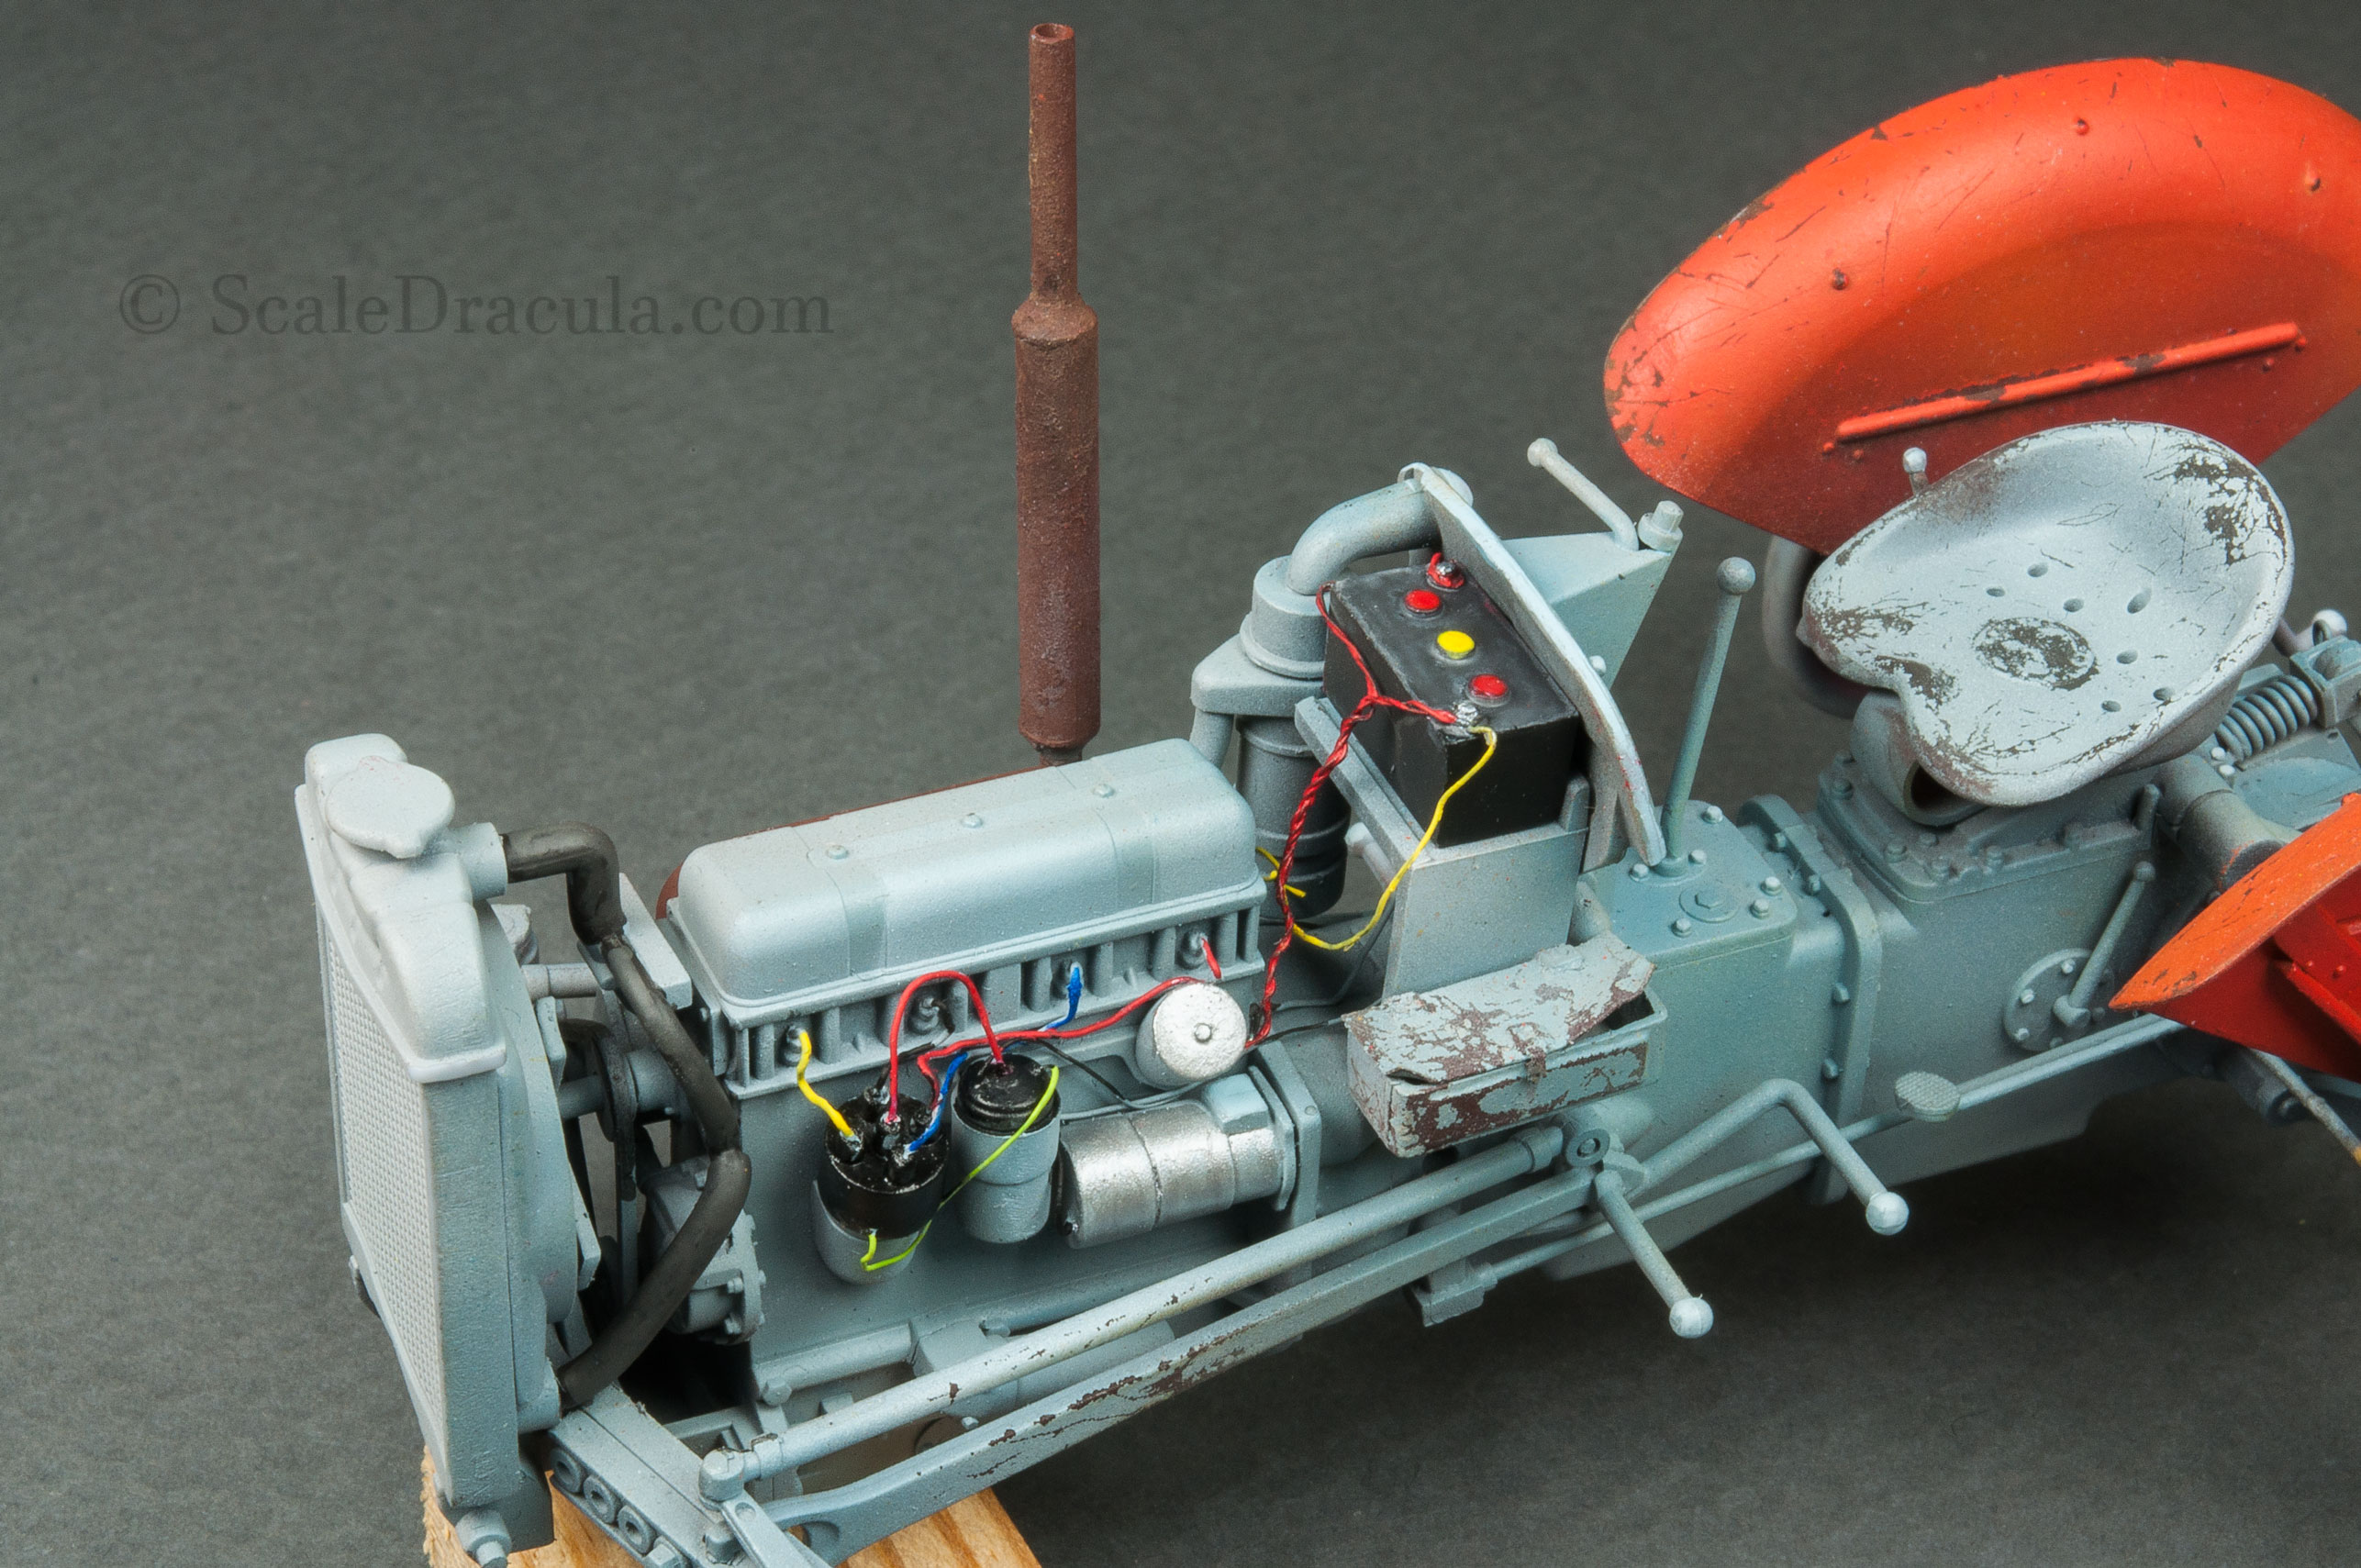
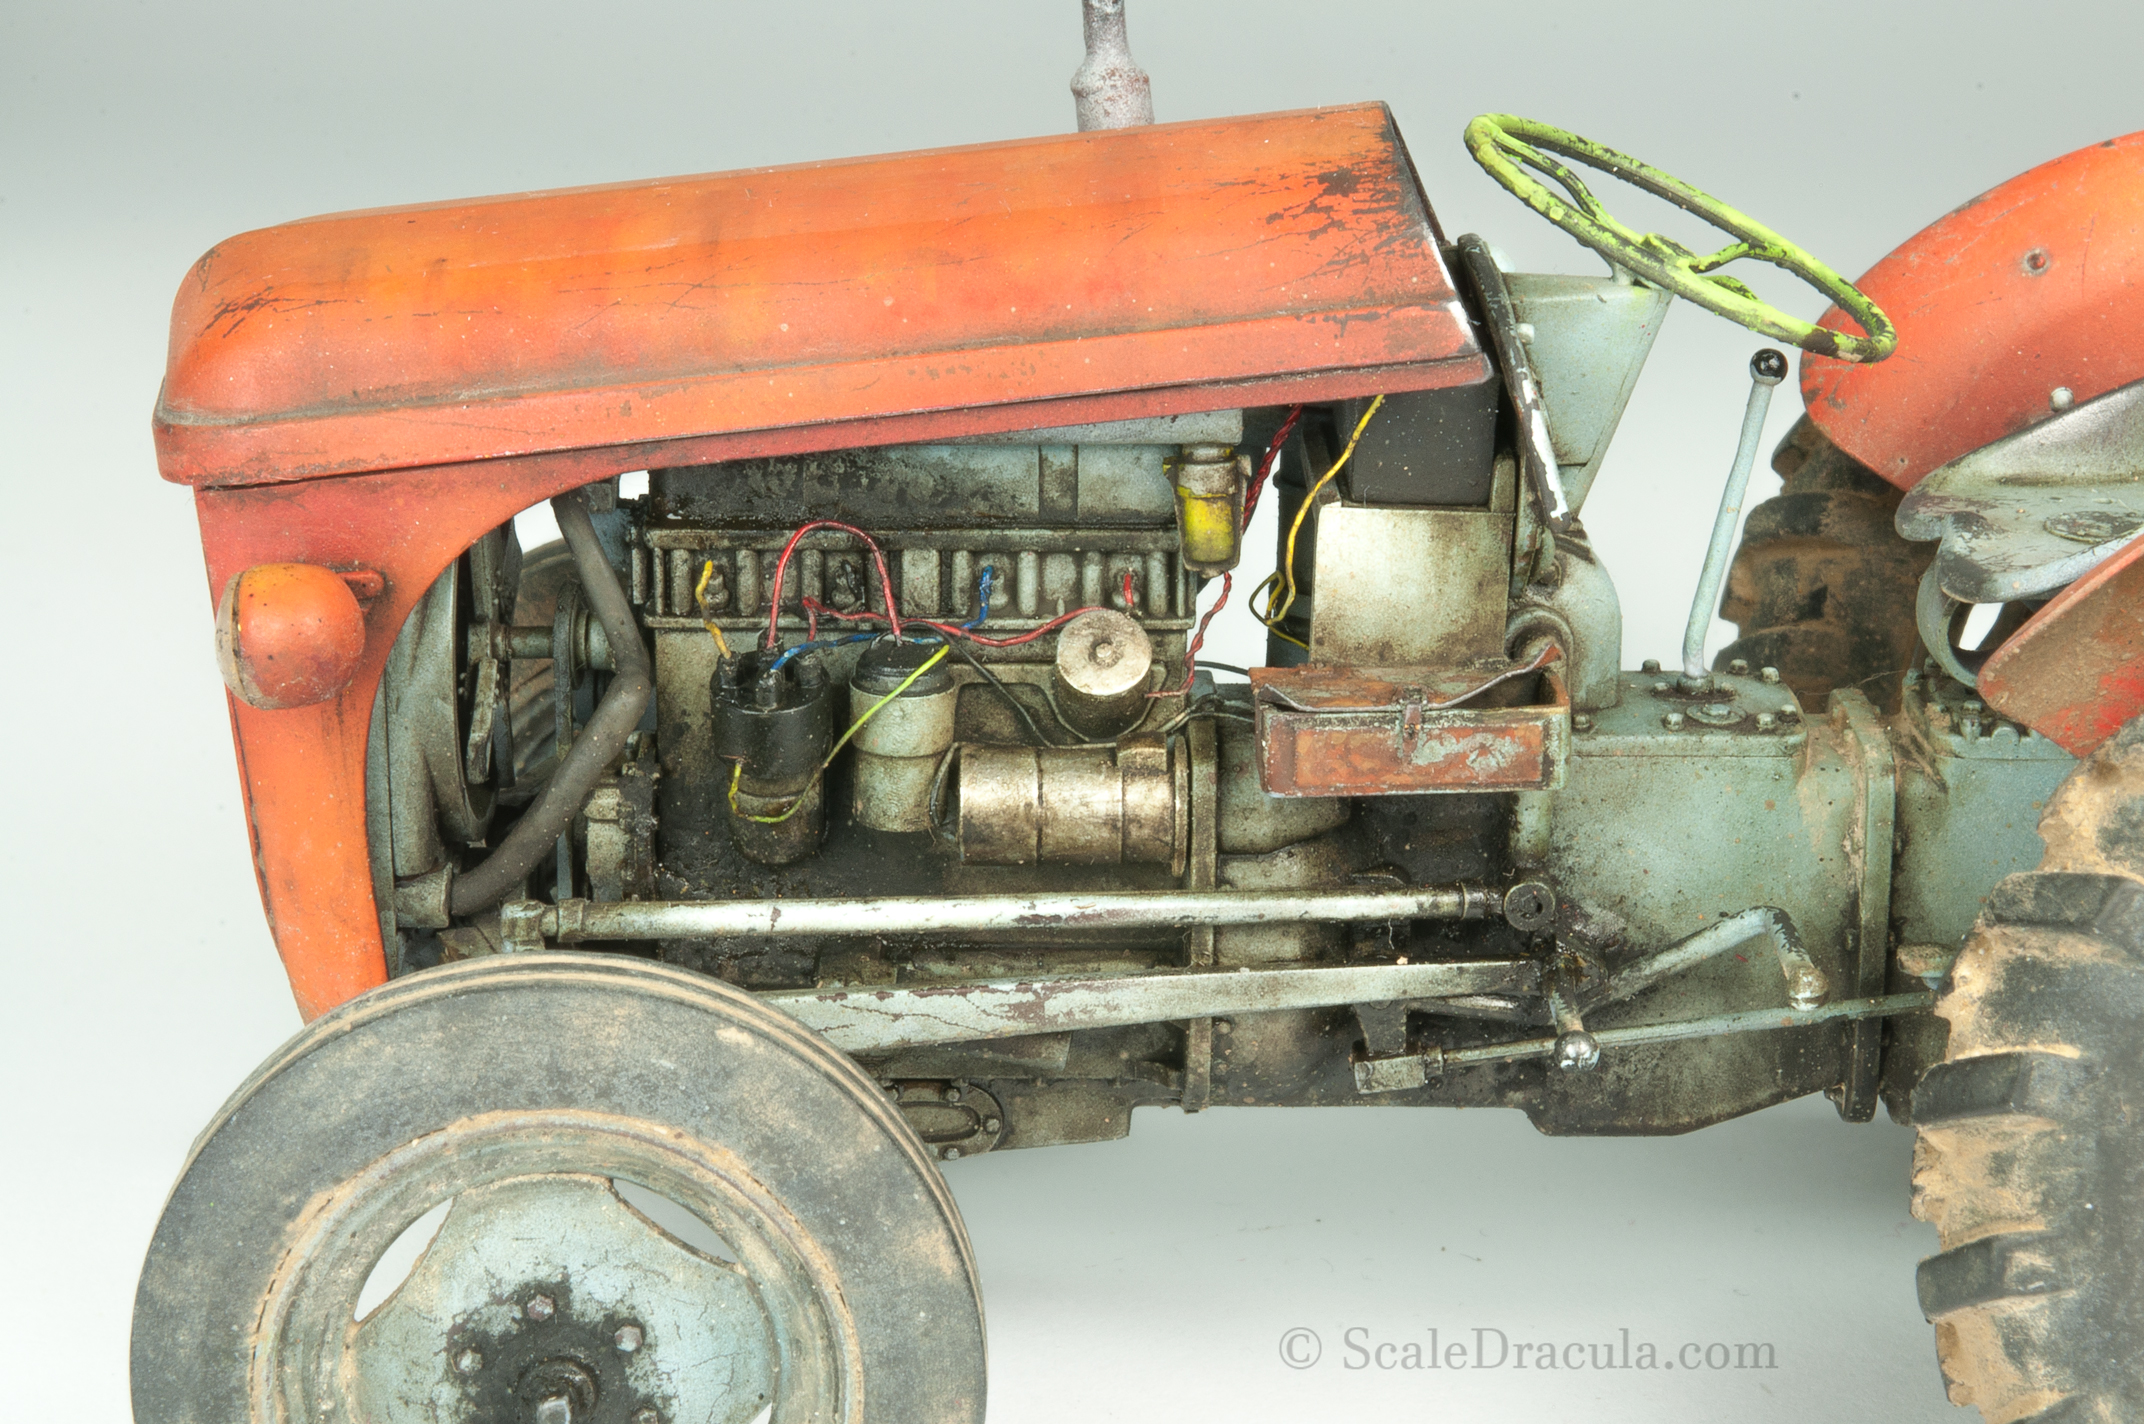
I also replaced one of the headlights with a part borrowed from another kit. As I wanted to present it as broken, I created some inside details from leftover PE parts. Oh, and I’ve added some wires running from the engine to the battery and the gear box. If you ever want to add some life to a out of the box model, wires are always a good idea, really easy as well.
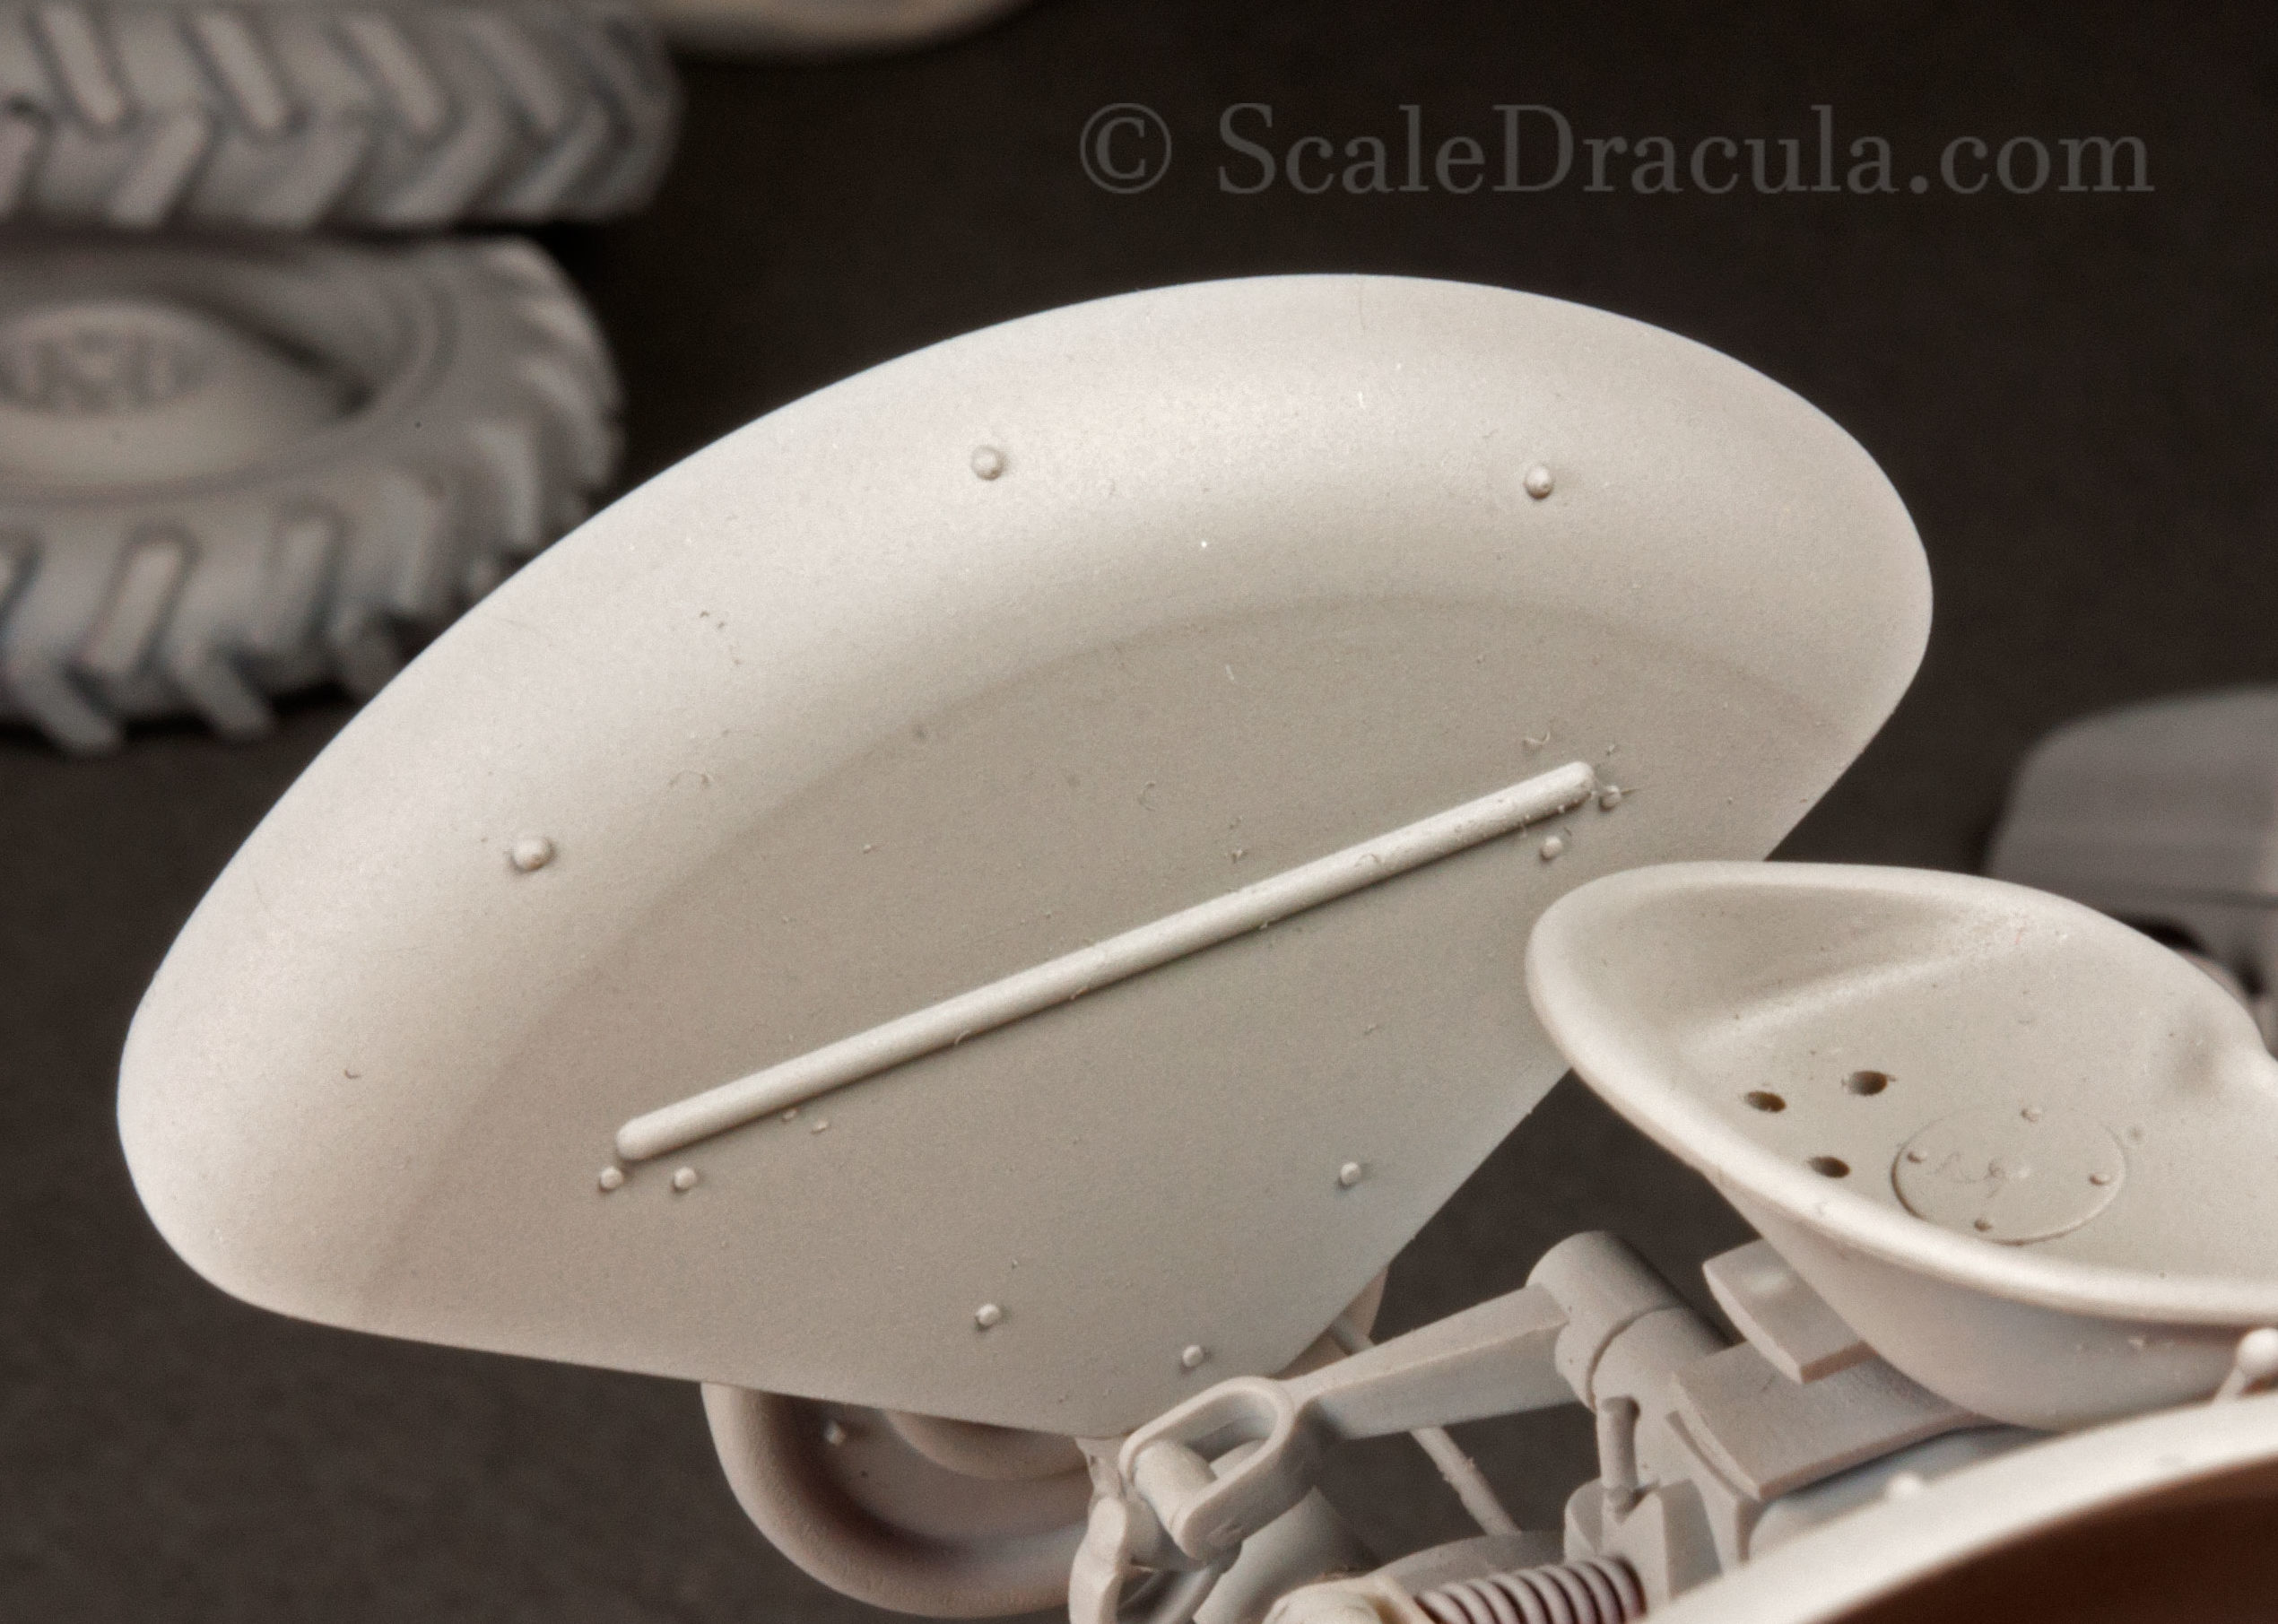
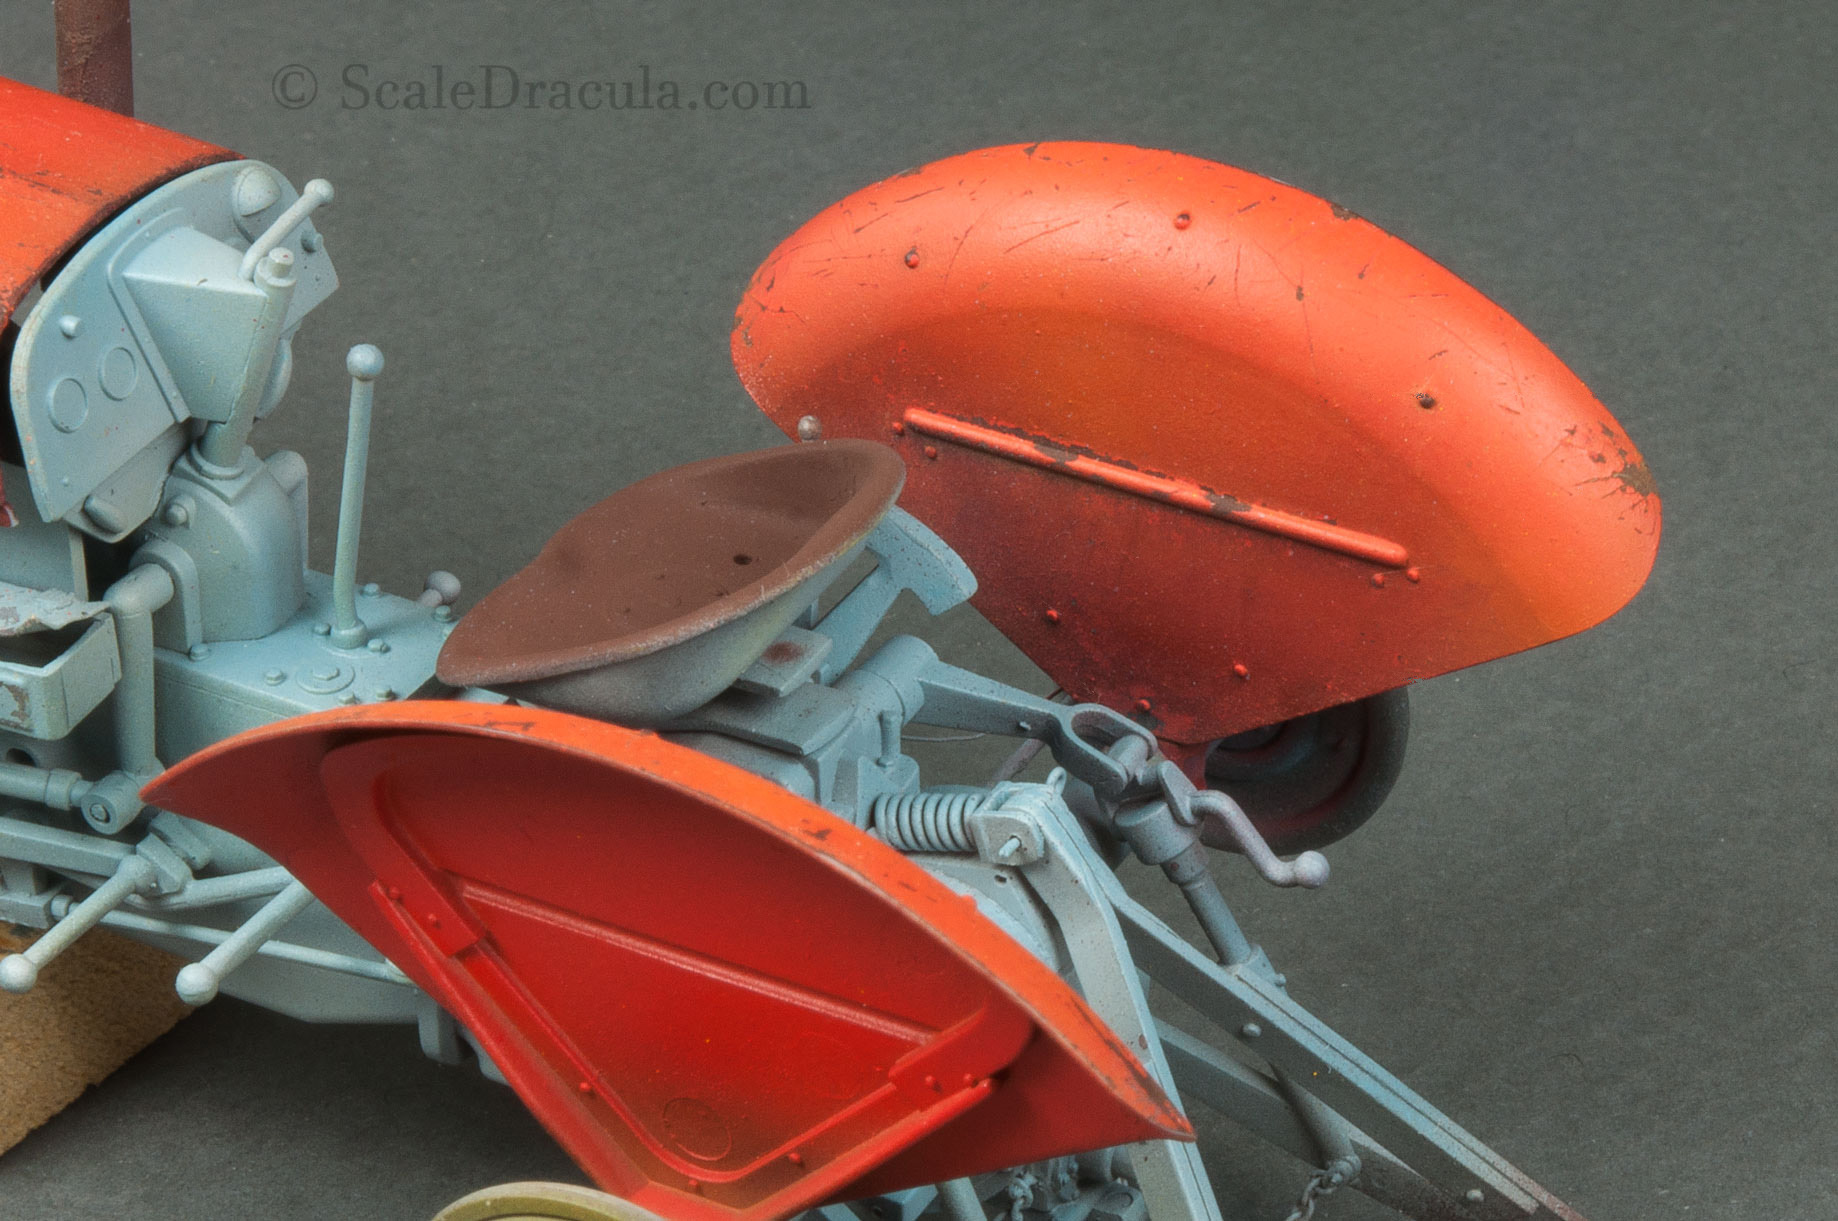
As you can also see, I took some time removing ejection marks on the fenders. It later turned out it to be a rather lousy job, but the fenders are going to be almost totally covered by the wheels.
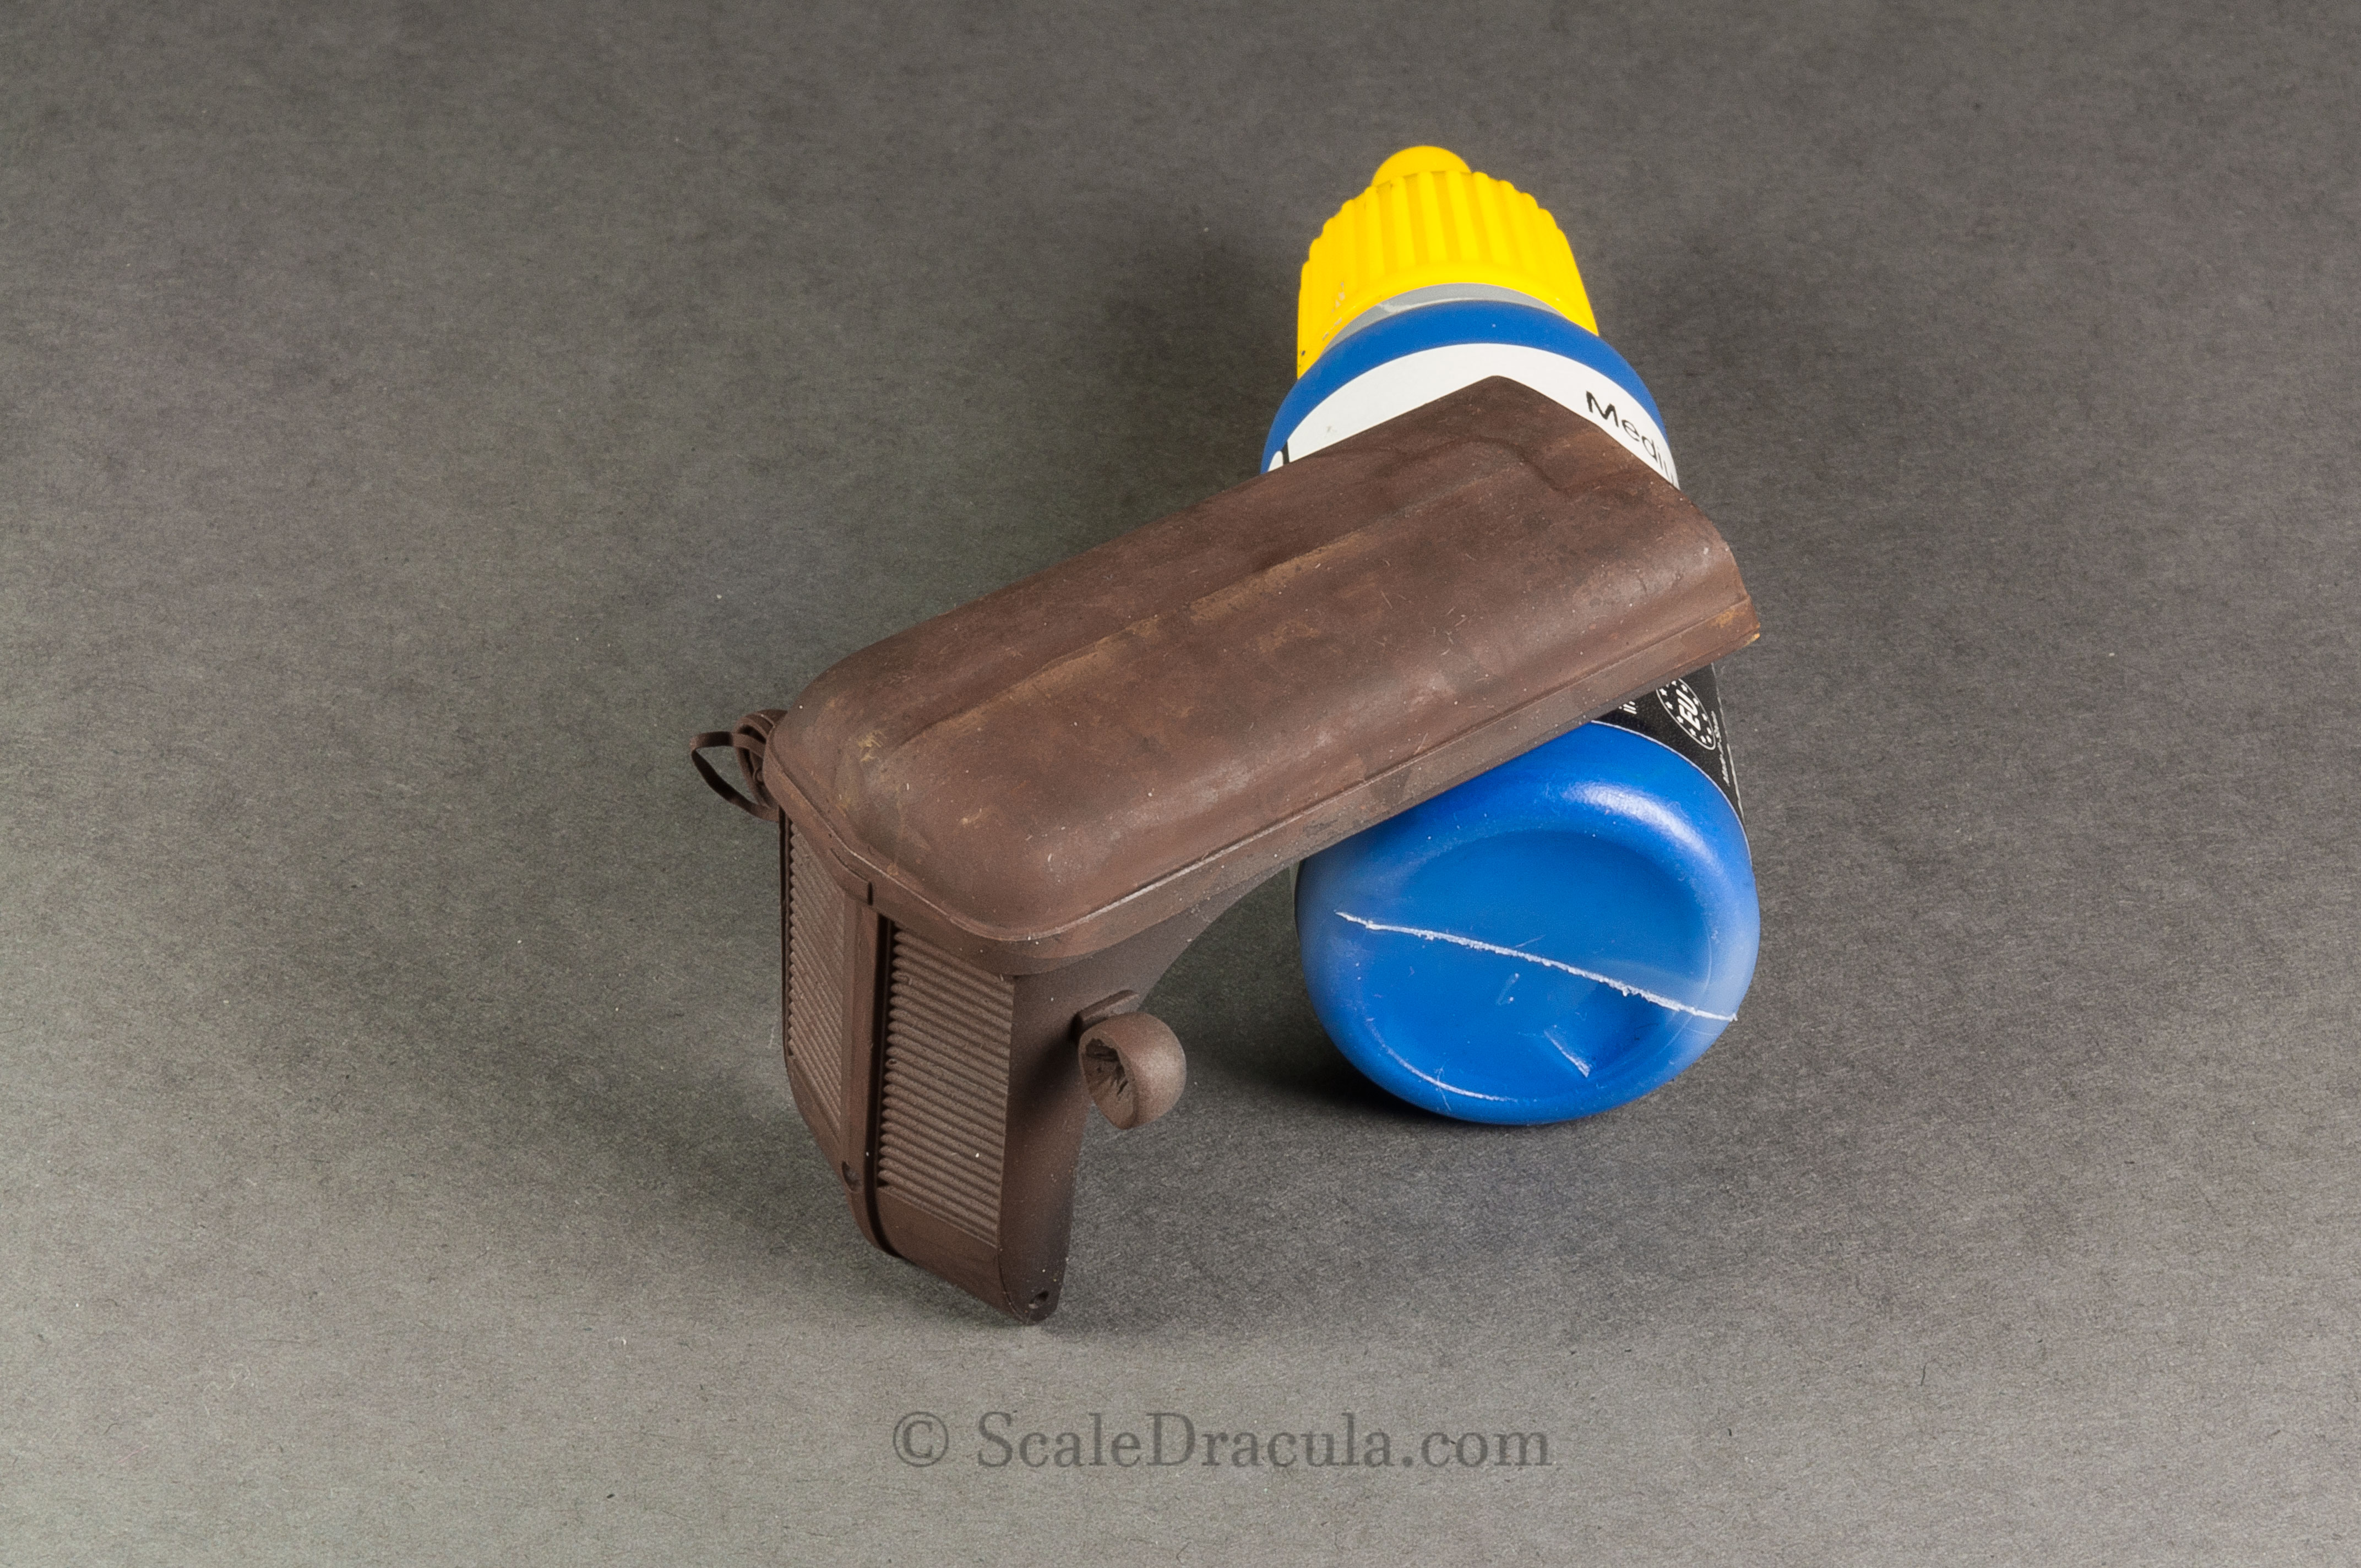
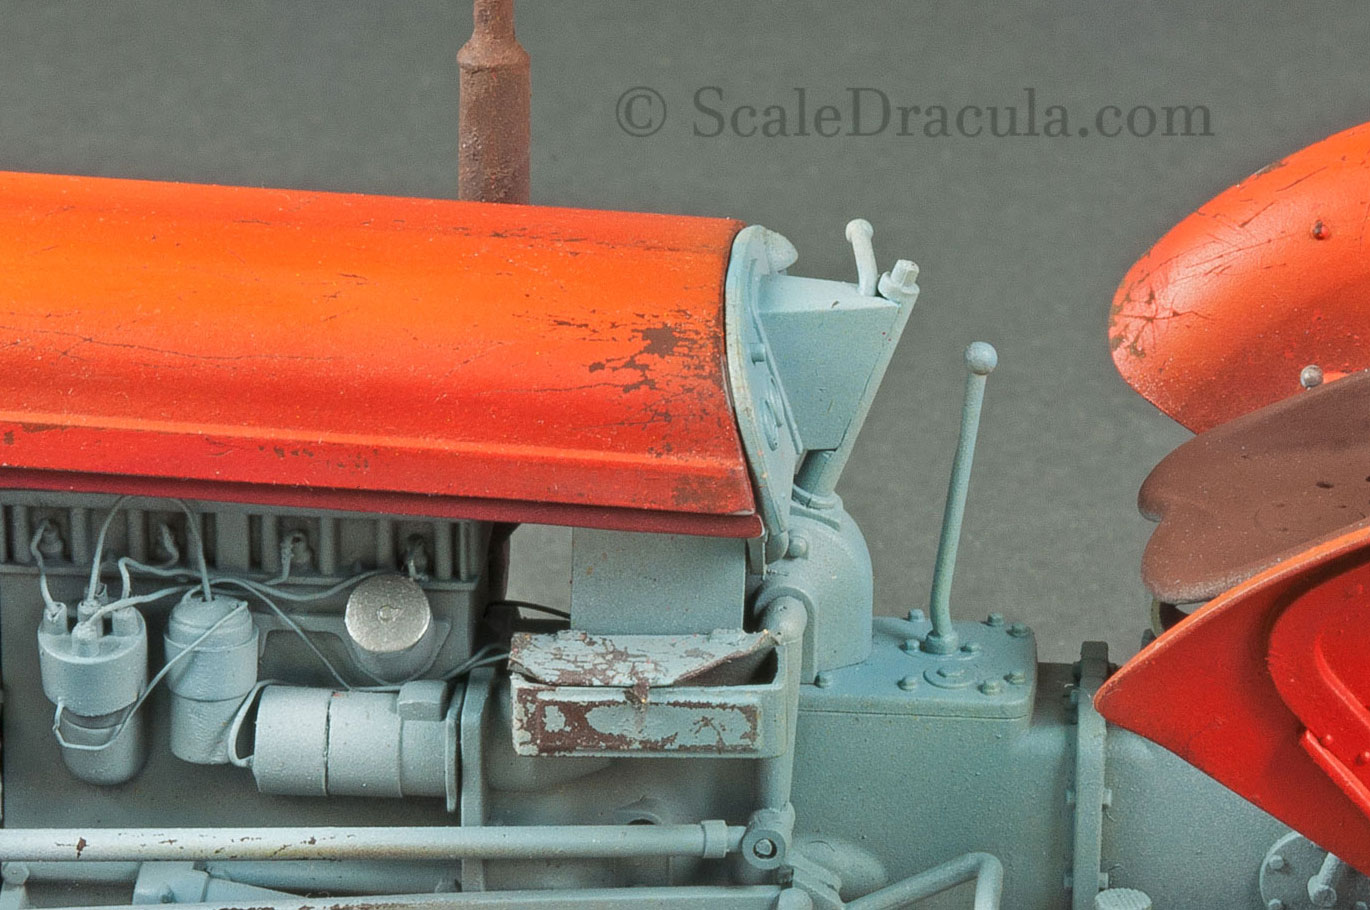
I wanted to make the exhaust pipe very rusty, so I added some texture to the plastic. It is a simple mixture of Mr. Hobby’s Surfacer 500 and microballons. Dab it on the part with an old brush and polish with sandpaper if the effect is too strong. I also drilled a hole on the top. Easy peasy.
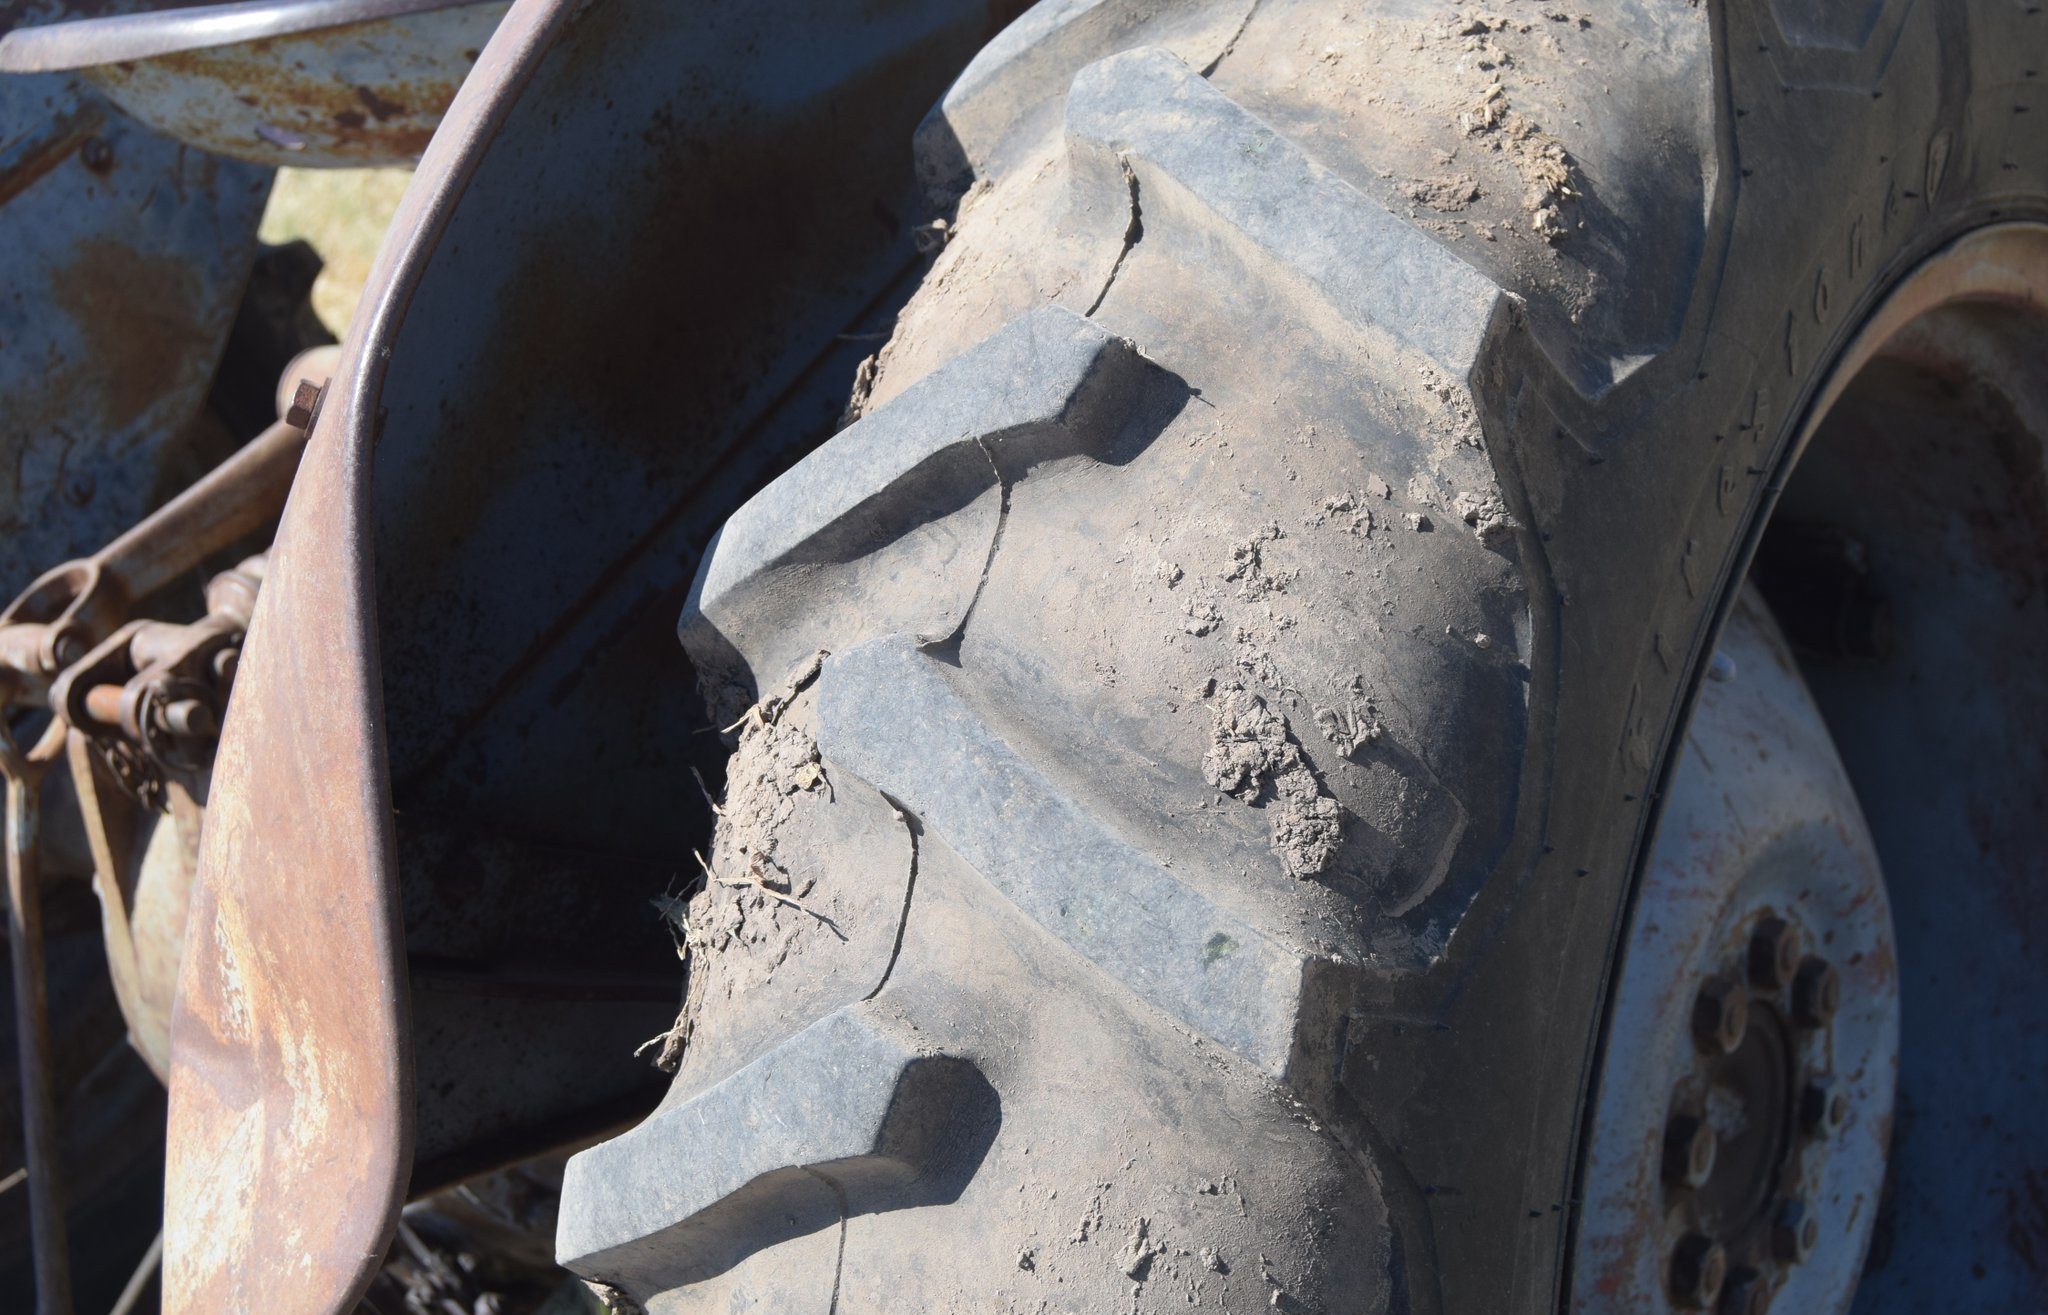
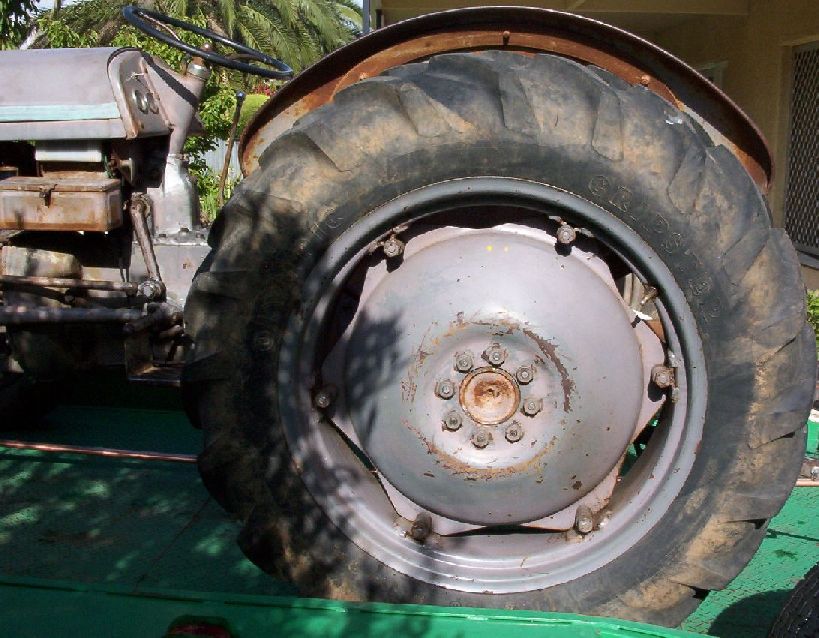
As I’ve already mention the rubber parts are a real pain in the ass to work with. Forget about sanding them, just use a very sharp knife with a fresh blade to clean up. I wasn’t satisfied with the result on my tyres, but I decided I would hide the remains of the ugly seam line under some weathering. The seam line itself isn’t a bad thing. The real tyres have it as well. Look at the picture below. But I don’t like it and I can’t help it.
Finally, I drilled a hole at the bottom of the model. I’d put a barbecue stick in it to be able to hold the miniature comfortably while painting. Always look for solutions like that. You do NOT want to touch the surface of your model once the construction is done and especially don’t touch it while paint is still semi-wet.
Quick tip
Avoid touching your model when the painting process has started. Use gloves, stick or rotating platforms to conveniently move the miniature around.
Then I proceeded with cleaning the model with IPA alcohol. The easiest way is to spray it from the airbrush. You can also use a soft, wide brush to clean places that are difficult to access. Alcohol will dissolve grease that you transmitted on the model during the construction. It will hopefully take care of dust and dirt as well.
At the very last, I primed the model and all the separate parts with Ammo MIG grey surface primer. It’s a decent paint, but I have some complaints about it. I’m very eager to find out if MIG’s new One Shot Primer will be an improvement. More thoughts on this matter later. One more thing: it may happen that during the priming some little pieces of dust will sick to the model. Take a look at the picture below.
If this happens, don’t panic. Wait 24 hours until the paint is dry, polish it with sanding paper and re-paint. Make sure the surface is clean and even before you proceed.
So there it is. I’ve had a lot of fun building this little fellow. I can’t wait to paint it.
The Painting
I left off the little Ferguson after it was put together and primed.
It was at this point that I had to decide what kind of vehicle I would like to build.
I assumed my Ferguson will be a worn out machine that have spent years on the field but is still in operating order. So the model will be chipped and dirty but I don’t want it to look like an abandoned, rusty wreck. It was really important to take those decisions, because they were going to guide me throughout the build.
Airbrush time! I did a very quick pre-shade with Ammo Matt Black. Then I painted the whole model with Ammo Medium Grey with just a drop of Medium Blue. Grey is a pretty dull colour. That’s why I usually add something to it to give it some life.
Then I painted a basic layer of rust using Lifecolor paints (a mix of Rubber black and Burned rust). These are the places I’d use the hairspray technique on. I will concentrate on the hood, fenders and wheels.
If you plan to chip big areas of the model, it’s good to give the surface some more interesting texture. I thinned down other rust shades of Lifecolor paints and did a quick mapping effect.
If you only plan to make some tiny scratches and chips though, all you need is a straight dark brown colour.
I decided I want to paint my Ferguson in orange, but that’s where a problem appeared. The hairspray technique works best when the top layer of paint is pretty thin. But I sure needed a lot of orange paint to cover the dark rust base.
Look closely at the picture below:
This is the same paint (Ammo Mig acrylic red), but sprayed over different colours. On the left it is light grey, and on the right dark brown. The amount of red is exactly the same. Bottom line: to get a rich, clean orange colour I would have had to spray much much more layers. And I didn’t want to do that, because it would affect the hairspray technique.
What’s the solution? I covered the model with Ammo Mig Heavy Chipping, then I simply sprayed a thin layer of light grey before moving to orange.
Then I started to paint with a mix of Ammo Mig Red and yellow starting from a darker shade. After that the fun really begins. Just grab a toothpick, needle or brush, moisten the surface with water and go with the chipping. Here’s the model after this process:
I wanted to make the hood particulary faded, so after the chipping, I sprayed a little bit of Lifecolor streaking rust on top.
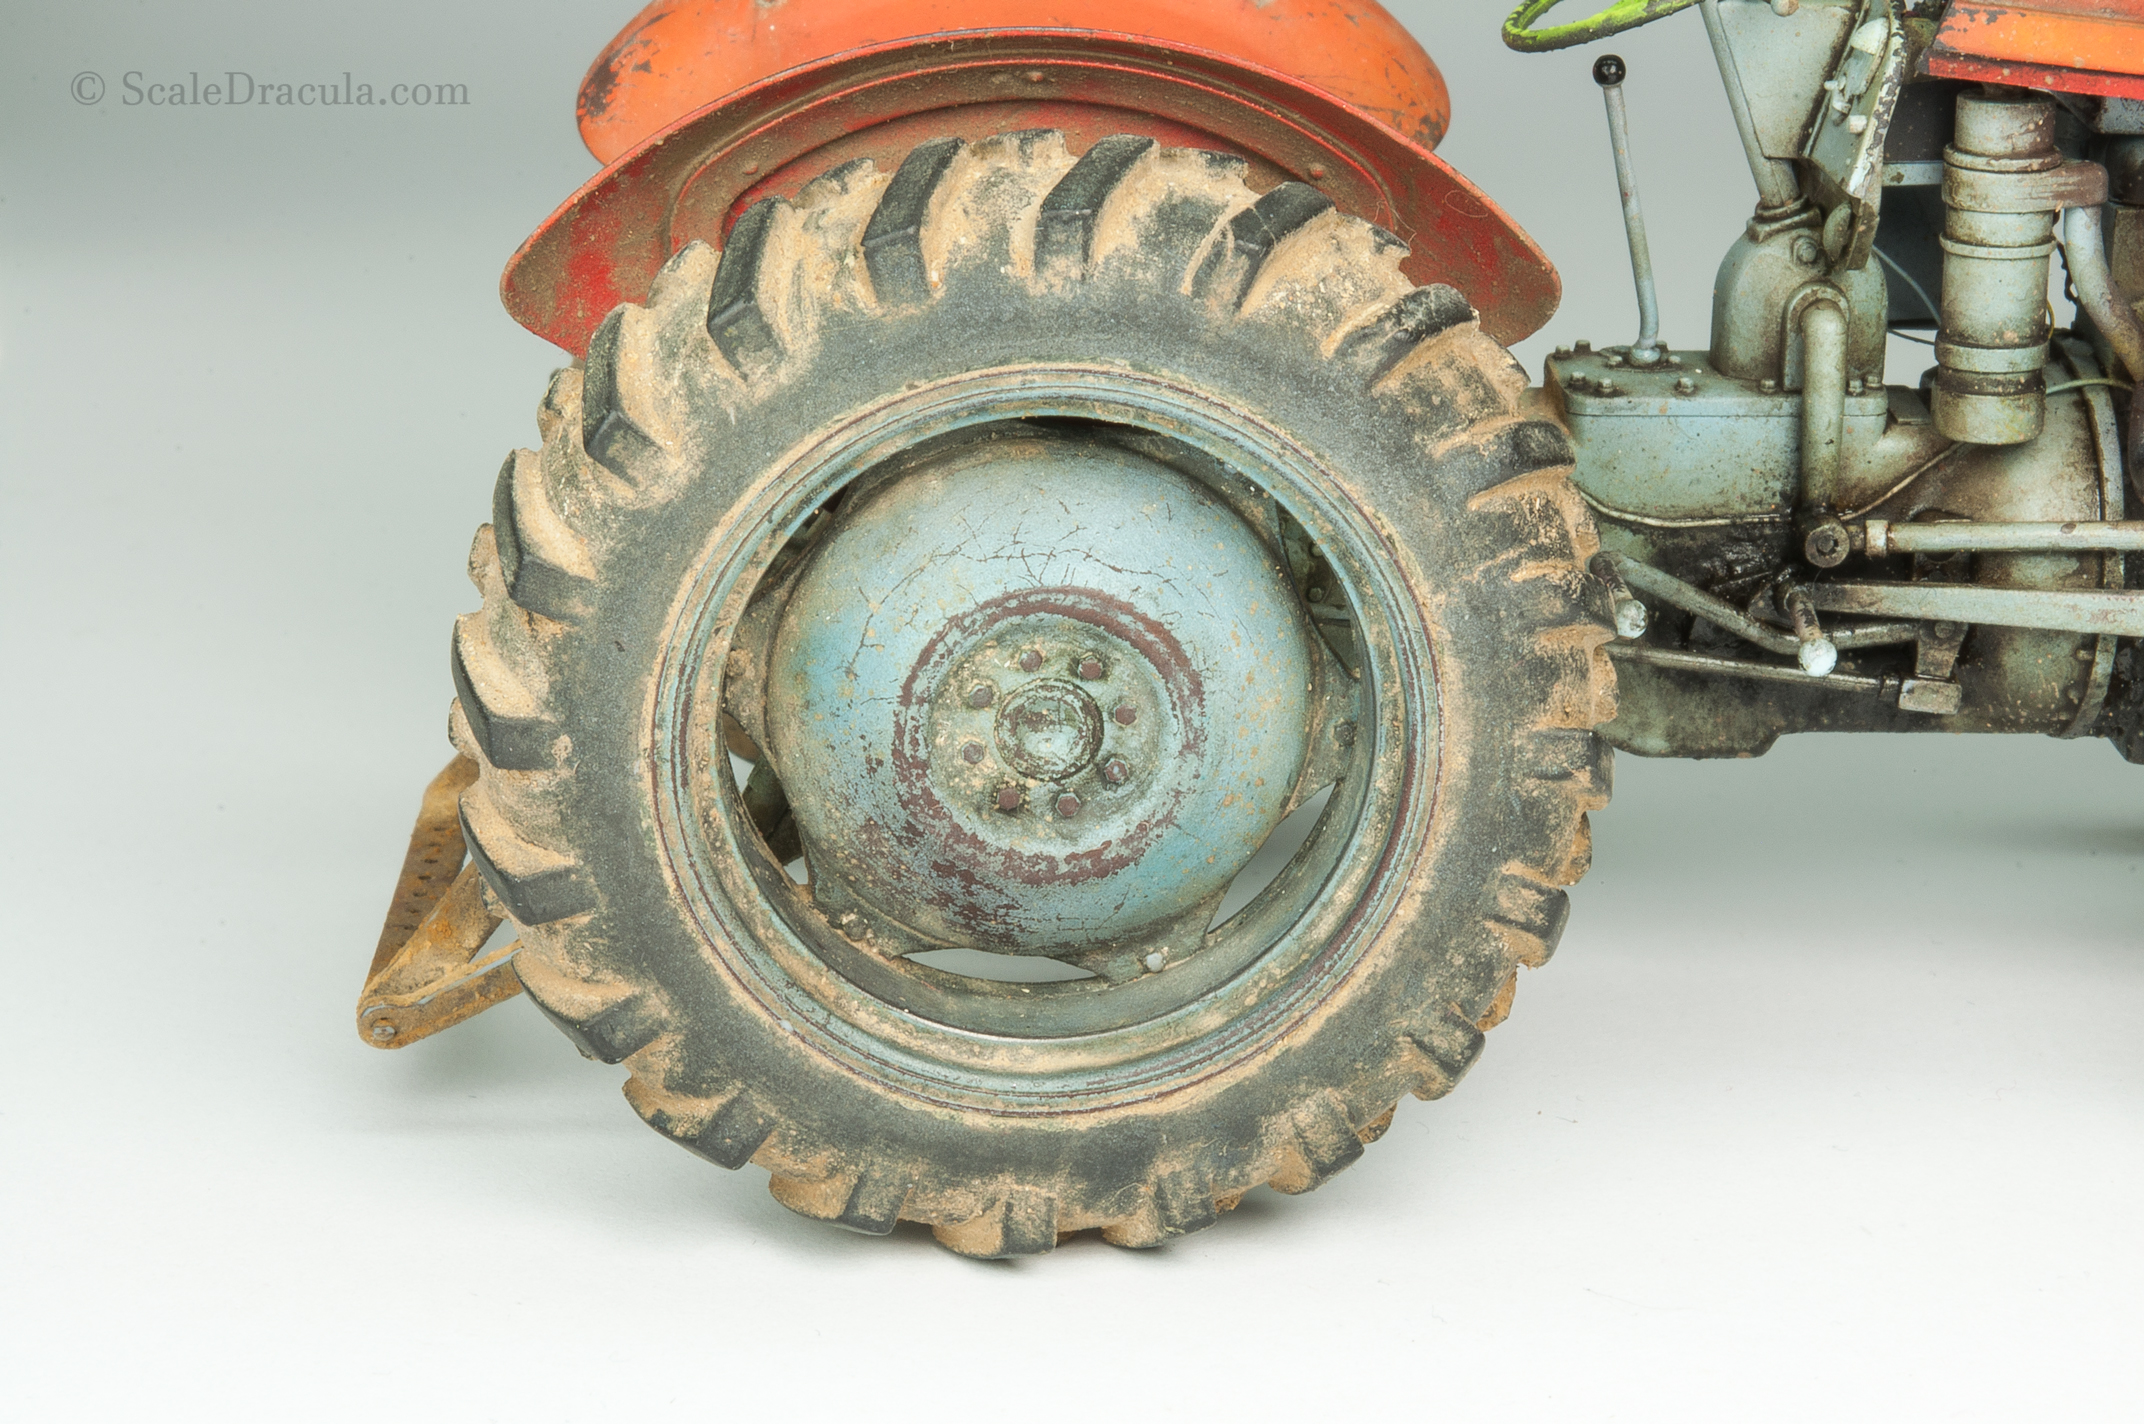
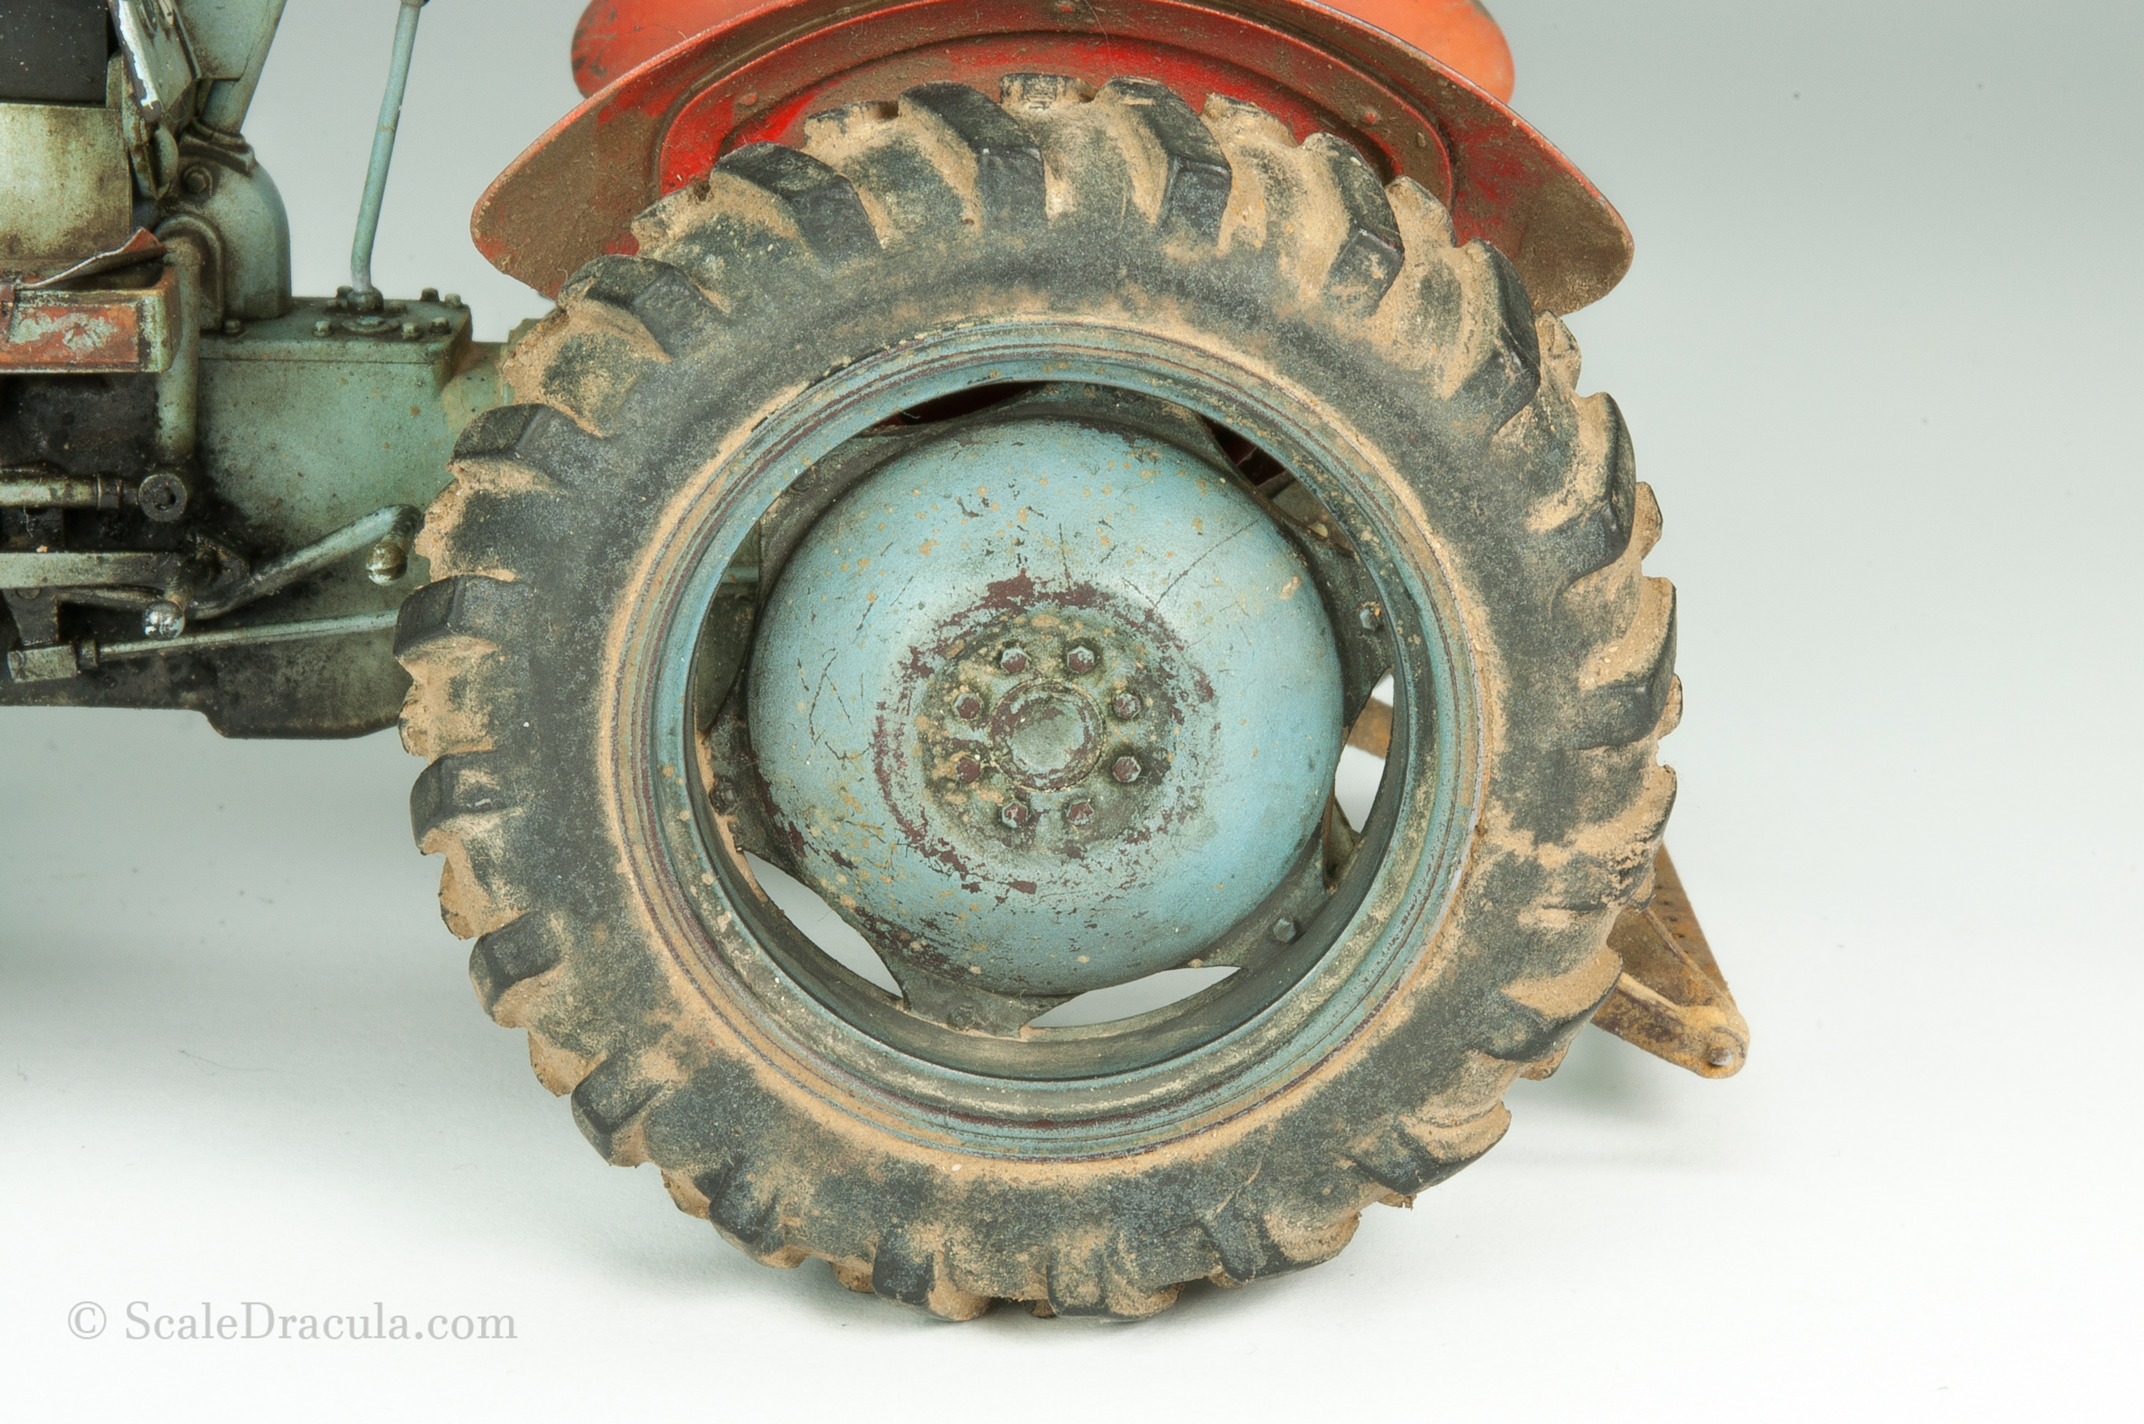
The wheels get their chipping as well, I painted them grey with a little bit of blue, just like the chassis.
This photo served me as a reference:
Hairspray technique is great not only for chipping. For the next step I decided to make the tyres old and a bit worn out. First I painted them with matt black and highlighted a little with Ammo Mig Rubber and Tyres. Then I sprayed the tyres with Heavy Chipping fluid and a thin and uneven layer of Ammo Medium Grey. When it was dry, I started removing paint with a soft brush dipped in water. The result is pretty convincing. You may notice that after the chipping stage I sprayed some more blue-tinted-grey on the wheels, just to give them some more colour.
For the seat I had a slightly different idea. I assumed the constant friction of, well, the driver’s ass, would not allow the seat to go that much rusty. I sprayed it with glossy dark grey then.
After that I started making chips using my favourite tool- an old airbrush needle.
Decals time. I must say I really hate this stage and I generally hate decals as well. Fortunately there wasn’t much of them in this model. First I airbrush the place where the decals are supposed to go with Ammo Gloss Varnish.
Then I use a hobby knife with a fresh blade to cut off as much of the edges as possible. The point is to get rid of the translucent film, that we don’t really need.
Then I put the decals in water for a couple of seconds and slide them into the model with a clean brush. Use decals fluids if the place is particularly tricky. I used Micro Set just in case. After that another layer of glossy varnish and you’re good to go.
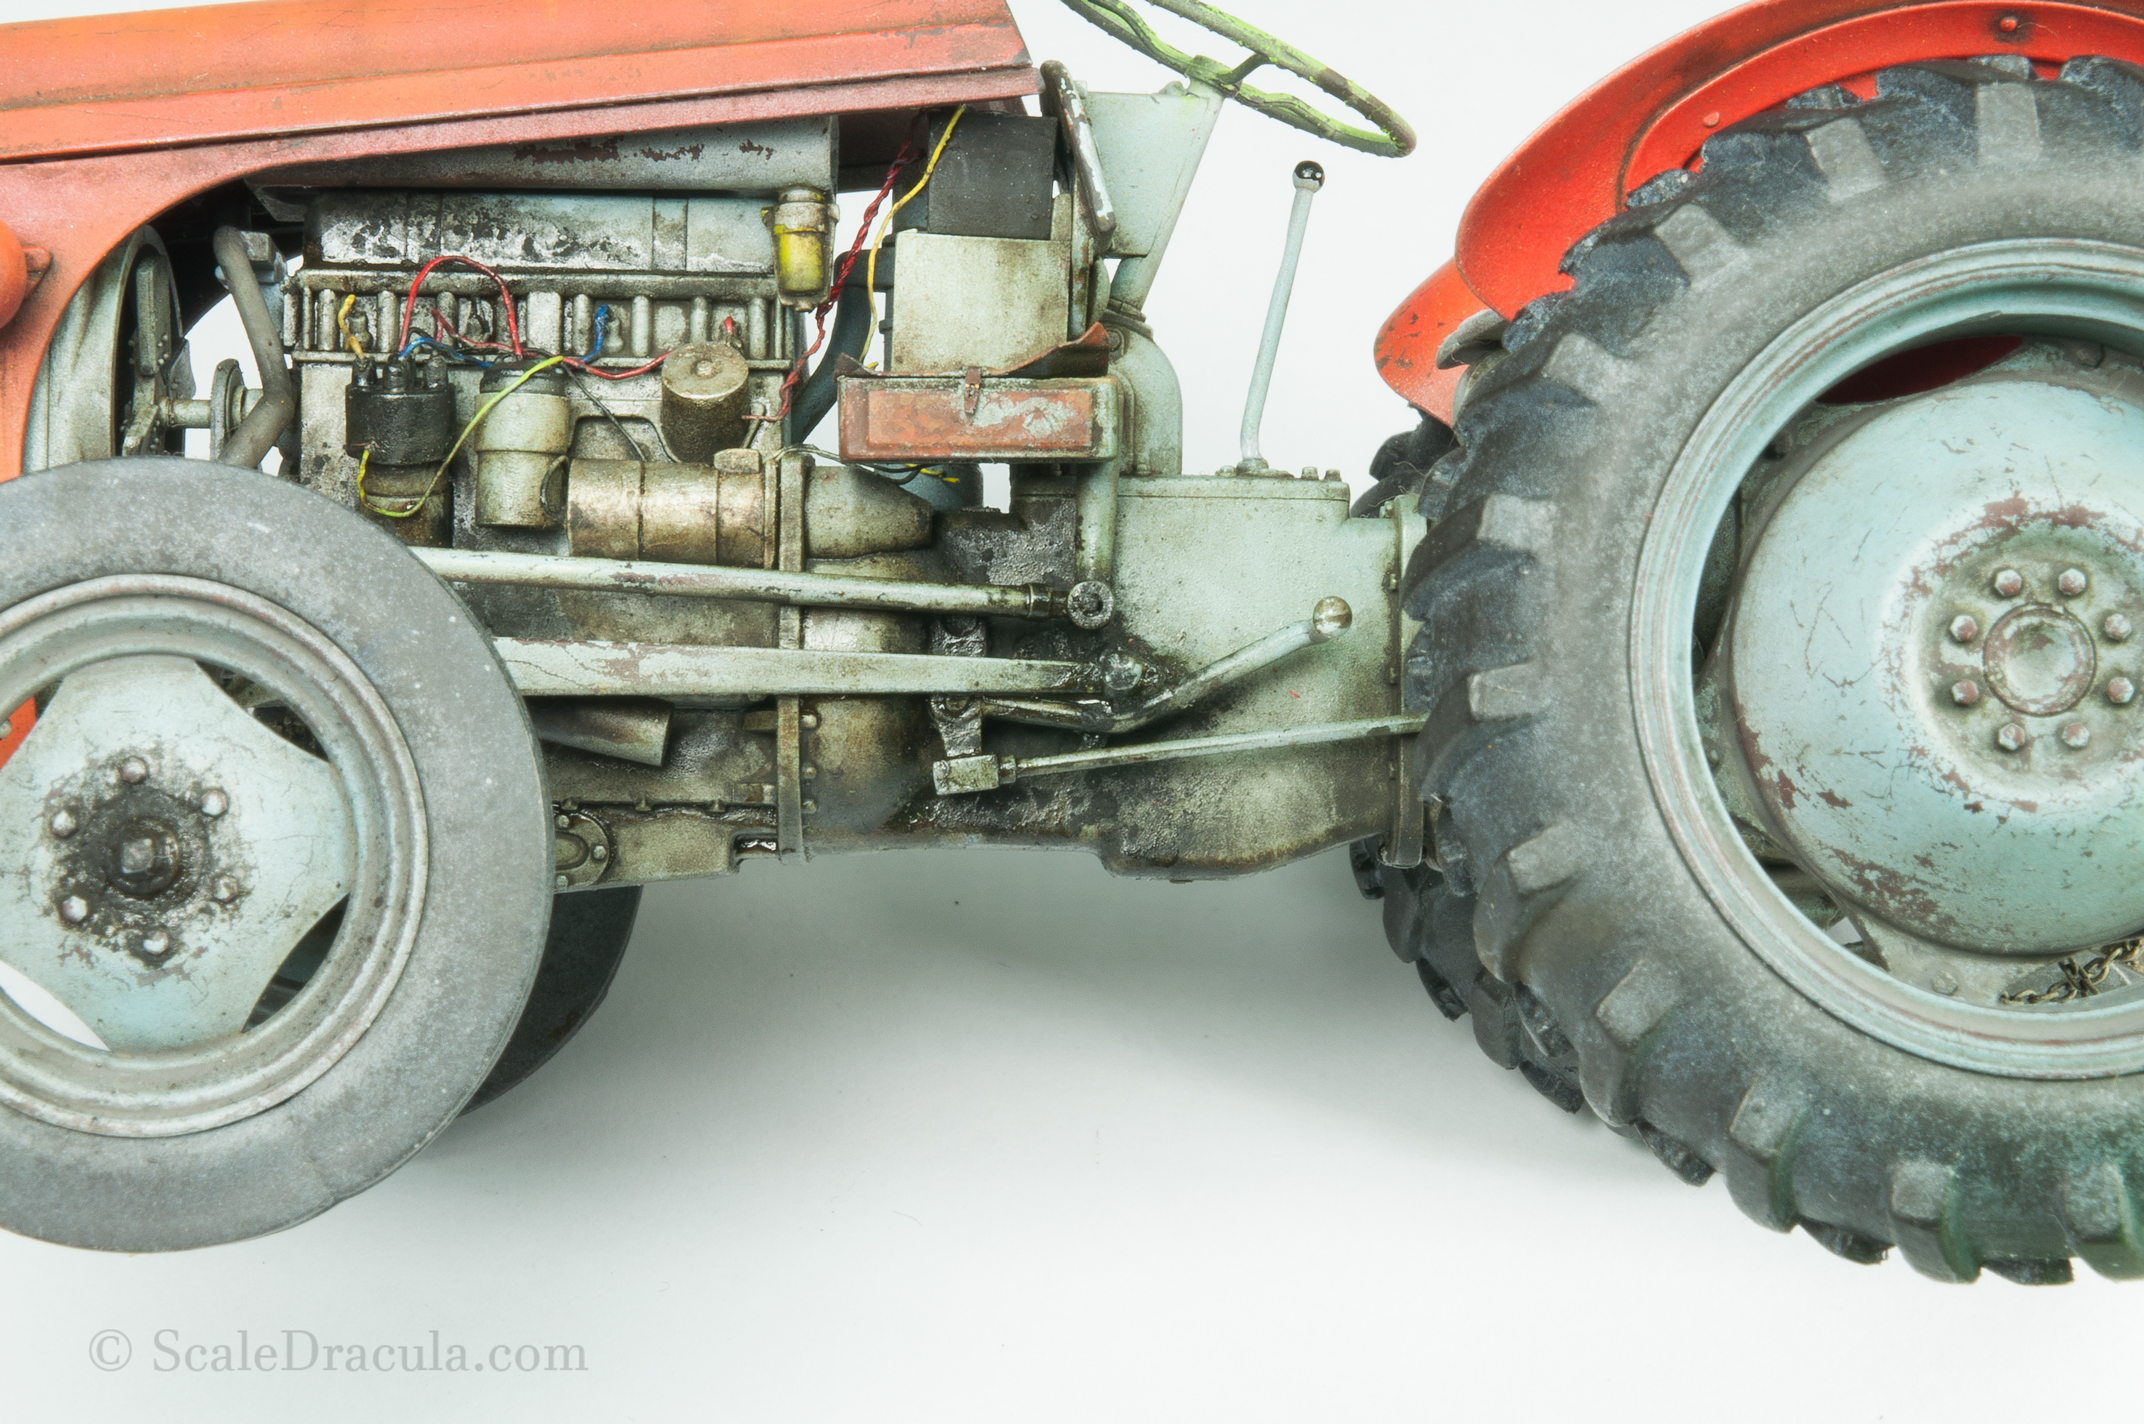
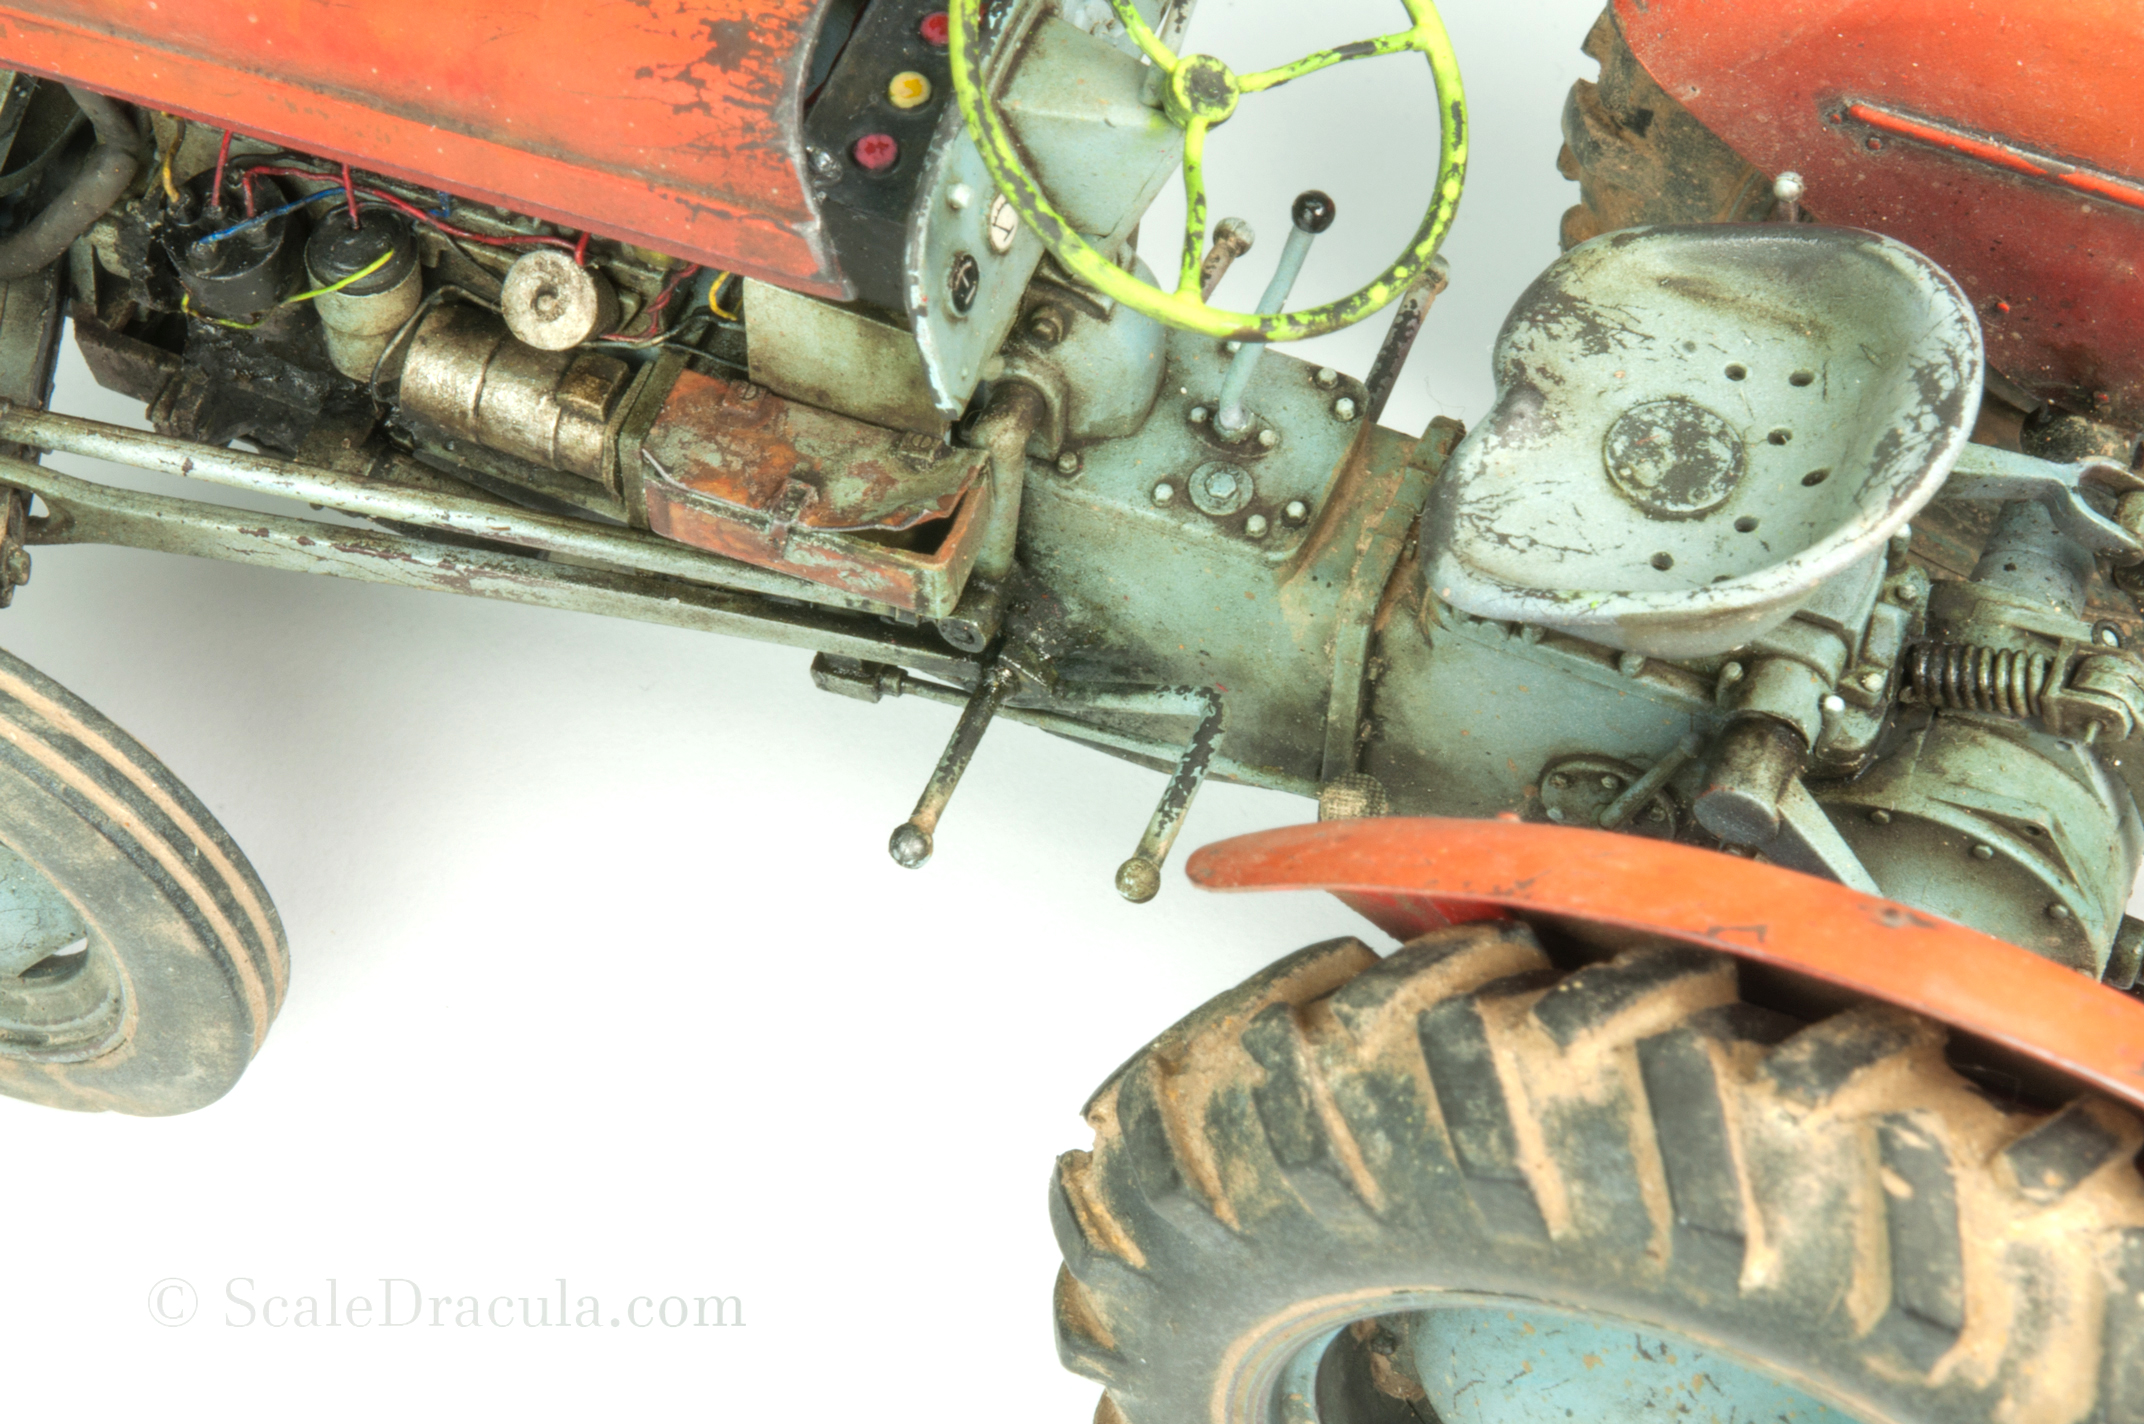
You may have noticed that I started to paint the details with a brush. I hit the battery and different parts of the engine with contrasting shades trying to give some life to my Ferguson. Then I painted the wires with all the colours of the rainbow and no historically-accurate-forum-nerd could stop me.
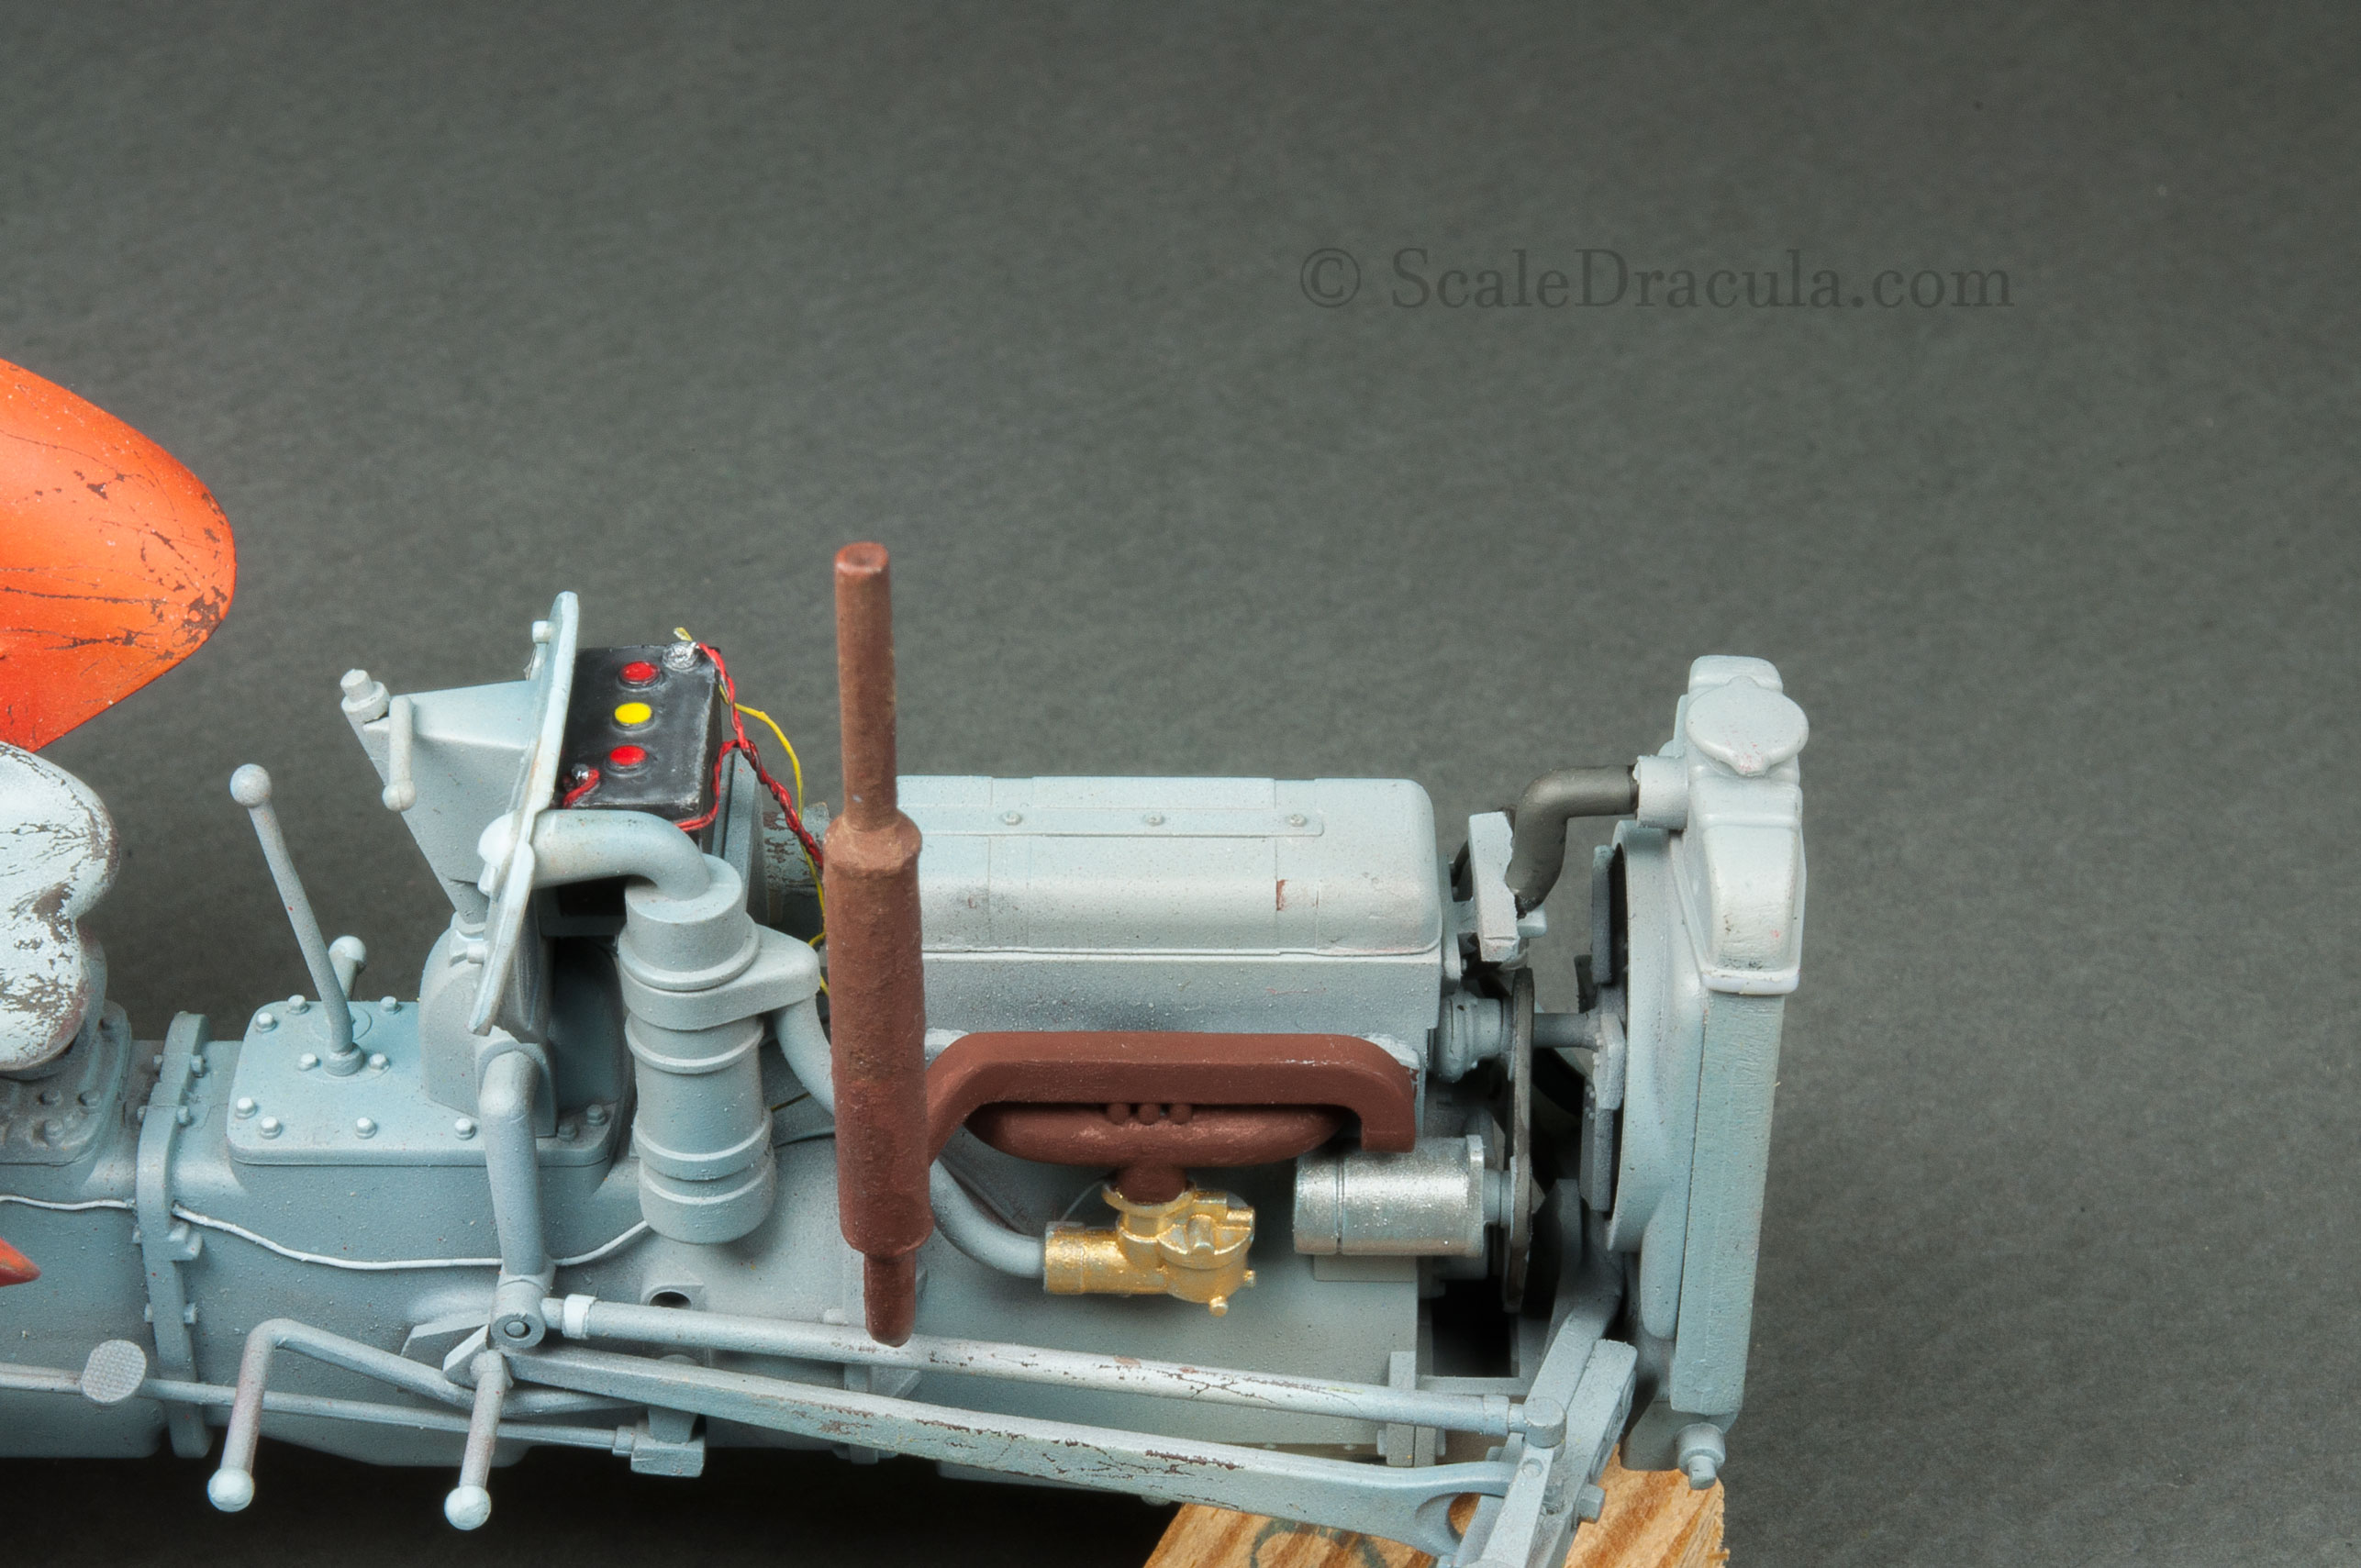
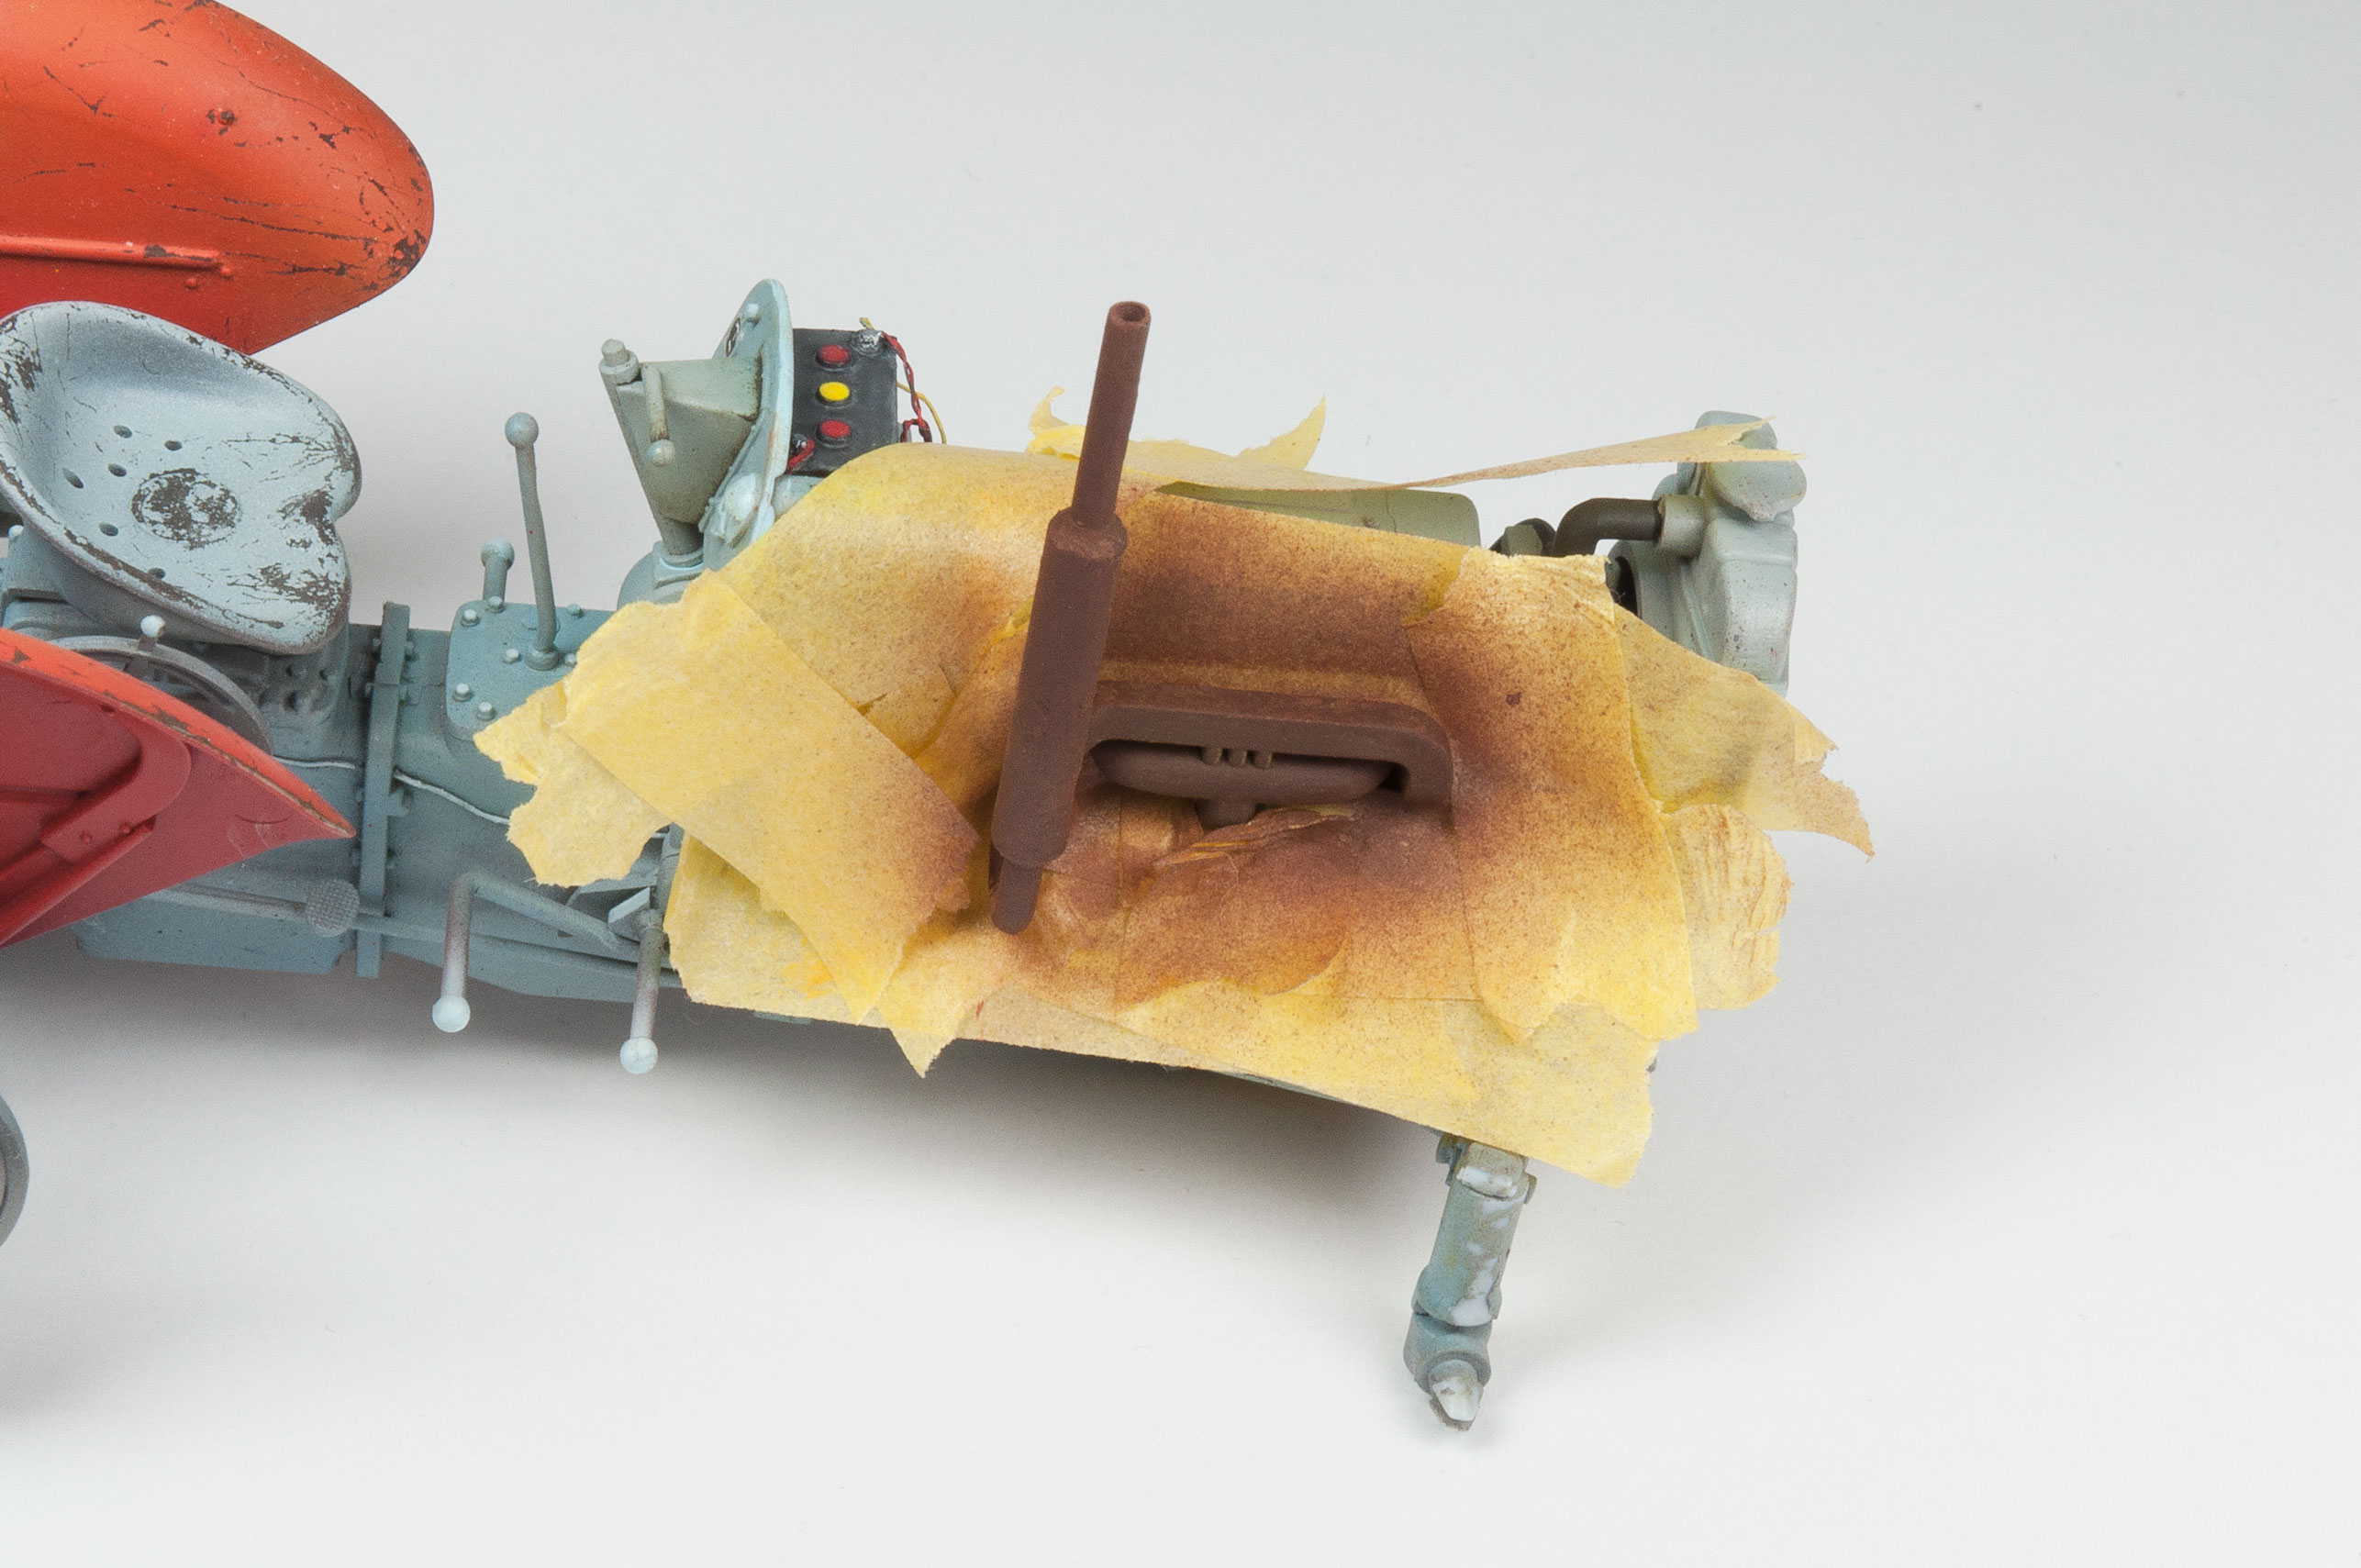
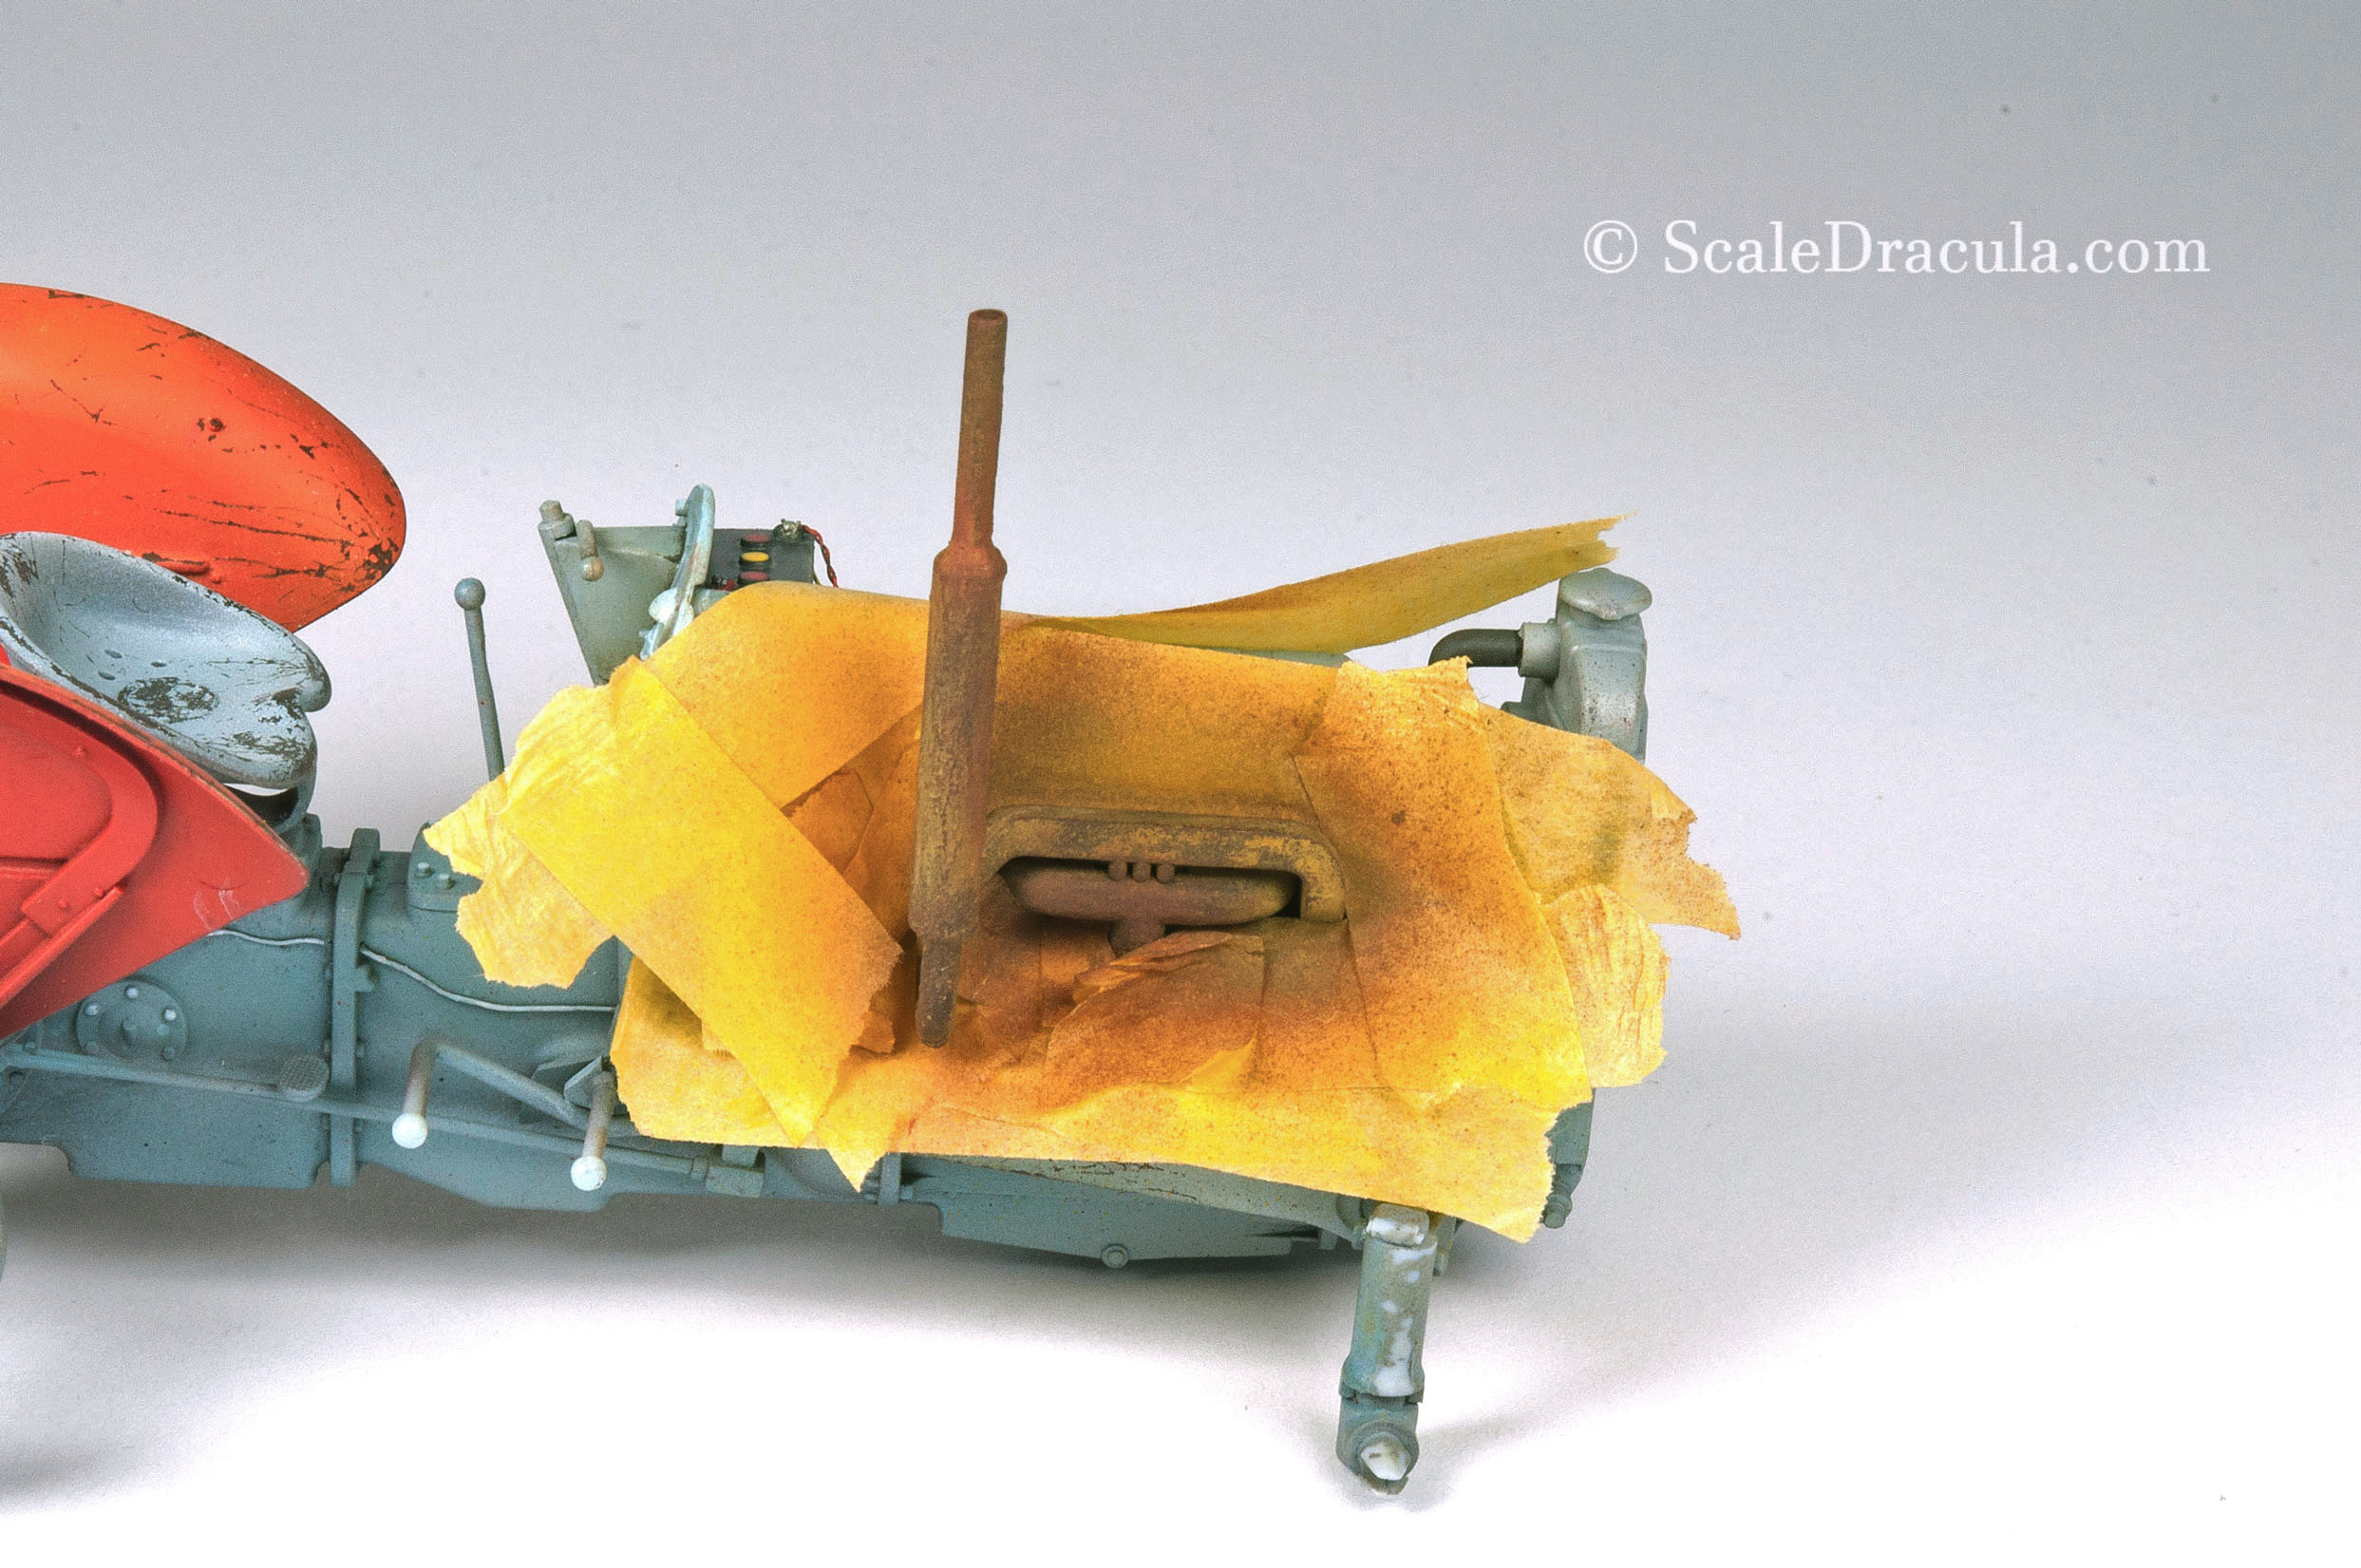
Last but not least, I used the chipping fluid again to paint the rusty parts of the engine. You know the drill by now. After painting the thing with Lifecolor Corroded Rust, I sprayed some chipping fluid. When it dried, I airbrushed a thin, uneven layer of Streaking Rust- a very light, yellowish colour. And finally, I got rid of some of the paint with a brush moistened in water.
I haven’t assembled the model yet, because I still need easy access to same areas during the weathering.
The Weathering
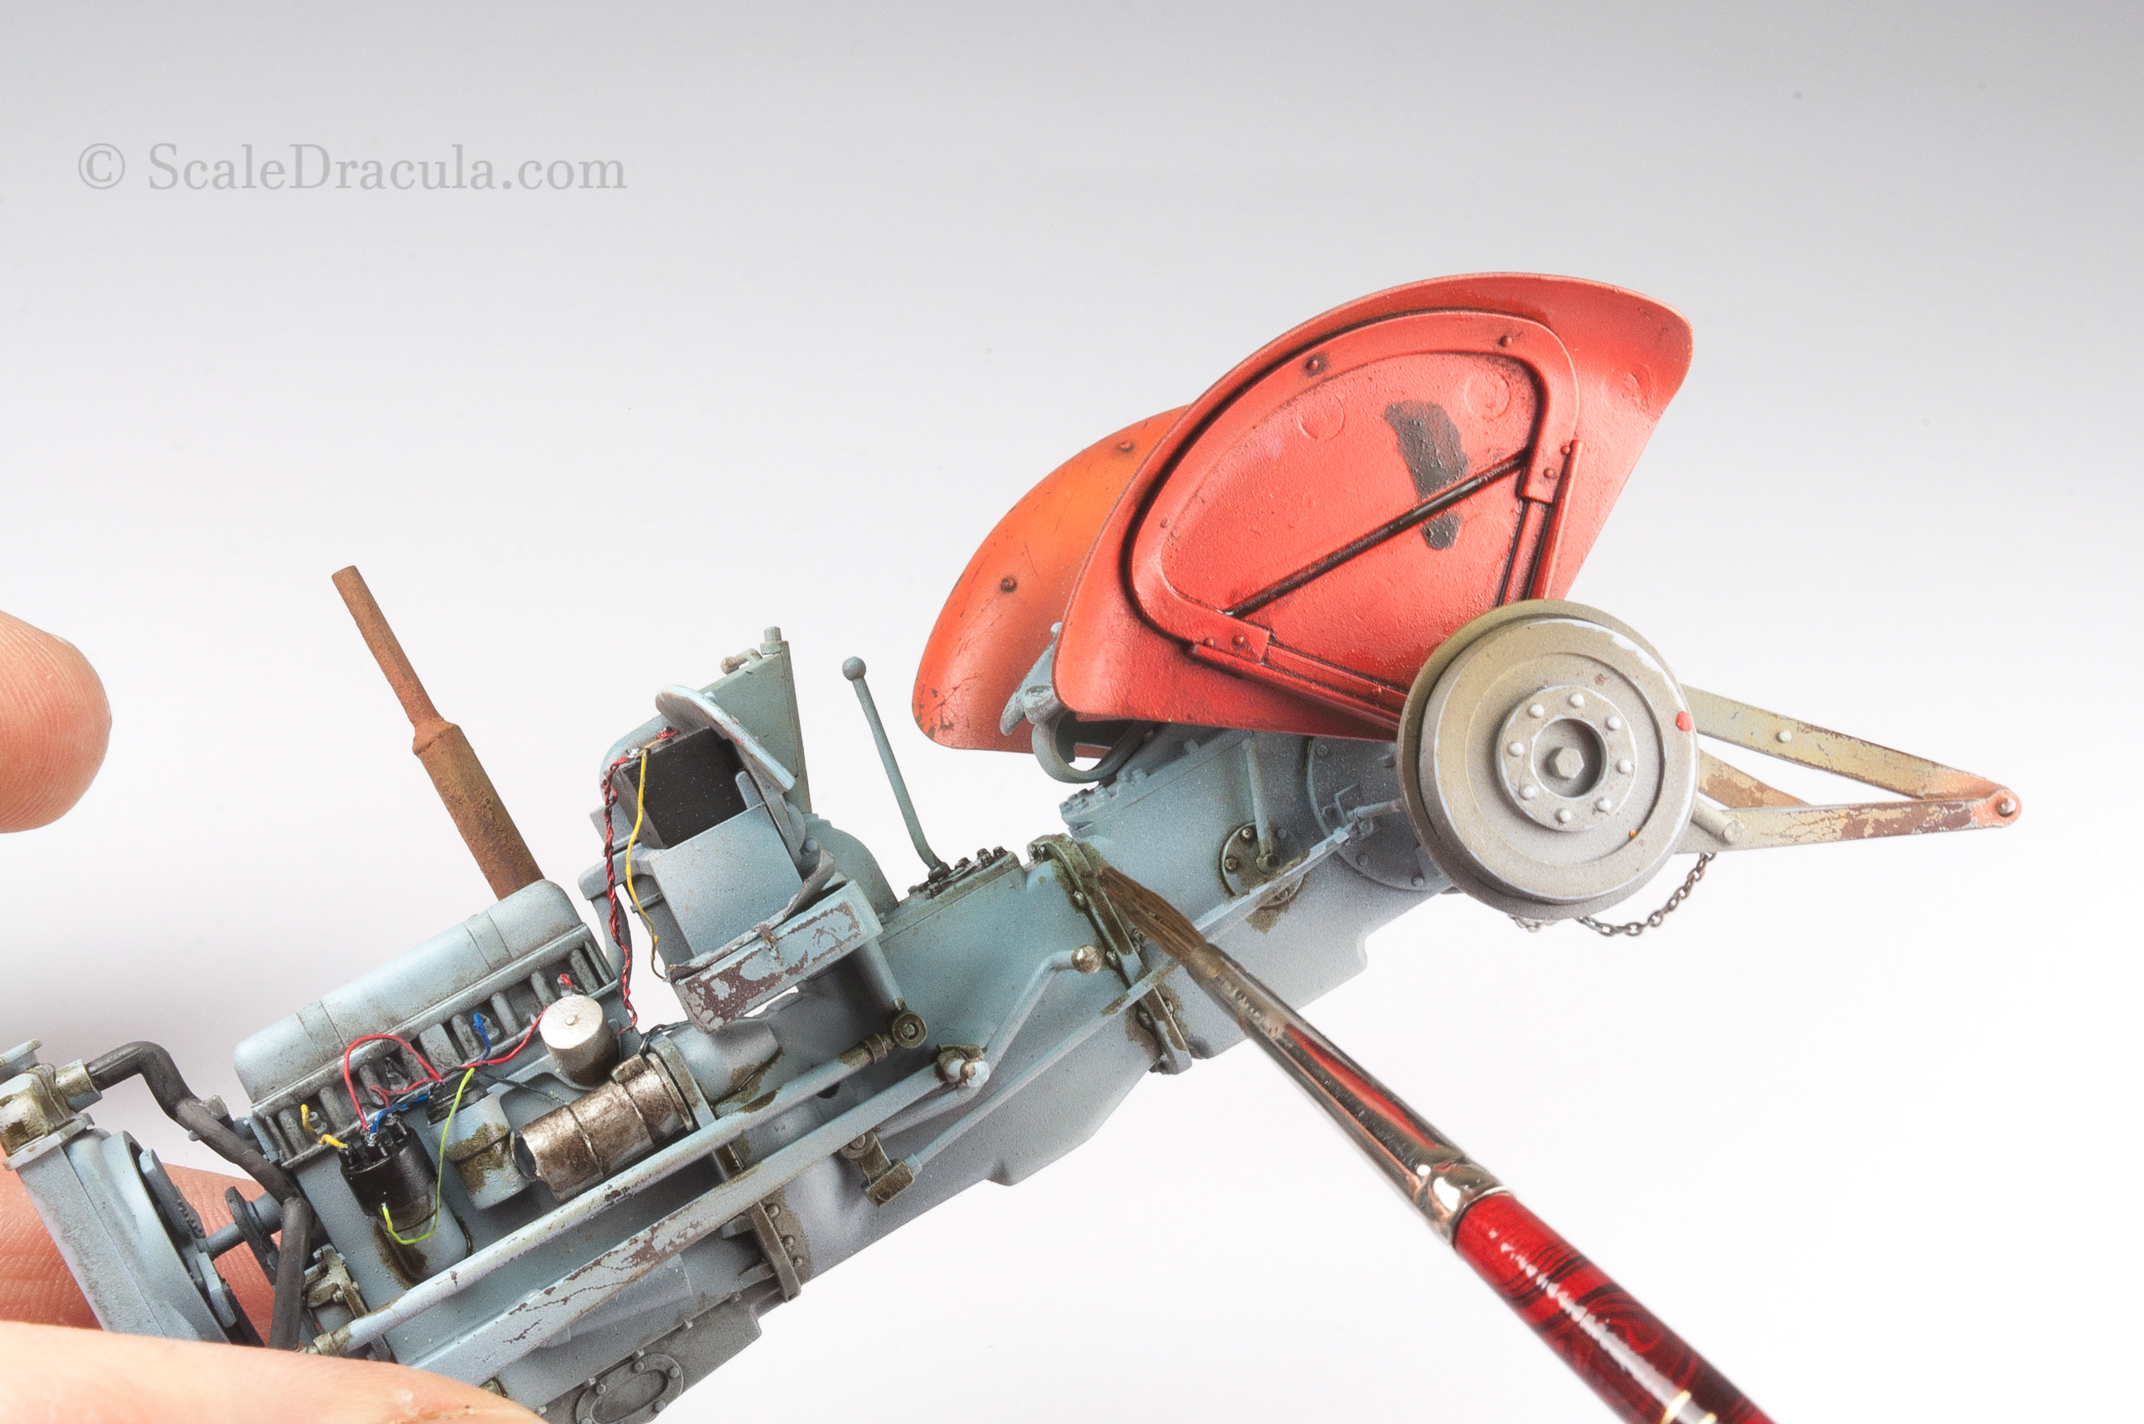
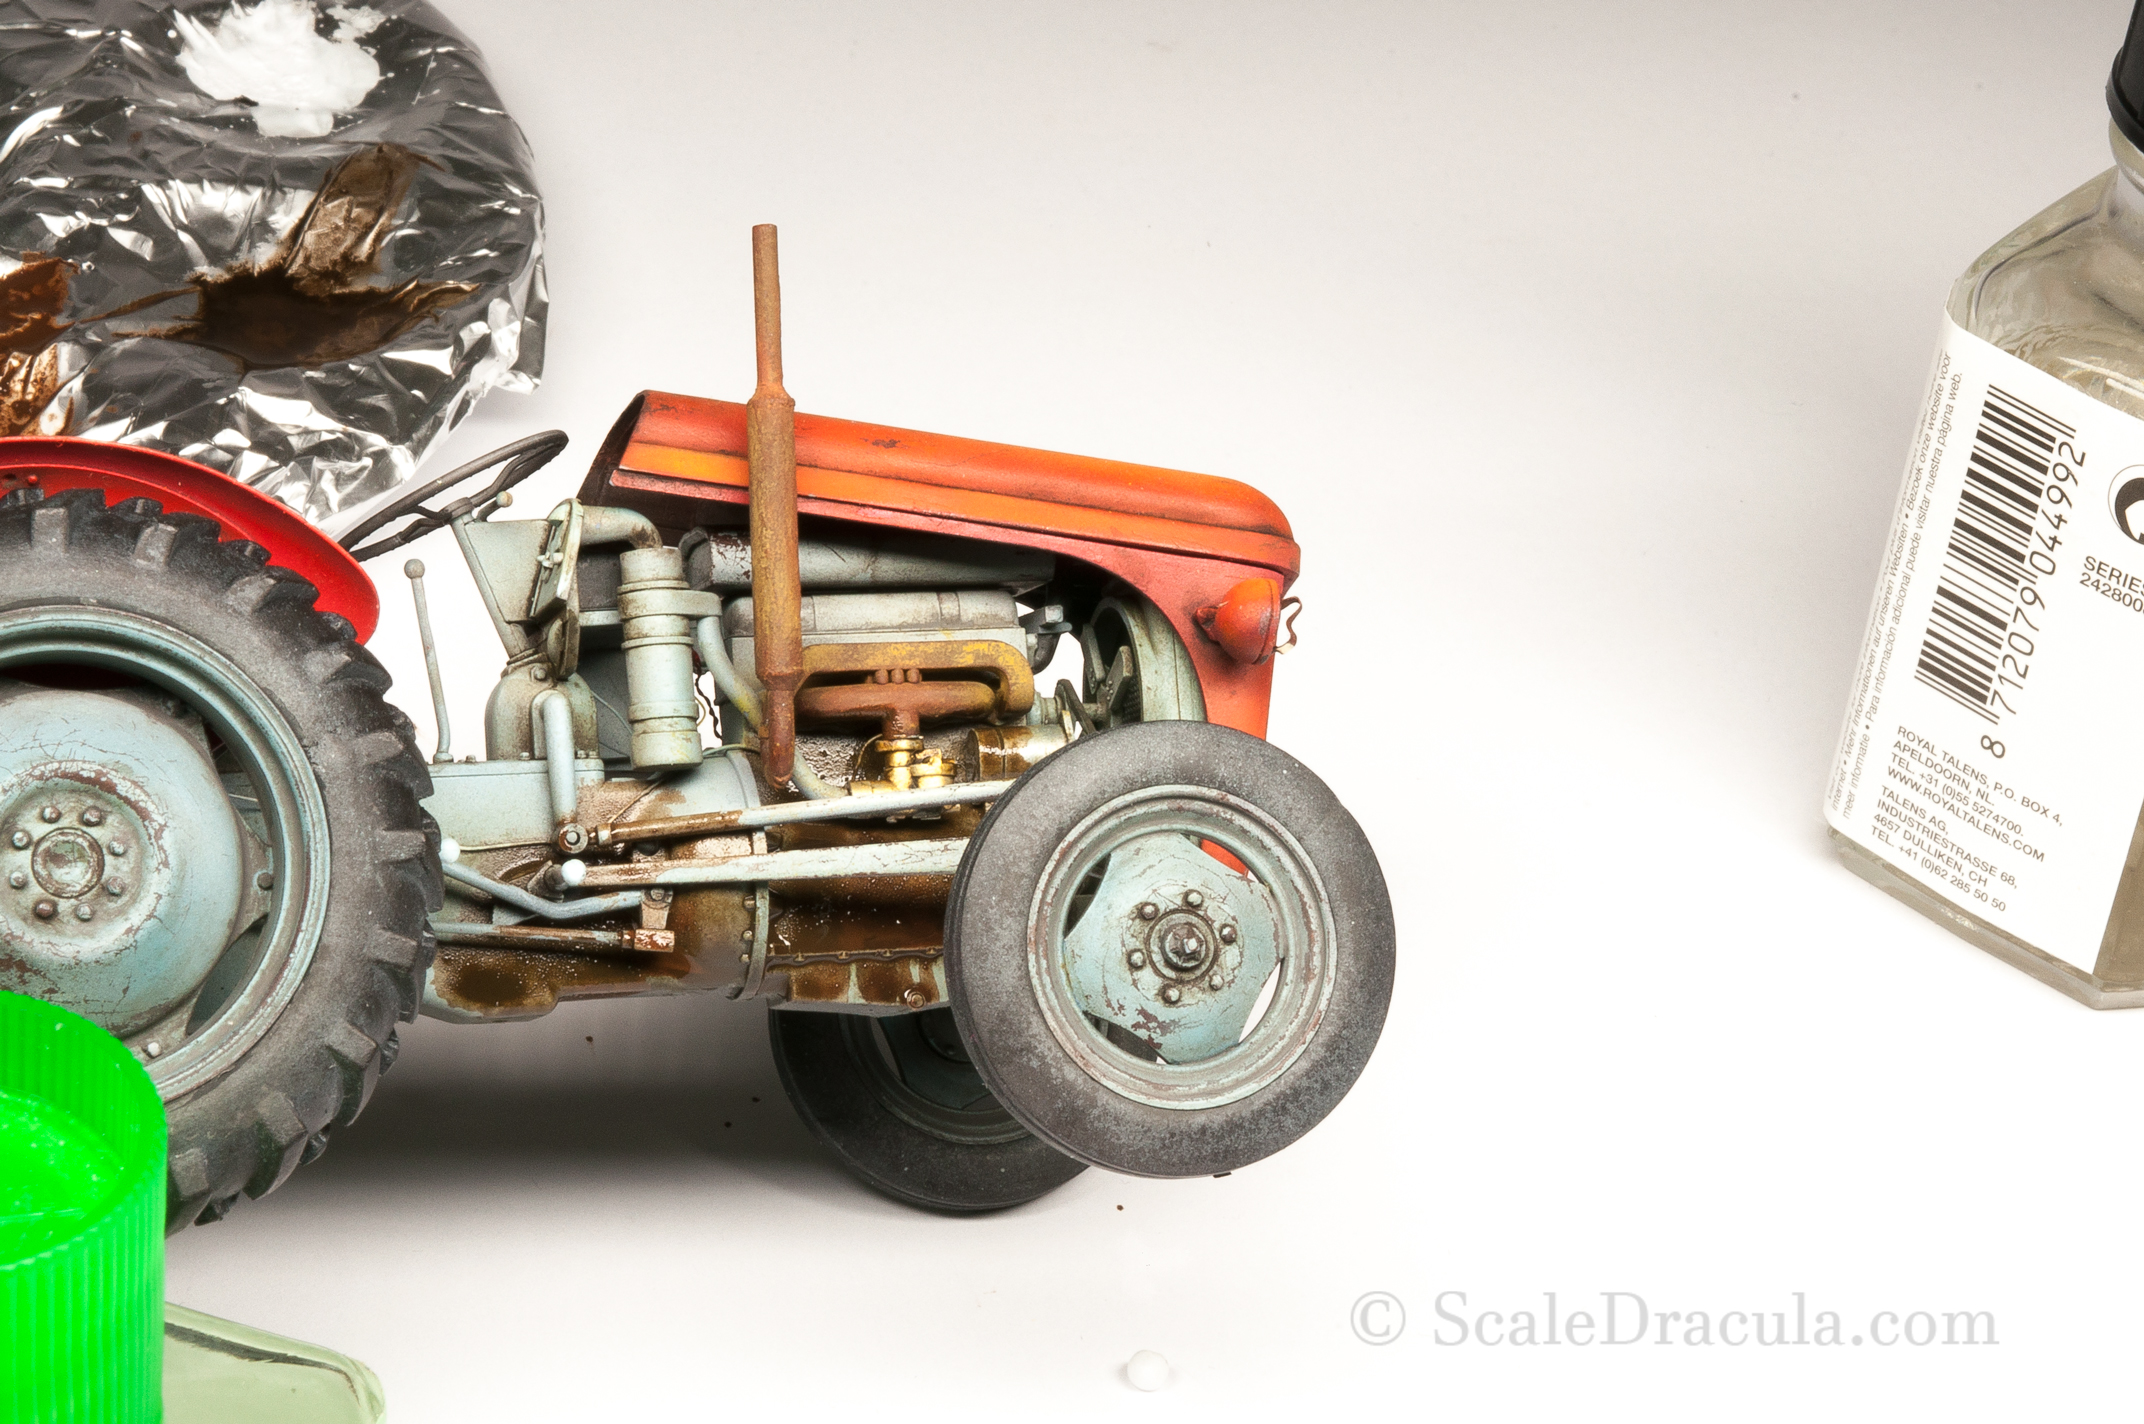
Here’s my favourite part of every build: the weathering. I really like when all the necessary ‘chores’ are done and I can only concentrate on adding some seasoning to the dish. My model was still in pieces, because I wanted to have easier access to same areas. I start the weathering with a fairly dark wash (Dark brown wash for green vehicles by Ammo Mig) and I put in all the nooks and crannies of the model. Then I blend it with a brush dipped in Talens White Spirit.
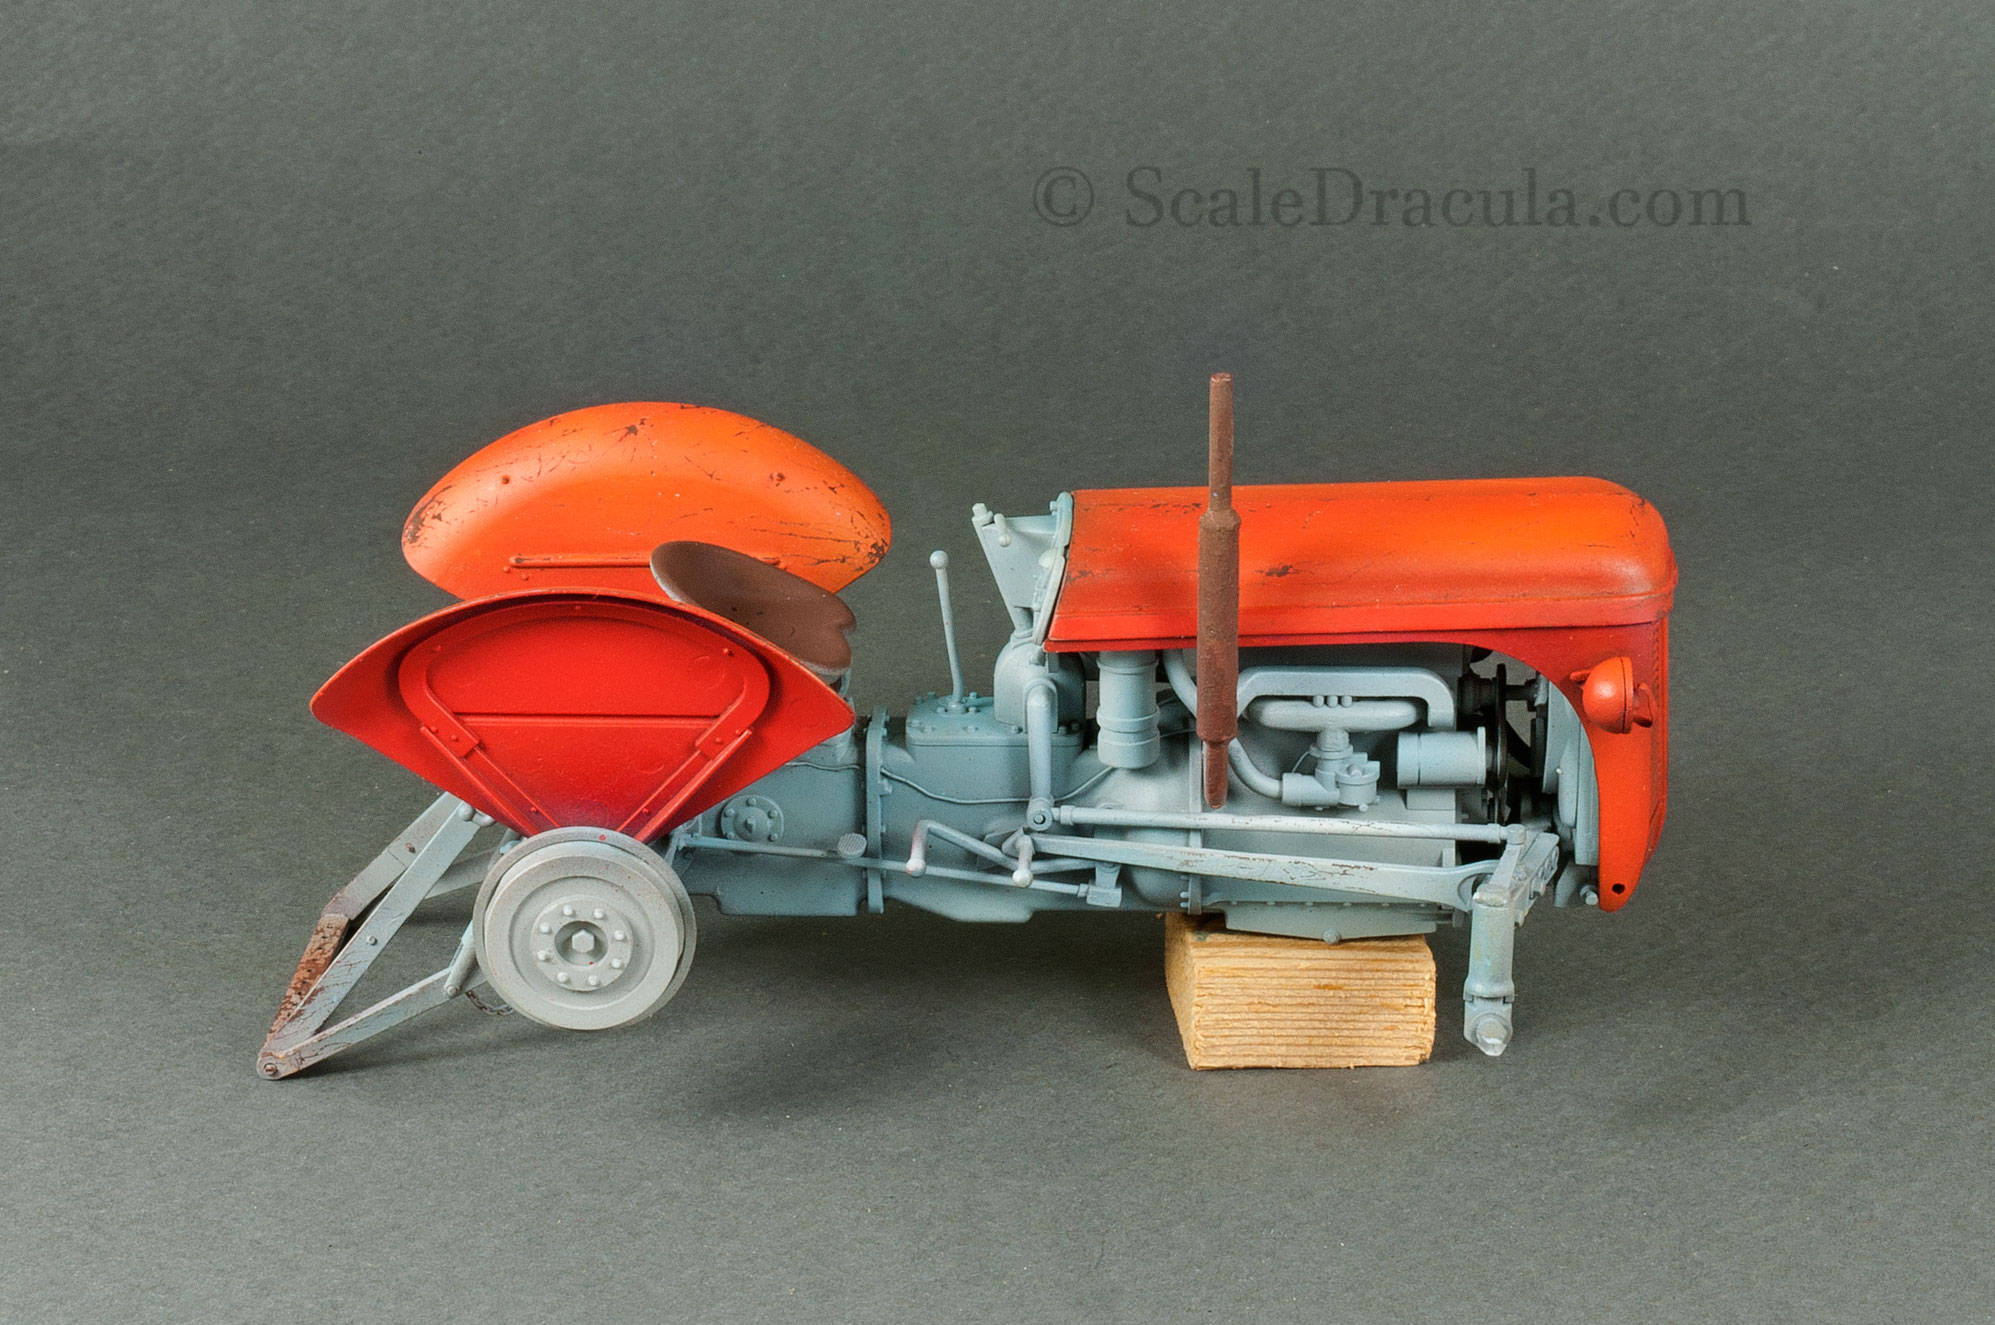
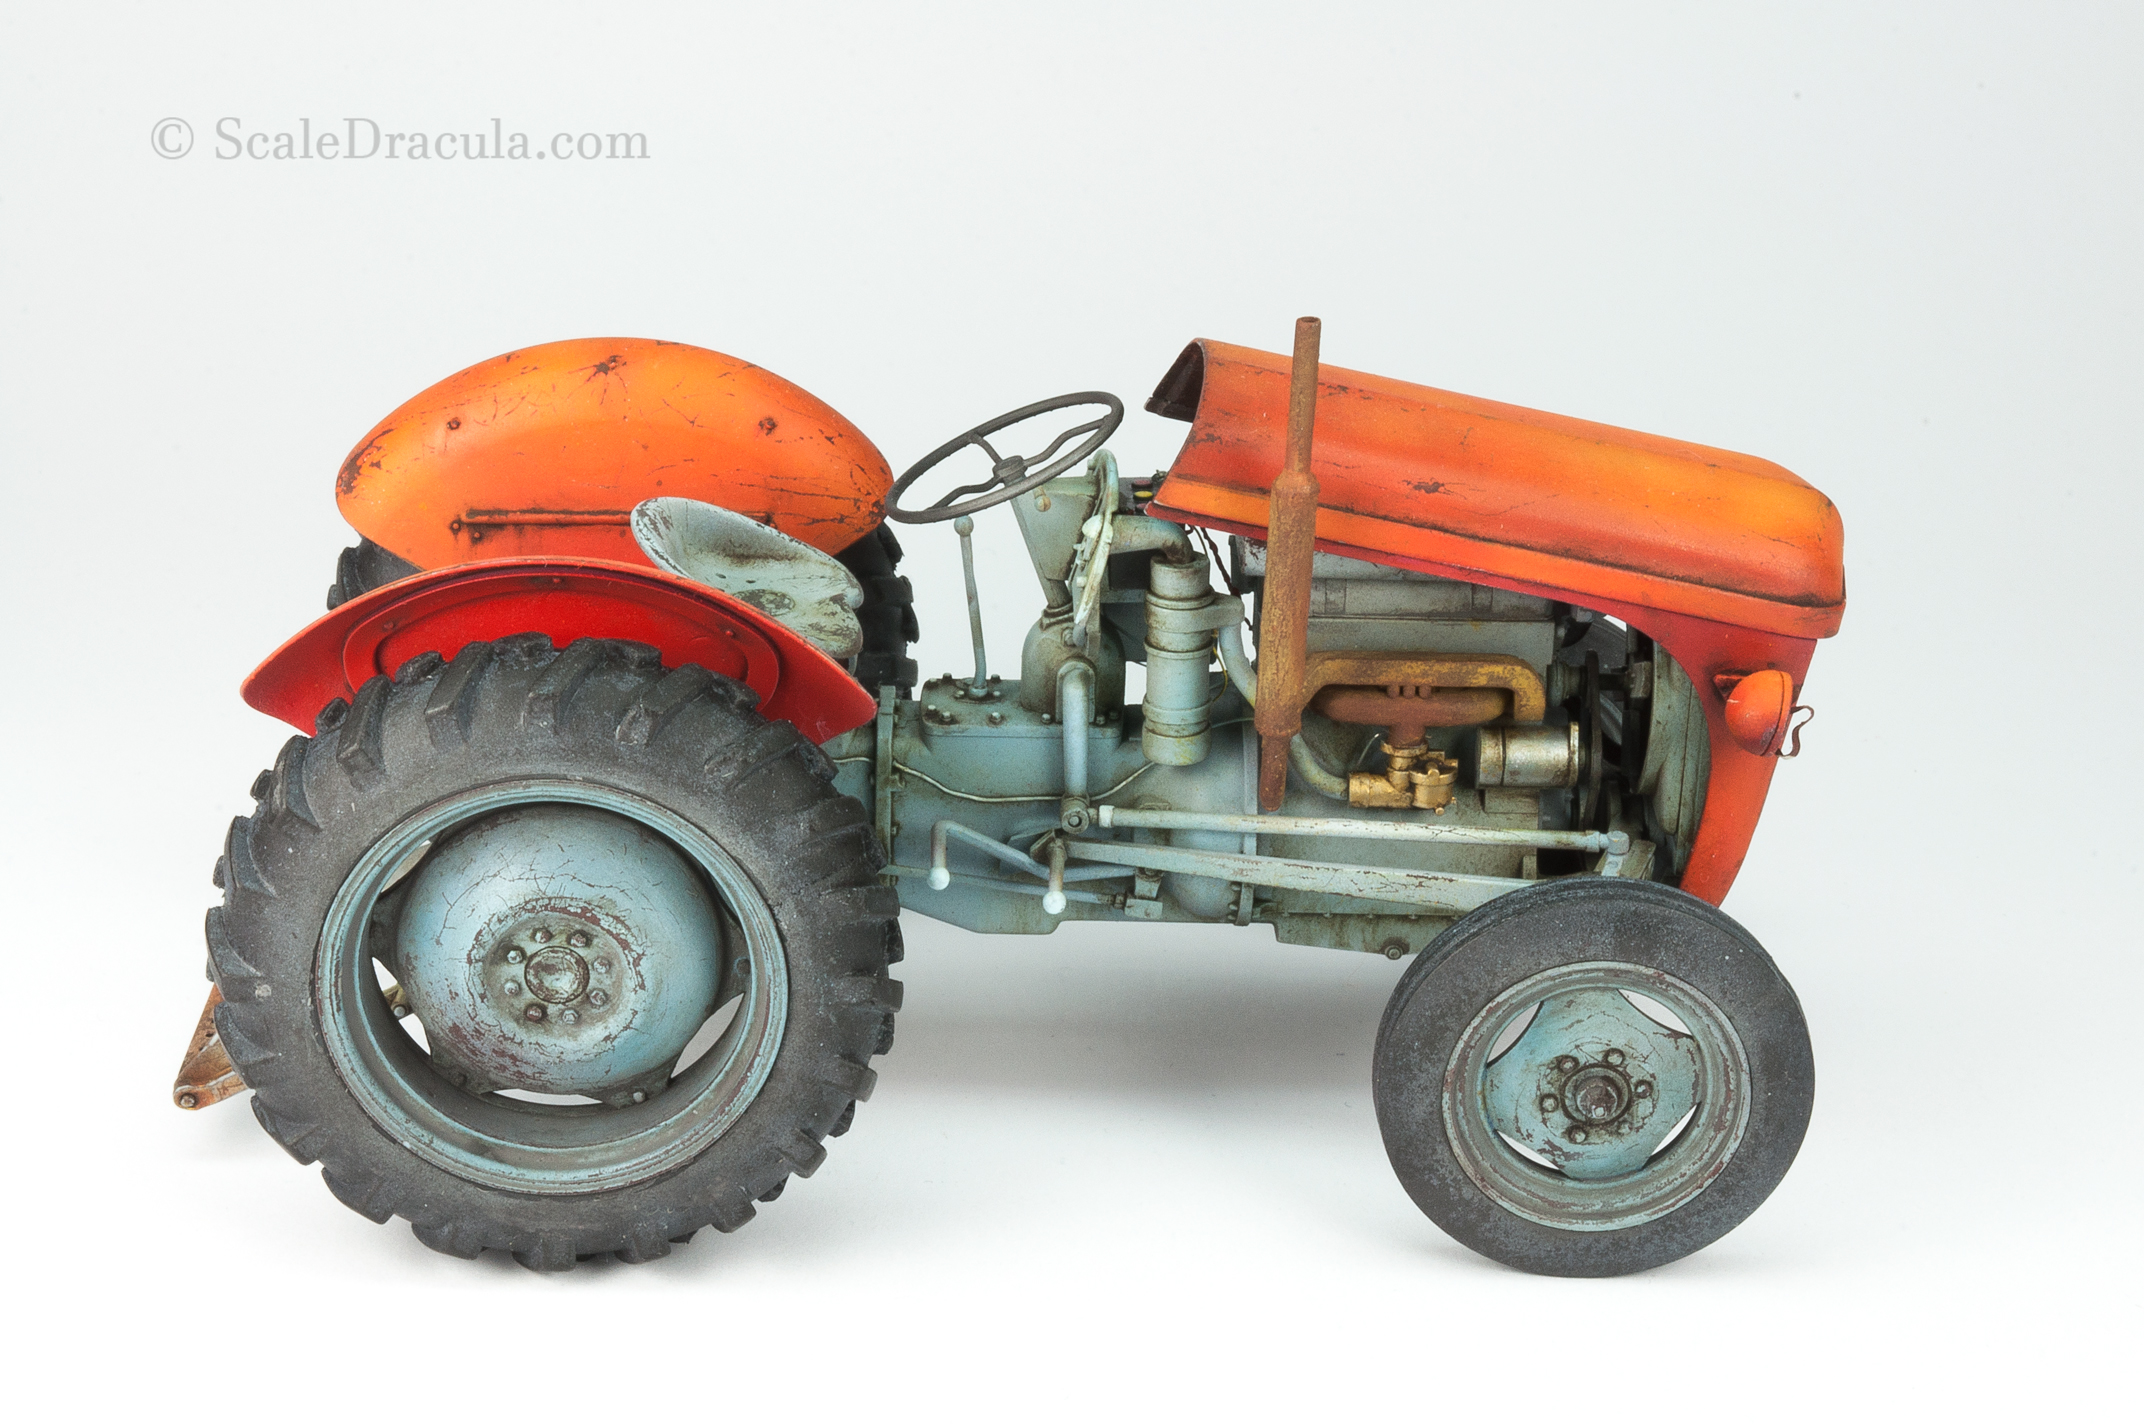
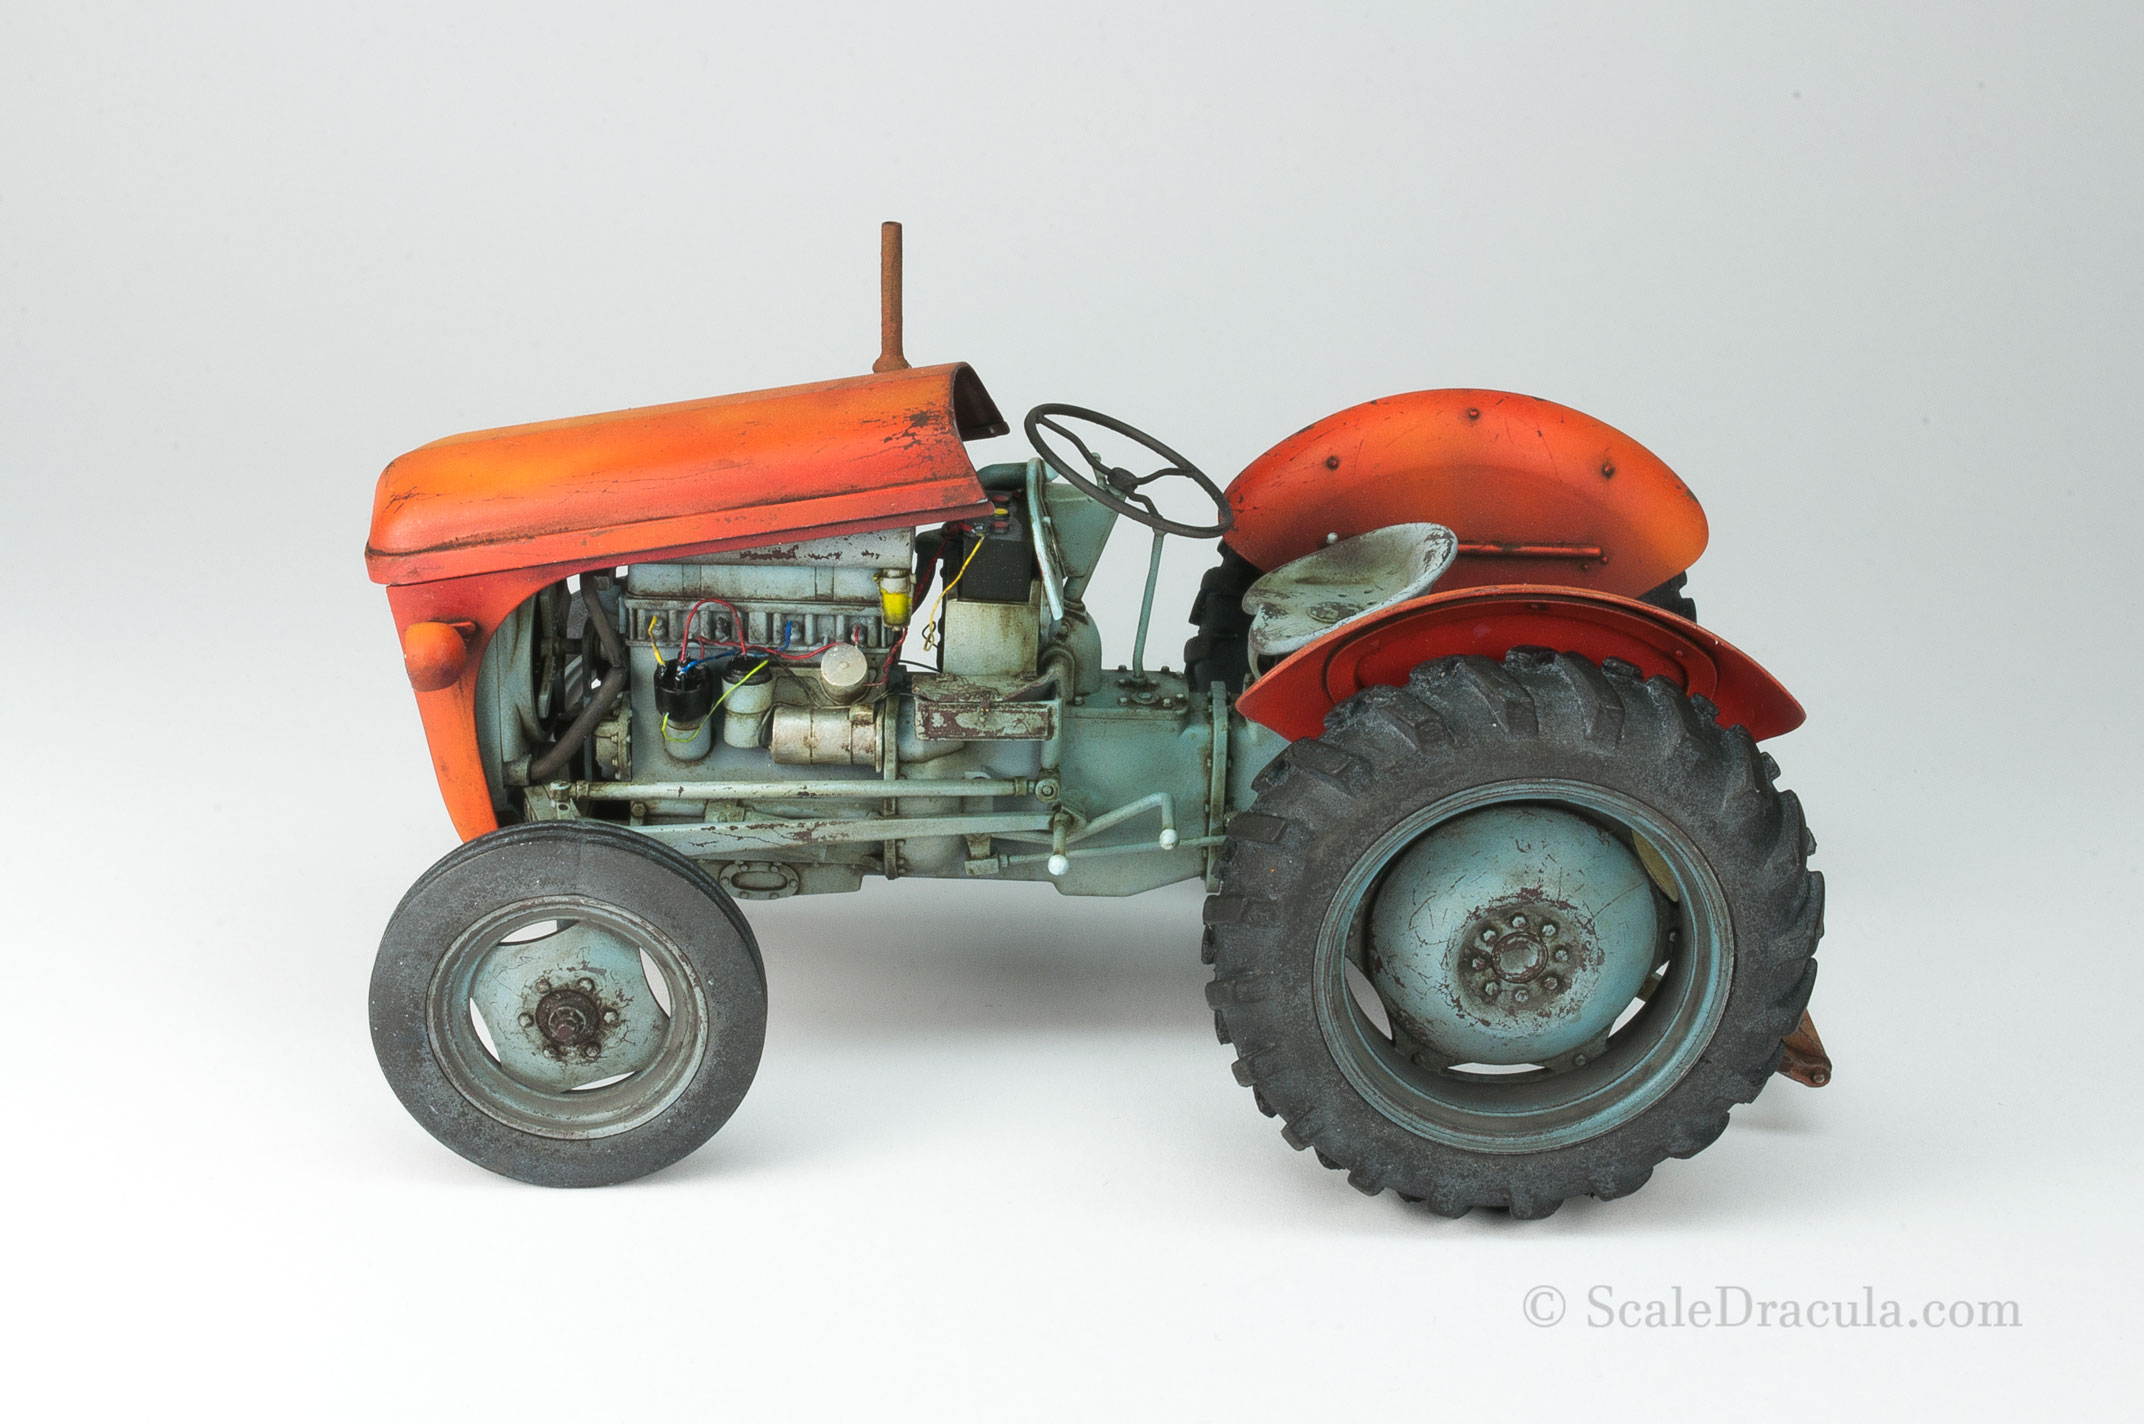
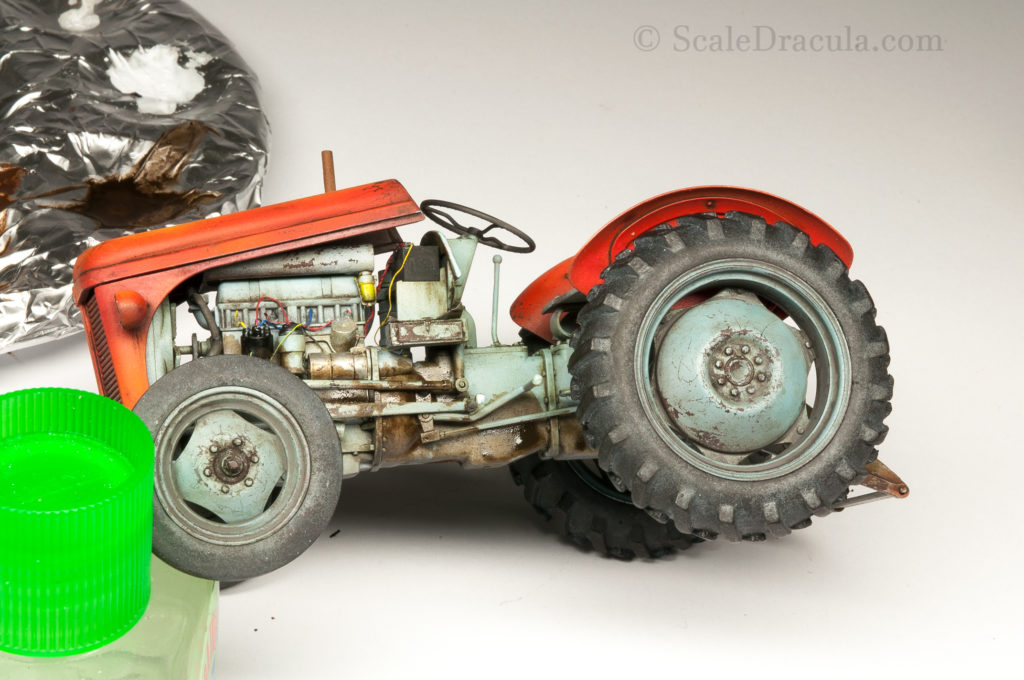
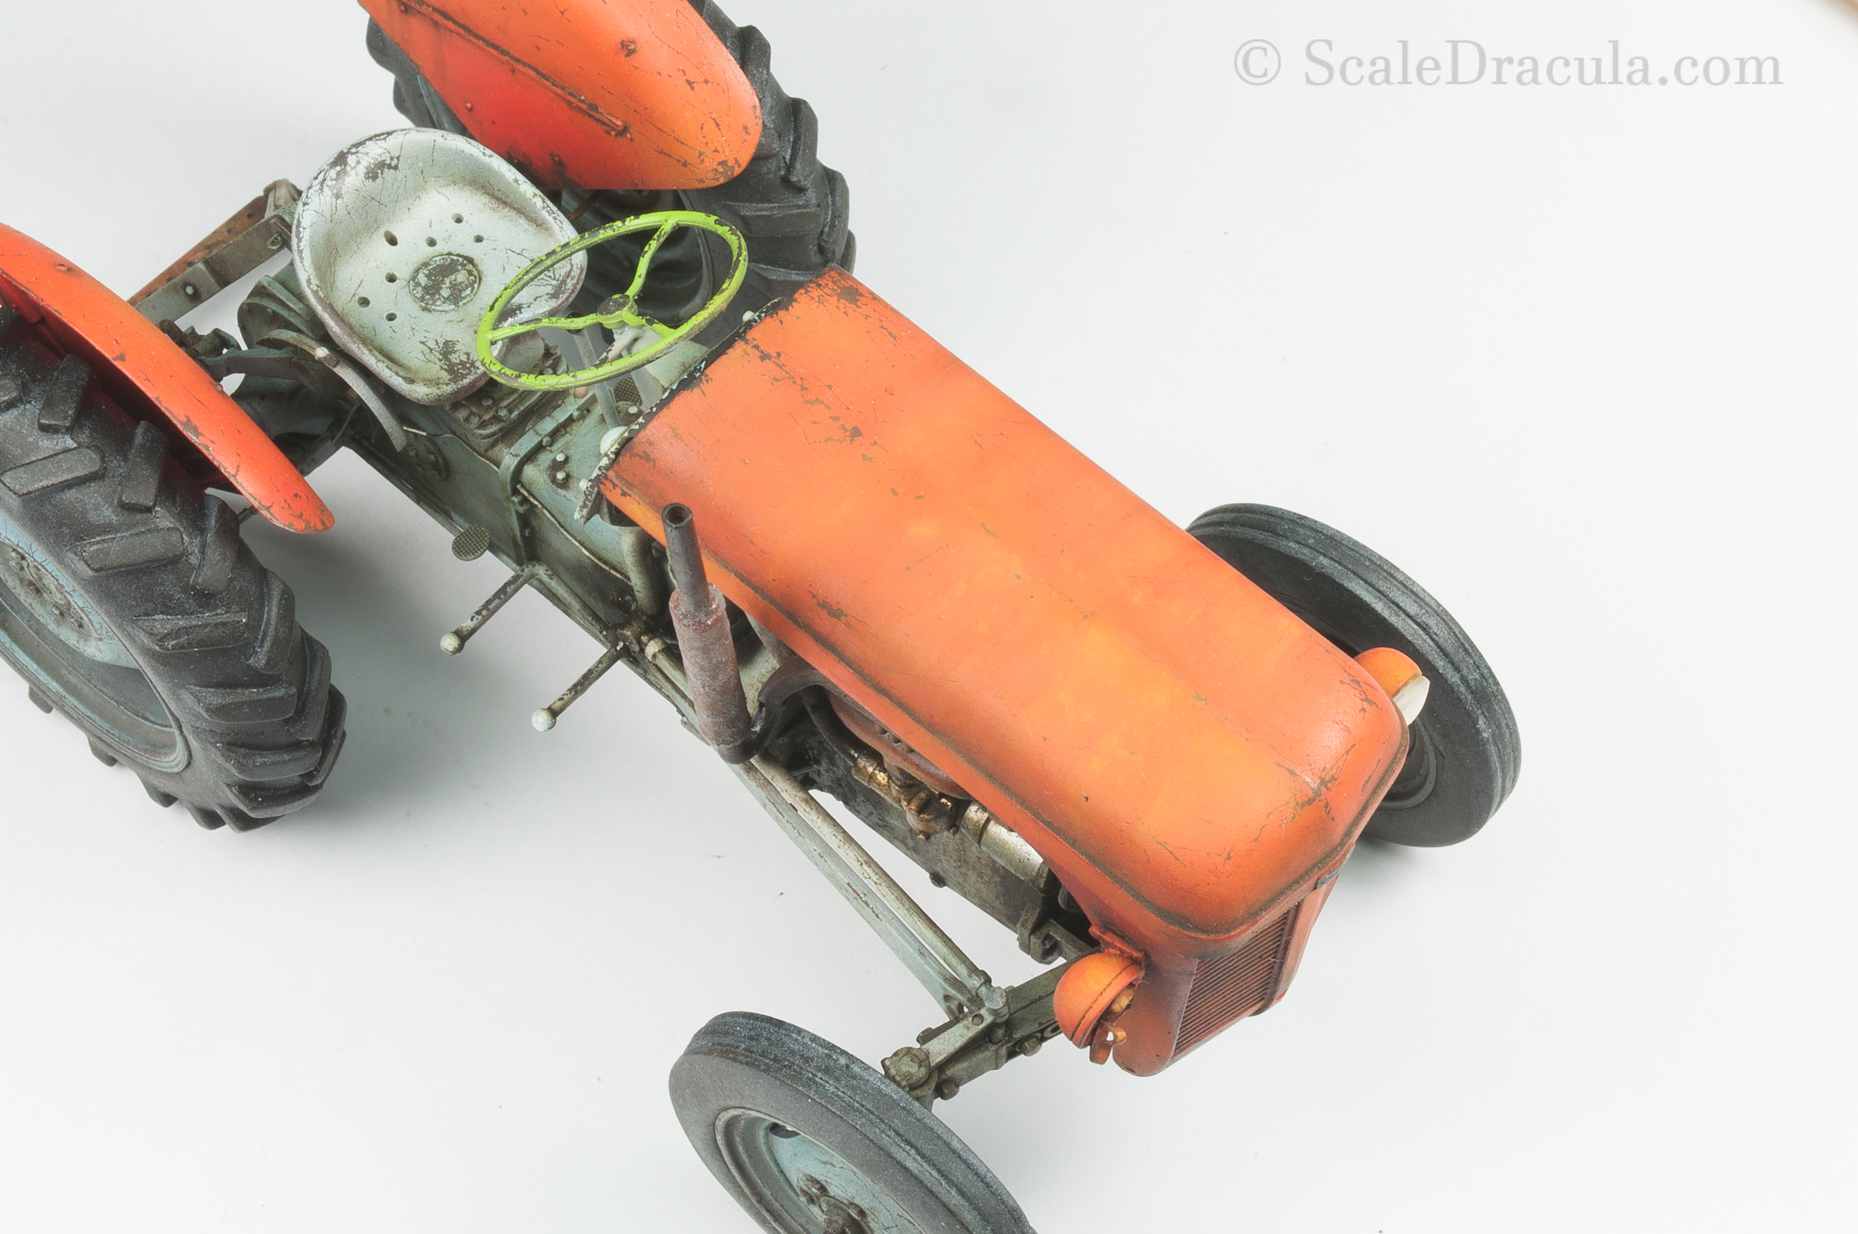
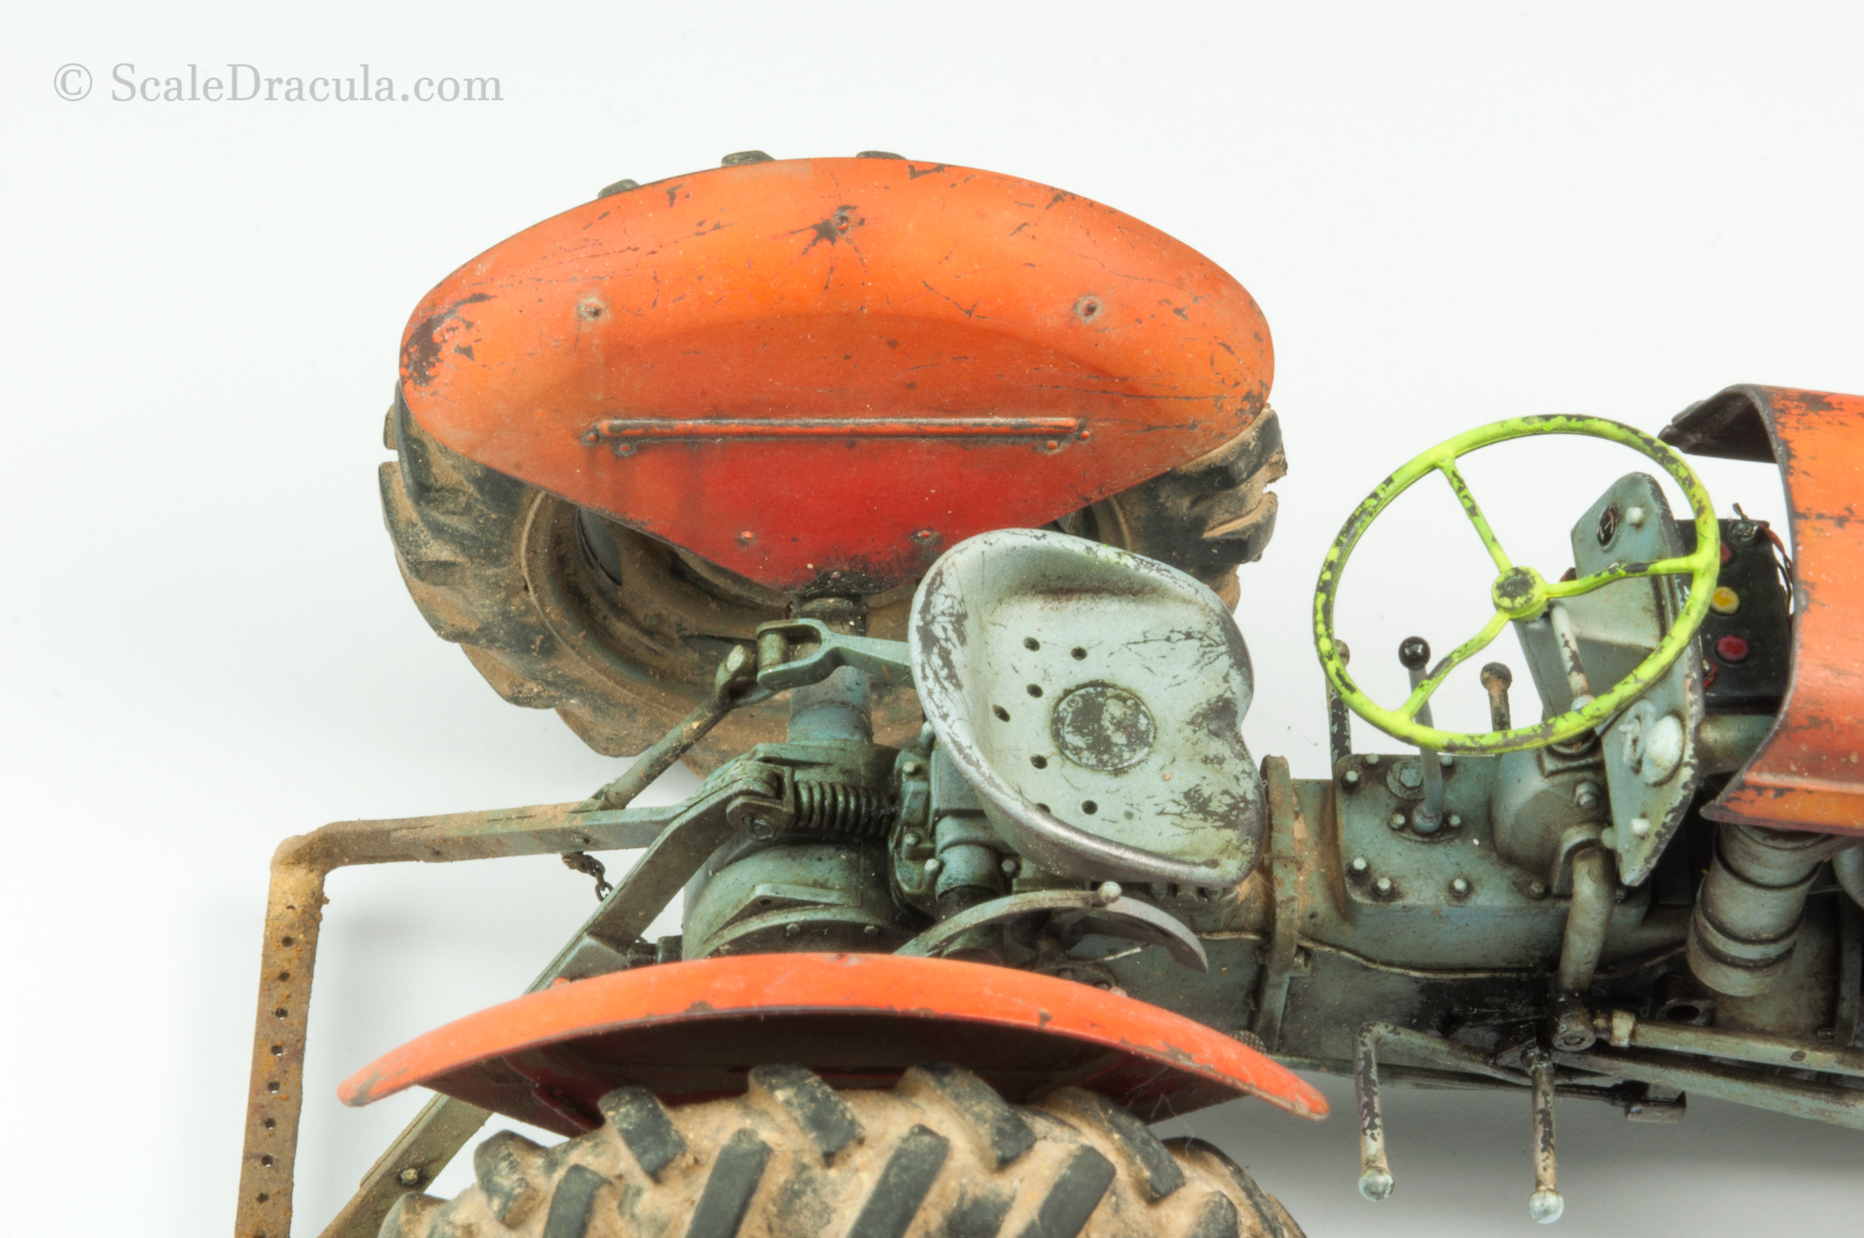
It’s finally time to assemble all the loose parts of the tractor. I really like this moment as I can finally see the bigger picture of what I’m working on. Here’s some pics of the assembled model.
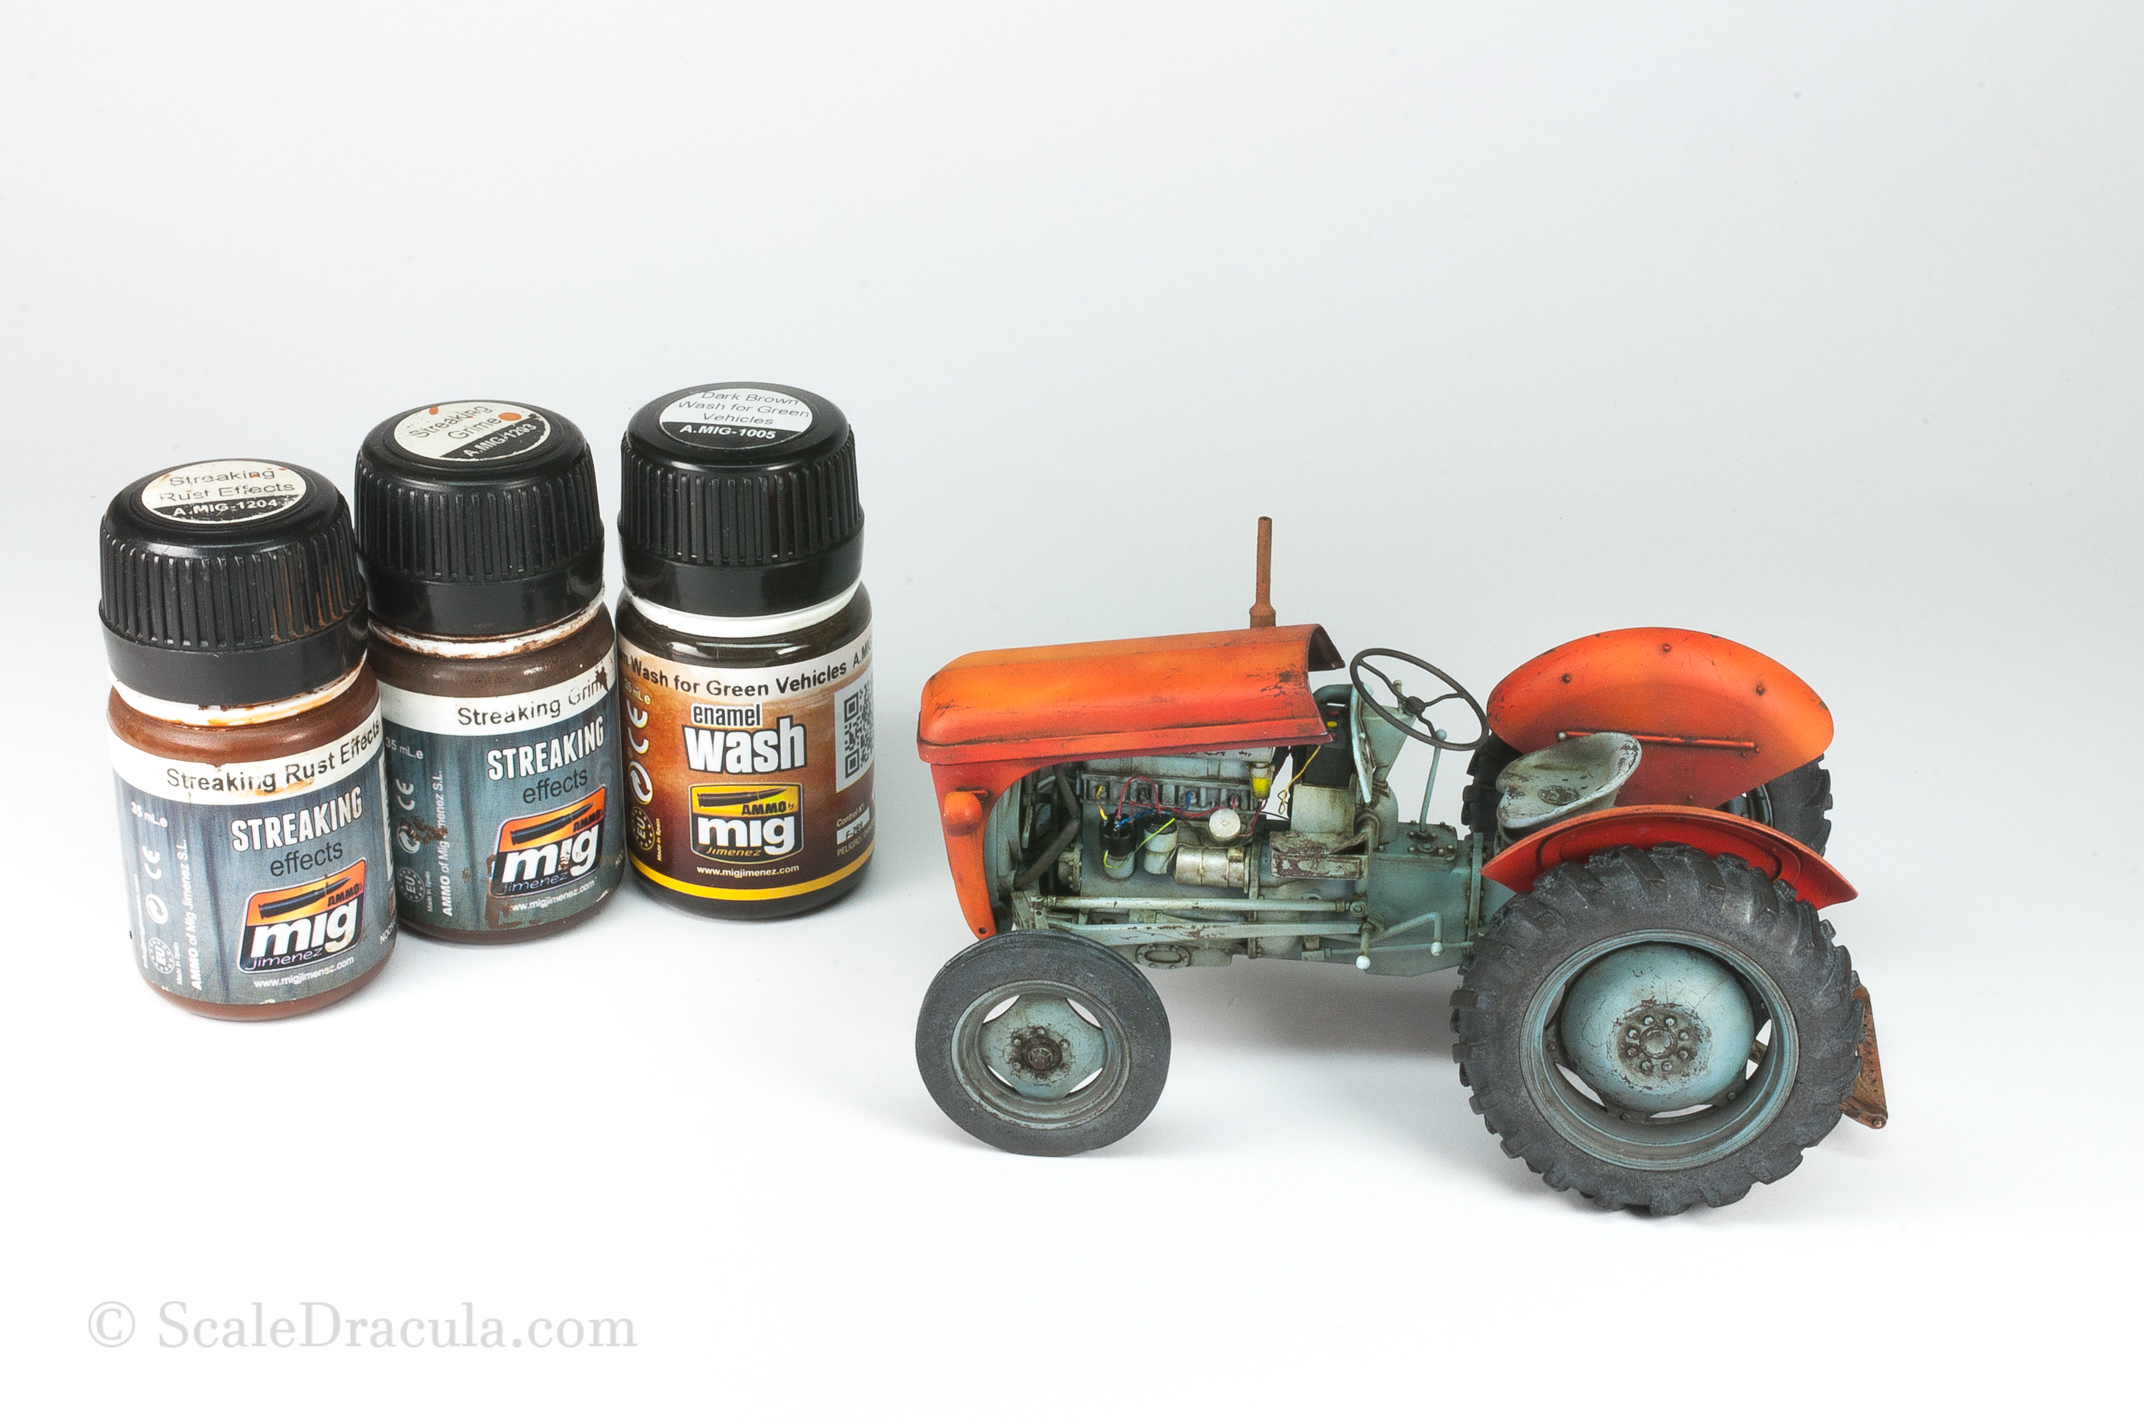
The model looks ok, but still a bit clean, isn’t it? It’s time to go a little more aggressive with the wash. I picked some more colours by Ammo Mig like Streaking Rust and Streaking Grime.
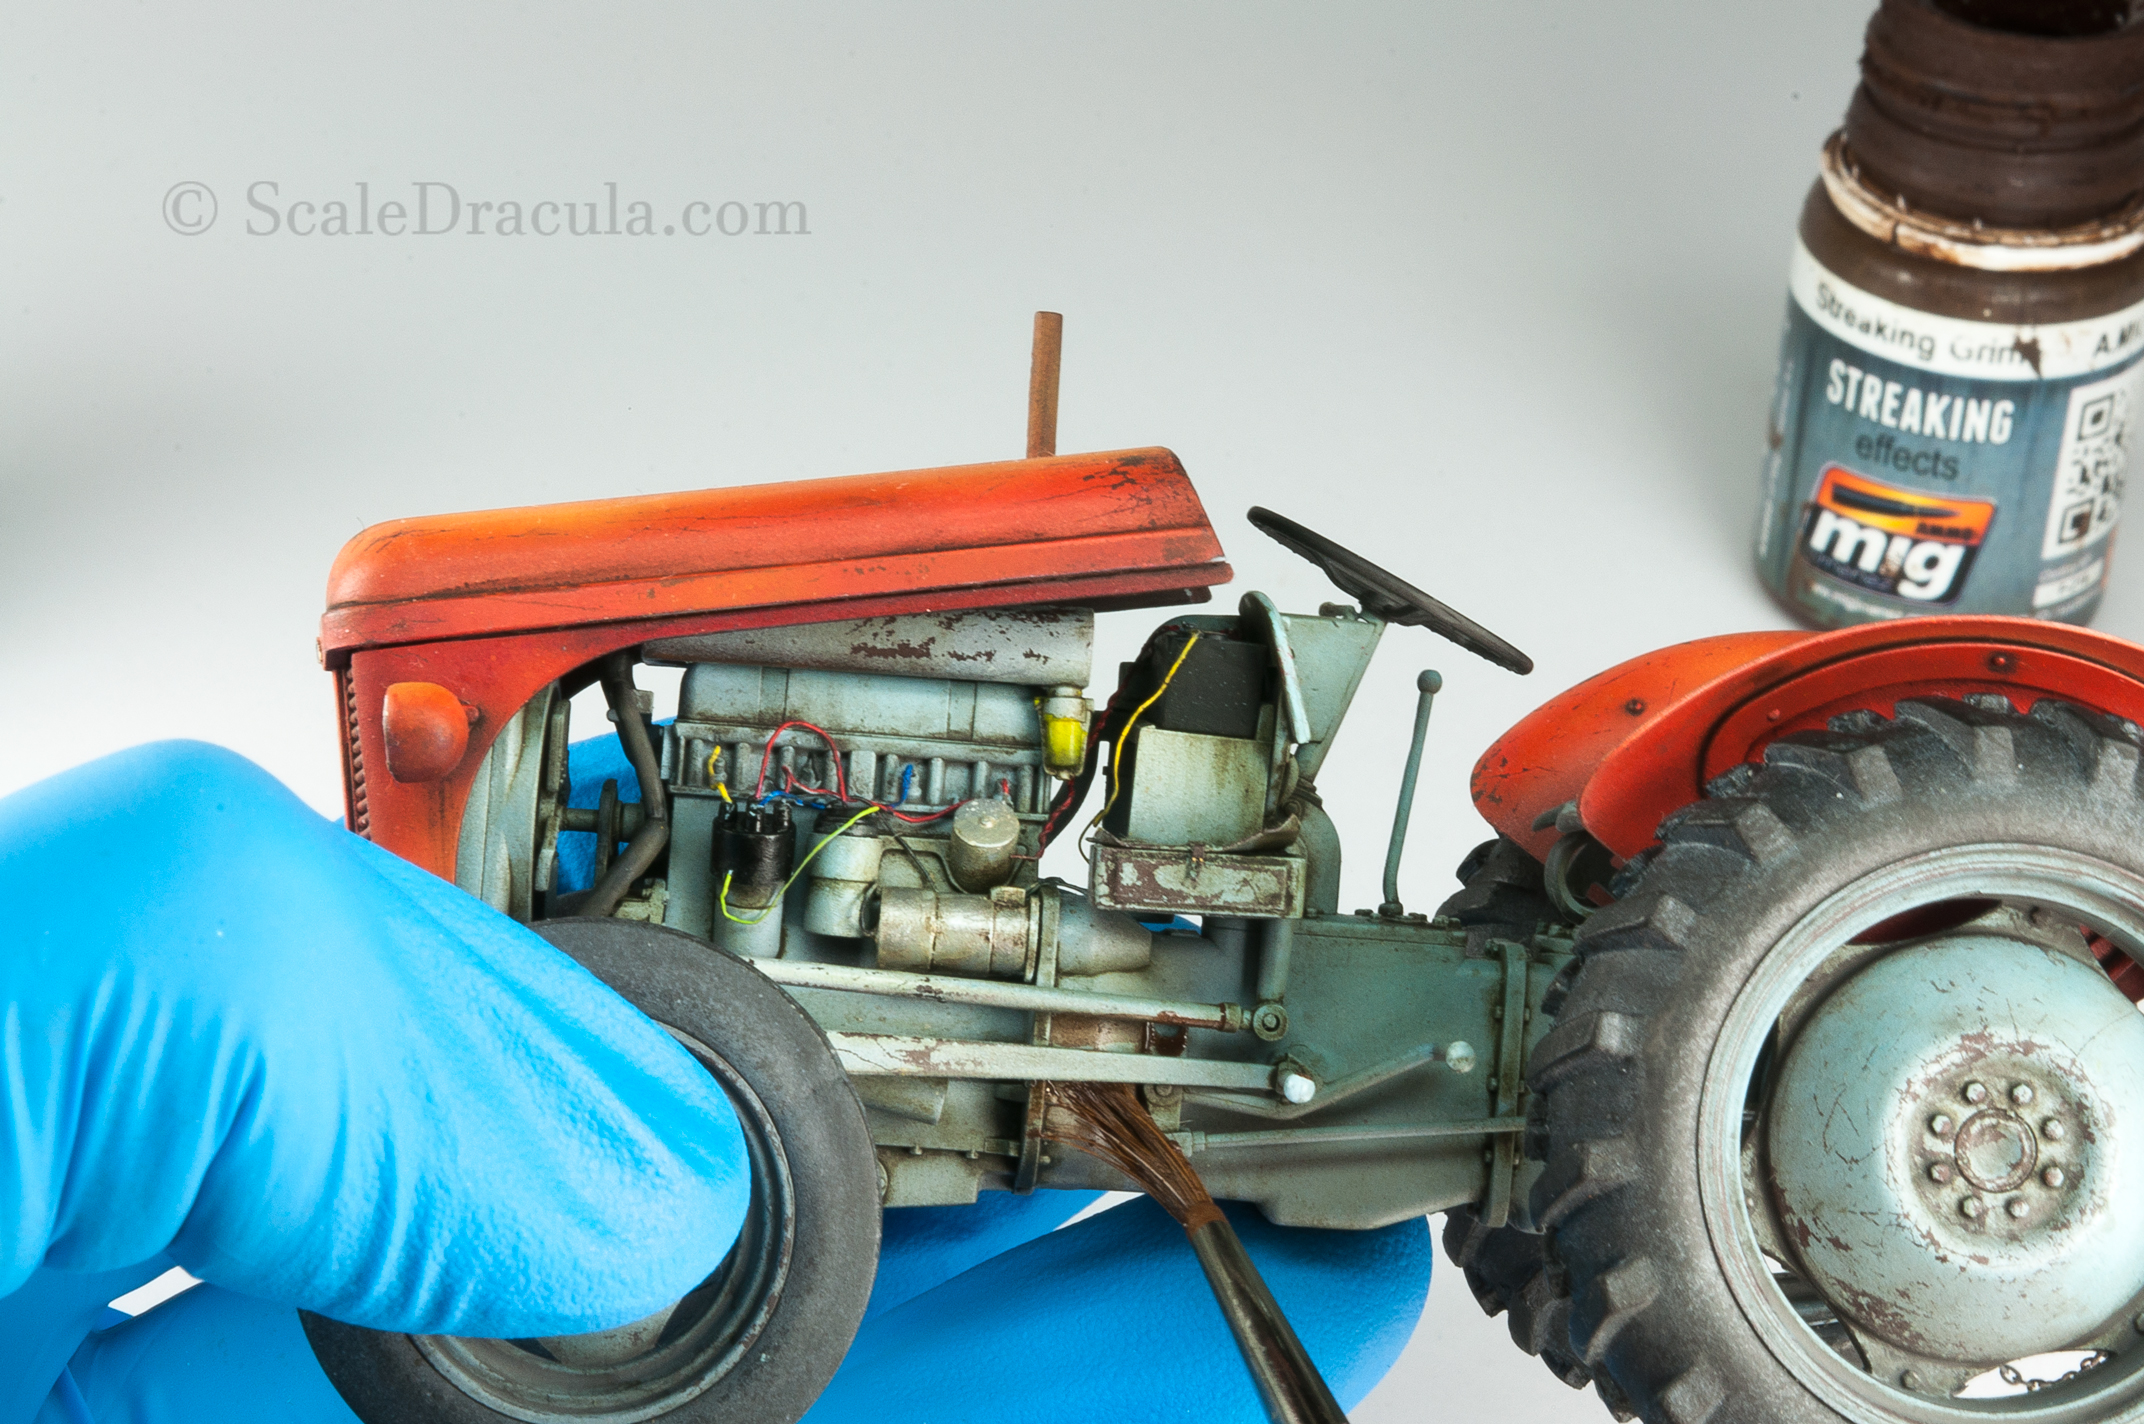
This time I’m focussing on places that are prone to collect dirt and grime. The paint is blended the usual way, but this time I’m trying to leave just a little bit more wash on the model.
It’s also a good moment to do some streaks, but I don’t want to go crazy with them as the model is pretty small. Use a small brush to draw a line going down. Then with a larger, flat brush dipped in white spirit blur the borders of the line.
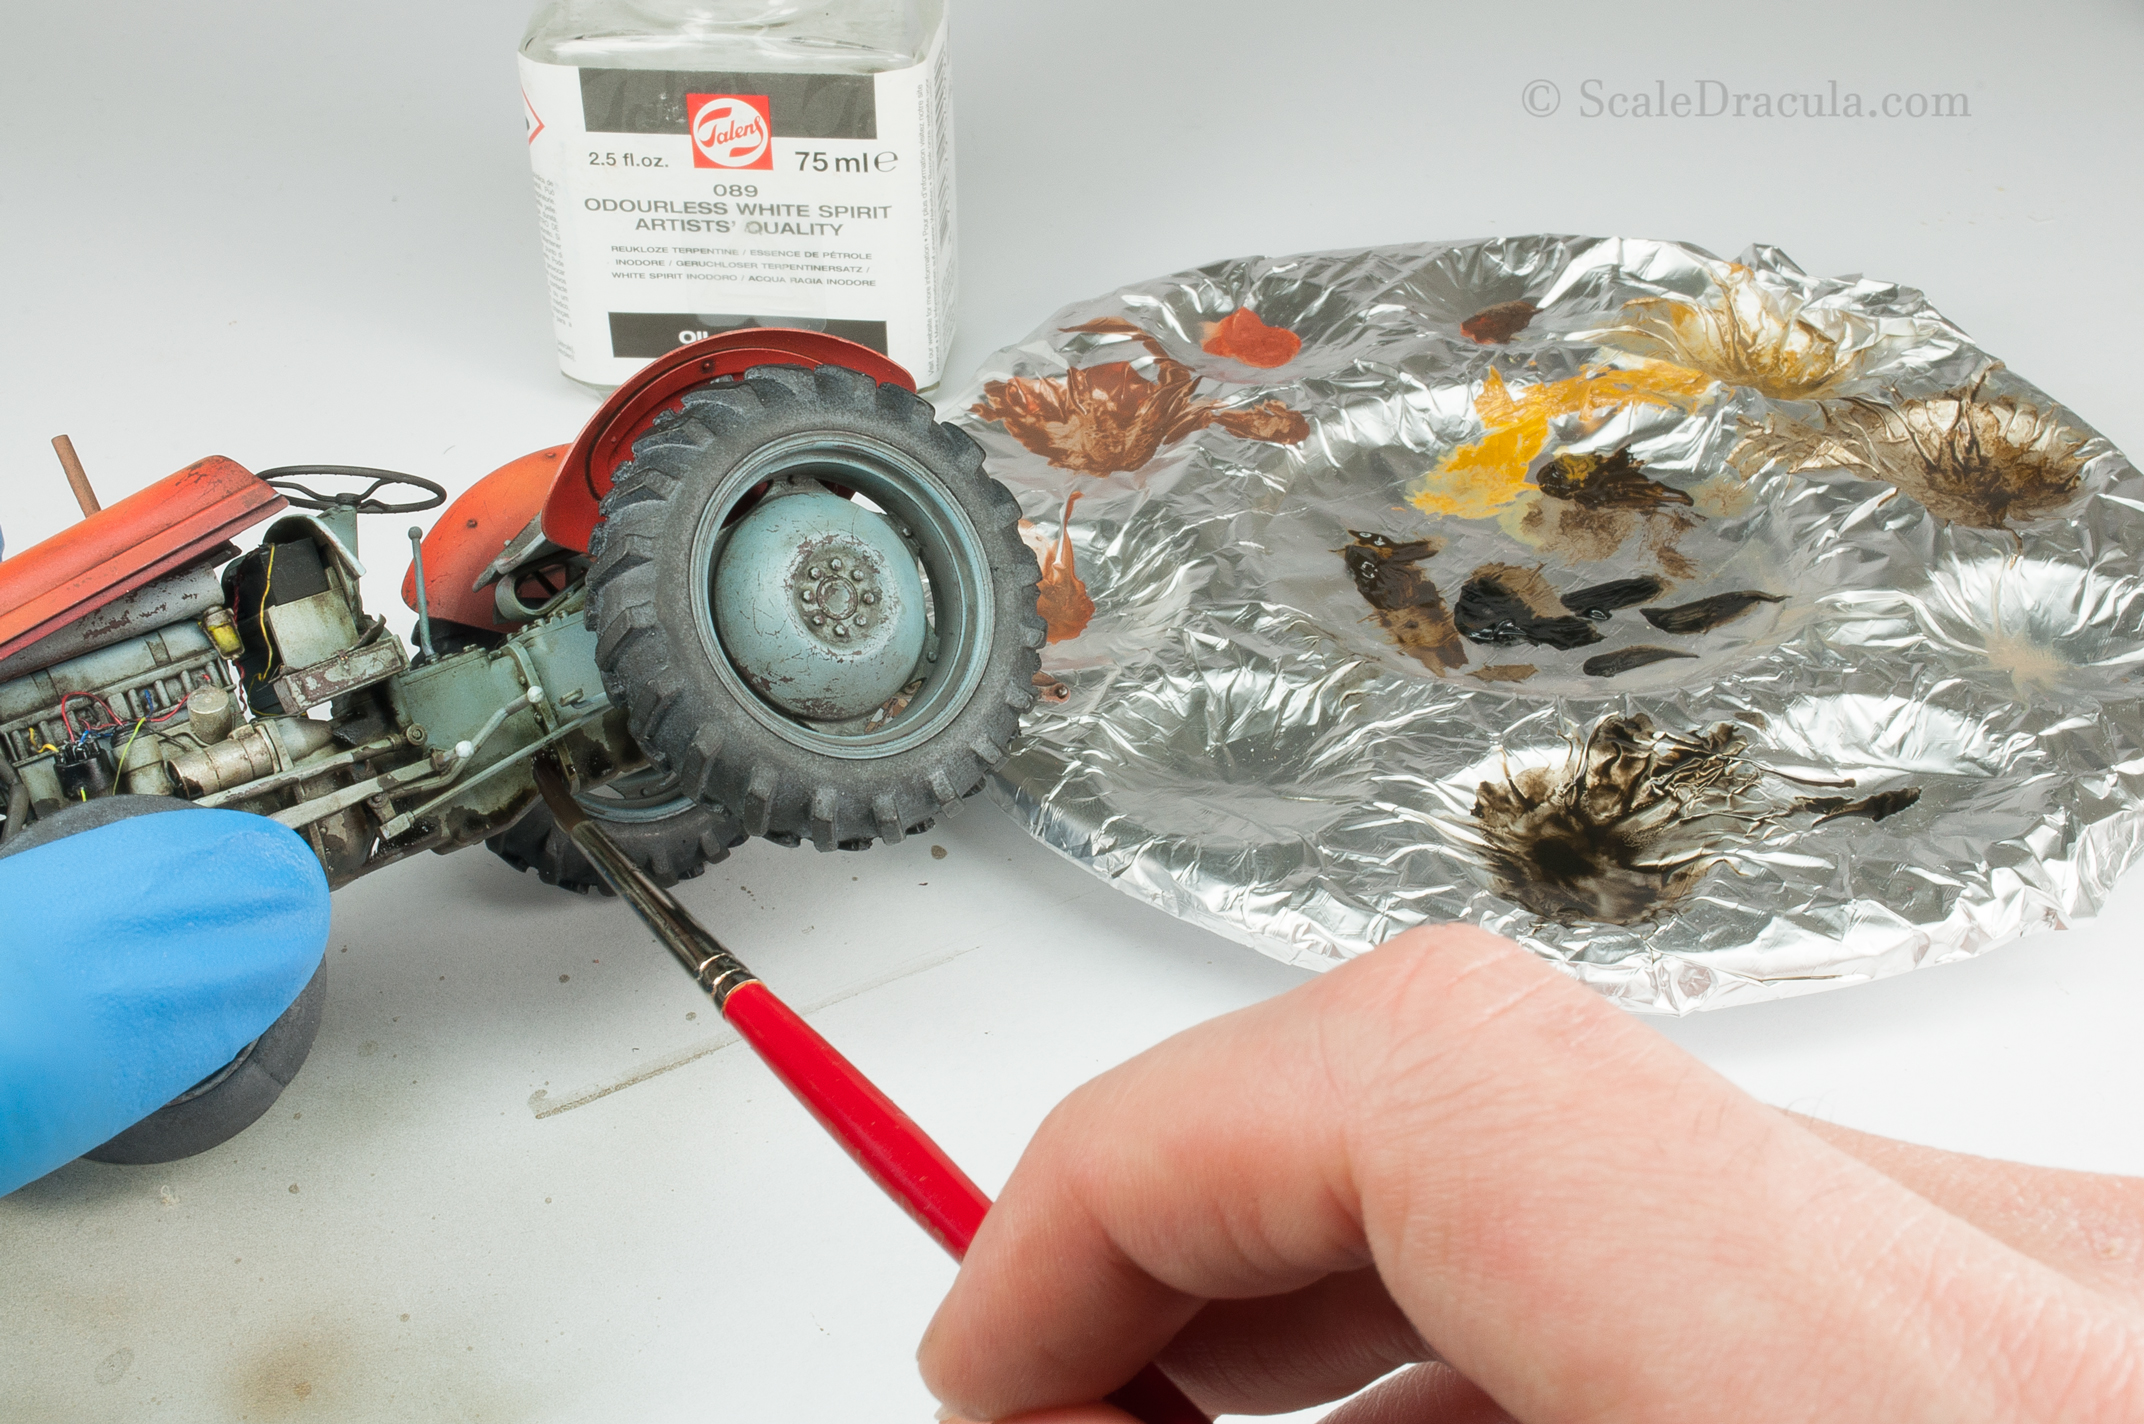
It’s time to intensify the effect even more. I switch to oils and I prepare a fairly dark mix of burnt umber and black. I focus on the places, that I worked on previously to make them even more dark and dirty.
You see what I did there? It’s like a gradual transition of washes. The first one was just supposed to emphasize some details of the model, then I started to build up the dirt and grime. But as I was using similar colours all the time (only a bit darker every step of the way) I was able to achieve a smooth effect.
After that I realized I missed some places during the chipping process. This time I did them with a brush and a dark brown paint (Vallejo’s German Black Brown). For job like that you need a good quality pointy brush and a pretty thick paint to make chips with good contrast.
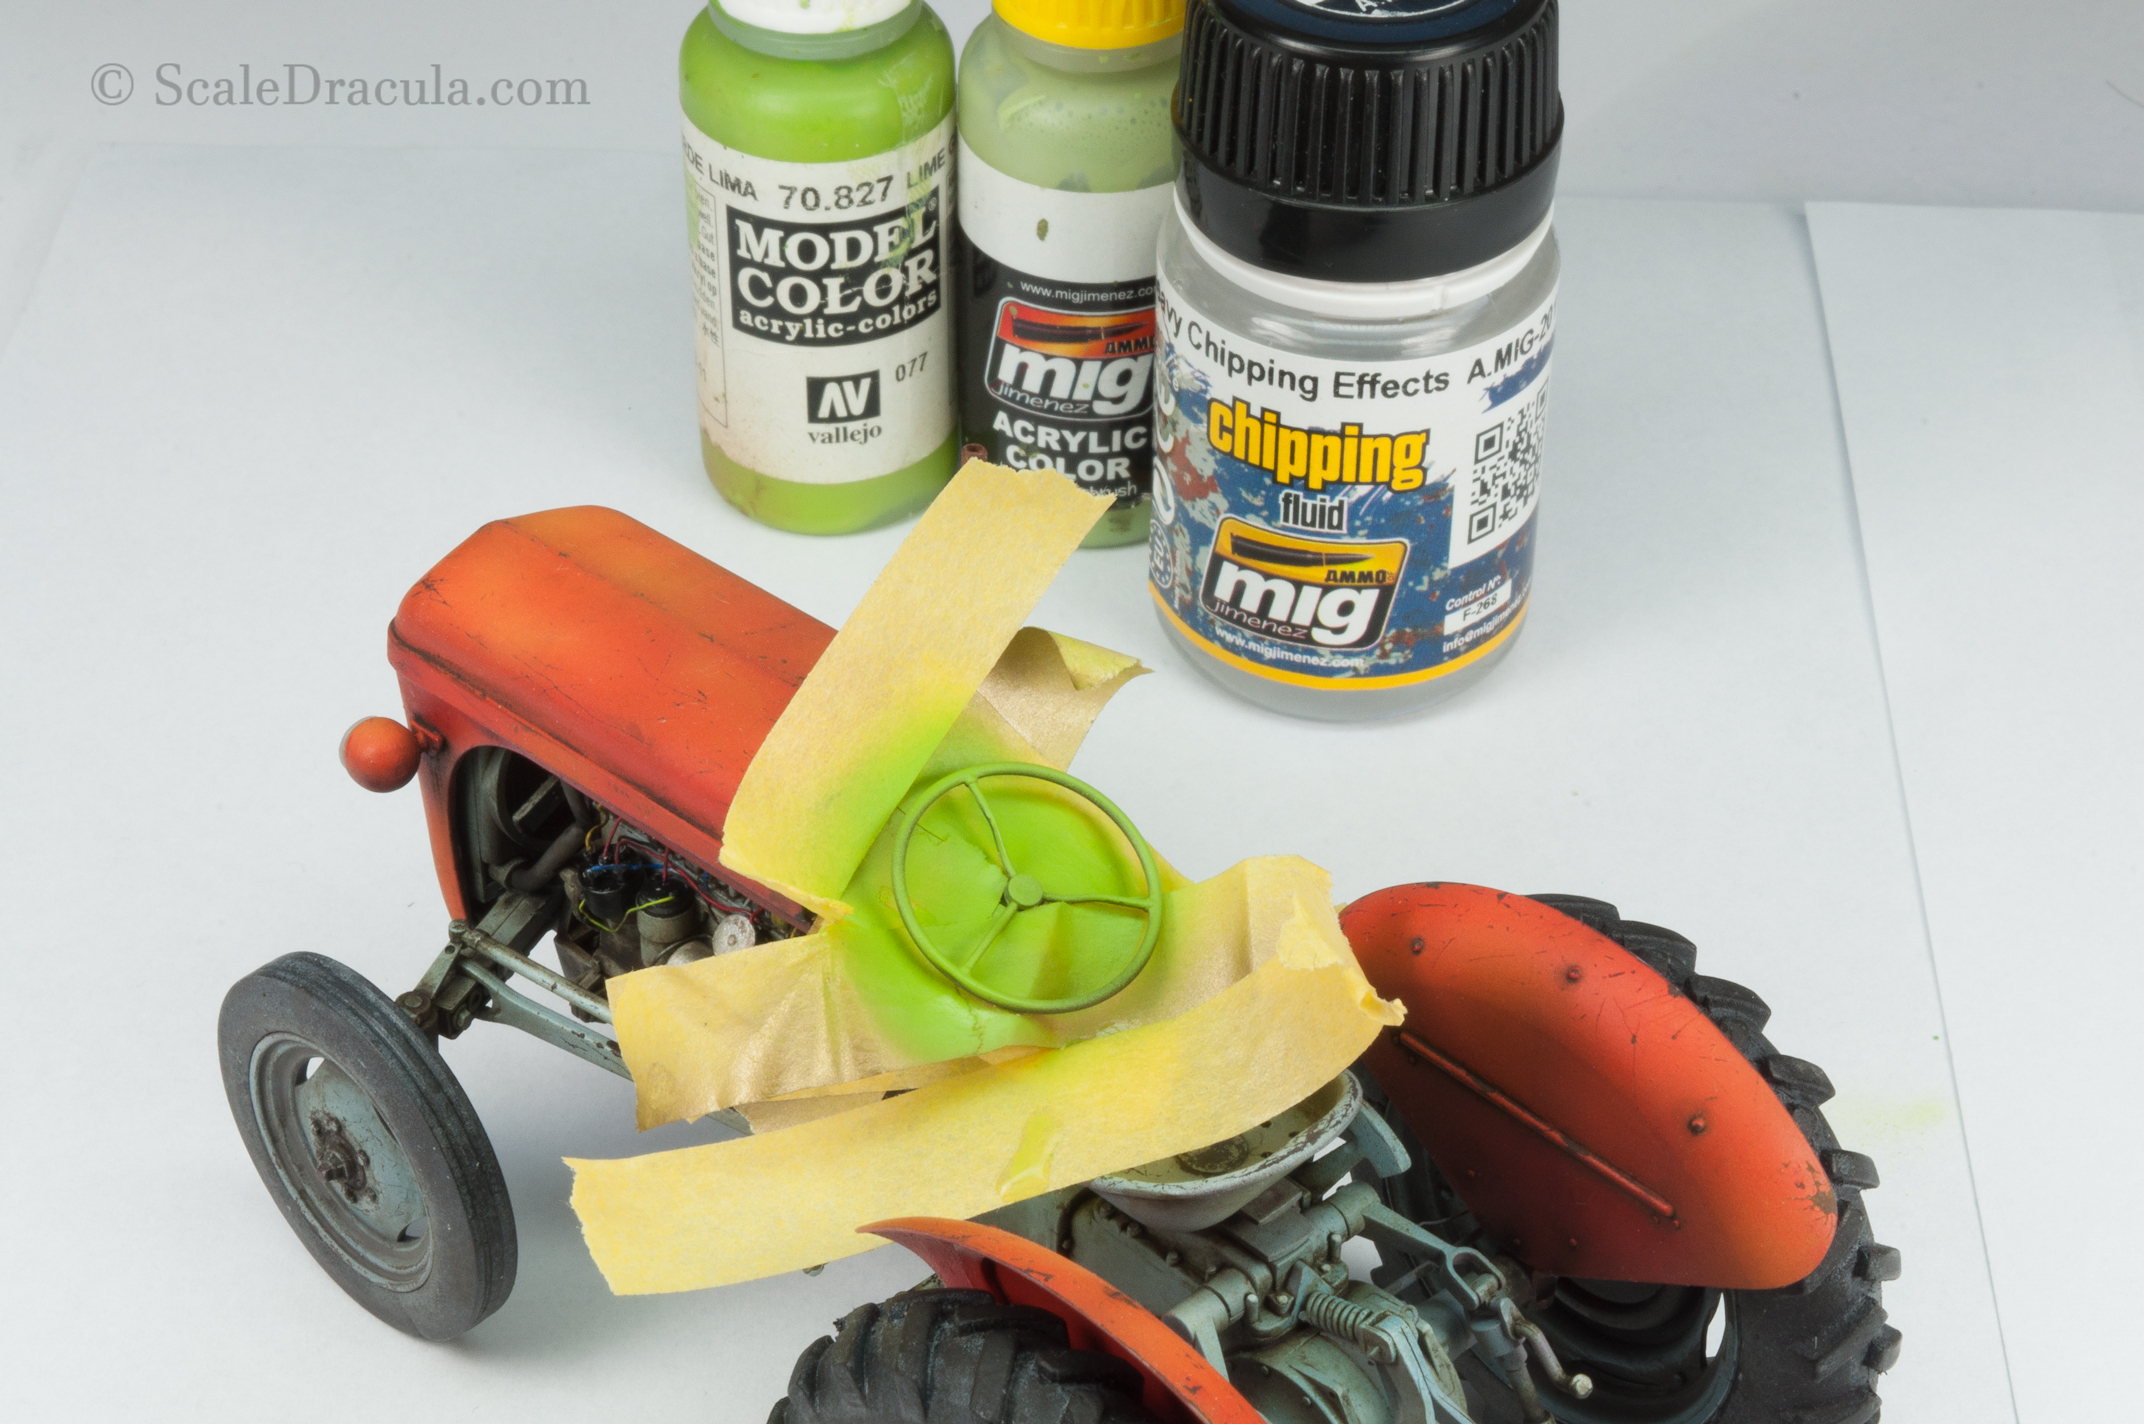
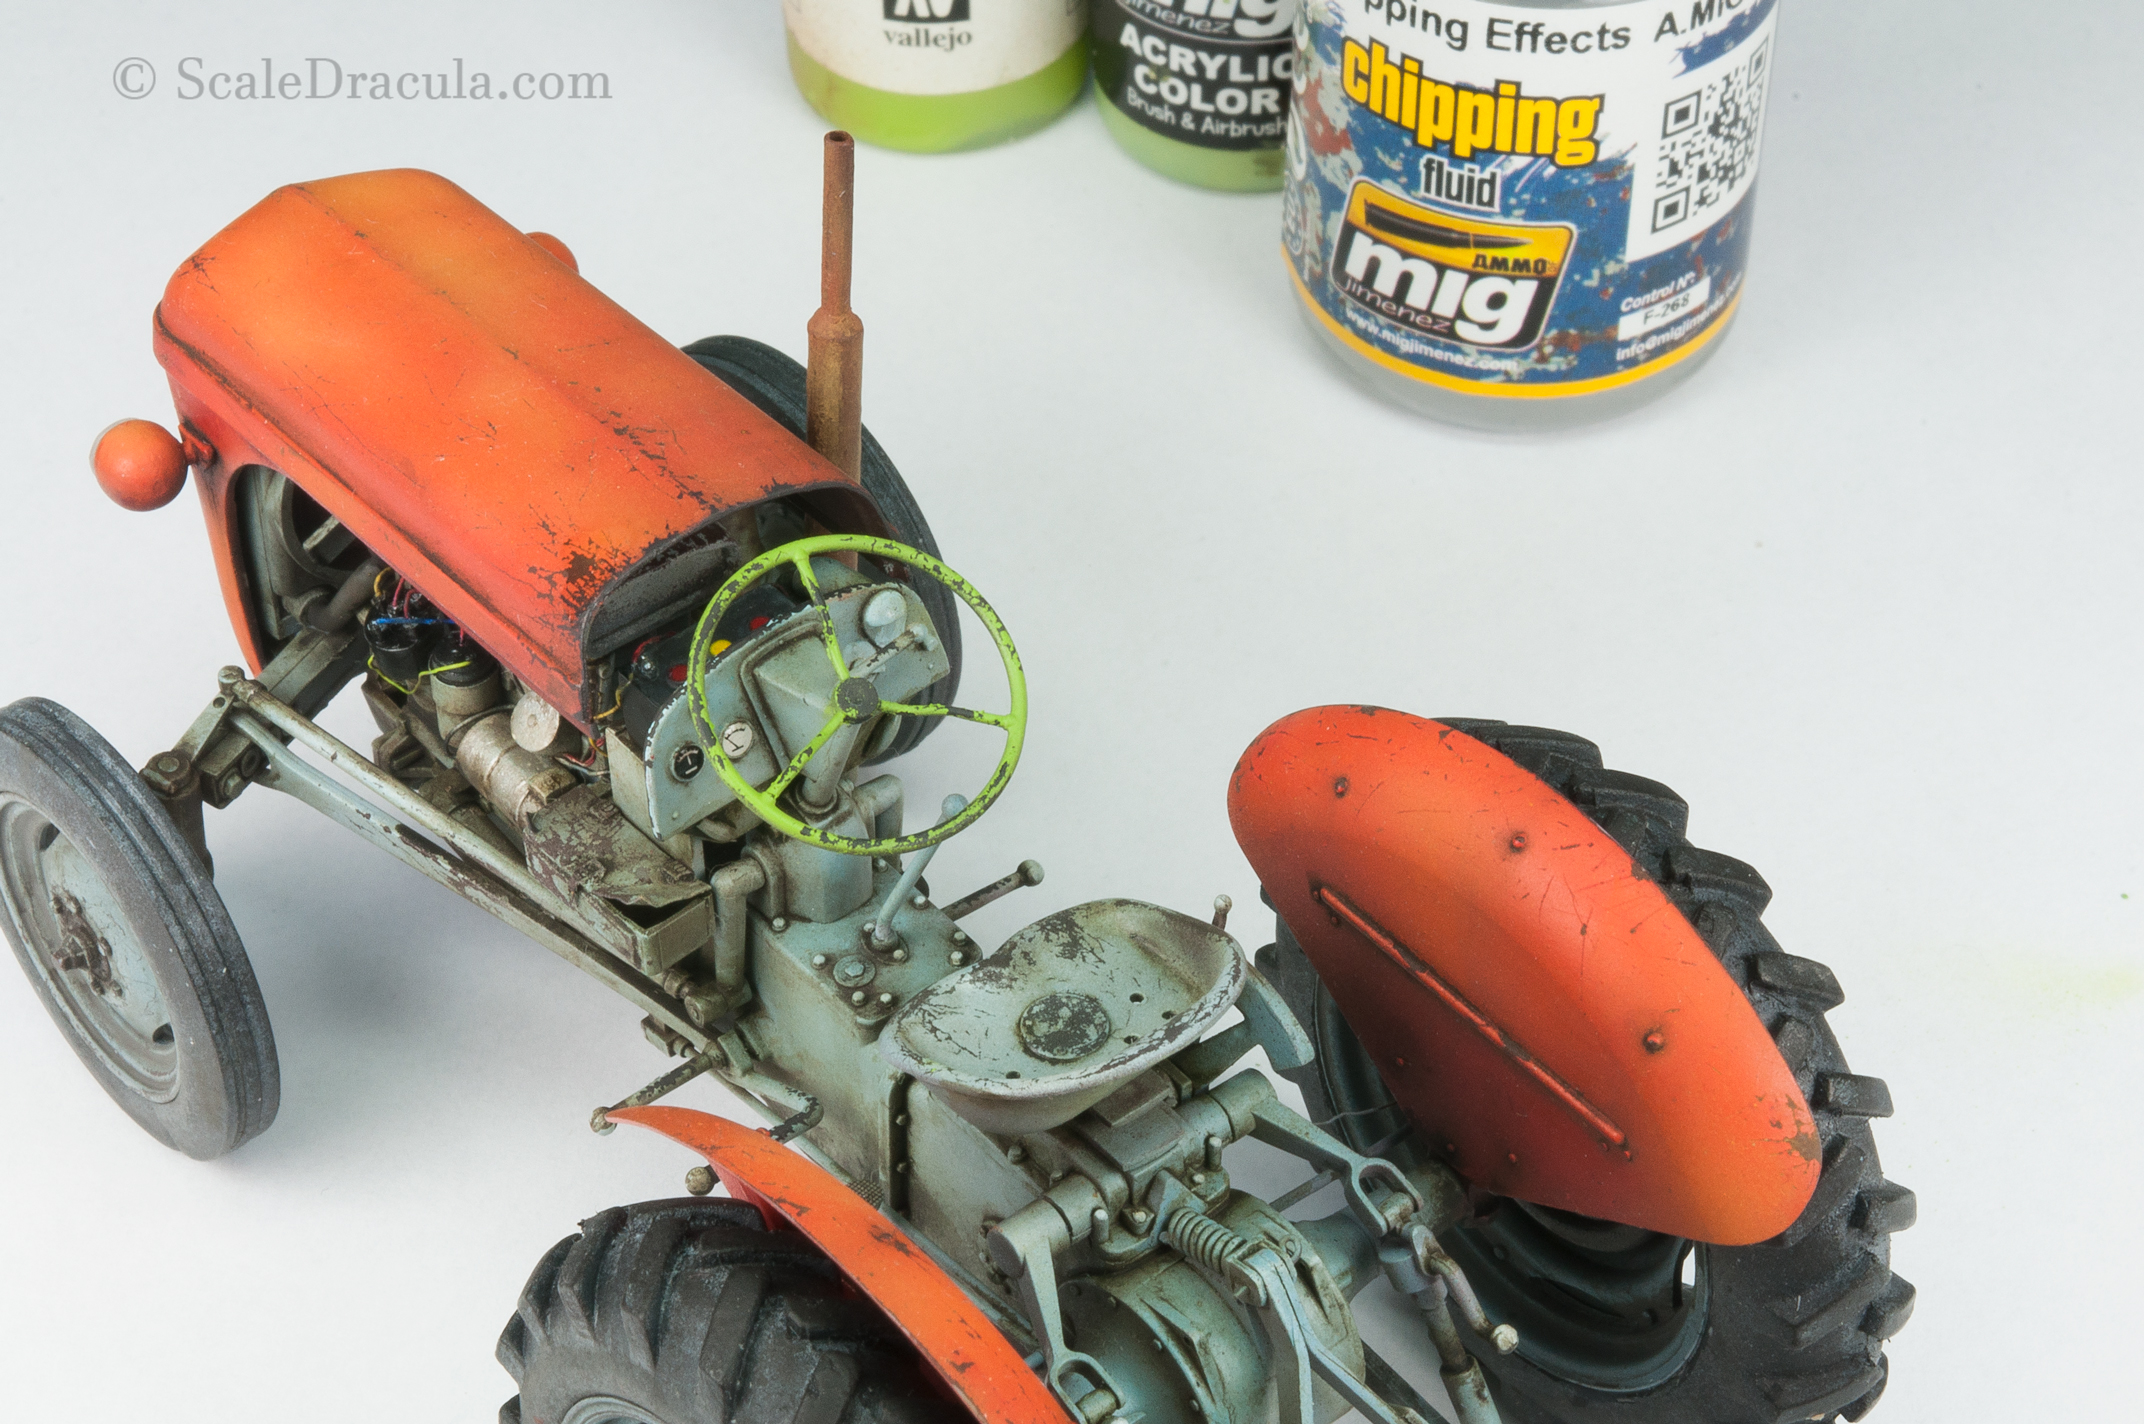
The black steering wheel seemed a bit boring to me. So I decided to paint it in some bright eye-catching colour. Let’s assume the owner of this tractor was a really funky farmer.
I did a mix of Vallejo Lime Green and Ammo Mig Light Green (at least I think it’s Light Green- the names on these bottles come off really easy). Vallejo paints, based on acrylic resin, aren’t the ideal choice for hairspray technique as they are pretty much out of control. But this time I didn’t really mind.
I decided to make my Ferguson even more dirty. Here’s a cool technique I’ve learned from an Ammo Mig video.
I sprinkle all the chosen places with black pigment. Then I use Ammo Mig Engine Oil to fix the pigment in place. Repeat the process couple of times to get an extremely realistic effect of glossy engine grime deposits. Remember to choose the places of application wisely. You need to blend the effect with the previous dark wash.
You may have noticed that I’ve started to paint the rust. I had to work in a hurry though as I used acrylics. So there was no time to take photos. But I will explain everything later.
It’s time to do some fading for which I picked up the Ammo Mig recent product: the Airbrusher. I won’t go into details about the product itself, maybe I’ll do a separate post about it.
I chose some corresponding colours, red and yellow, and applicated them accordingly to achieve darker and lighter shades. This looks a little bit like the oil dot technique, but I don’t randomize the colours, I rather plan ahead and enhance the already existing contrasts.
Then I use White Spirit to blur and blend the colour dots. Remember to clean you brush constantly after almost every stroke.
The result is a faded paint on the hood. The effect is rather discreet, but that’s what I wanted.
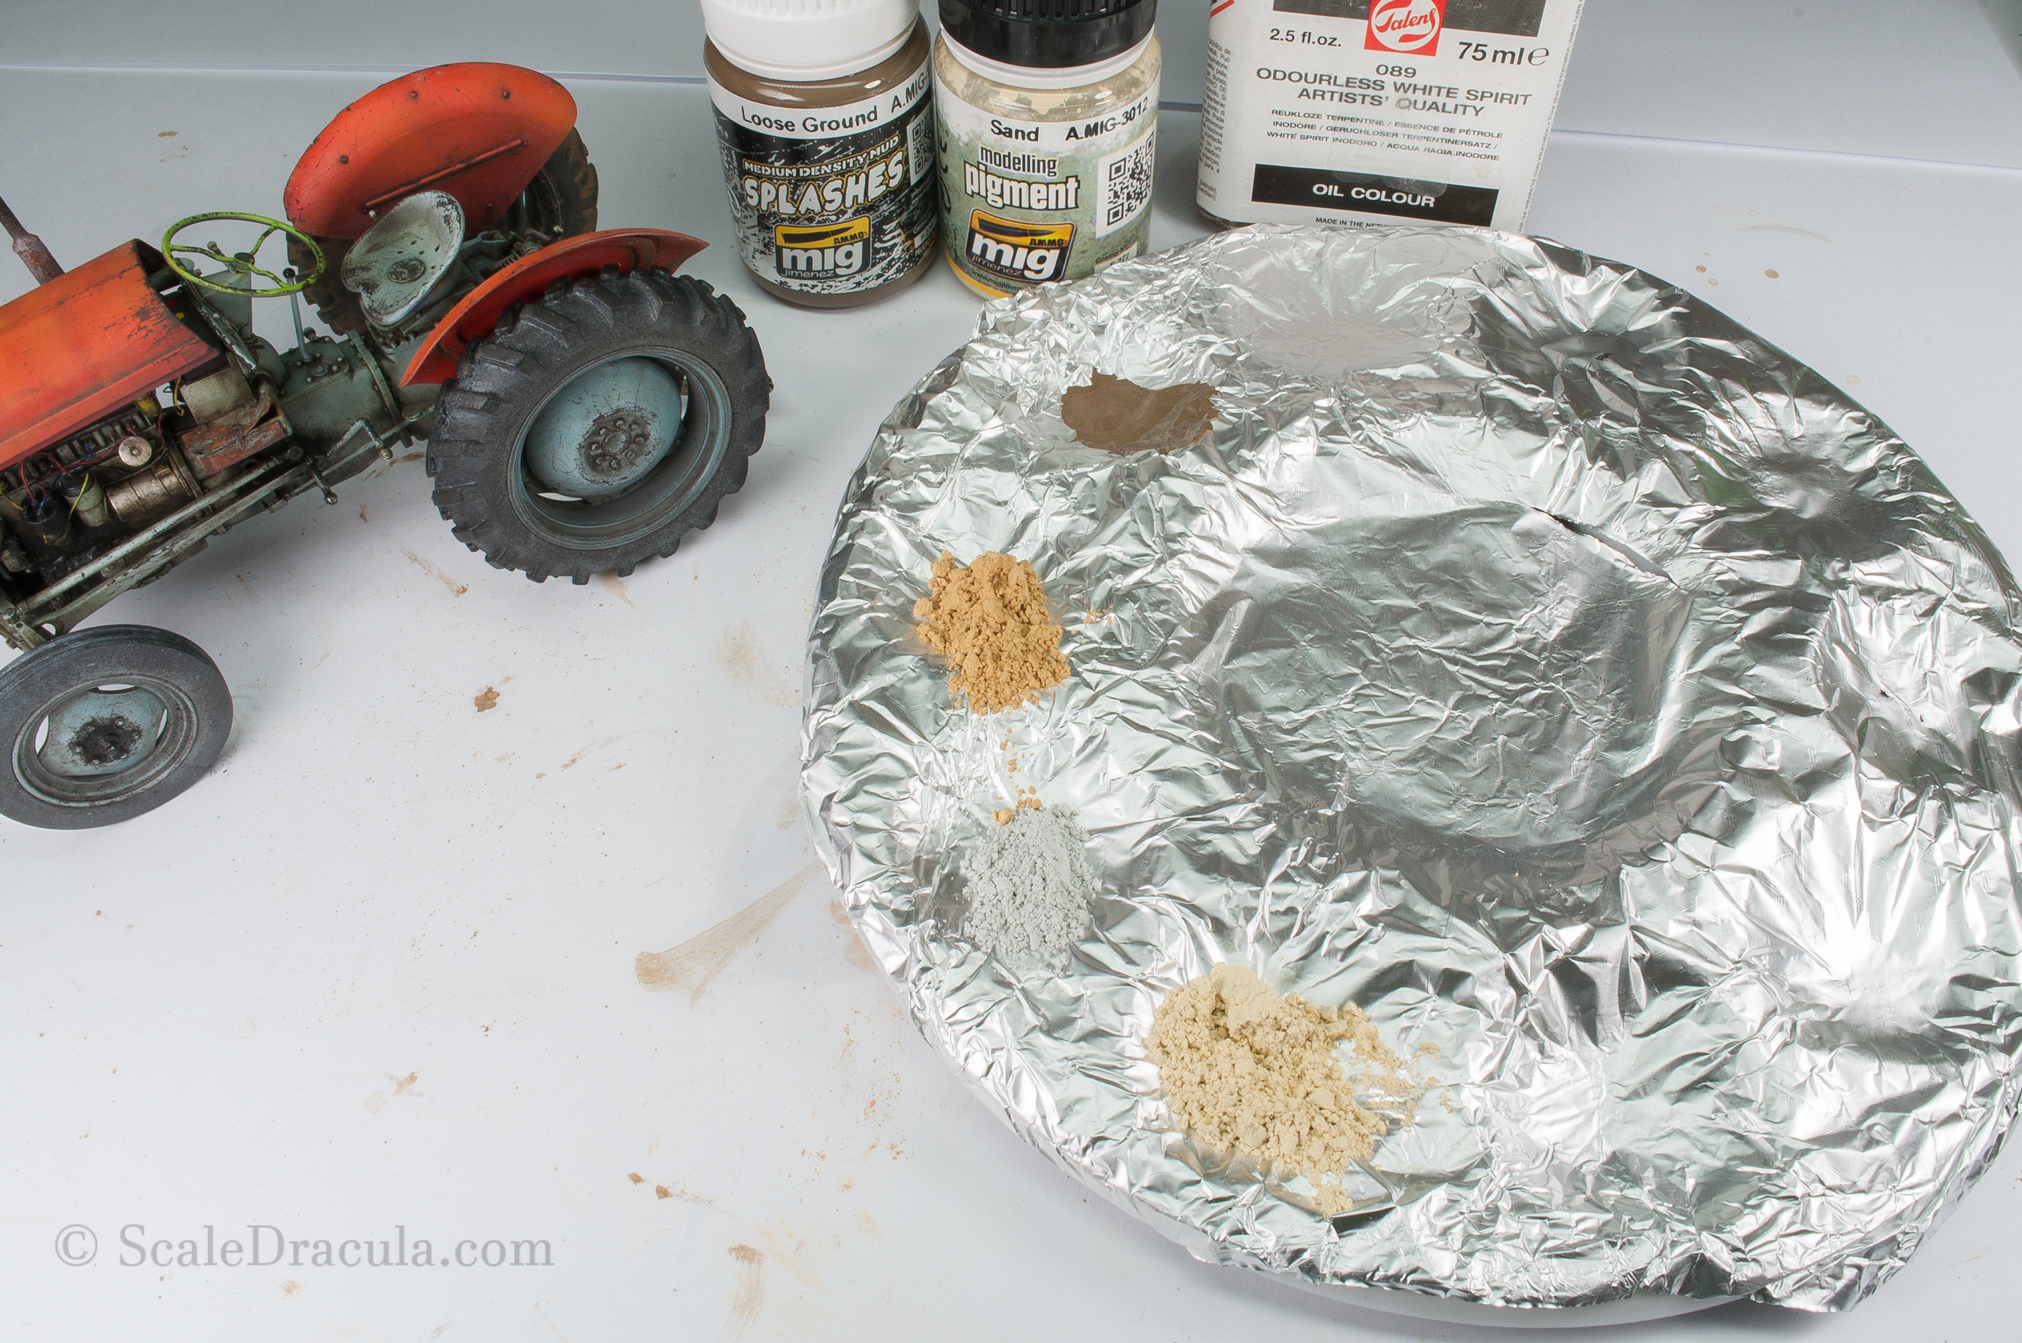
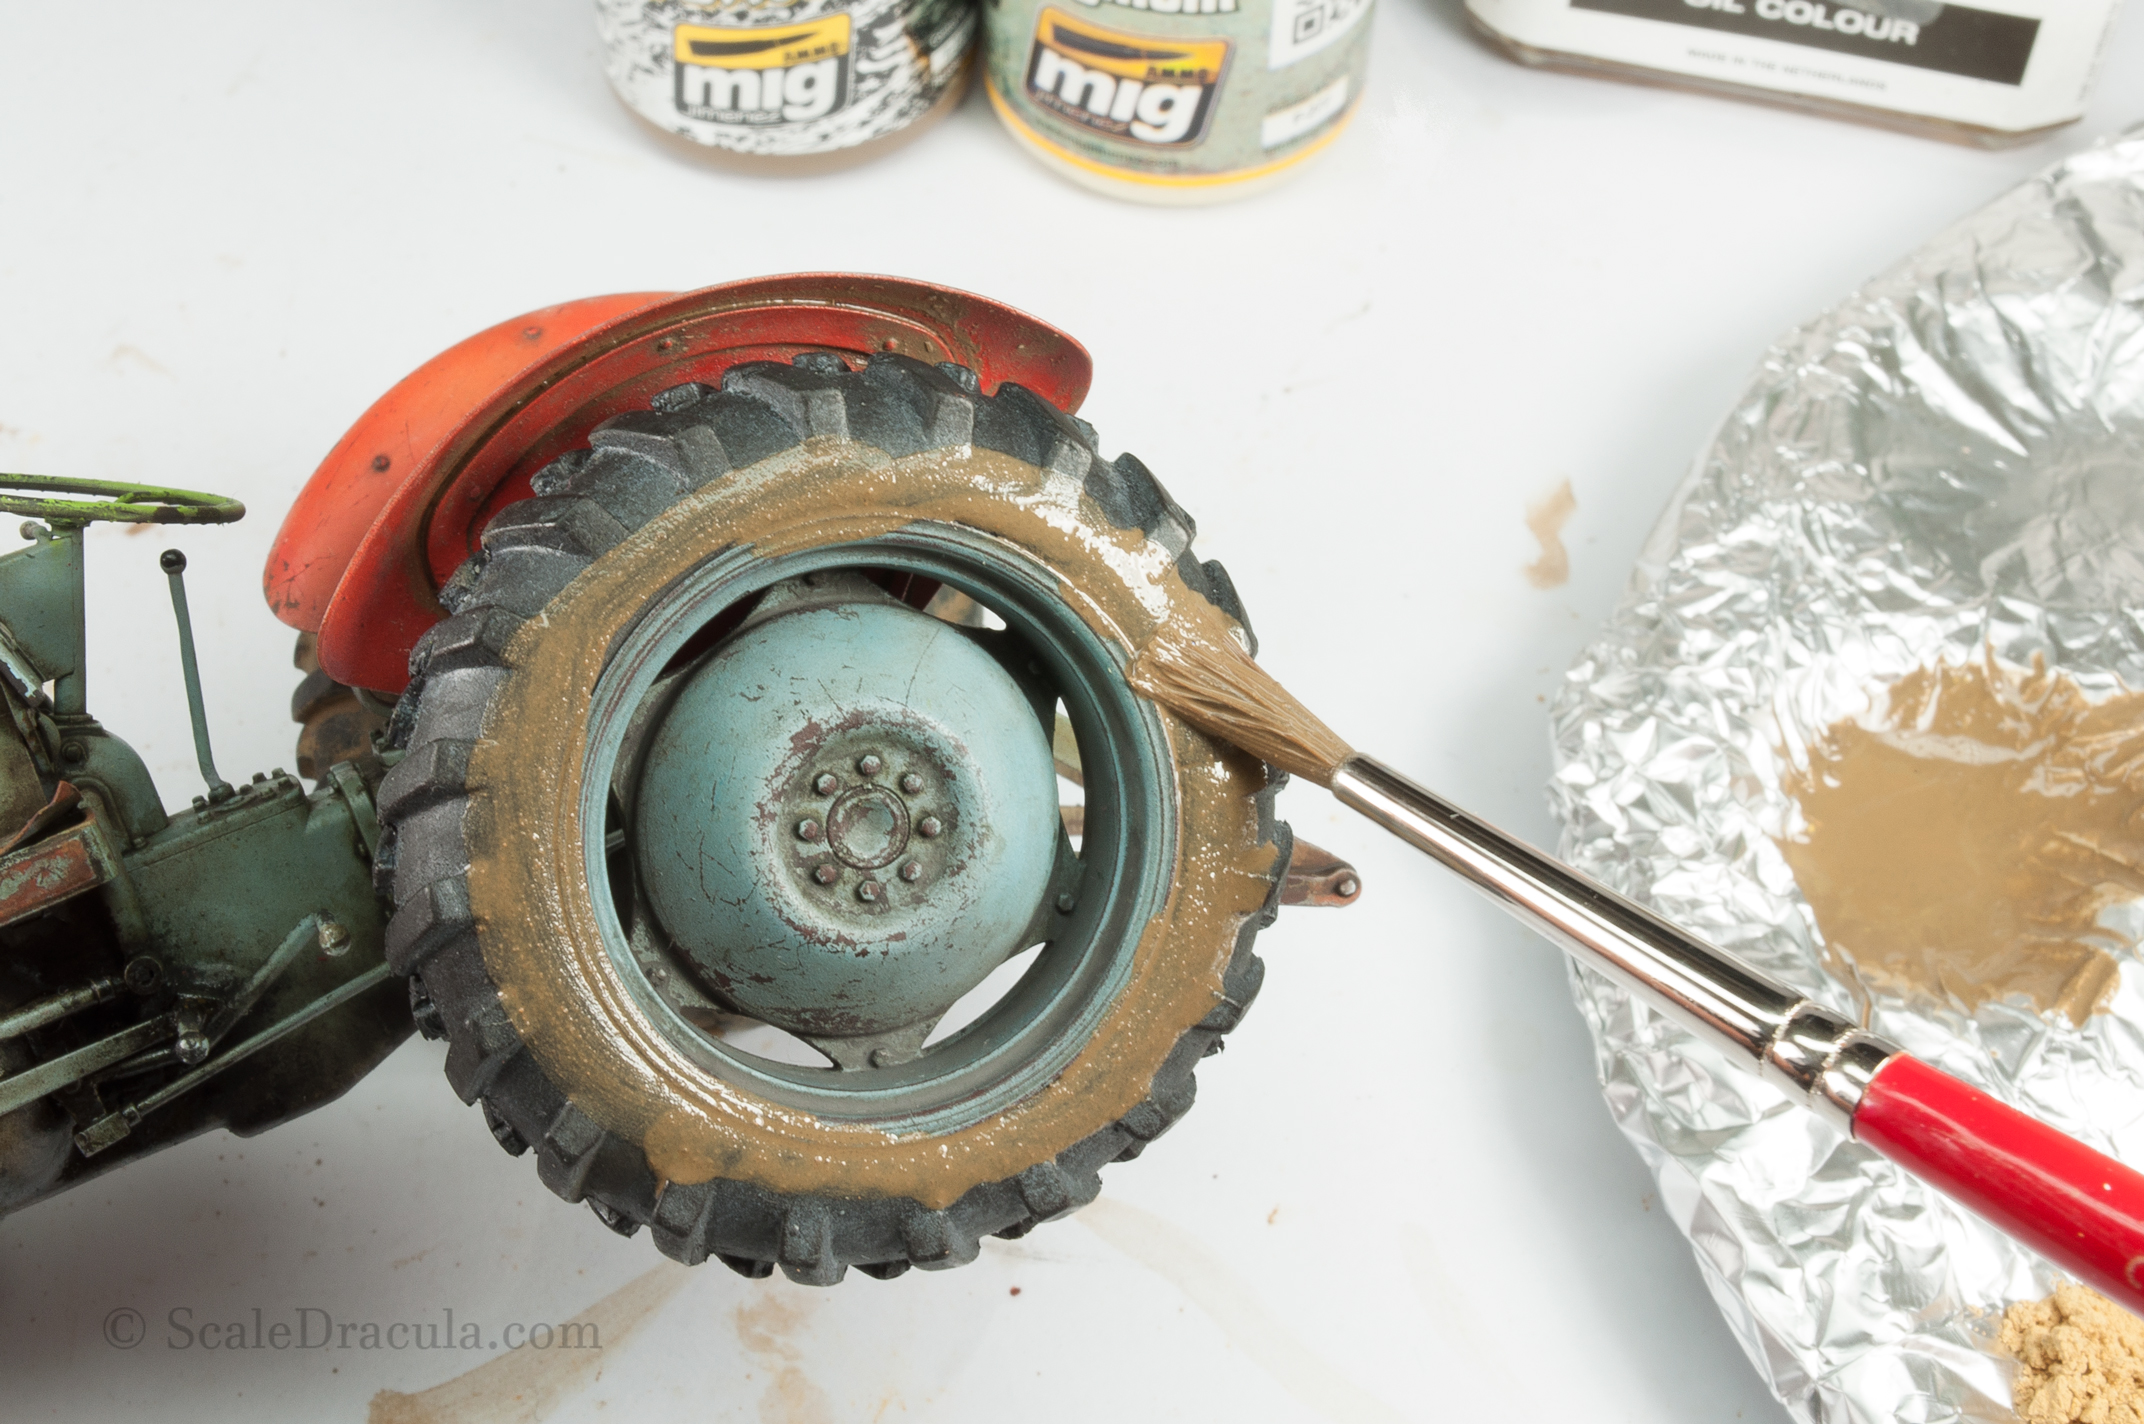
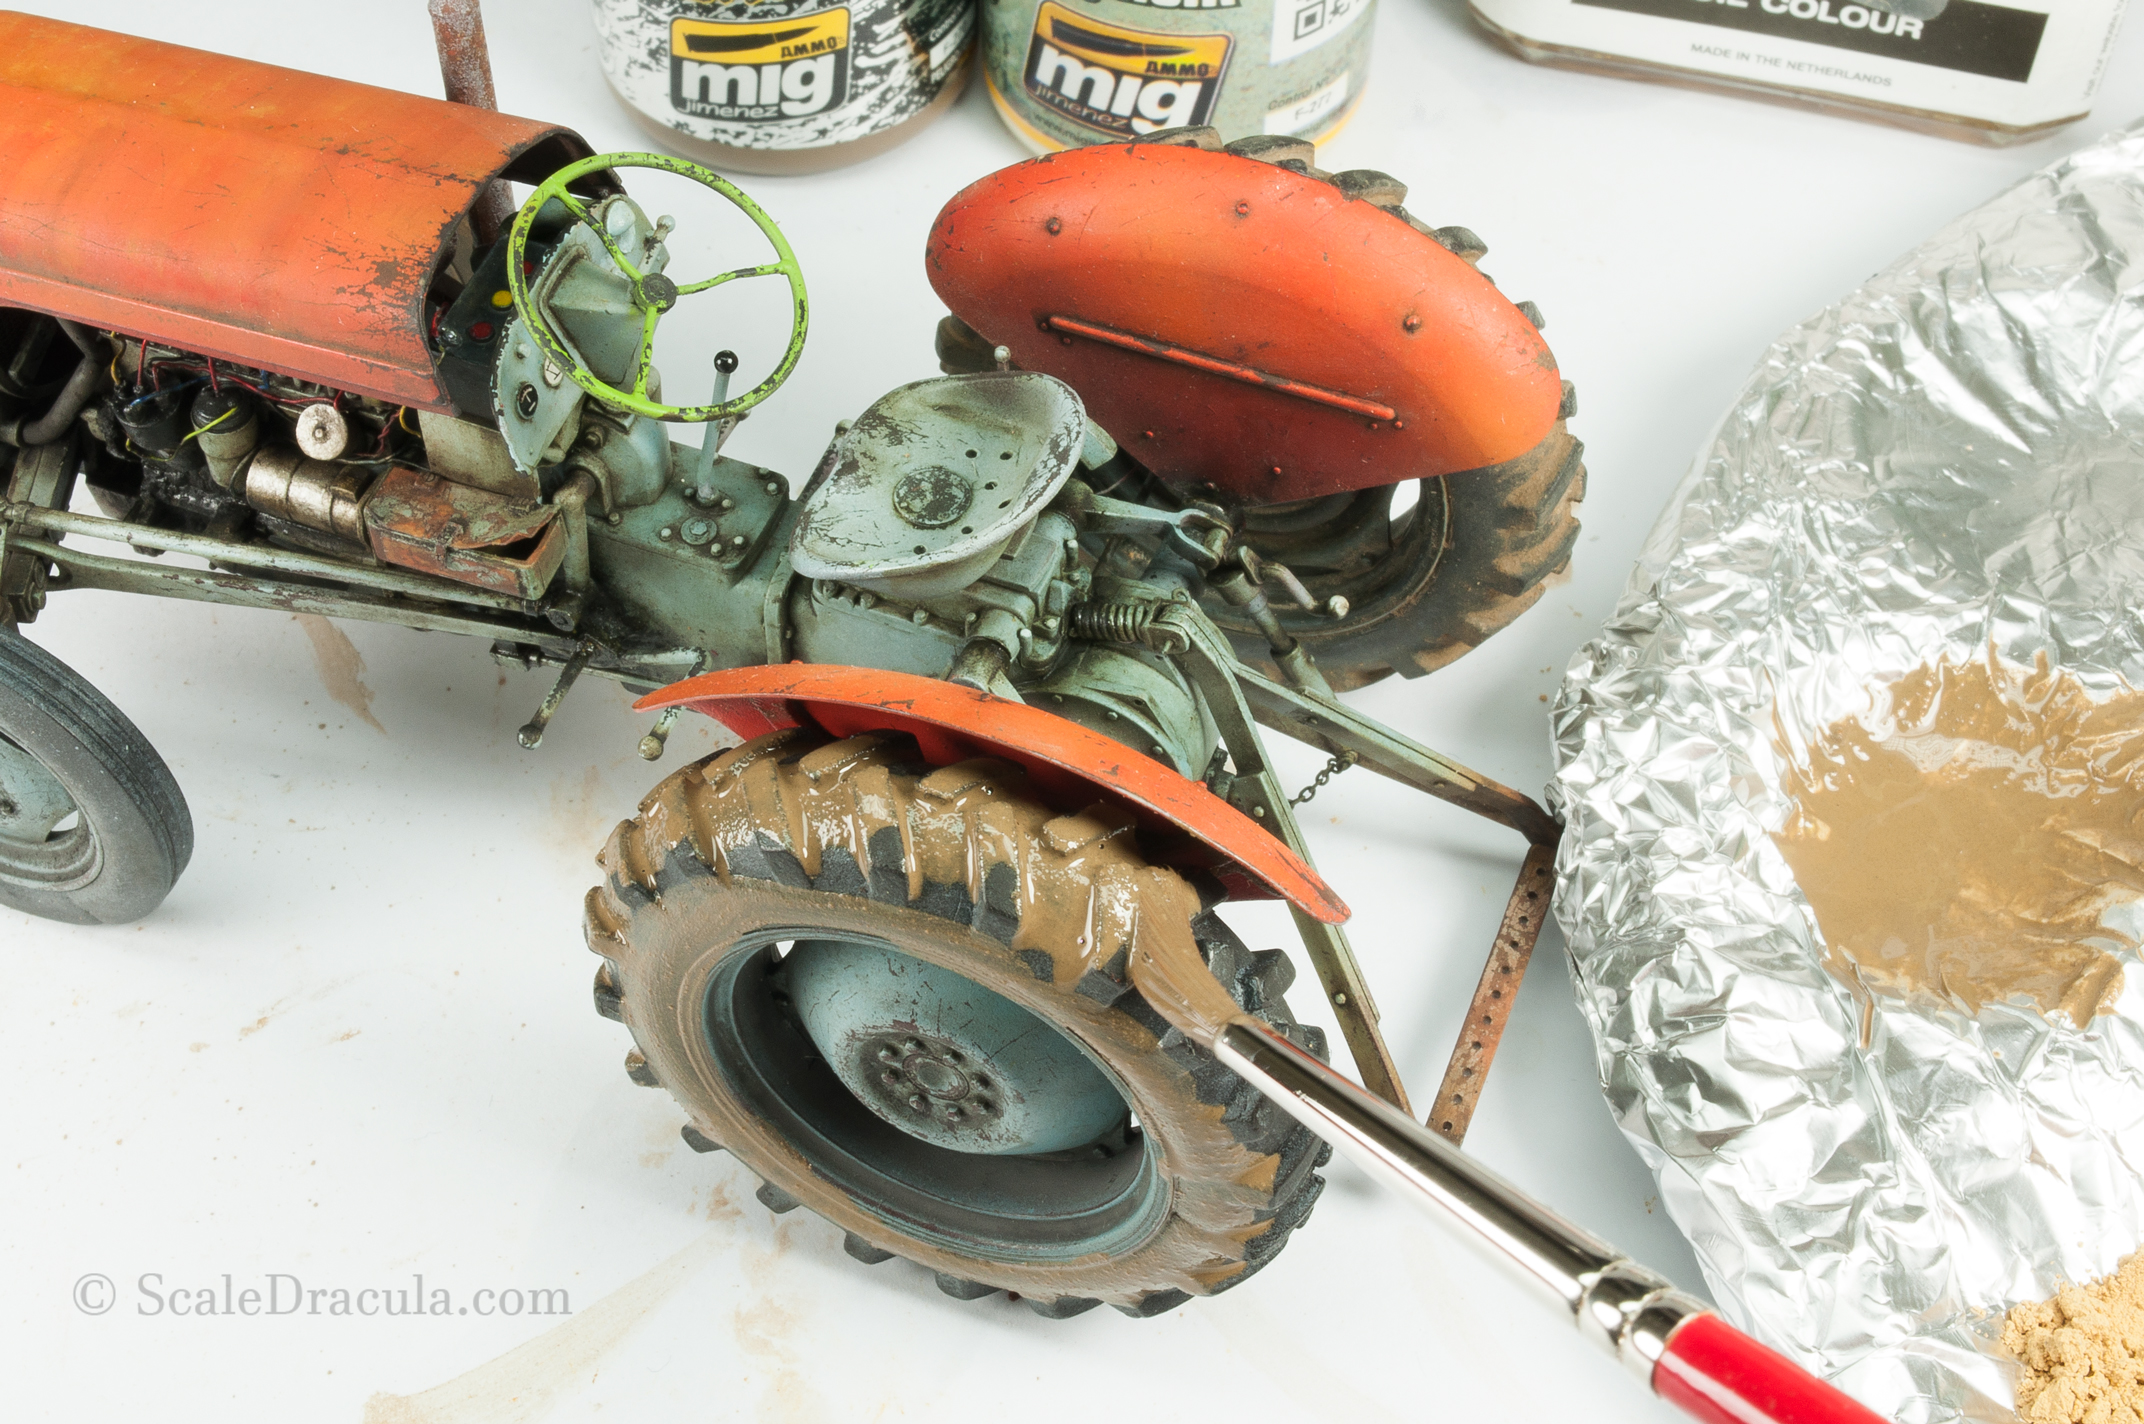
Mud time everyone! I start with a product called Loose Ground from the Ammo Mig Splashes collection. It’s a medium density fluid designed for splashes, but I will use it as a thick wash. First I put it one the fenders straight from the bottle. I remove the excess with a brush dipped in White Spirit.
Then I prepare a mixture of Loose Ground and various pigments. Note that all the pigments are rather light. I want to go for a dusty appearance, not a thick, fresh mud.
I cover the tyres with the mixture. It’s good to change the proportion of the pigments from time to time to avoid a dull, uniform look. I prepared 3 or 4 mixtures and used them randomly. You can sprinkle some more pigment on the still wet layer to give it more texture. The pigments are known for going considerably darker when they are wet. Take this into account.
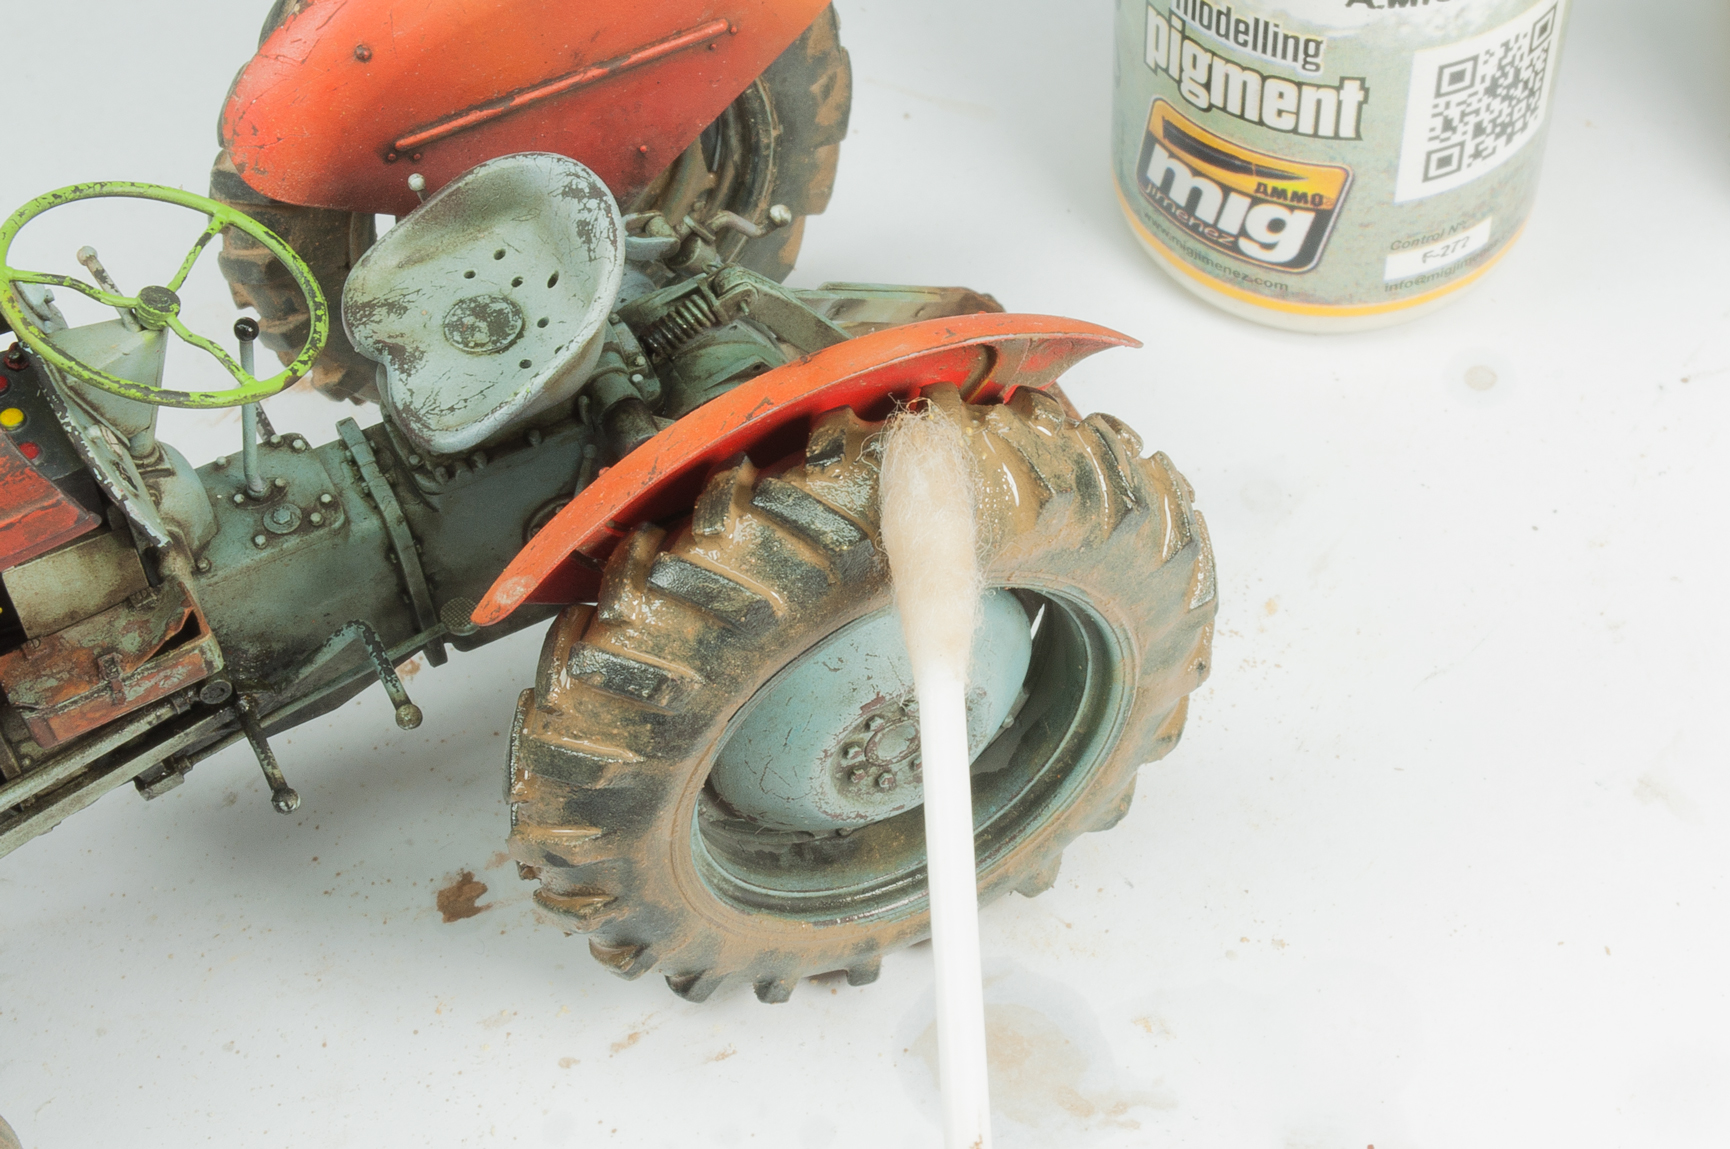
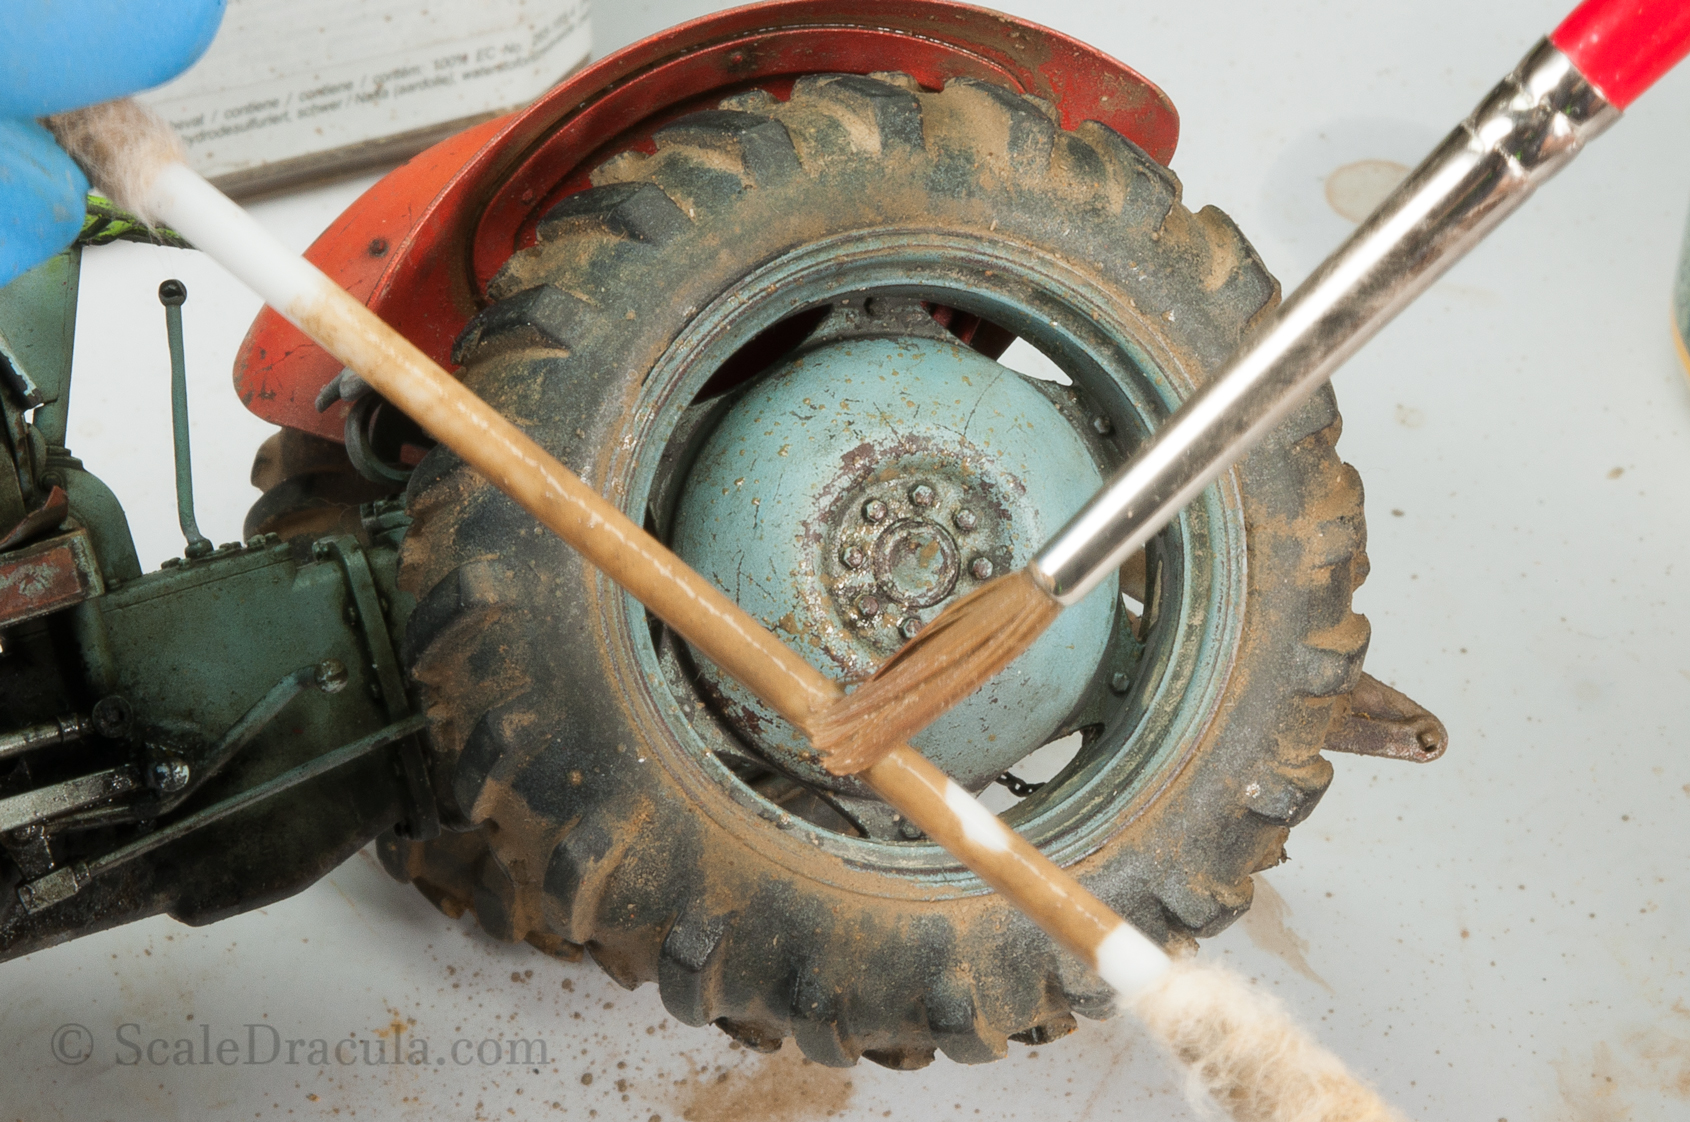
Give the paint couple of minutes to dry, but don’t wait to much as the enamel paints can dry completely within an hour. Now it’s time to remove some of the mud. I start with a brush sweeping it repeatedly towards the centre of the wheel. Then I clean the tread of the tyre with a q-tip. This part of the wheel usually stays super clean.
Finally I add some splashes of mud around the lower part of the vehicle. Again, I keep it moderate not to overwhelm all the previous effects.
Finally, I use Ammo Mig Gun Metal pigment to give some shine to the edges of the model. I do it with a silicone brush- a very versatile tool for this work. Be careful not to exaggerate this effect though.
I mentioned earlier that I will explain how I painted the rust. I couldn’t take any photos of the process as I was in a hurry working with fast-drying acrylics. Take a look at the next picture and hopefully everything will be clear.
And there it is. The model is finally ready. I’ve really had a lot of fun with the little Ferguson. I especially enjoyed the freedom I had when choosing all the colours. I’m sure I’ll return to the civil vehicles in the future but right now I want to put my hands on some serious HEAVY METAL, with armour and stuff.