The idea for this build came to me after watching HBO’s TV series ‘Chernobyl’. I’ve always been interested in abandoned landscapes and postapocalyptic stylistics. And I will explore those subjects in future projects. But what I found particularly interesting in ‘Chernobyl’ is the realism of the story. The creators took a lot of effort to recreate the events as faithfully as possible. The show seems like a horror and the fact that it presents historic facts makes it even more terrifying.
Now, as far as I know there is no 1:35 ZIL firetruck on the market, only in 1:72 or in a weird 1:43 scale. But it actually works for me. I chose the 1:72 model hoping it would be a quick and relaxing build. Also, I’ve never made a model in 1:72 so it will be a fresh experience and a new challenge. To speed up the process, my first idea was to build the model out of the box and get to painting as soon as possible.
A BIT OF HISTORY
ZIL-131 and a slightly smaller ZIL-130 were true workhorses of the Soviet Union’s economy and military transport. The reliability and versatility of the construction led to many different versions. ZILs served as infantry carriers, command cars, oil tankers, construction vehicles… You name it. Both trucks were also in service of the fire brigade in Pripyat.
Fire station in Pripyat. At the brink of the tragedy.
Firemen from this station were the first responders at the fire in the Chernobyl Nuclear Plant. The famous explosion took place on the night of April 26, 1986. Due to staff negligence and technical failures one of the reactors exploded leading to a worldwide nuclear crisis.
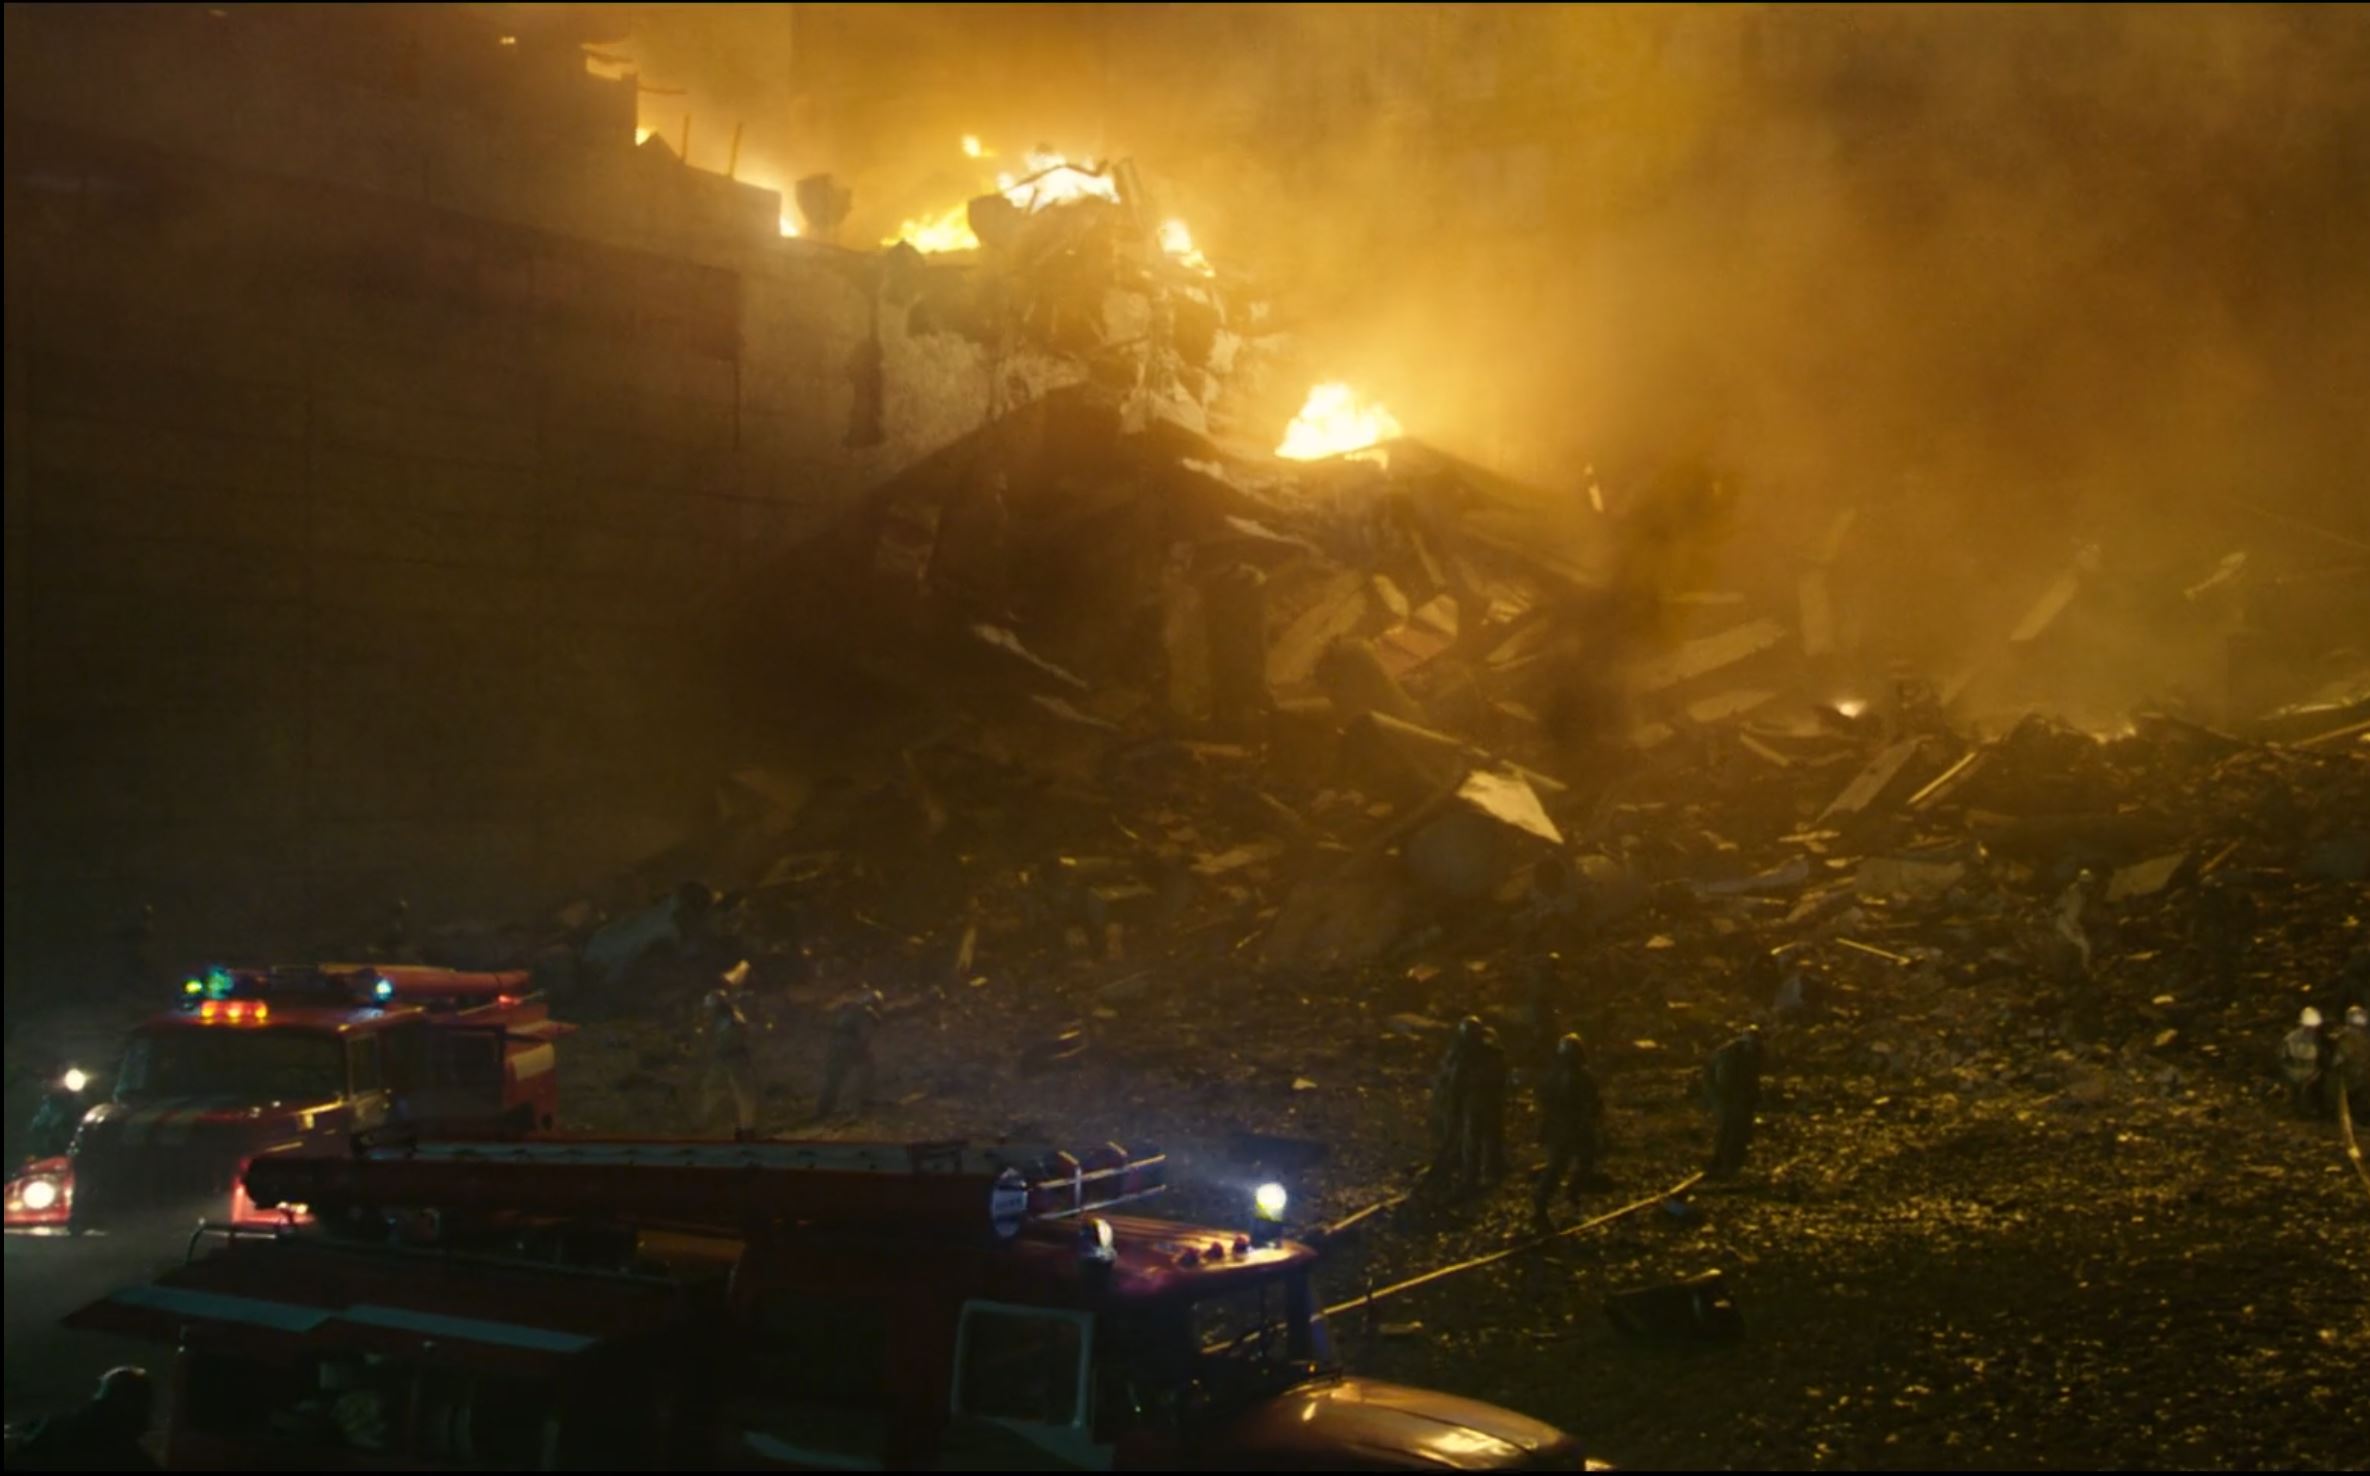
Still frame from the HBO TV series Chernobyl. ZIL firetrucks at the site of the reactor 4 fire.
The firemen took part in the action unaware of the risk. At that point nobody knew about the deadly levels of radiation around the plant. Most of the men who went there that night would sadly die from severe radiation illness shortly after the incident.
Monument dedicated to the brave firemen of Pripyat
The Soviet government went to great lengths to keep the explosion a secret. But when the truth was finally revealed, no expense was spared to contain the effects of the tragedy. And sadly, human lives were among these expenses as well. Although the incident itself didn’t take lots of direct casualties, the radioactive substances released to the atmosphere would cause much more harm subsequently. People involved in the clean up would later suffer from cancer and lung diseases. And it’s impossible to estimate the impact of the incident on the cancer related deaths across the whole Europe.
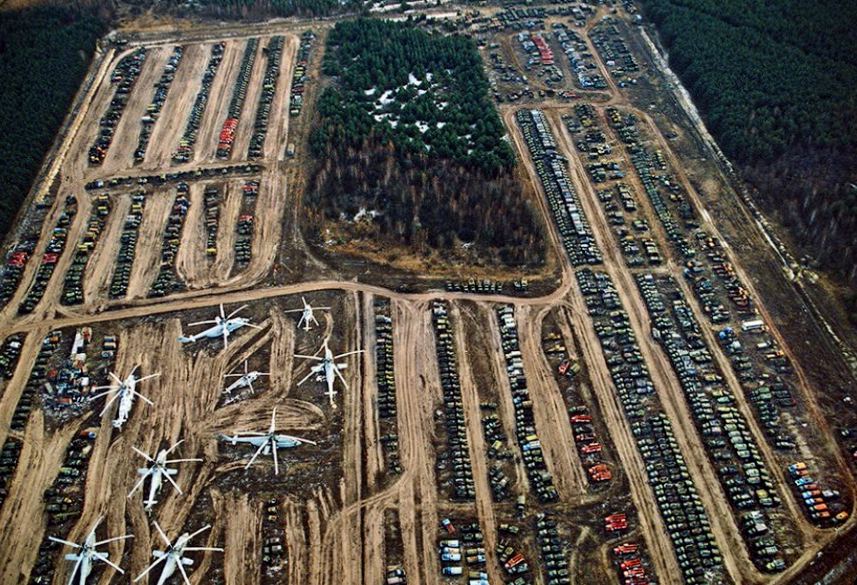
Apart from the human cost, a tremendous amount of equipment was used during the liquidation process. Most of these machines would later be abandoned in the zone due to the high level of contamination. Tanks, APCs, helicopters and trucks were gathered on a vehicle graveyard near the Chernobyl Nuclear Plant.
And among them there’s also ZIL-131 firetruck that I’ll be dealing with on this project. After more than 30 years of decay these vehicles are in very poor state.
Probably not a Chernobyl wreck, but still a good reference material.
THE MODEL
I bought the AVD kit not exactly knowing what to expect. As I’m new to the 1:72 scale I don’t really have a clue about the quality standards.
The upper body of the car is moulded as one part. You also get a fair amount of decals and rubber wheels. What surprised me was that the wheel axes are delivered as metal rods with the intention of (probably) make them movable. Why? Does anyone really play with those cars after assembling them? Seriously?
I like the main part of the vehicle body. Considering the scale, it looks pretty good to me.
It gets worse however when we look at the details. Again, I don’t know the scale standards but some of these look pretty nasty.
I guess I need to leave the ‘out-of-the-box’ concept of this project. Some of these details will need to get replaced.
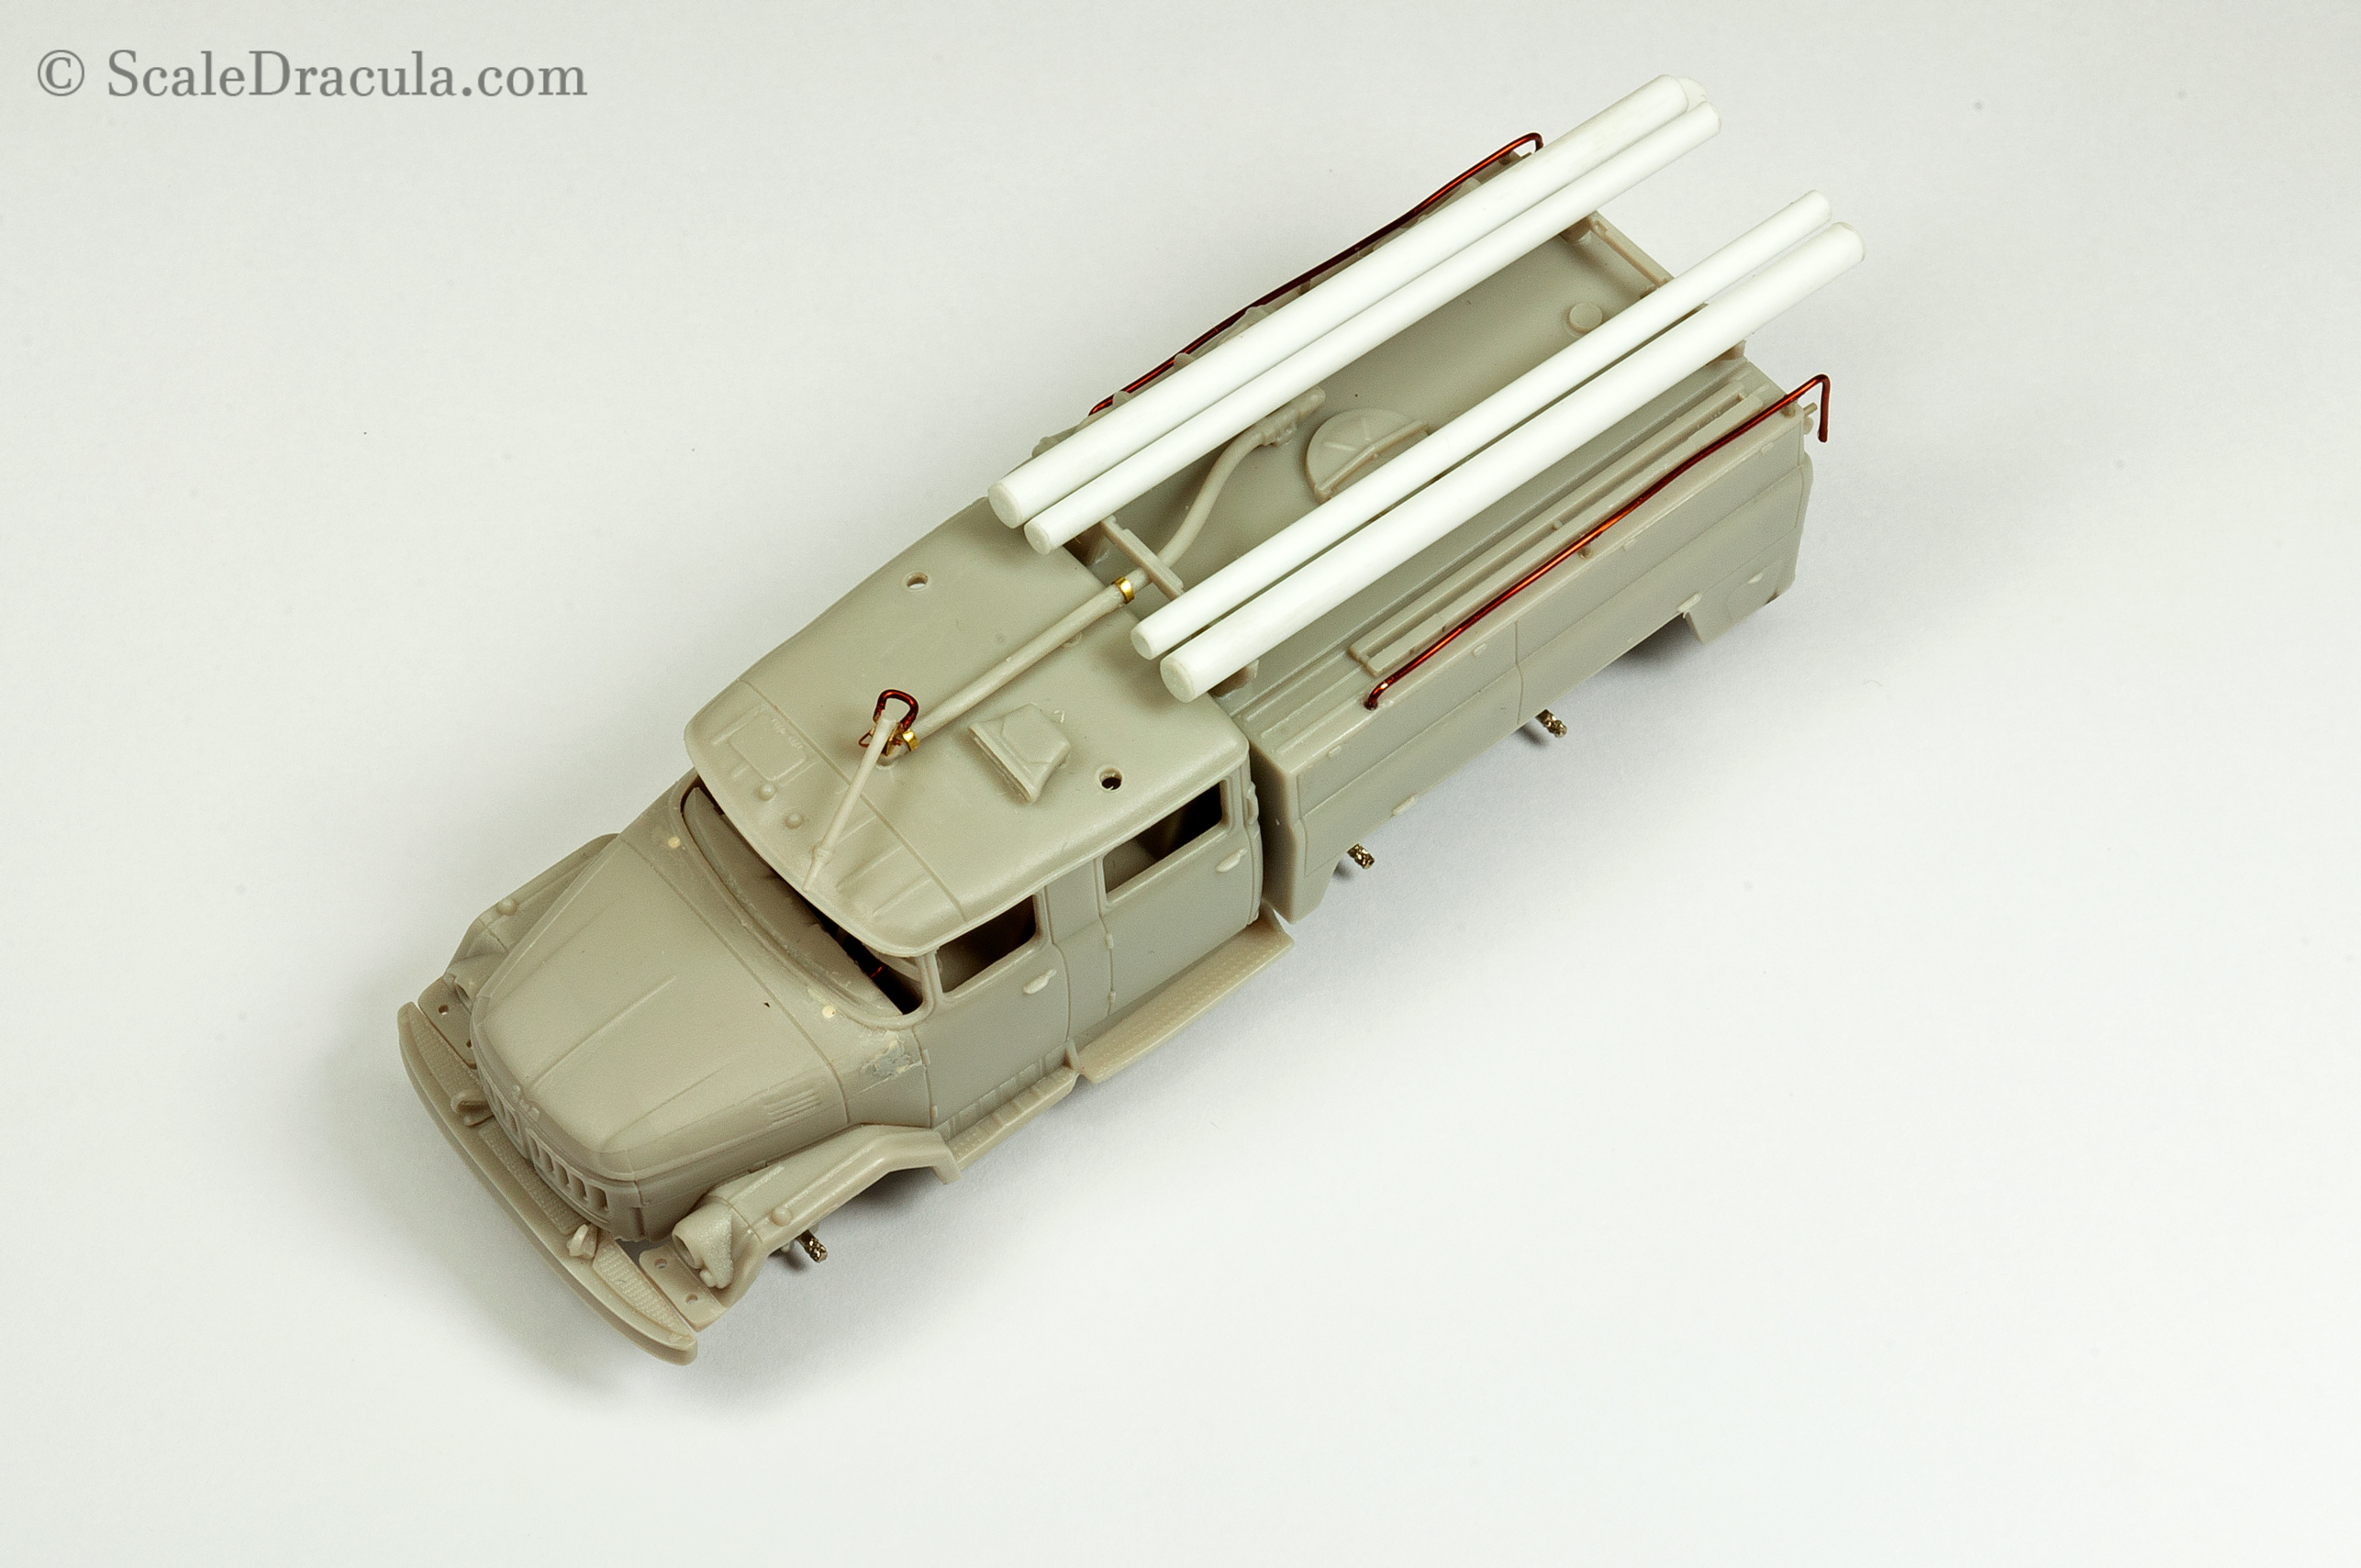
THE CONSTRUCTION
The model can be conveniently broken down into three sections. The undercarriage, the main body and the interior. I’ll keep them separate until painting.
I found out a lot of the details can be replaced very easily. Here I used a styrene pipe and some tiny PE parts.
A brass wire is always useful for rails and handles.
I replaced the parts that looked particularly nasty and were reasonably easy to scratch-build.
I considered opening one of the doors but I finally assumed it would be too much hassle. Especially because the model’s interior has very little to offer.
The side mirror and the headlight covers were especially hard to recreate. I do realize they ended up a bit overscaled but this is the best I could do. Using a thinner wire would make the parts too fragile for future handling.
I also replaced door handles and wipers. This stuff is pretty easy to make from wire and random PE parts. And details like that certainly push the model forward.
An that’s it for now. I will put together the sections after some initial painting is done.