
I’d like to show you another technique that will work great on heavily weathered projects. Tanks are generally made of metal so we want this material to look good on our models. But non-metallic elements can also be taken to the next level. So take a look at this tutorial and maybe it will inspire you to make some cool effects. Just FYI, I didn’t invent this technique. I saw other modellers use it before…
Do you want Search?
Search

InMessages
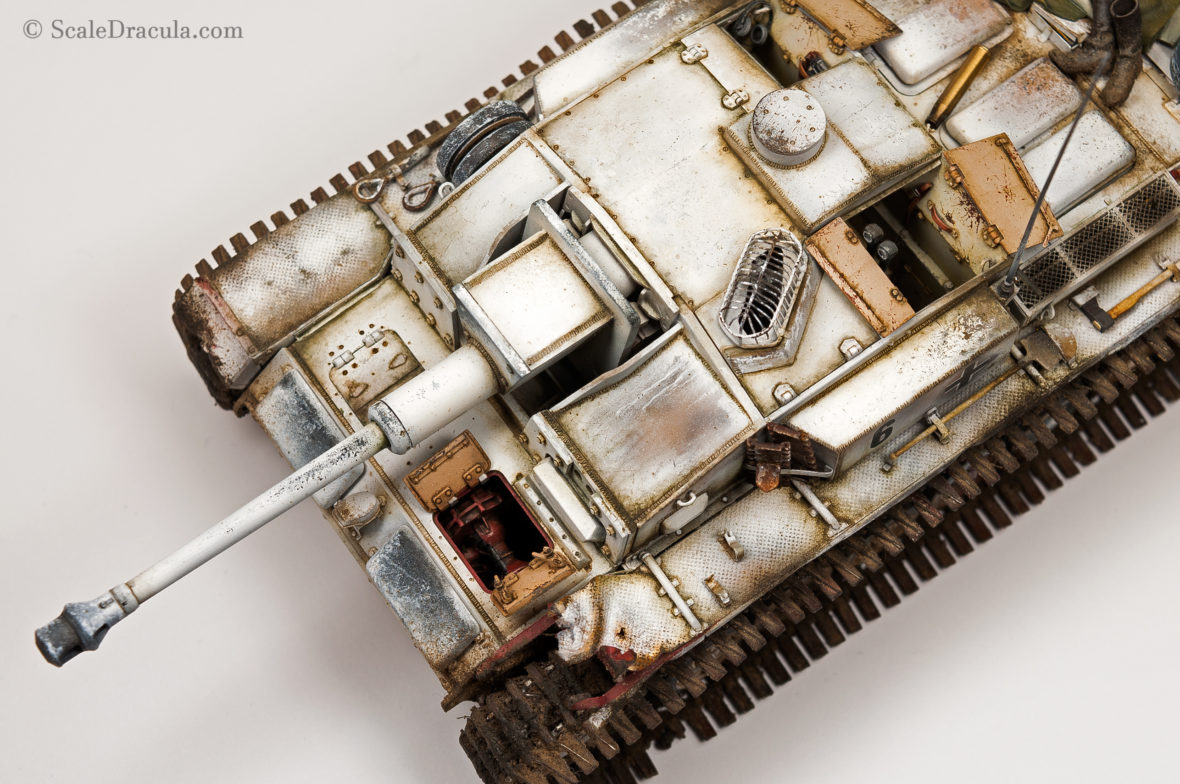
How to: paint rust with oils (advanced level)
I’m a great fan of oil paints as they are the most versatile weathering product ever. On one of the previous ‘How to…’ articles I’ve already shown you how to create an easy rust effect with just a couple of oil colours. Here I’d like to present to you a more elaborate step-by-step guide which hopefully will give you some more interesting results. Apart from oil blending I will use other techniques like hairspray chipping…

InMessages
Vietnam war Centurion finished
Guys, my newest model is ready and it is an Australian Centurion serving in the Vietnam War. I went hard on this one with lots of modifications on the construction level, plenty of accessories and an abundance of weathering techniques. I also took a lot of effort working on the mud textures this time. Not my area of experise for sure but I figured a Vietnam War subject needed that kind of treatment. A very…

InMessages
The late vanguard: construction part 2
In my last post I introduced the new T-64 project with its historical background. I also managed to build the main hull, together with the front glacis ERA panels and side skirts. This time I’ll finish the construction of the tank starting from the most complex part- the turret. Buckle up as there will be many ups and downs on this bumpy road. If you missed the first part, use the link below to catch…

InMessages
The late vanguard part 1: introduction & construction
I’m coming back to the photo recreation projects with the most demanding and complicated model so far. This time I want to crank it up to 11 with some serious challenges at every step of the way. So there’s going to be quite a lot of scratch-building, aftermarket parts, complex painting schemes and weathering techniques. My point will be to check where my limitations are and hopefully push myself forward. The T-64, with its complicated…
InMessages
My Stug F/8 finally ready…
Here’s my recently finished model – Stug F/8 by Dragon in 1:35. I must admit I’m far behind with my blog publications. They just require to much time to keep them in line with my daily modelling work. I’ve been documenting the whole process though. So a complete SBS will be shared here… Some day… For more info on the StuG check out my Facebook page or this particular album.

InMessages
Galactic chicken: painting
Last time I was able to put together the legs of AT-ST only with some minor modifications. On the other hand, the cockpit is still in pieces waiting for the paint. Thanks to the high quality of the kit the construction stage was really enjoyable and effortless. But here’s where the real fun is about to start- the painting. As I’ve already mentioned in the previous chapter- this sci-fi project will be an occasion to…

InMessages
Galactic chicken: introduction & construction
I’m a huge fan of military history and I usually try to base my models on real fighting vehicles. However, sometimes it’s nice to distance yourself from the dull reality and just let your imagination run wild. So here’s my first attempt at a science-fiction subject. I actually wanted to build an AT-ST for a long time. I’m not a die-hard Star Wars fan but I kinda like this wacky design and I’ve heard that…

InMessages
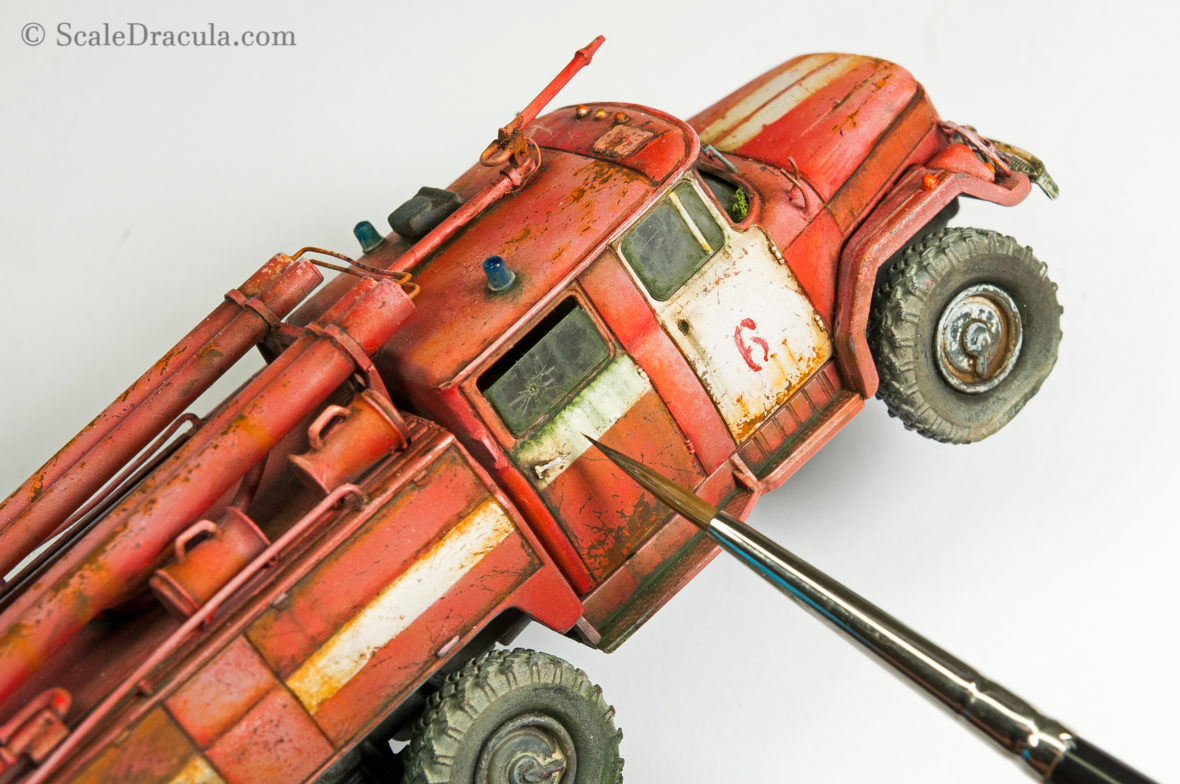
Nuclear waste: the base
It was at the weathering stage I realized my ZIL would just look weird without a proper base. A heavily weathered vehicle like this, kind of needs a scenario which would authenticate all the techniques applied. A simple, wooden base wouldn’t just tell the whole story. I’m not much of a diorama guy – mostly for the lack of time – so I welcomed the opportunity to work on something fresh. This is the last…
InMessages
Nuclear waste: weathering
And here comes the weathering. I was really looking forward to this stage as I was curious how all the techniques I know from 1:35 scale would work on a 1:72 model. A smaller scale obviously requires more precision. But I also think it needs more tonal variety and contrast so the tiny sections of the model would be easily recognizable. It was my first attempt at a 1:72 build so I was kind of…