
If you follow this blog, you already know that the weathering is my favourite part of any project. I like the whole process of building the model but those finishing touches are usually the most satisfying for me. Before the weathering, the model looks like a nicely painted toy. After the weathering, it turns into a miniature war machine.
In this part of the SBS I will concentrate on the oil paints. I’ll show you a variety of effects that can be created with these colours. I must say working with oils is pretty hard – they require some skill and a lot of experience with a brush. I’ll try to explain the techniques as thorough as possible.
If you’re new to the story, check out the other parts below:
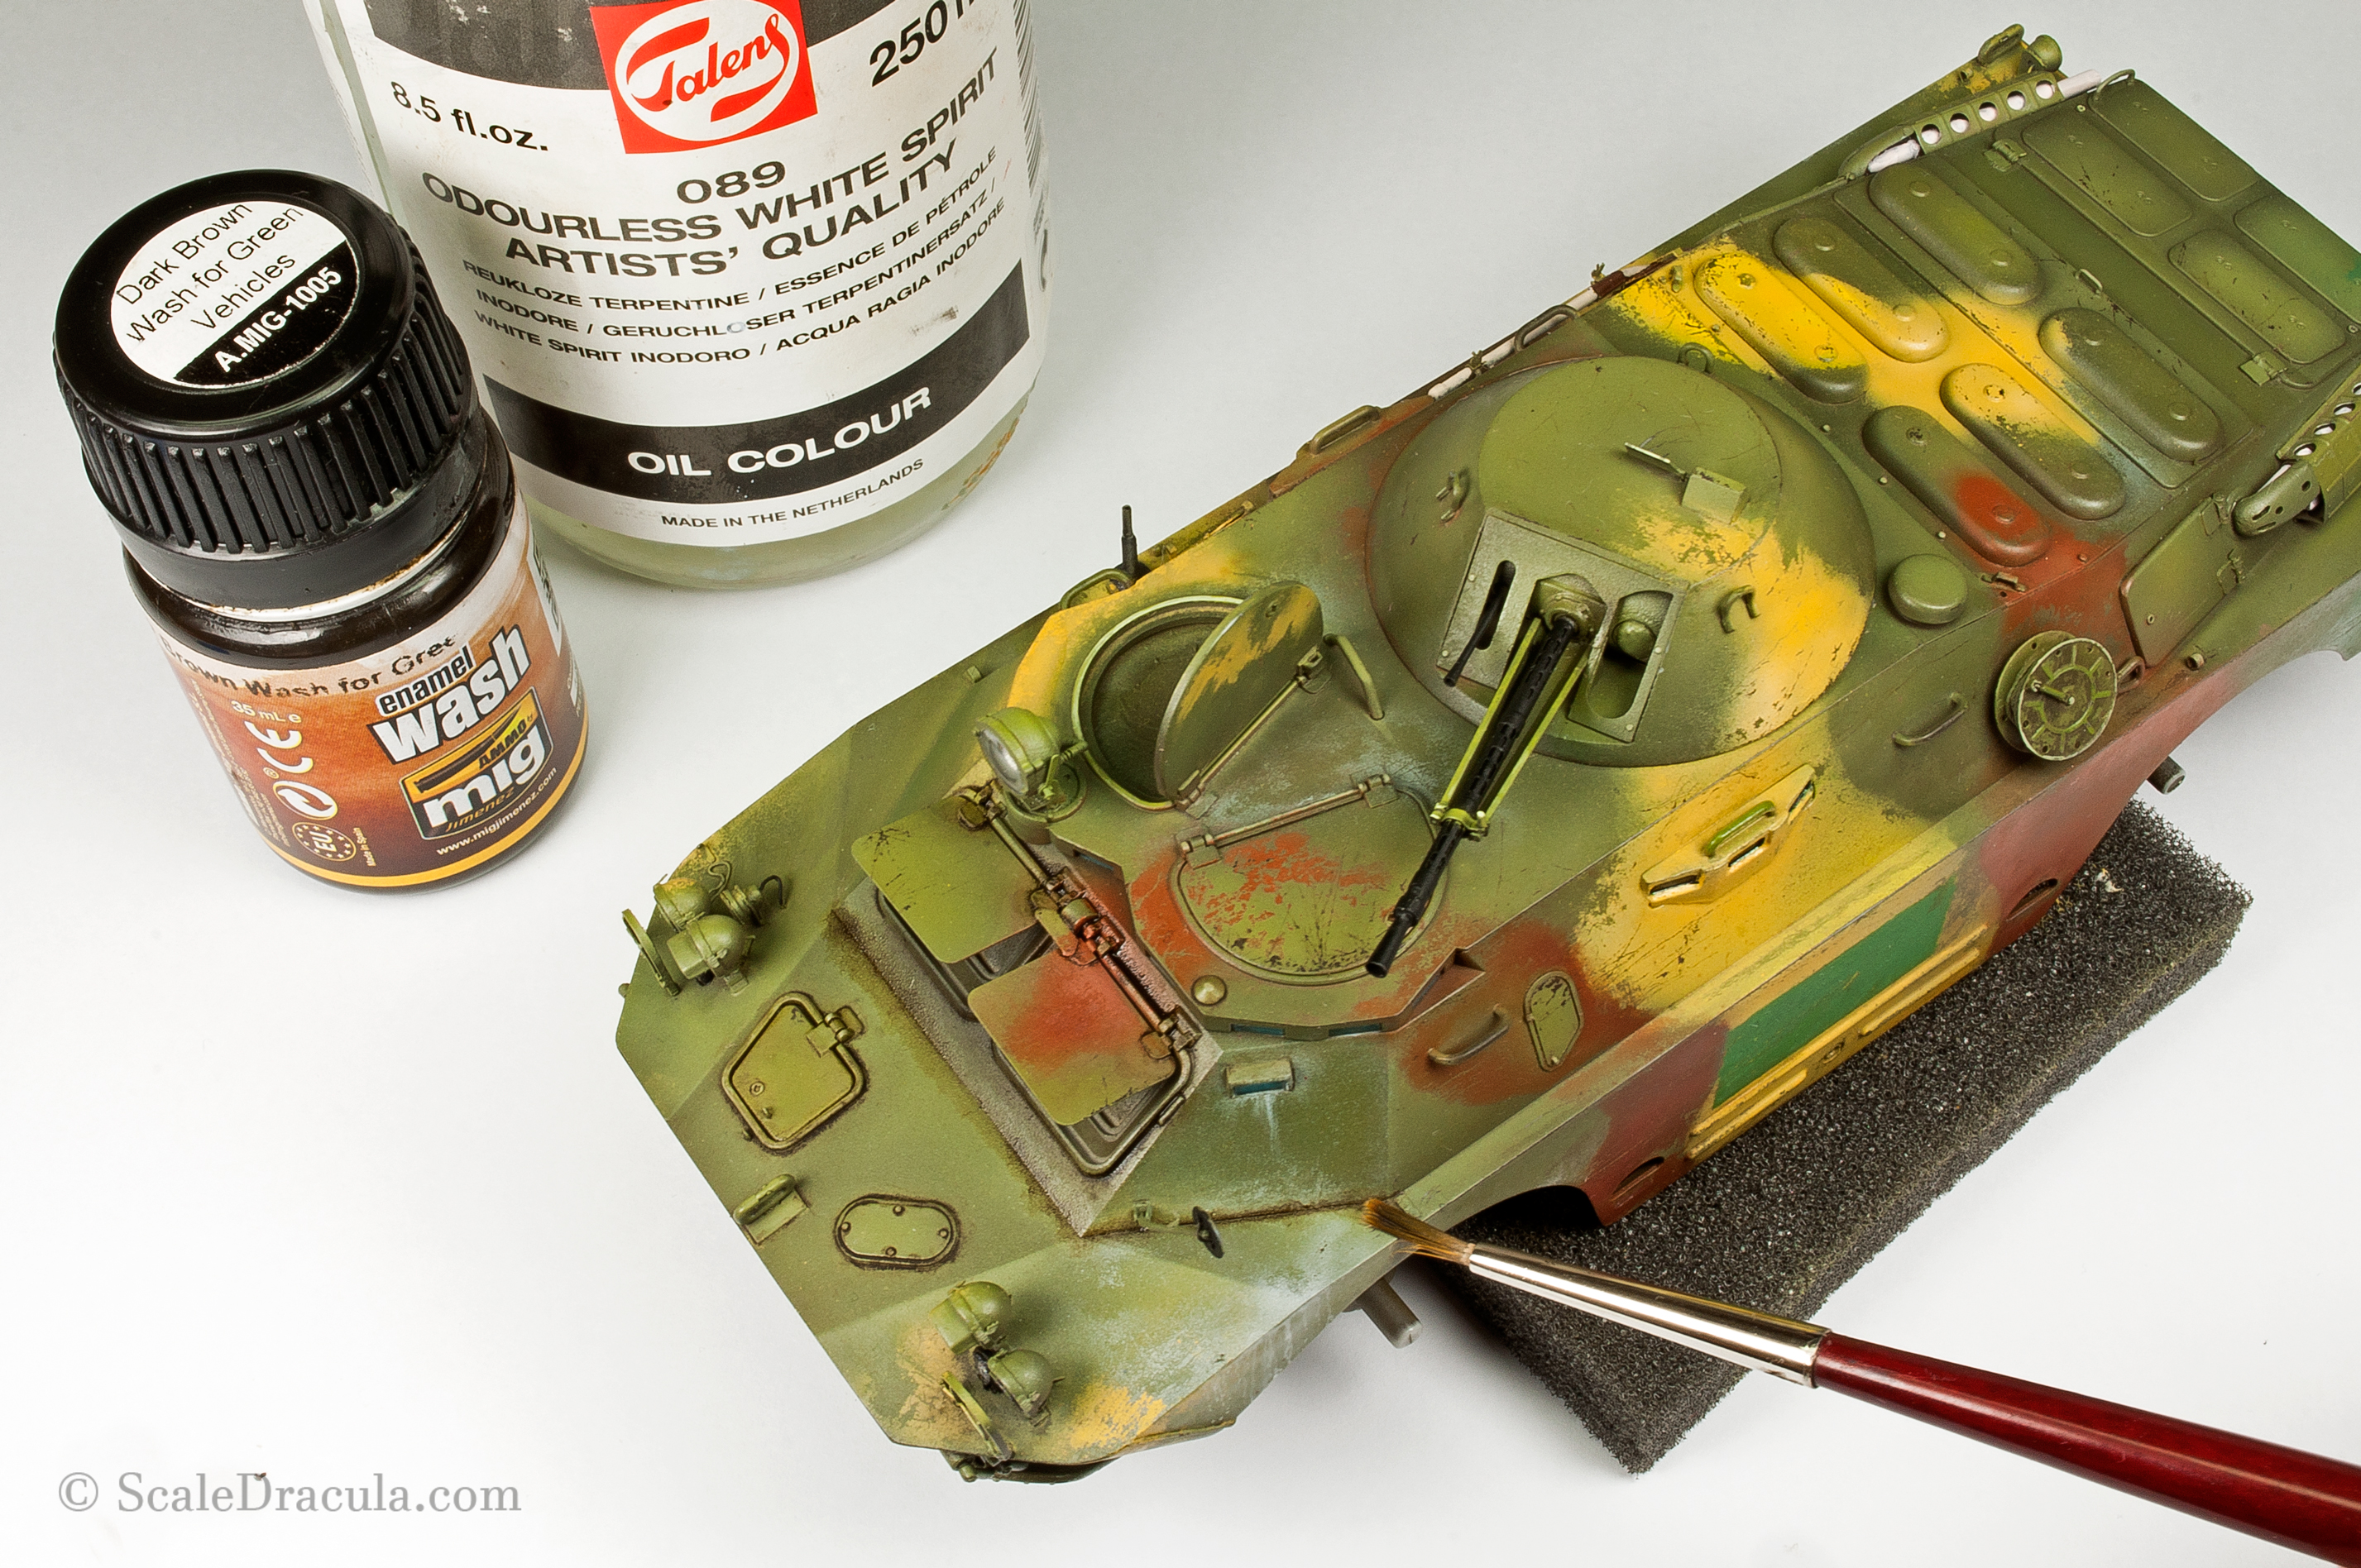
The general dark wash is usually the first step of the weathering for me. It’s an ancient Chinese technique but it still works very well in giving the model the first touch of realism.
I use Dark Brown Wash for Green Vehicles by Ammo Mig and I clean the excess with the white spirit by Talens.
It’s good to be precise with the application of the wash. Don’t flood the model with the paint – it’s going to make some ugly stains on the surface, especially if you went for a porous matt finish.
Also, single colour wash is the most basic option. Experiment with more shades or various intensities to make the effect even more interesting.
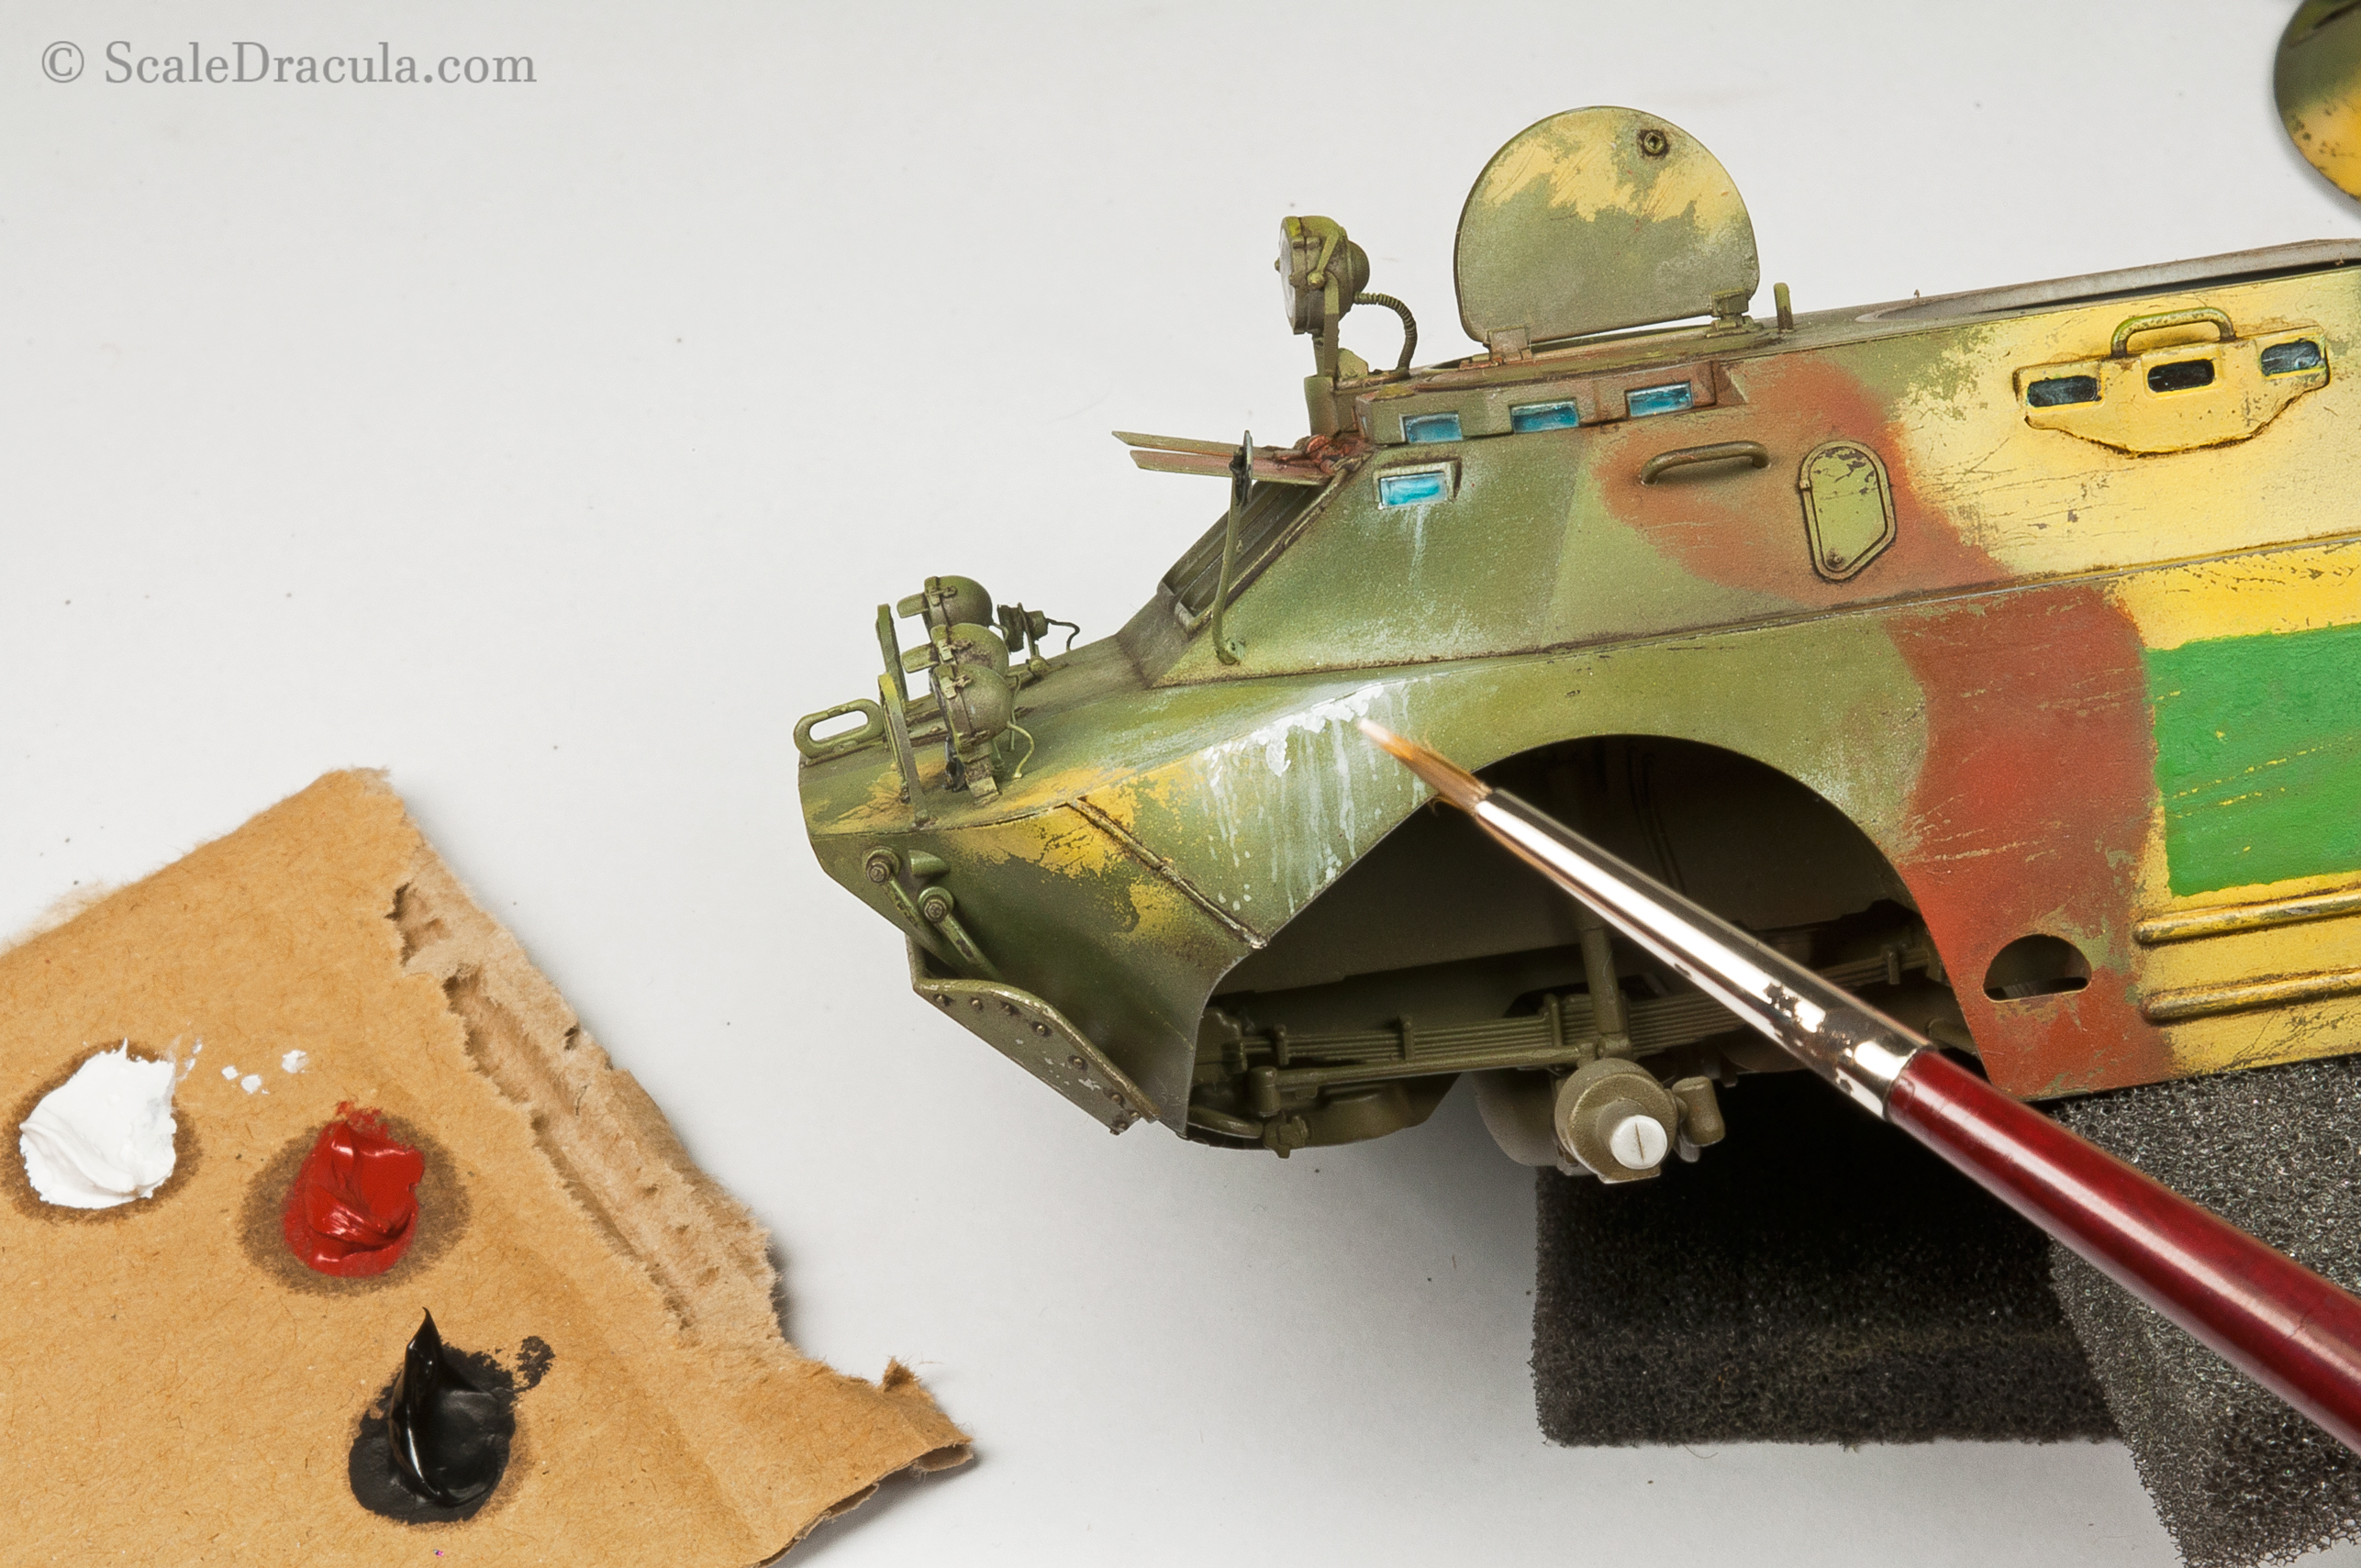
With a mix of Oilbrusher White and AMMO Yellow I painted a discolouration visible on the right side of the vehicle.
I’ve chosen the Oilbrusher for this job because it has more opacity than a regular oil paint. I see it as something between oils and enamels.

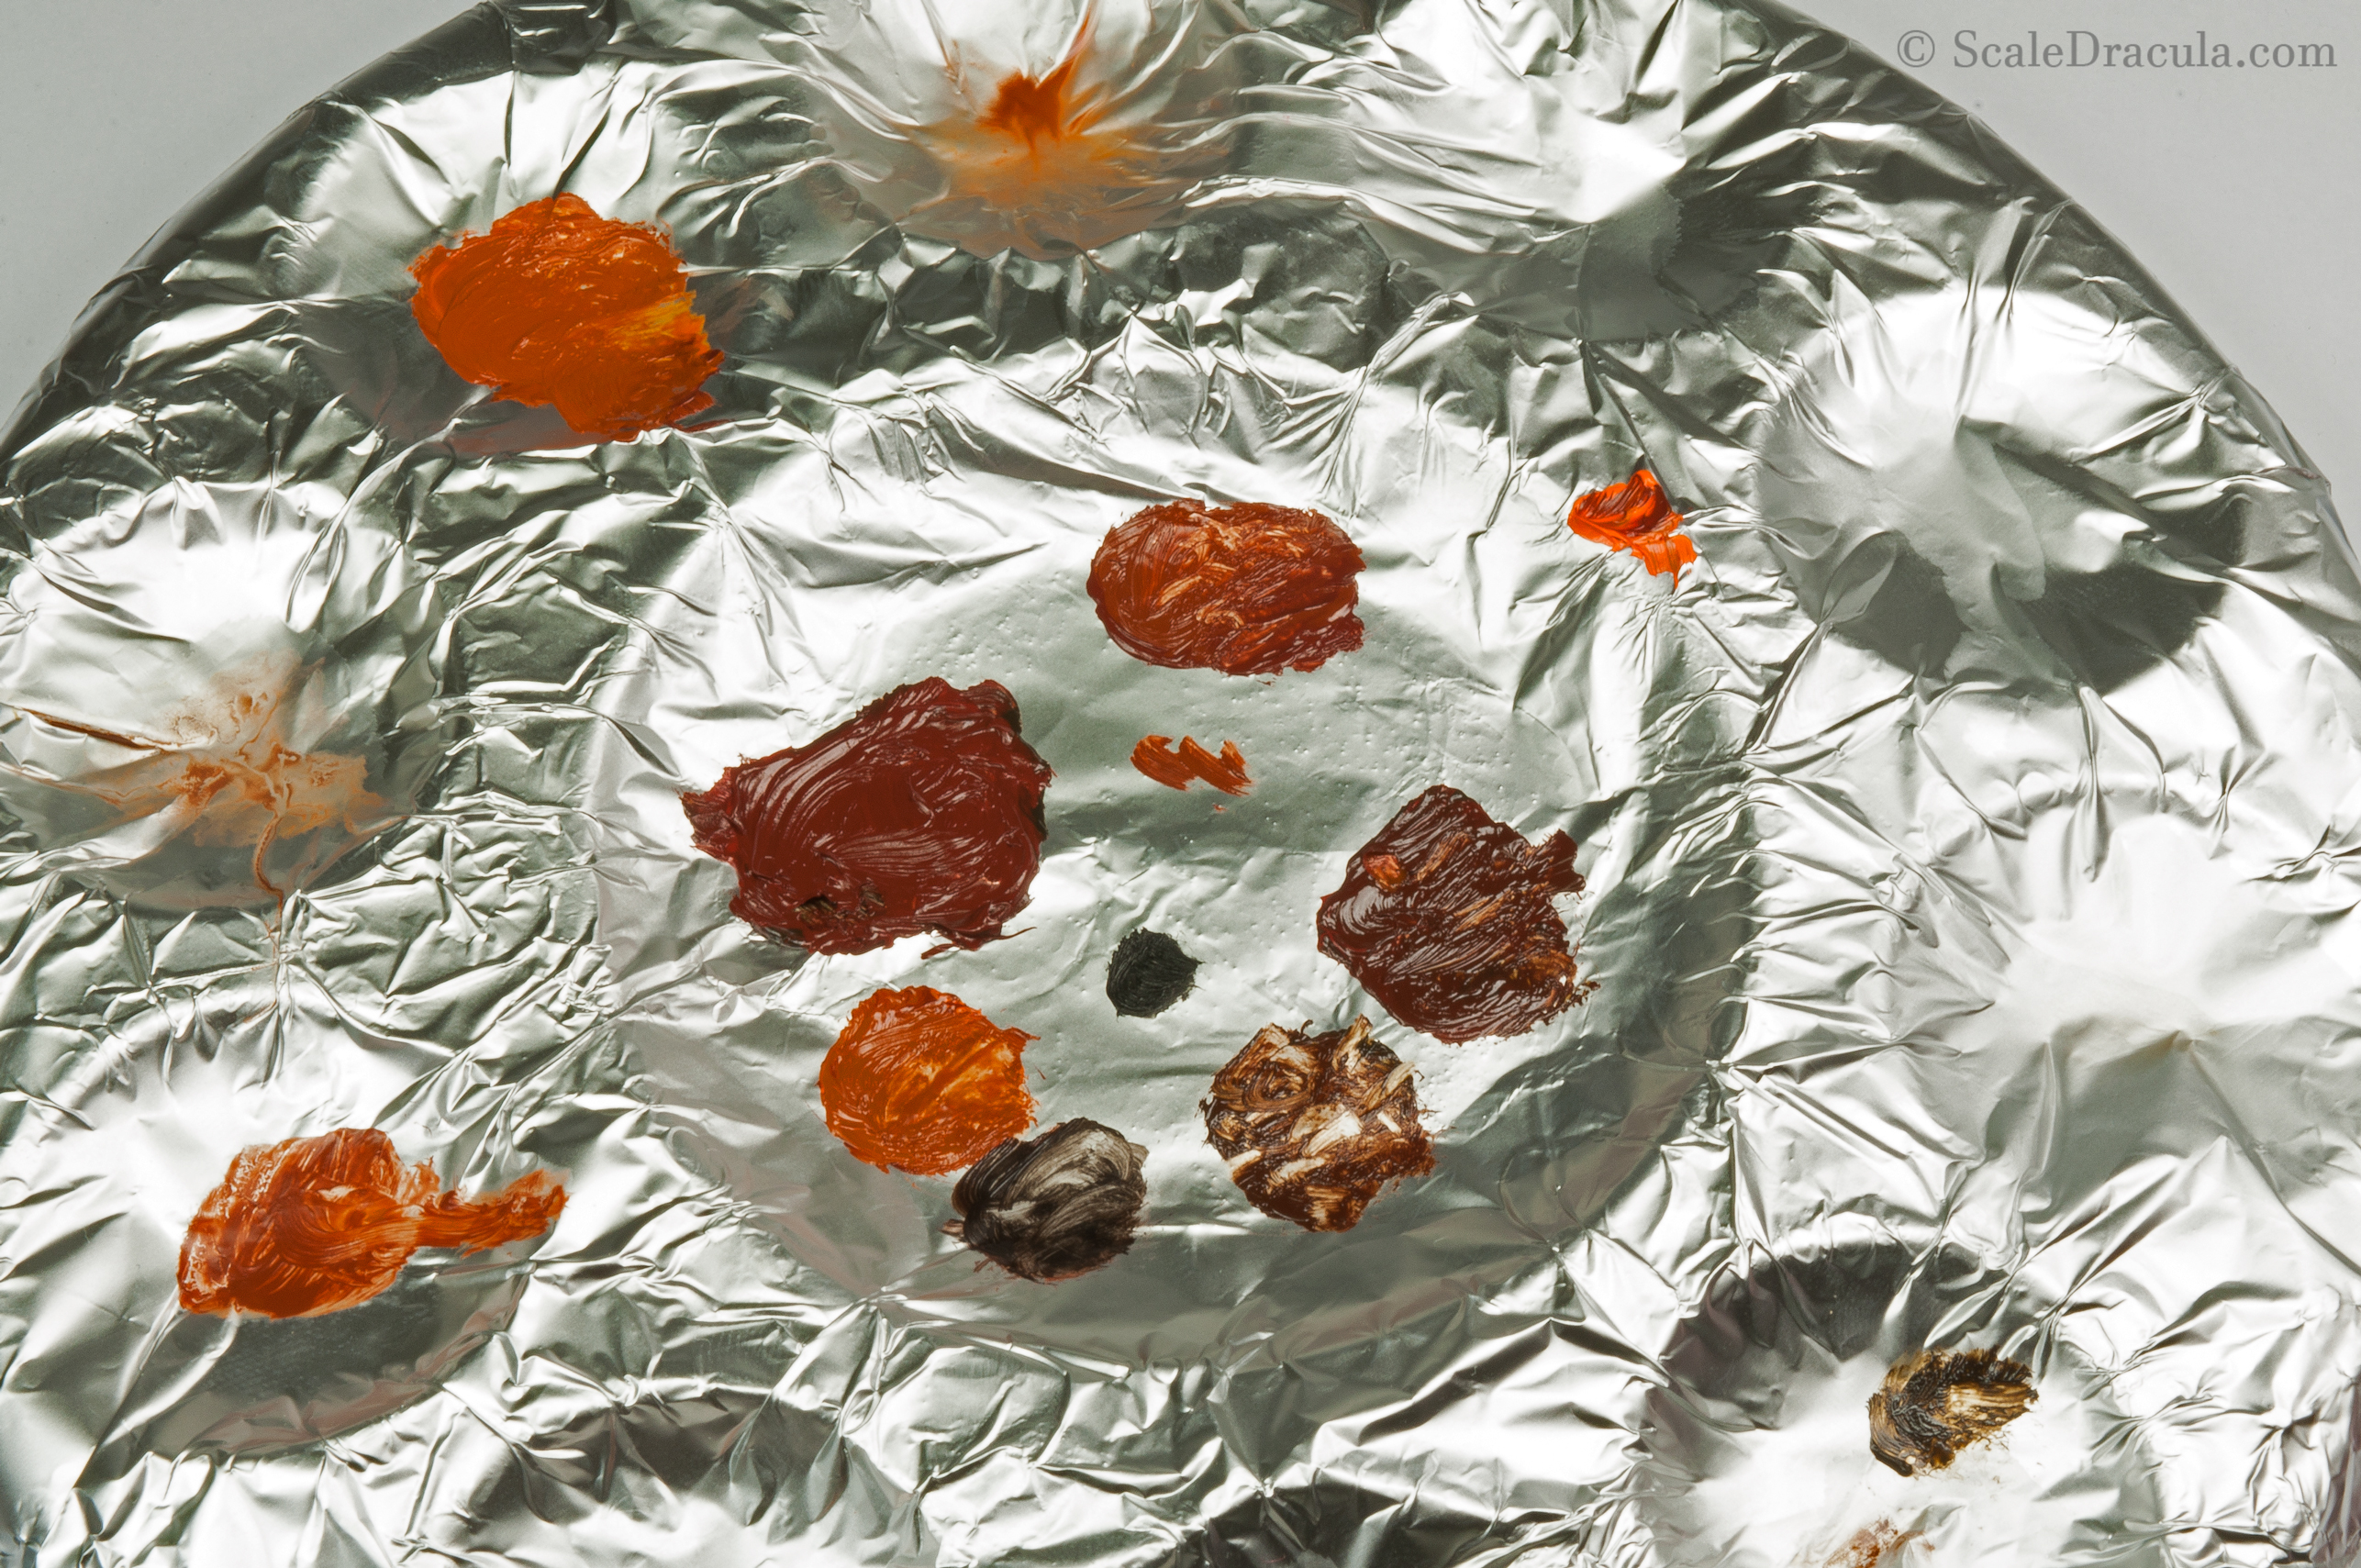
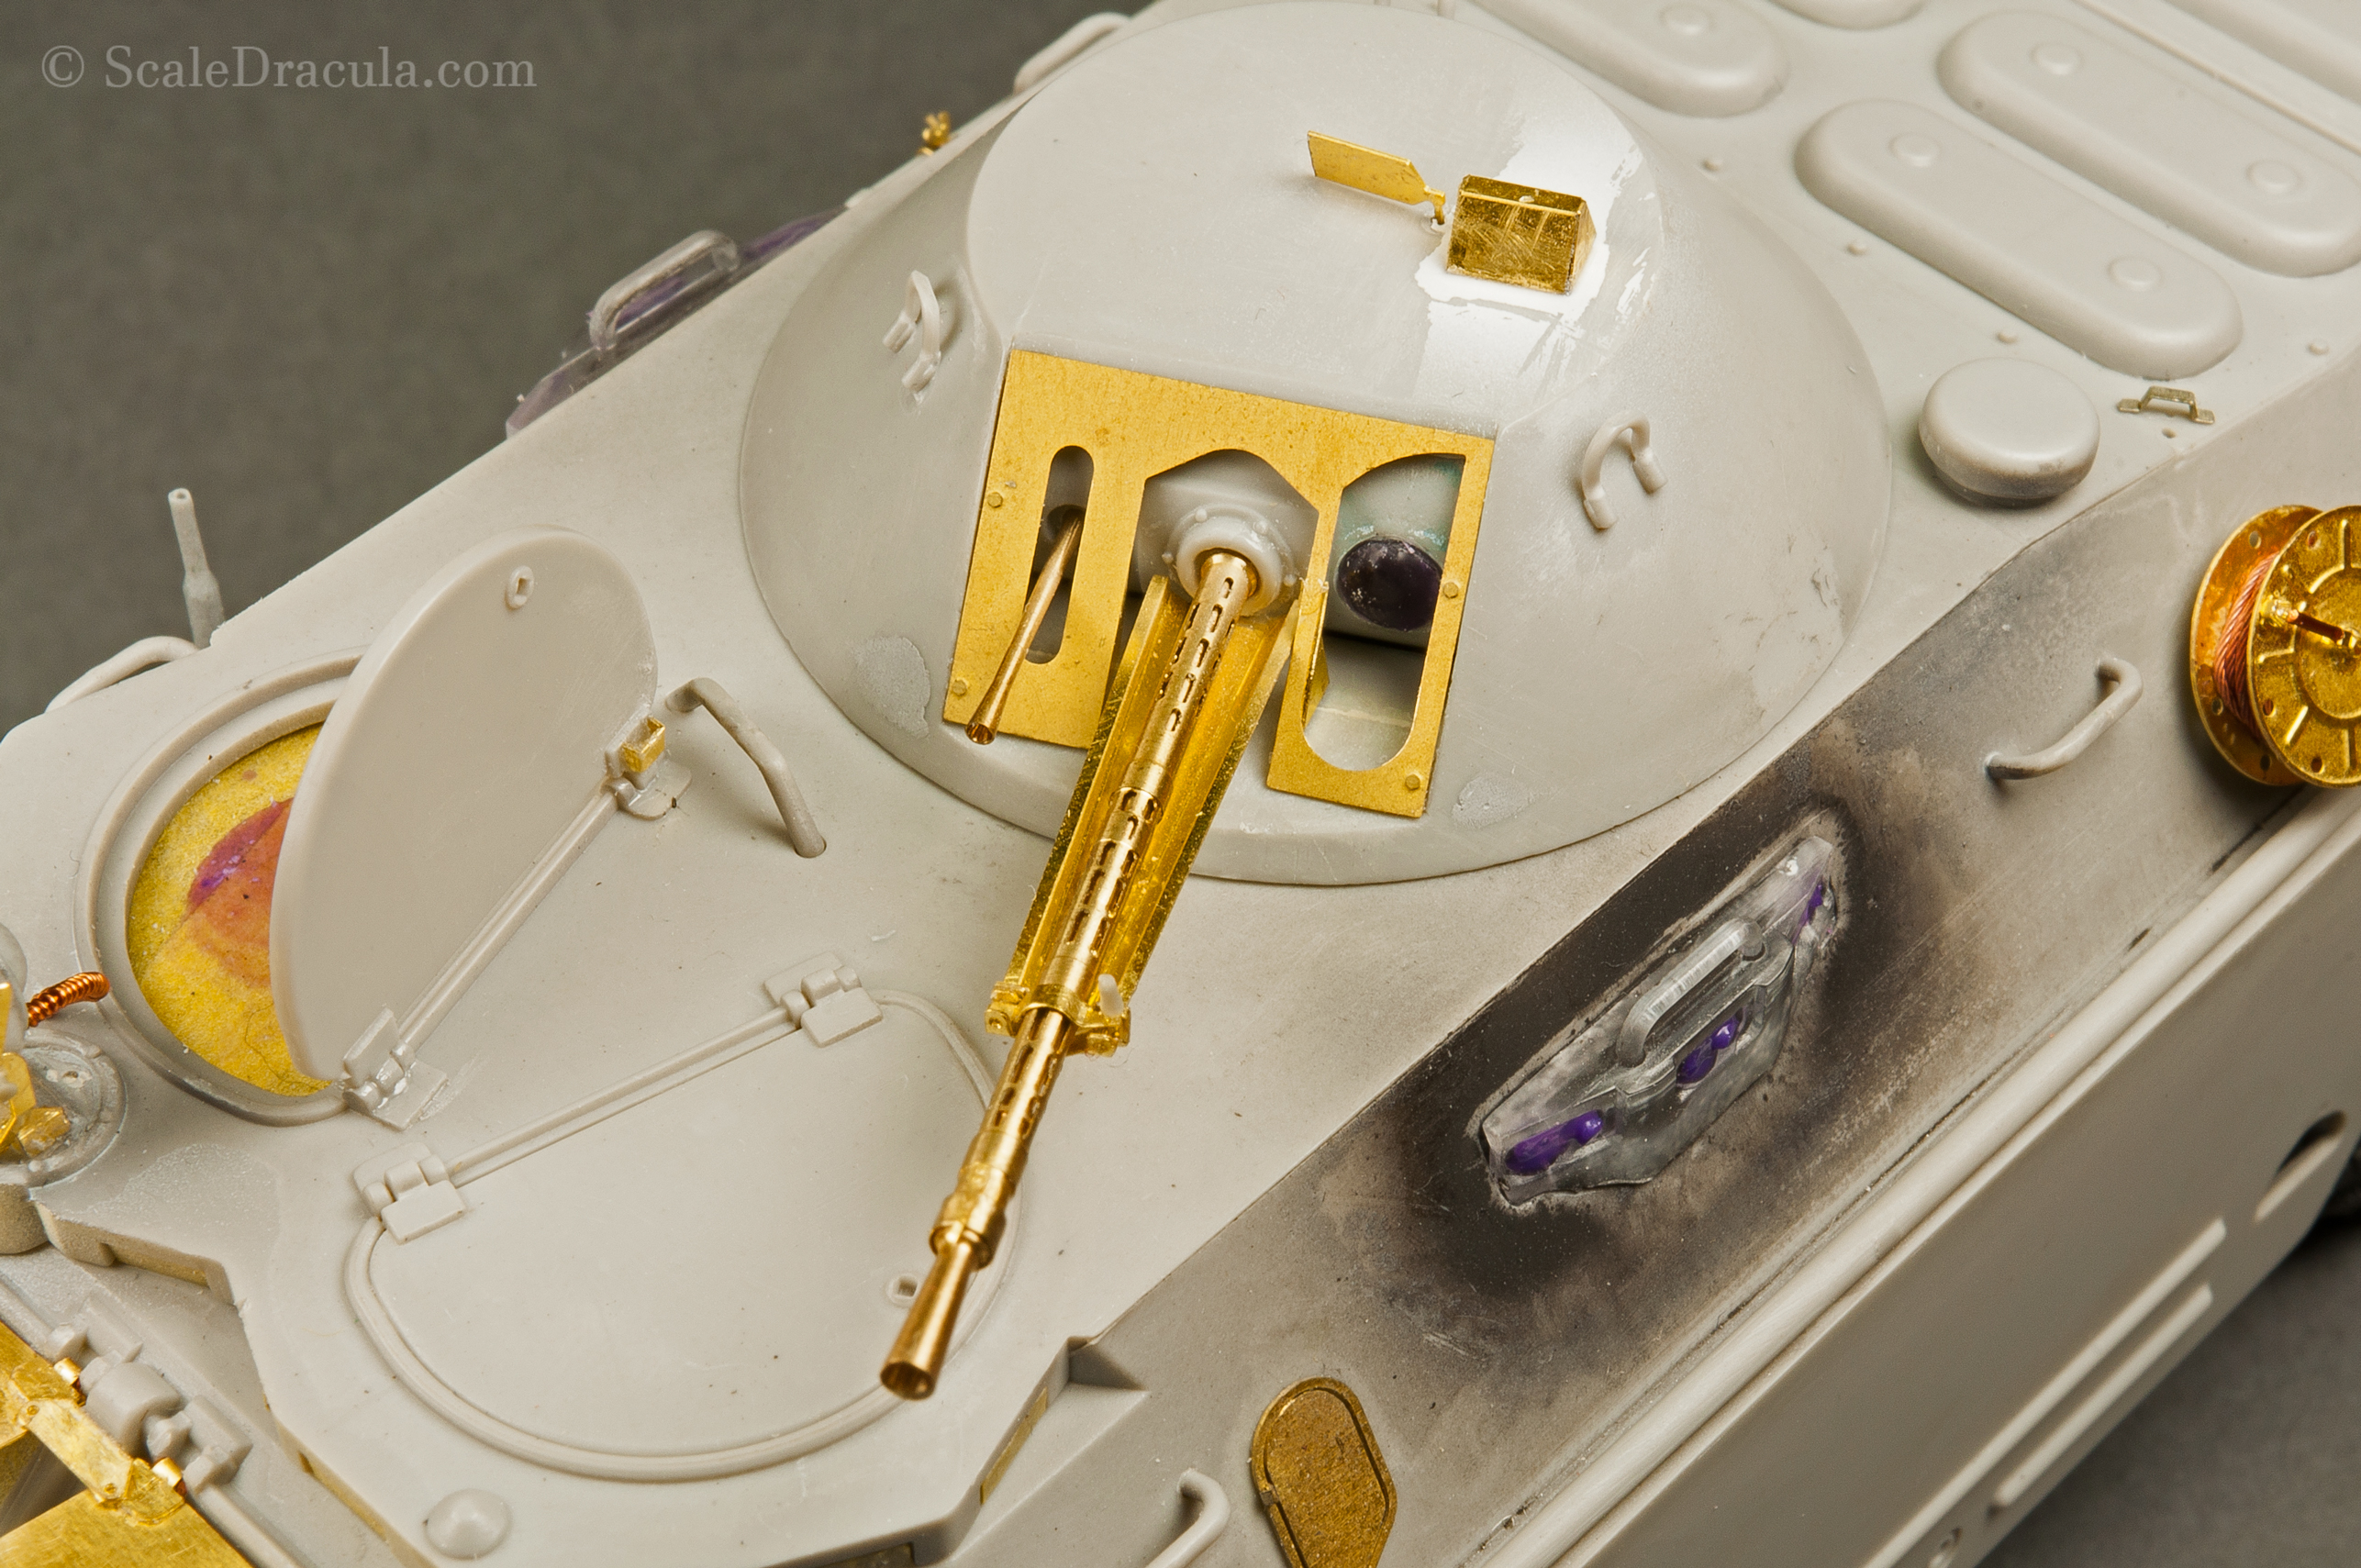
It’s time to crank those oils up to 11. The first step is the rust.
I created some shades by mixing various oils like: Raw Umber, Light Oxide Red, Black and Cadmium Orange. All paints belong to the van Gogh palette by Talens.
It’s important not to dilute oils at this points, at least no to much. However, you can drain the linseed oil on a piece of cardboard.
I create some rust effects with a detail brush. I dilute the colour slightly, then I apply just a little bit of paint on the model. Finally, I blend the colours with the tip of my brush.
Two things are crucial here: the way you dilute the paint and the brush movements.
1. The paint should be pretty thick. If you dilute it to much, it becomes runny and looses its opacity. Just a tiny bit of thinner is necessary.
2. The brush should work in gentle stippling motion. If you start to drag it along the surface you’ll wipe the paint away instead of blending it.

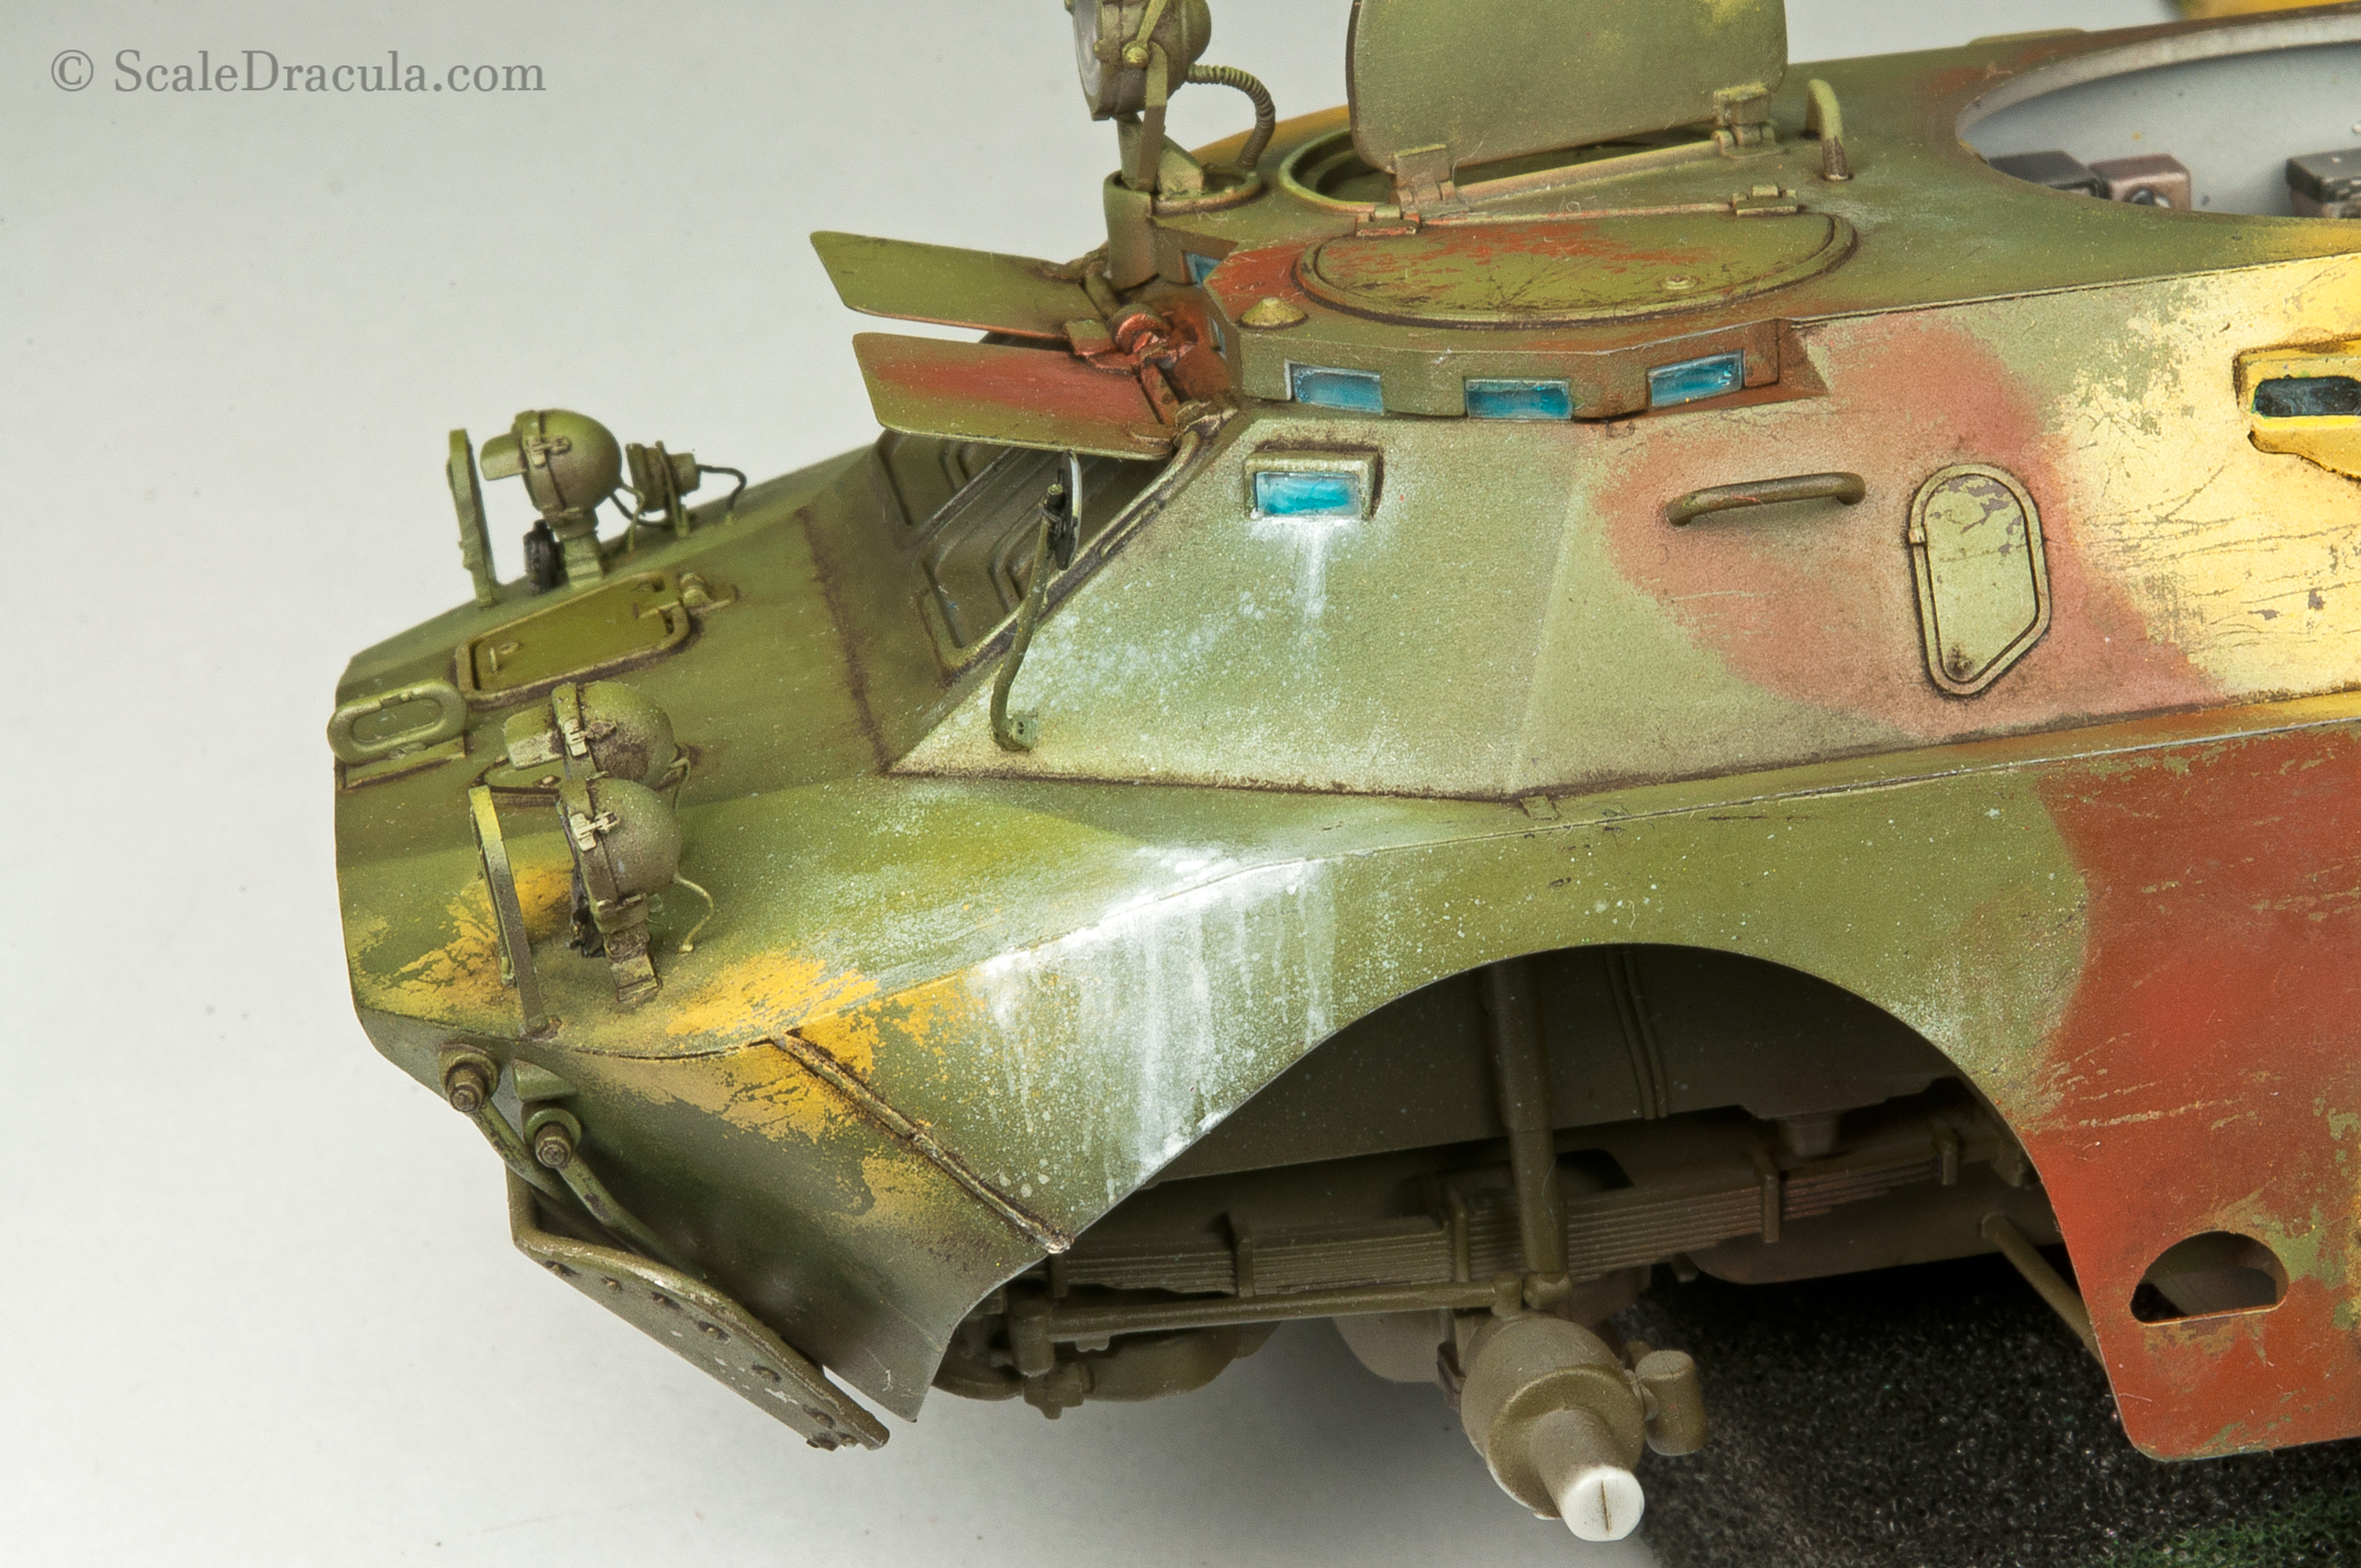
I decided to use some more oil paints on the white streaks. I know – it’s painting white over white. But structurally, those are two different colours and they behave in a unique way. I often use different kinds of the same colour to get those little variations.
An here’s the result.
I also painted the periscopes in transparent blue but I’m not satisfied with the result. I’m a tank guy, I don’t know how to deal with those transparent things. I’ll try to darken the periscopes later with Tamiya Smoke.
I’m not done with the oils just yet.
I apply some dark brown paint on the edges and then I blend it with gentle brush movements. Again, the paint must be pretty thick. And don’t put too much of it- this will complicate your work.
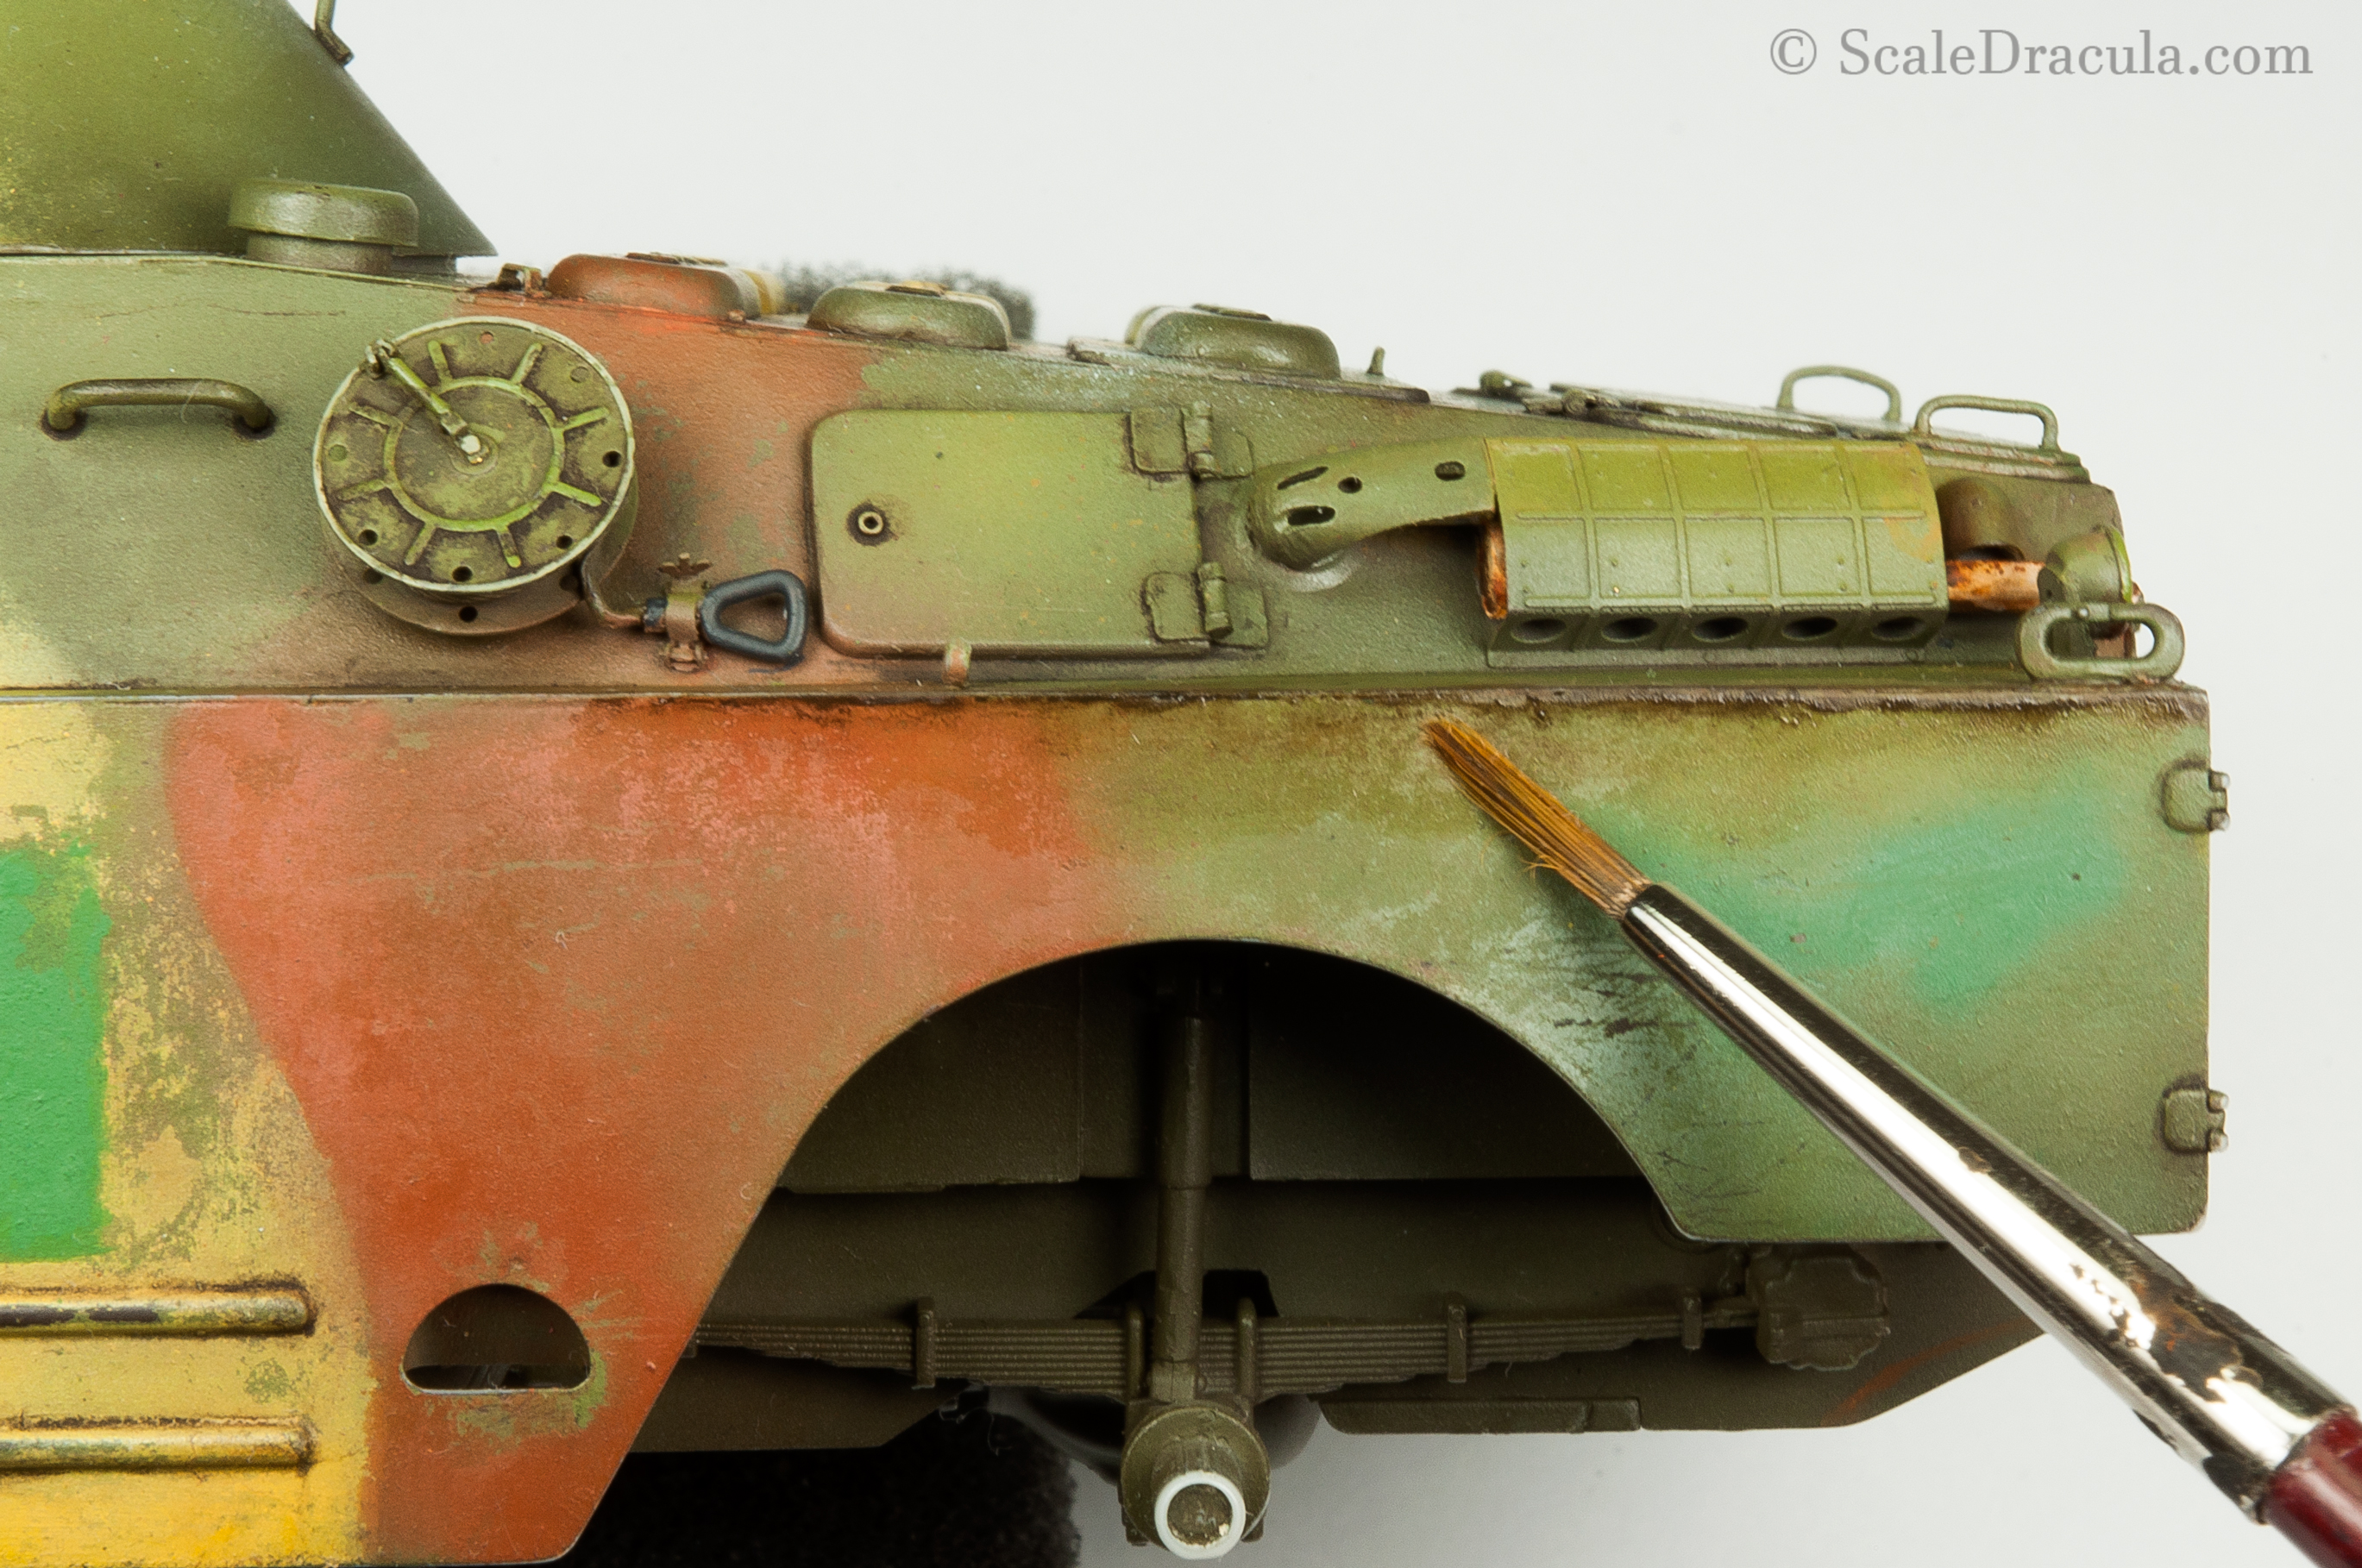
I also use the oils for the rusty scratches. The technique is the same but you need even less paint this time. Cover the scratch with just a tiny amount of colour and then clean the edges with a brush.

Nobody said you can’t airbrush oil paints. I mix them with white spirit and I build up the red brown colour in various places.
The typical oil paint dries very flat and is extremely fragile at first. Give it a few days to set properly.

The oils are also used for the exhaust covers. I start with dark brown colour and I gradually build up the colour up to black. The easiest way is to let the paint dry between the layers. But if you a pro, you should try to do it in one go.

Artistic oils are probably the most versatile weathering product. It's not easy to work with them at first, but they can produce some truly spectacular results.
Next step is painting some chips on the spotlight. I used Ammo Matt Aluminium for that and I’m really happy with this paint.
Acrylic metallics I’ve used before had very low opacity and were hard to control. With this paint I was able to paint some sharp, contrasting chips.

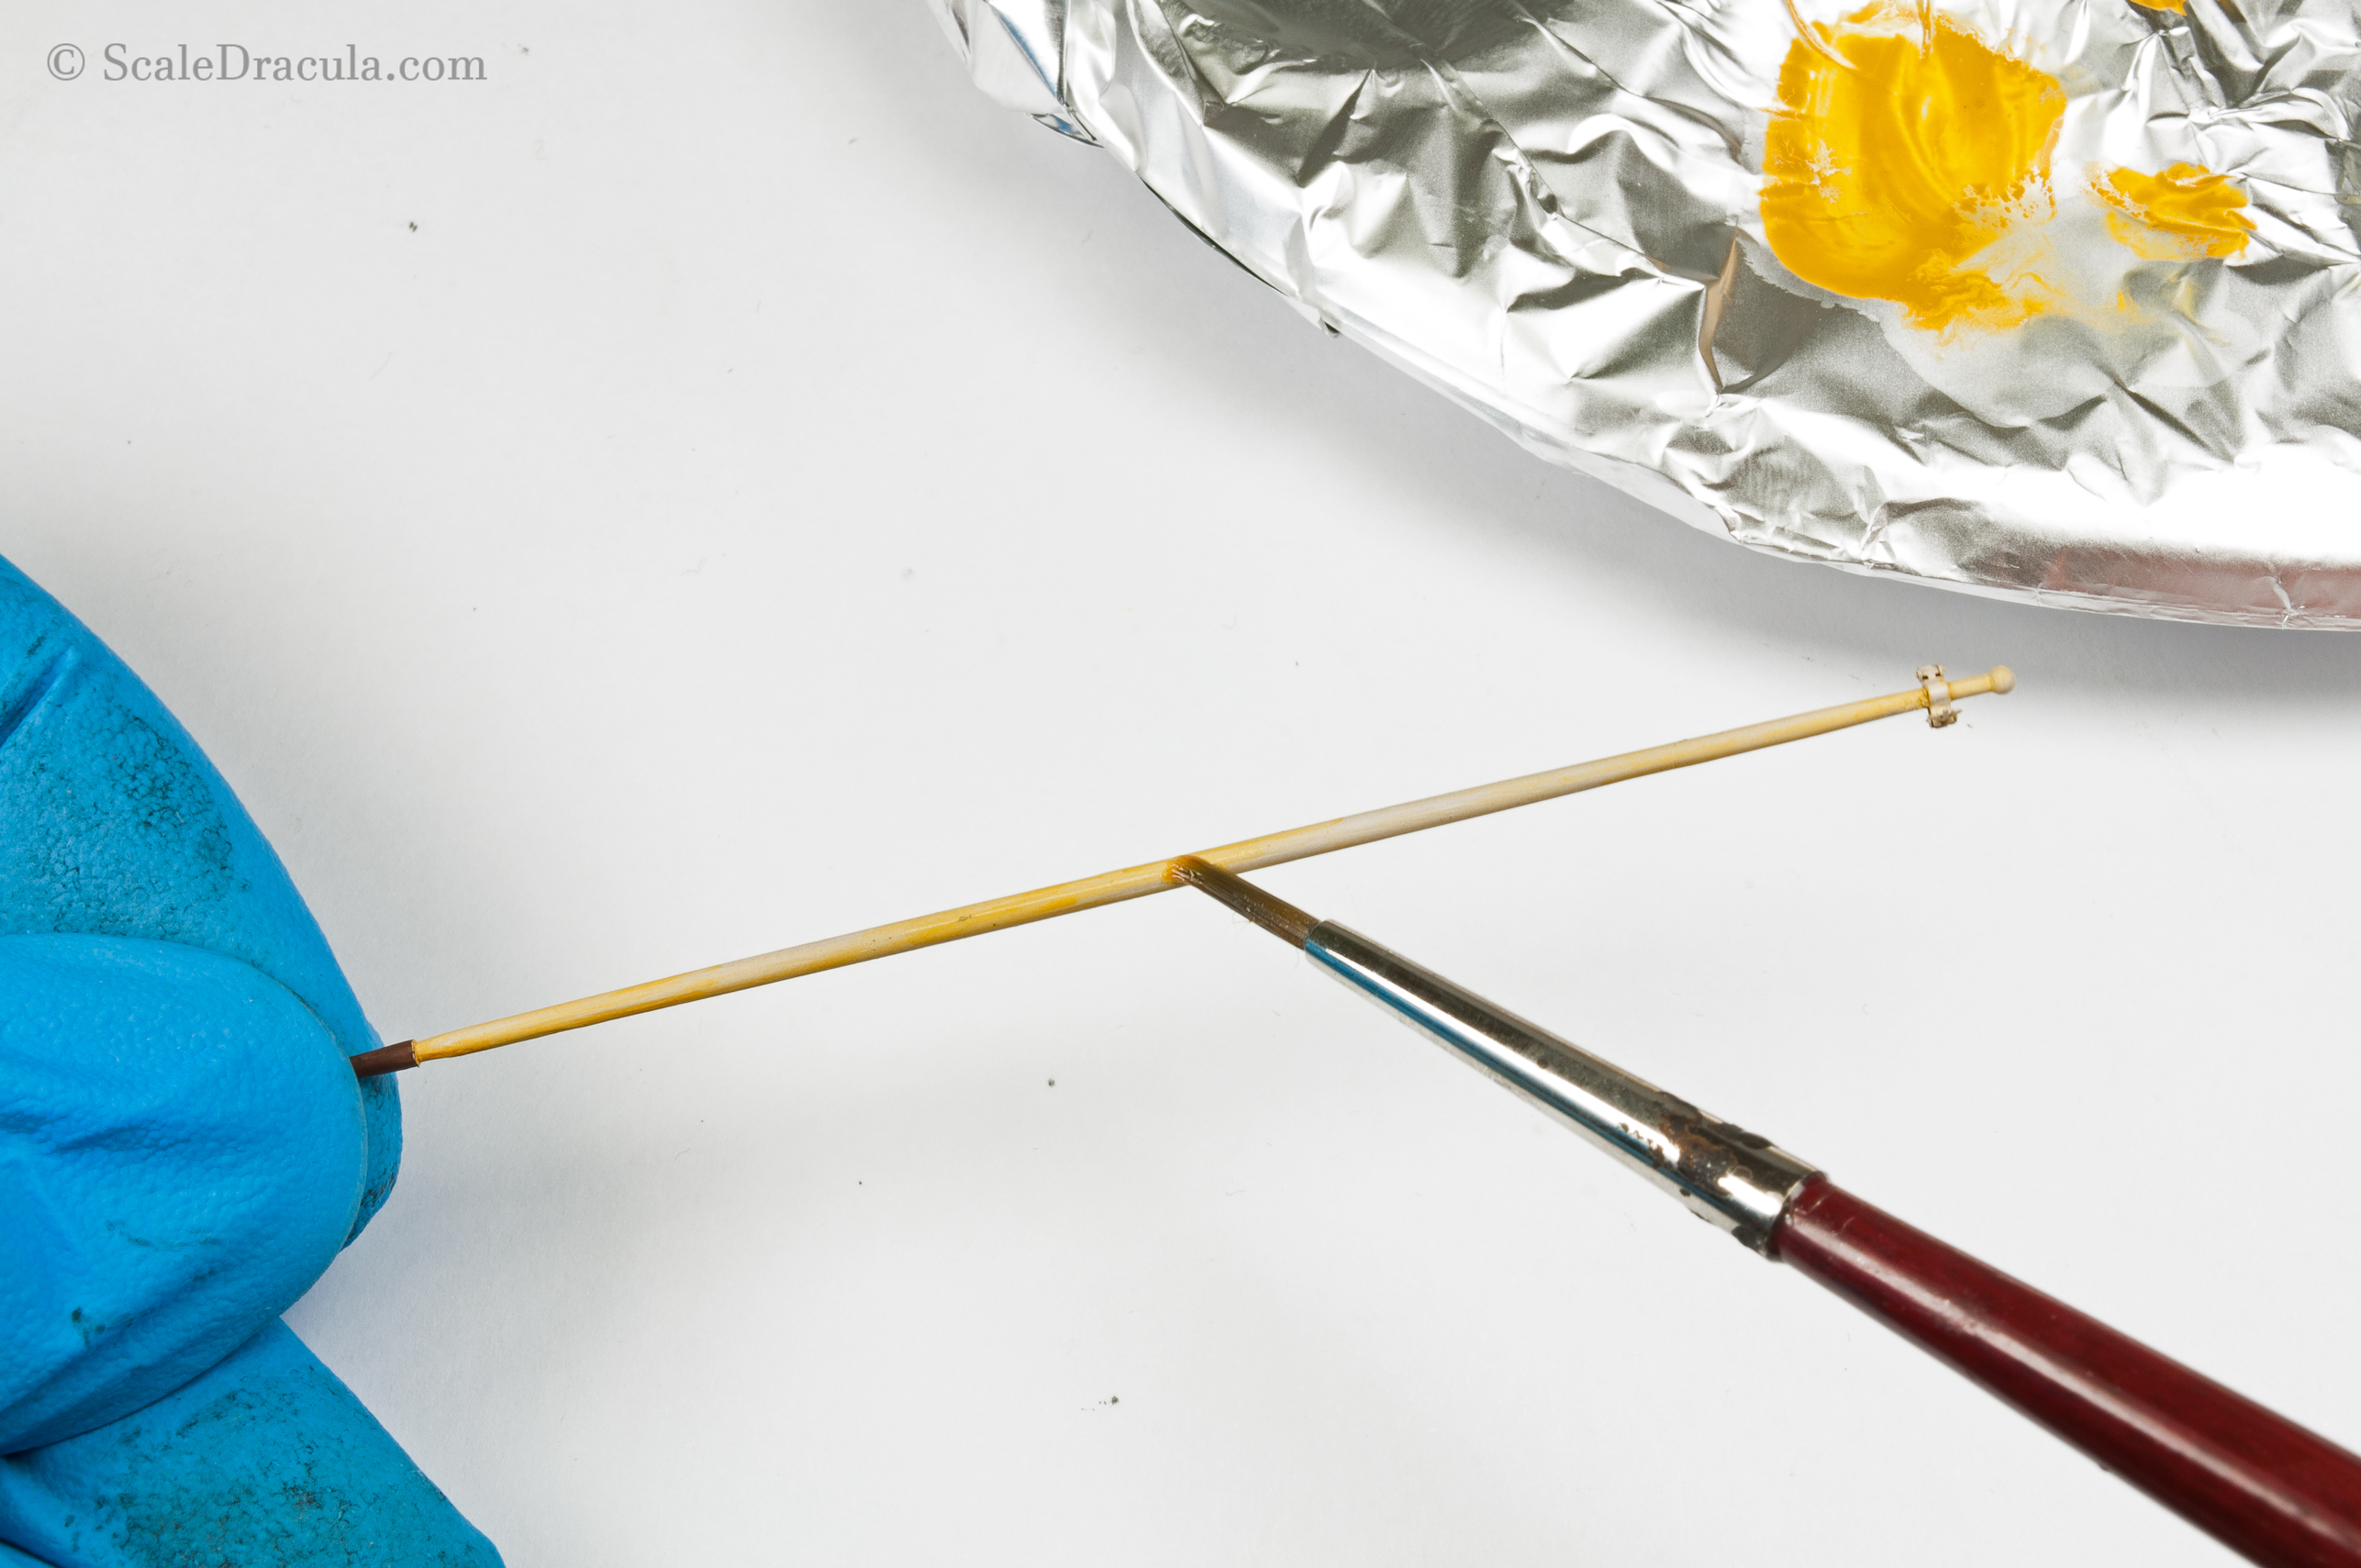
I put the main hull aside for a while as I decided to deal with the accessories. I painted the pike pole light brown. Then I created some filter effects with ochre and raw umber oil colours.
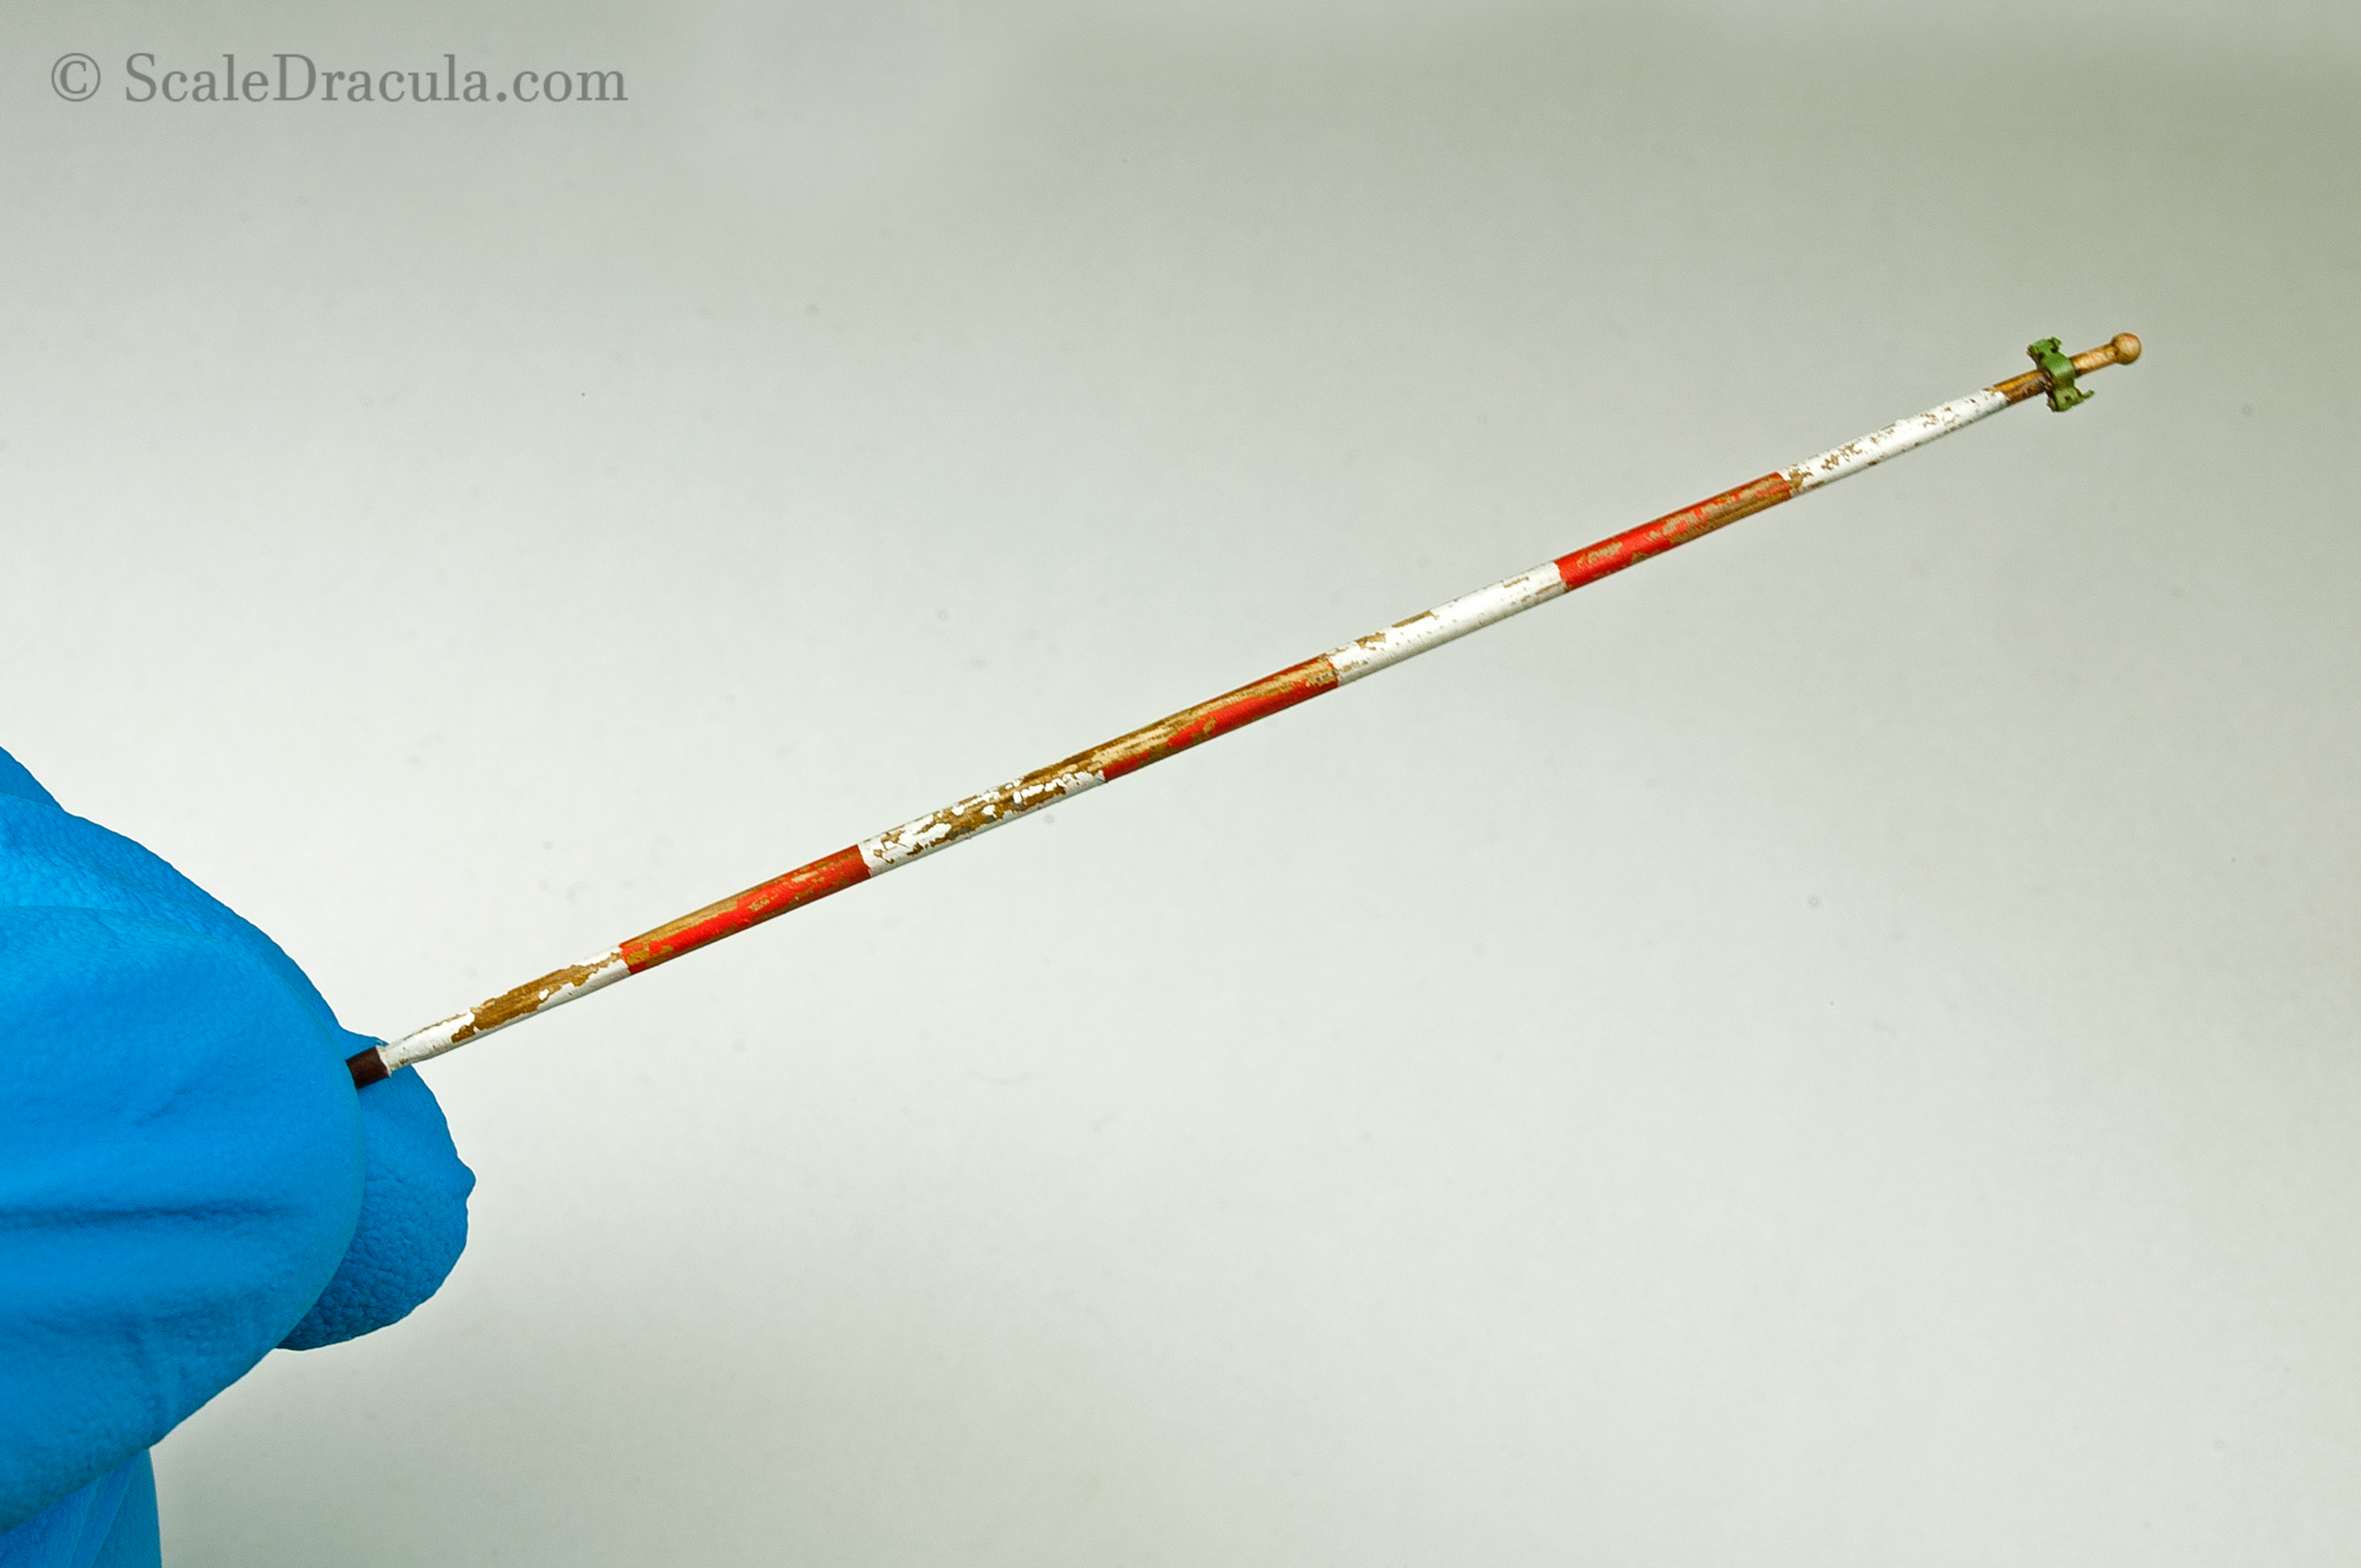
Here’s the pike pole fully painted and weathered. I used Tamiya masking tape to paint the stripes white and red. Then I scratched off some of the paint.
I want my pike pole to be an eye-catching detail. I’m always trying to add this splash of a vivid colour on my models.
By the way, I got mad with the stock rubber tyres and I decided to replace them. Panzer Art offers a great replacement set of wheels cast in resin.

The details on these parts are stunning. I love the tread as well as the side numbers and symbols. The quality obviously comes with a price but it’s a fair deal.
I’ve notices some moulding imperfections on the wheels but I hope they won’t be visible after the painting.

I already painted and weathered the wheels. It’s a whole separate SBS, so I’ll show you how to do it in another post.

I think it’s enough for today. There’s only one step remaining: the rest of the weathering and some detail finishing. I want to wrap up this model before the end of the year to start the 2019 with a fresh project. So expect to here from me soon. Take care, guys!


2 Comments
Barry Smyth
1 January 2019 at 04:28Hi there, love this site & devour every post. I have a question regarding moving from final paint to weathering, you mention “porous matt finish” early on & that this can create problems, what process do you use in between final & weathering? A gloss coat & if so, what brand of gloss do you use? Thanks in advance. Barry (Australia)
ScaleDracula
1 January 2019 at 10:14Hi Barry,
Good question. If I don’t need decals on the model I don’t use any varnish at all. The Ammo Mig acrylics are naturally satin and it’s works well enough for me. You can work around it by adding some satin varnish to the paints of your choice. Also, the flat (matt) finish isn’t that bad for the weathering actually. You just need to be extra careful with washes and other oil/enamel effects. Start to work on them immediately after the application.