This is the last part of my Ferguson built. Use the links below to check out the previous stages:
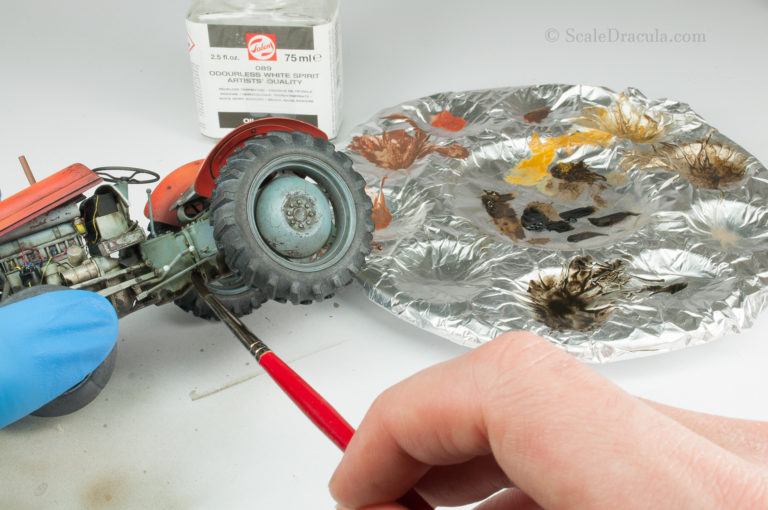
Here’s my favourite part of every build: the weathering. I really like when all the necessary ‘chores’ are done and I can only concentrate on adding some seasoning to the dish. My model was still in pieces, because I wanted to have easier access to same areas. I start the weathering with a fairly dark wash (Dark brown wash for green vehicles by Ammo Mig) and I put in all the nooks and crannies of the model. Then I blend it with a brush dipped in Talens White Spirit.

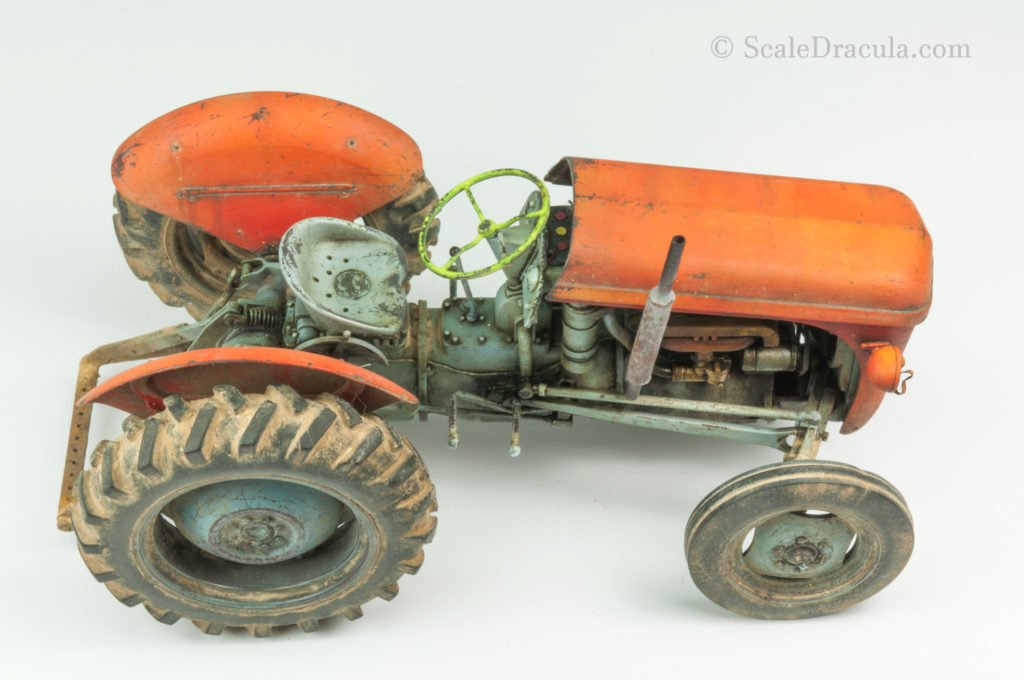
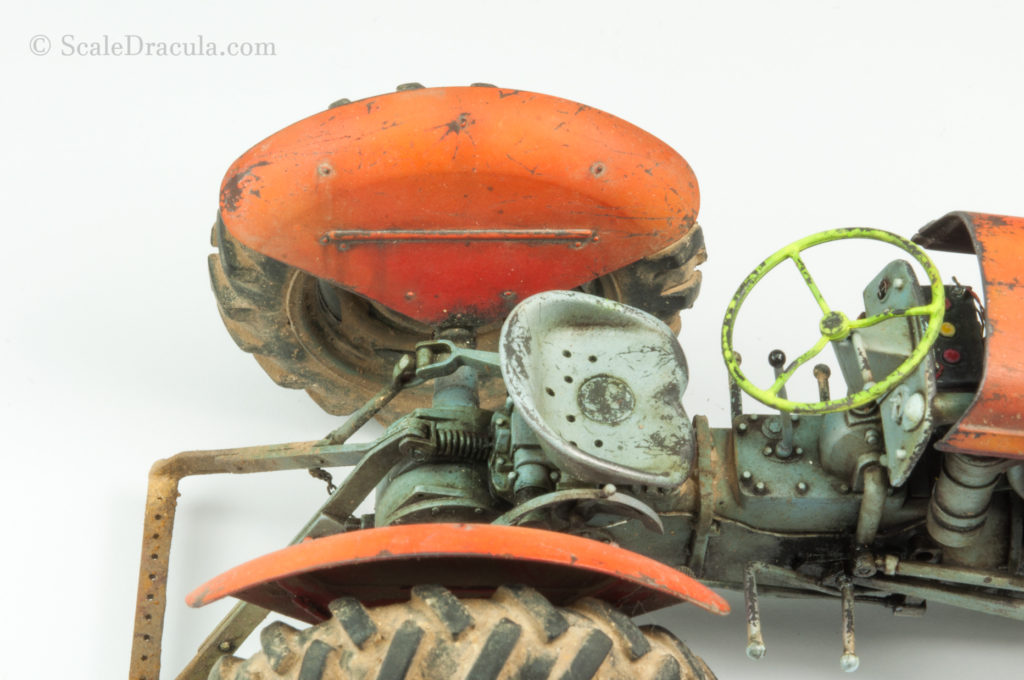
It’s finally time to assemble all the loose parts of the tractor. I really like this moment as I can finally see the bigger picture of what I’m working on. Here’s some pics of the assembled model.

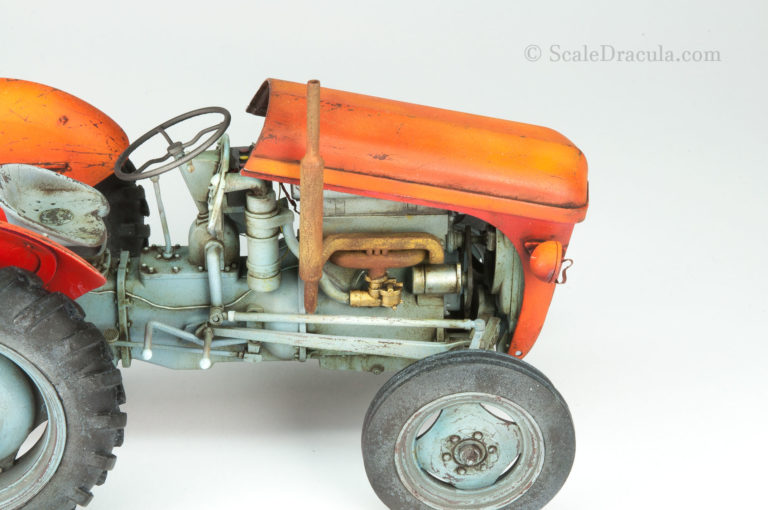
The model looks ok, but still a bit clean, isn’t it? It’s time to go a little more aggressive with the wash. I picked some more colours by Ammo Mig like Streaking Rust and Streaking Grime.

This time I’m focussing on places that are prone to collect dirt and grime. The paint is blended the usual way, but this time I’m trying to leave just a little bit more wash on the model.
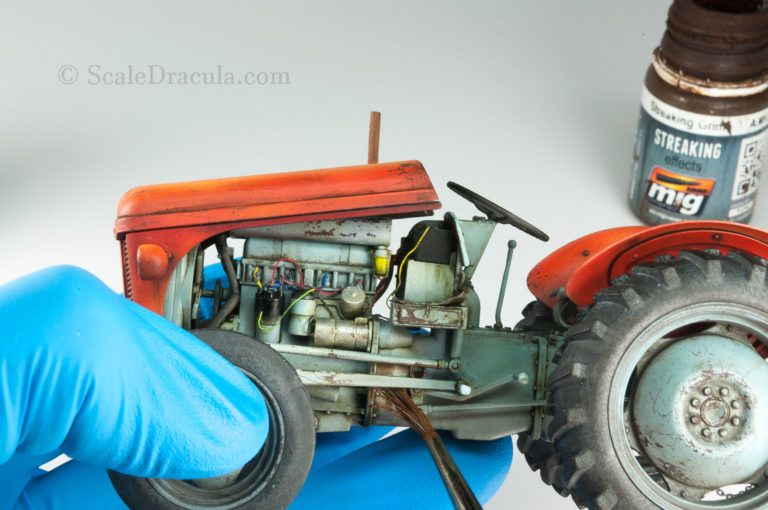
It’s also a good moment to do some streaks, but I don’t want to go crazy with them as the model is pretty small. Use a small brush to draw a line going down. Then with a larger, flat brush dipped in white spirit blur the borders of the line.

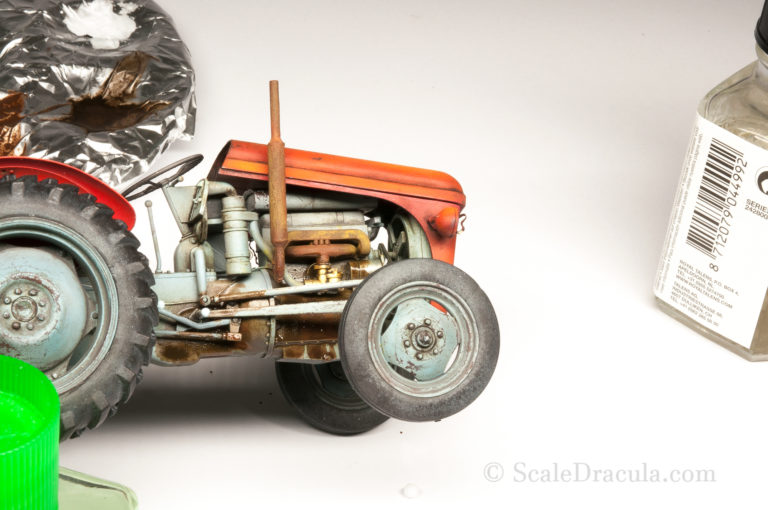
It’s time to intensify the effect even more. I switch to oils and I prepare a fairly dark mix of burnt umber and black. I focus on the places, that I worked on previously to make them even more dark and dirty.

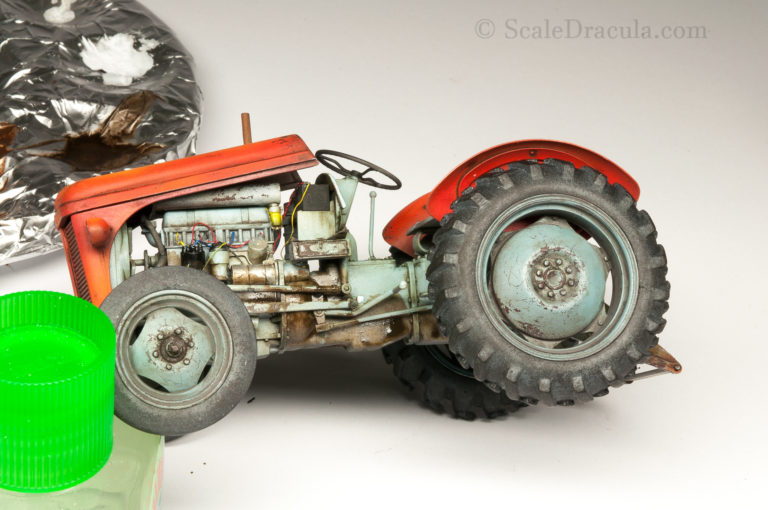
You see what I did there? It’s like a gradual transition of washes. The first one was just supposed to emphasize some details of the model, then I started to build up the dirt and grime. But as I was using similar colours all the time (only a bit darker every step of the way) I was able to achieve a smooth effect.
After that I realized I missed some places during the chipping process. This time I did them with a brush and a dark brown paint (Vallejo’s German Black Brown). For job like that you need a good quality pointy brush and a pretty thick paint to make chips with good contrast.

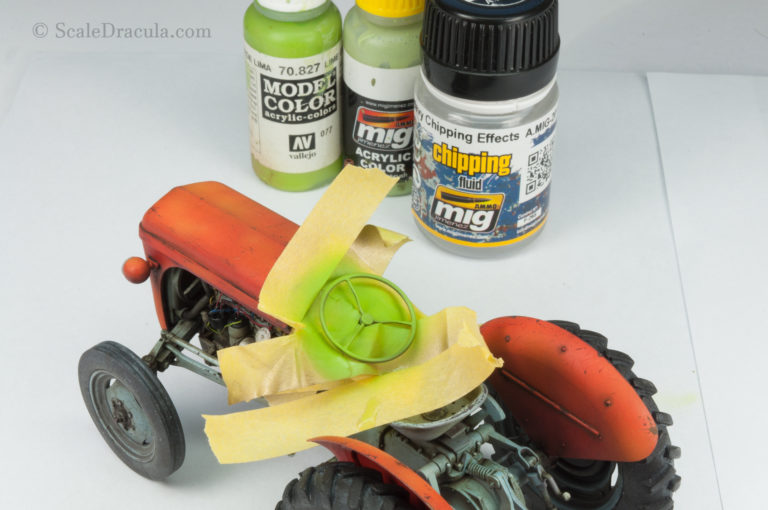
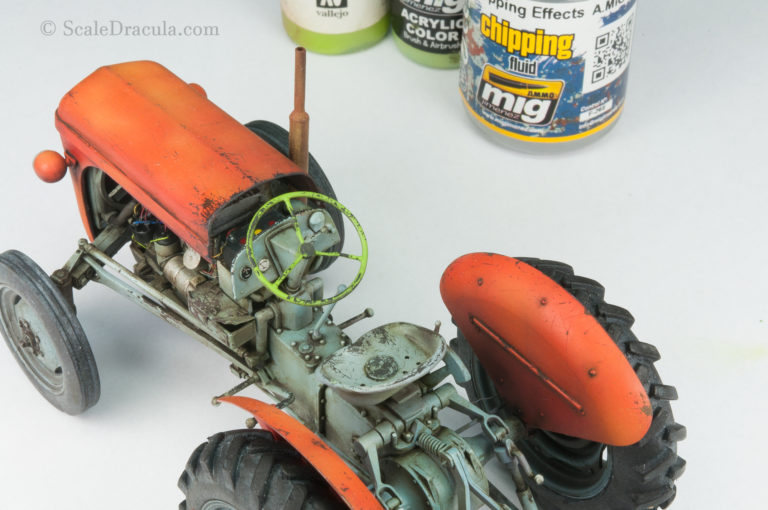
The black steering wheel seemed a bit boring to me. So I decided to paint it in some bright eye-catching colour. Let’s assume the owner of this tractor was a really funky farmer.
I did a mix of Vallejo Lime Green and Ammo Mig Light Green (at least I think it’s Light Green- the names on these bottles come off really easy). Vallejo paints, based on acrylic resin, aren’t the ideal choice for hairspray technique as they are pretty much out of control. But this time I didn’t really mind.
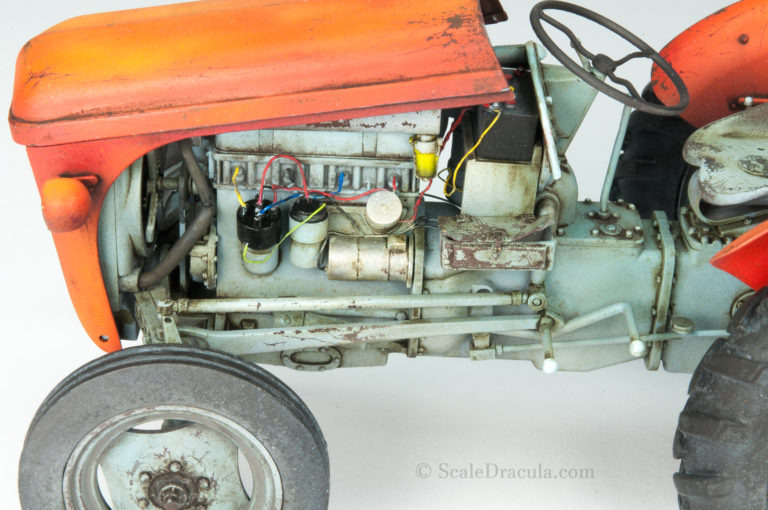
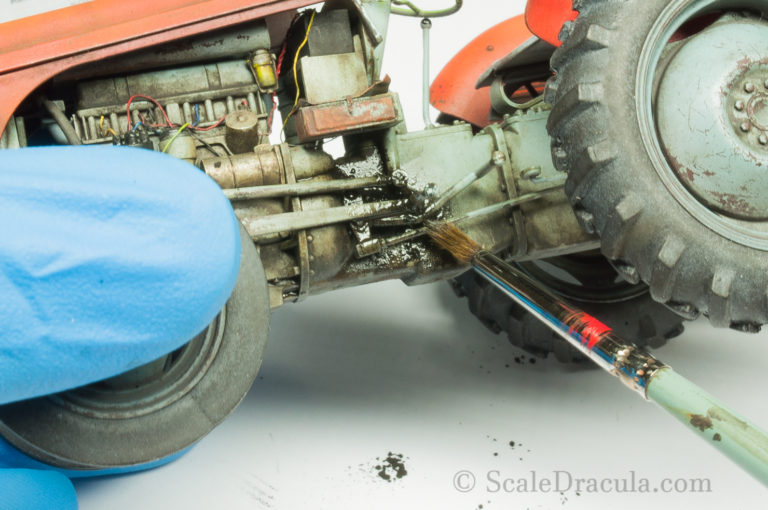
I decided to make my Ferguson even more dirty. Here’s a cool technique I’ve learned from an Ammo Mig video.
I sprinkle all the chosen places with black pigment. Then I use Ammo Mig Engine Oil to fix the pigment in place. Repeat the process couple of times to get an extremely realistic effect of glossy engine grime deposits. Remember to choose the places of application wisely. You need to blend the effect with the previous dark wash.


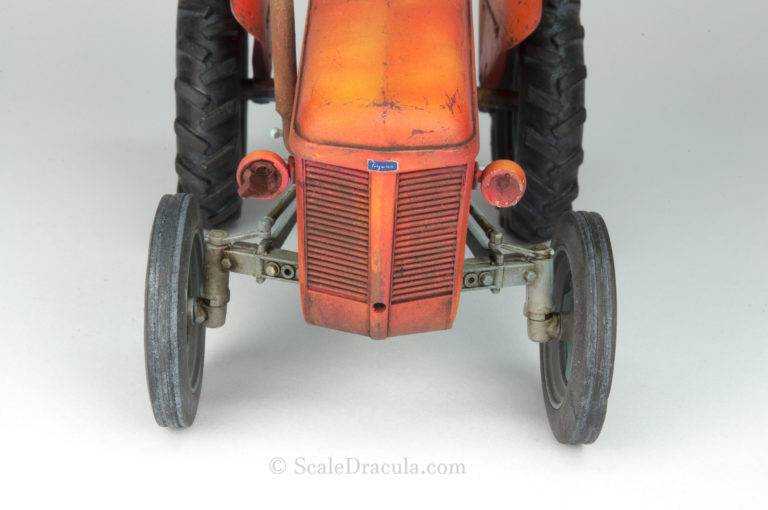
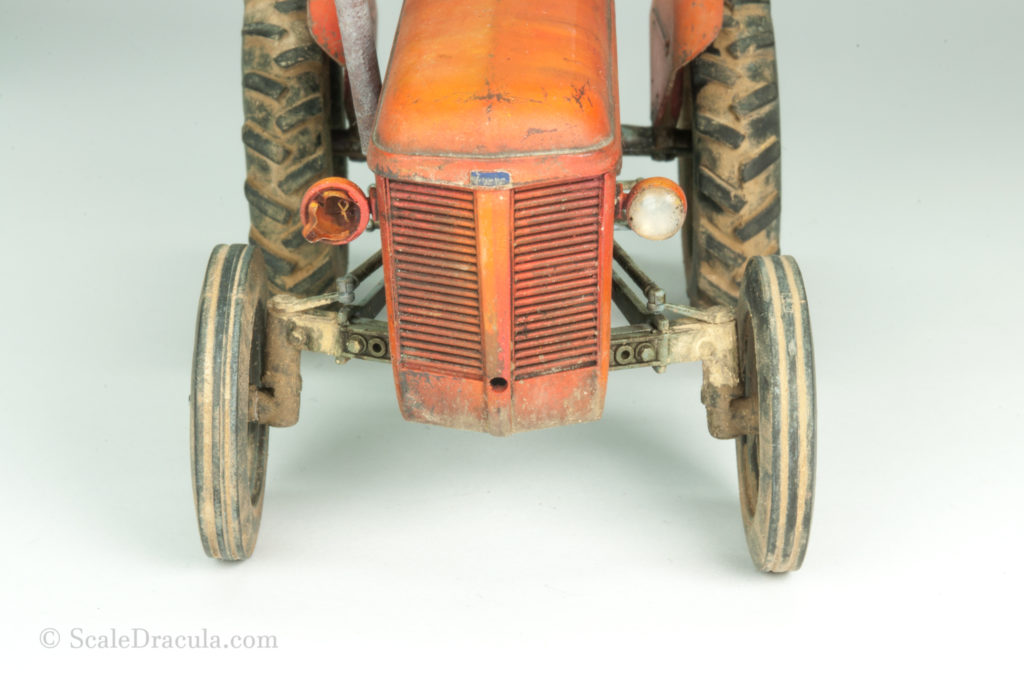
You may have noticed that I’ve started to paint the rust. I had to work in a hurry though as I used acrylics. So there was no time to take photos. But I will explain everything later.
It’s time to do some fading for which I picked up the Ammo Mig recent product: the Airbrusher. I won’t go into details about the product itself, maybe I’ll do a separate post about it.
I chose some corresponding colours, red and yellow, and applicated them accordingly to achieve darker and lighter shades. This looks a little bit like the oil dot technique, but I don’t randomize the colours, I rather plan ahead and enhance the already existing contrasts.
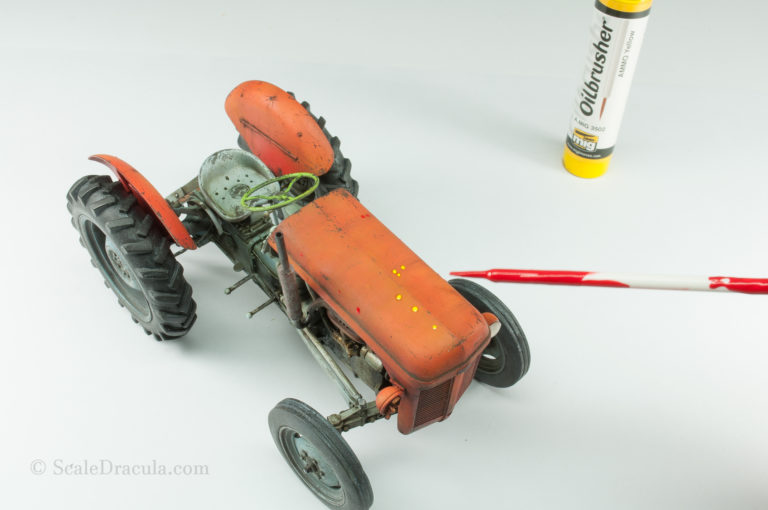
Then I use White Spirit to blur and blend the colour dots. Remember to clean you brush constantly after almost every stroke.

The result is a faded paint on the hood. The effect is rather discreet, but that’s what I wanted.

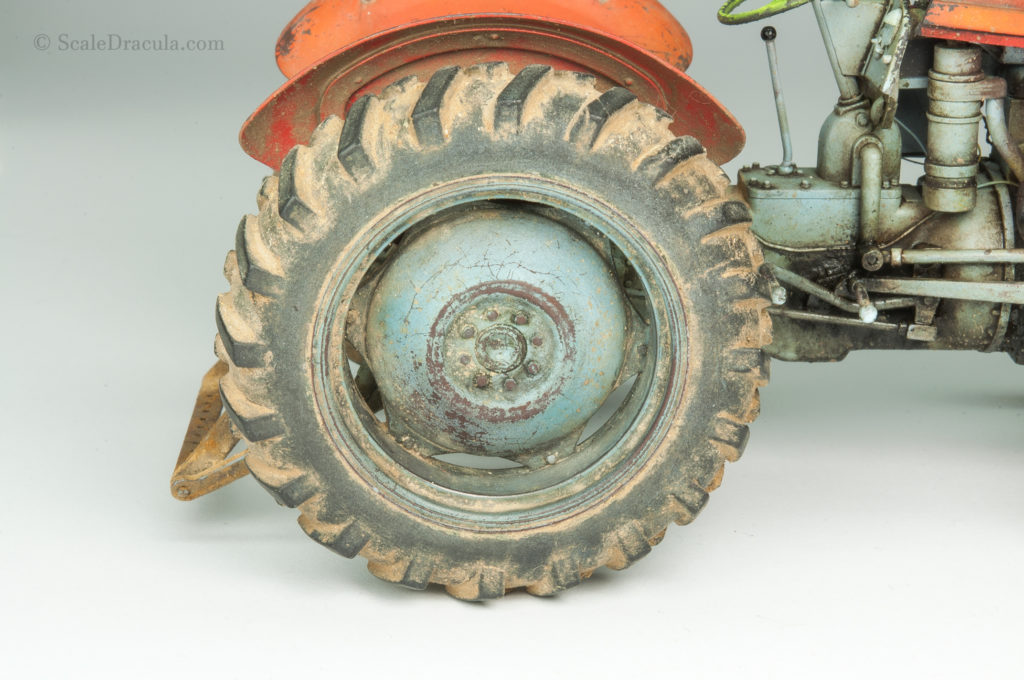
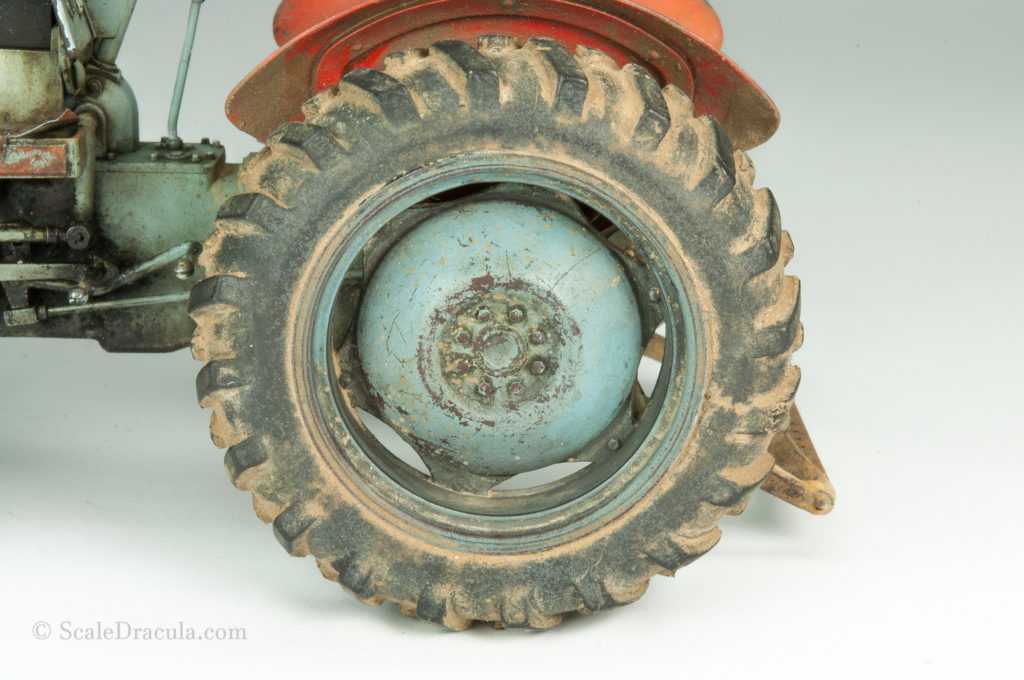
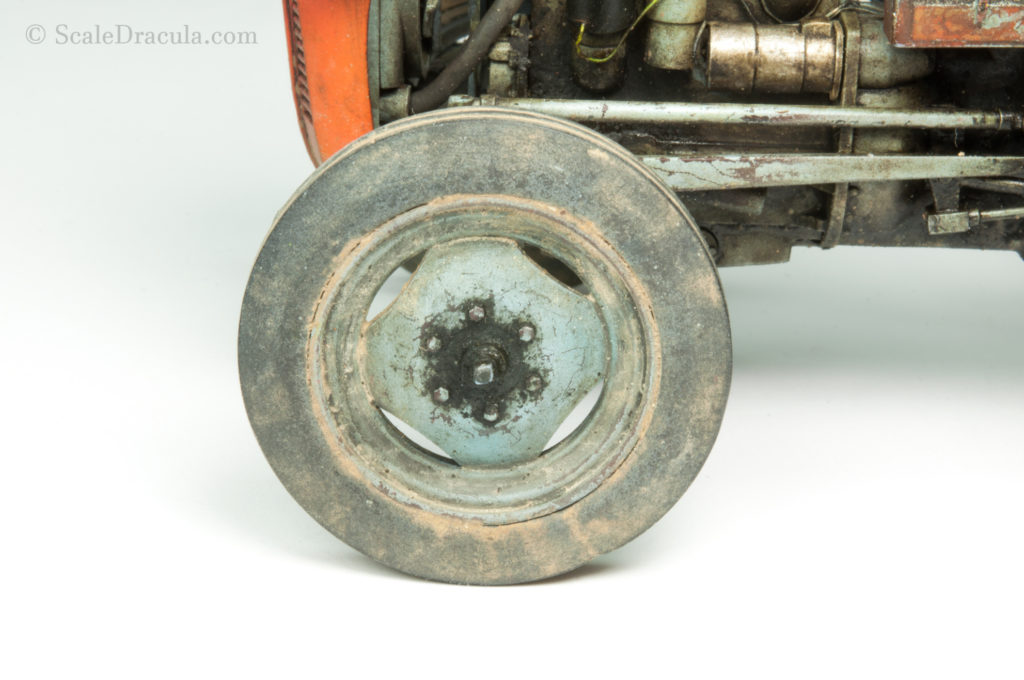
Mud time everyone! I start with a product called Loose Ground from the Ammo Mig Splashes collection. It’s a medium density fluid designed for splashes, but I will use it as a thick wash. First I put it one the fenders straight from the bottle. I remove the excess with a brush dipped in White Spirit.

Then I prepare a mixture of Loose Ground and various pigments. Note that all the pigments are rather light. I want to go for a dusty appearance, not a thick, fresh mud.

I cover the tyres with the mixture. It’s good to change the proportion of the pigments from time to time to avoid a dull, uniform look. I prepared 3 or 4 mixtures and used them randomly. You can sprinkle some more pigment on the still wet layer to give it more texture. The pigments are known for going considerably darker when they are wet. Take this into account.
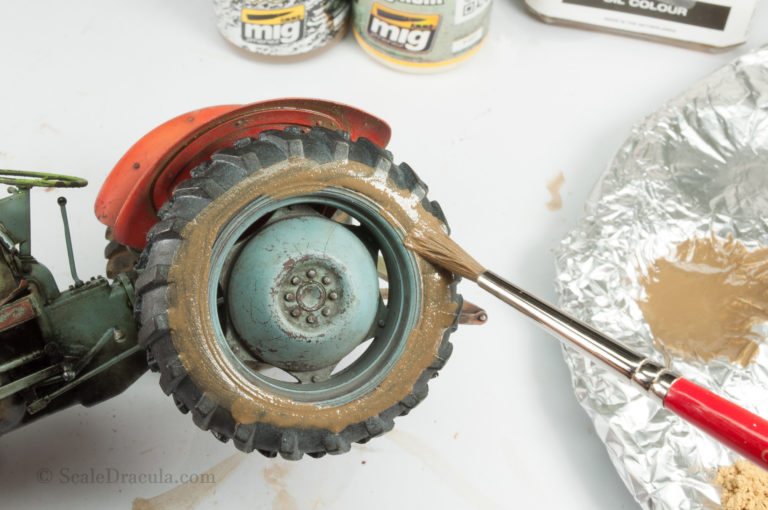

Give the paint couple of minutes to dry, but don’t wait to much as the enamel paints can dry completely within an hour. Now it’s time to remove some of the mud. I start with a brush sweeping it repeatedly towards the centre of the wheel. Then I clean the tread of the tyre with a q-tip. This part of the wheel usually stays super clean.


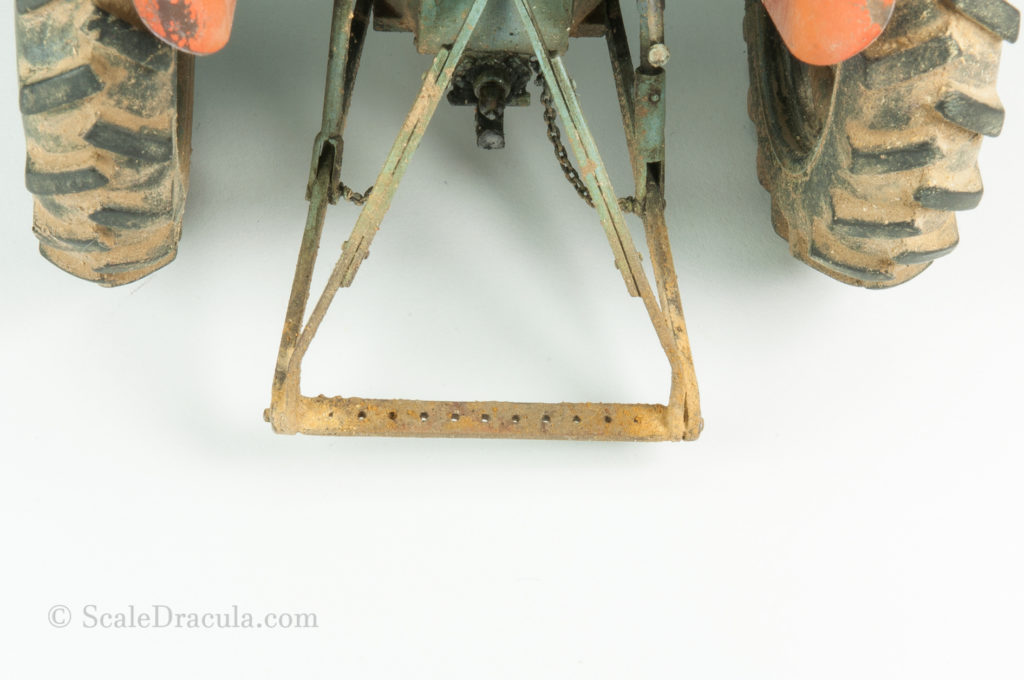
Finally I add some splashes of mud around the lower part of the vehicle. Again, I keep it moderate not to overwhelm all the previous effects.

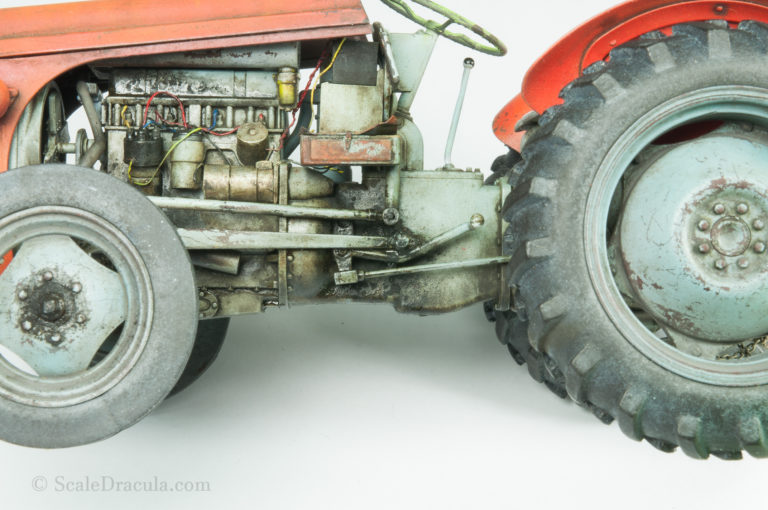
Finally, I use Ammo Mig Gun Metal pigment to give some shine to the edges of the model. I do it with a silicone brush- a very versatile tool for this work. Be careful not to exaggerate this effect though.

I mentioned earlier that I will explain how I painted the rust. I couldn’t take any photos of the process as I was in a hurry working with fast-drying acrylics. Take a look at the next picture and hopefully everything will be clear.

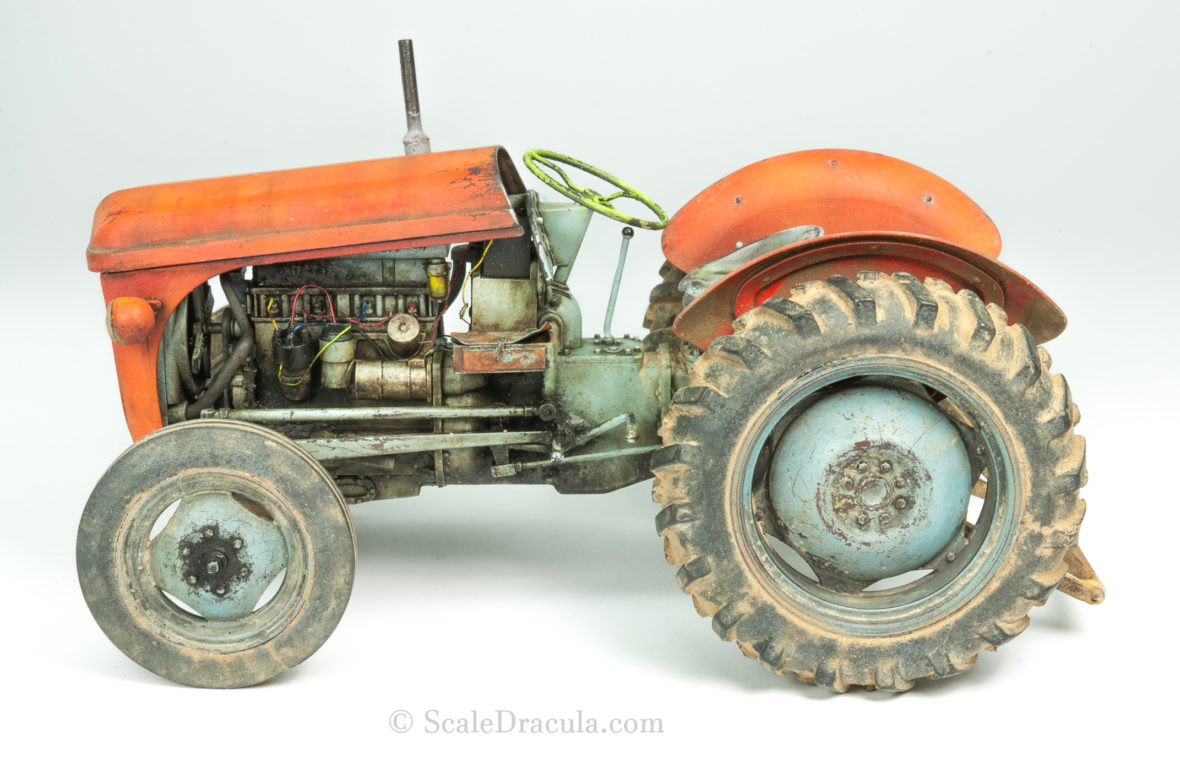
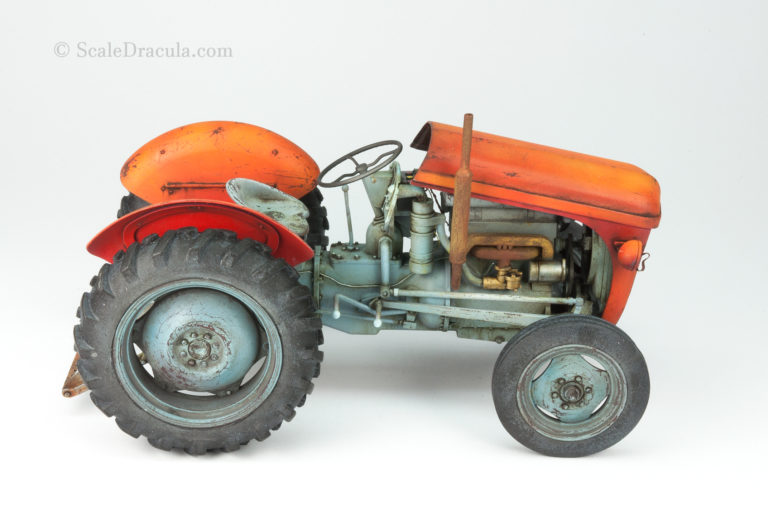
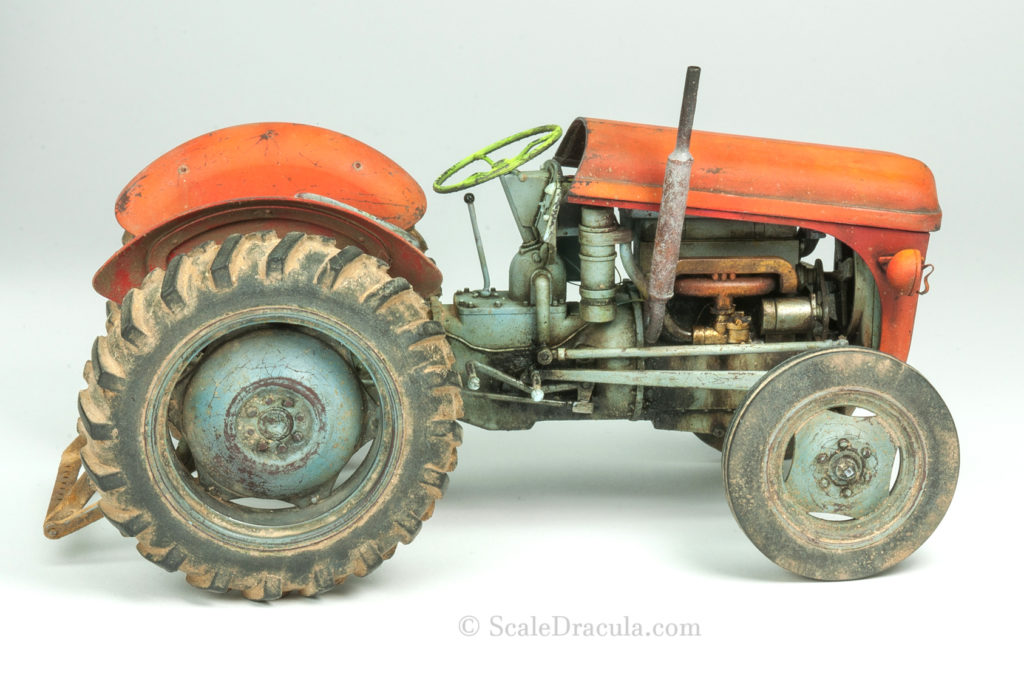
And there it is. The model is finally ready. I’ve really had a lot of fun with the little Ferguson. I especially enjoyed the freedom I had when choosing all the colours. I’m sure I’ll return to the civil vehicles in the future but right now I want to put my hands on some serious HEAVY METAL, with armour and stuff. More details soon.


When working with washes, it's best to build the layers gradually starting from the lightest shade.That way you'll get a nice, blended effect.
previous