


I’m coming back to the photo recreation projects with the most demanding and complicated model so far. This time I want to crank it up to 11 with some serious challenges at every step of the way. So there’s going to be quite a lot of scratch-building, aftermarket parts, complex painting schemes and weathering techniques. My point will be to check where my limitations are and hopefully push myself forward. The T-64, with its complicated design and recent combat history, seems like an ideal subject for that project.
So sit back and relax, this is going to take a while…
The T-64 is in many ways a unique tank in the post-Soviet arsenal. Introduced in the early 60s, it has been subjected to numerous upgrades and it remains relevant on the modern battlefield until today.
From the beginning, the T-64 was designed to be a cutting-edge, experimental construction that would push the whole armoured warfare forward. It was the first mass-produced tank to be equipped with a modern composite armour. Another novelty, the autoloader made it possible to reduce the crew of the tank to 3 soldiers thus lowering its size and weight.
The sophisticated design led to enormous problems during the manufacturing process. The T-64 was also extremely expensive to build in comparison to its more conventional counterpart – the T-72. However, the pressure to win the arms race was always imperative in the Soviet Union and soon the first version of the tank would enter into service.
Although for many years T-64 was considered the most advanced main battle tank in existence, more often it was used in propaganda, than on an actual battlefield. Unlike the T-72, the T-64 didn’t take part in the most important soviet military campaigns of the second part of the 20th century. Also, as a crown jewel of the soviet armoured forces, it was never exported outside the USSR. Apart from a minor contribution to the 1990 Transnistria War, the T-64 was given a real baptism of fire no sooner than in 2014 when a war broke out in the eastern Ukraine. A large number of T-64s, usually late B or BV versions, can now be seen fighting on both sides of the conflict.
Unlike in the previous photo recreation projects, this time I was able to gather a really solid reference material that shows the tank in different stages of its war path.
Here’s an Ukrainian T-64BV with the side number “300”, exhibited probably at one of the Ukrainian military bases.
Or actually, it is a B1V version but we’ll get to that later.
The close-up tells us the T-64 is hardly in mint condition: faded look and camouflage paint chipping off already makes it a good subject for a weathering project. This tank spent a while outdoors as a statue, exposed to different weather conditions.
At some point, after the Ukraine-Russia conflict broke out, the tank was called out from the retirement and re-entered the active duty. It looks even more battered now with the dust and grime all over the main hull. Also, notice that some of the ERA bricks have been misplaced along the way and yellow stripes were painted as an easy identification symbol.
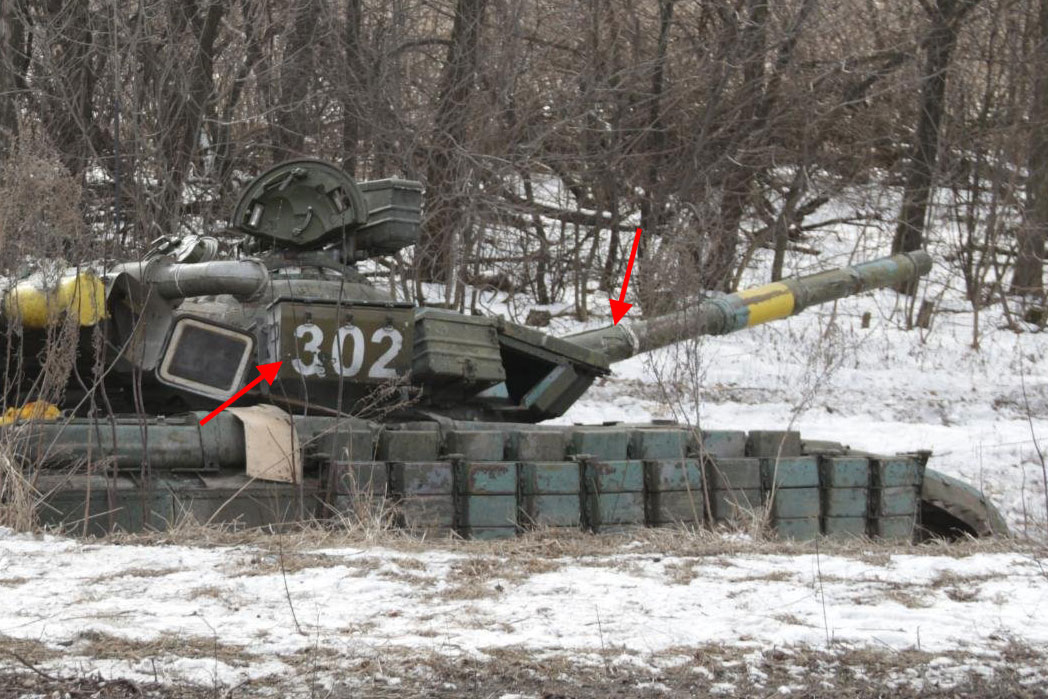
And here’s a series of pictures from the town of Chornukhyne in Eastern Ukraine. Here on 19th February 2015 the tank was damaged and probably abandoned by Ukrainian troops.
The T-64 has a different number now – “302”. But we can see the box the number was painted on is clearly a different colour than the rest. Maybe it was repainted or taken from other vehicle?
Also, the tank’s got a very specific damage on the barrel which will be important in a second.
It was at this point that the vehicle was probably captured by the pro-Russian separatists and incorporated into their armoured forces.
Here’s another photo taken some time later. We can see some major damage to the side reactive armour and to the barrel. Also, the yellow stripe was almost completely removed.
And here’s our T-64 under new management and after some lifting. The tank was completely repainted and fitted with a KMT-6 mine plow. Only the damage to the barrel reveals the connection with its past…
So here’s the story of my T-64. Or at least that’s what I’ve deducted from the set of photos…
It’s the first time I can see my subject in so many perspectives. And maybe because of that, I don’t really want to concentrate on one single photo. Instead, I’ll try to recreate the T-64 in an arbitrary point in time. This will give me some more liberty while working on all the details.
As I had chosen to build a tank from the recent Ukraine-Russia conflict, it had to be one of the later versions. I’ve picked up the T-64 BV by Trumpeter which has little competition at the moment. I will actually be building a B1V tank, but the conversion isn’t not that much of a problem.
I also bought an overwhelmingly huge photo-etch kit from Voyager Model. This thing lets you build all the individual ERA bricks, together with side skirts, smoke dischargers and many other details. Hands down the most complicated PE set I’ve ever work with.
And last but not least, I bought a barrel kit by Aber. Again, quite a complicated build by itself as the later versions of the T-64 had guns with thermal cover. And Aber being Aber, recreated that to the tiniest detail.
There’s going to be many other upgades, but I’ll talk about them later, at the appropiate time.
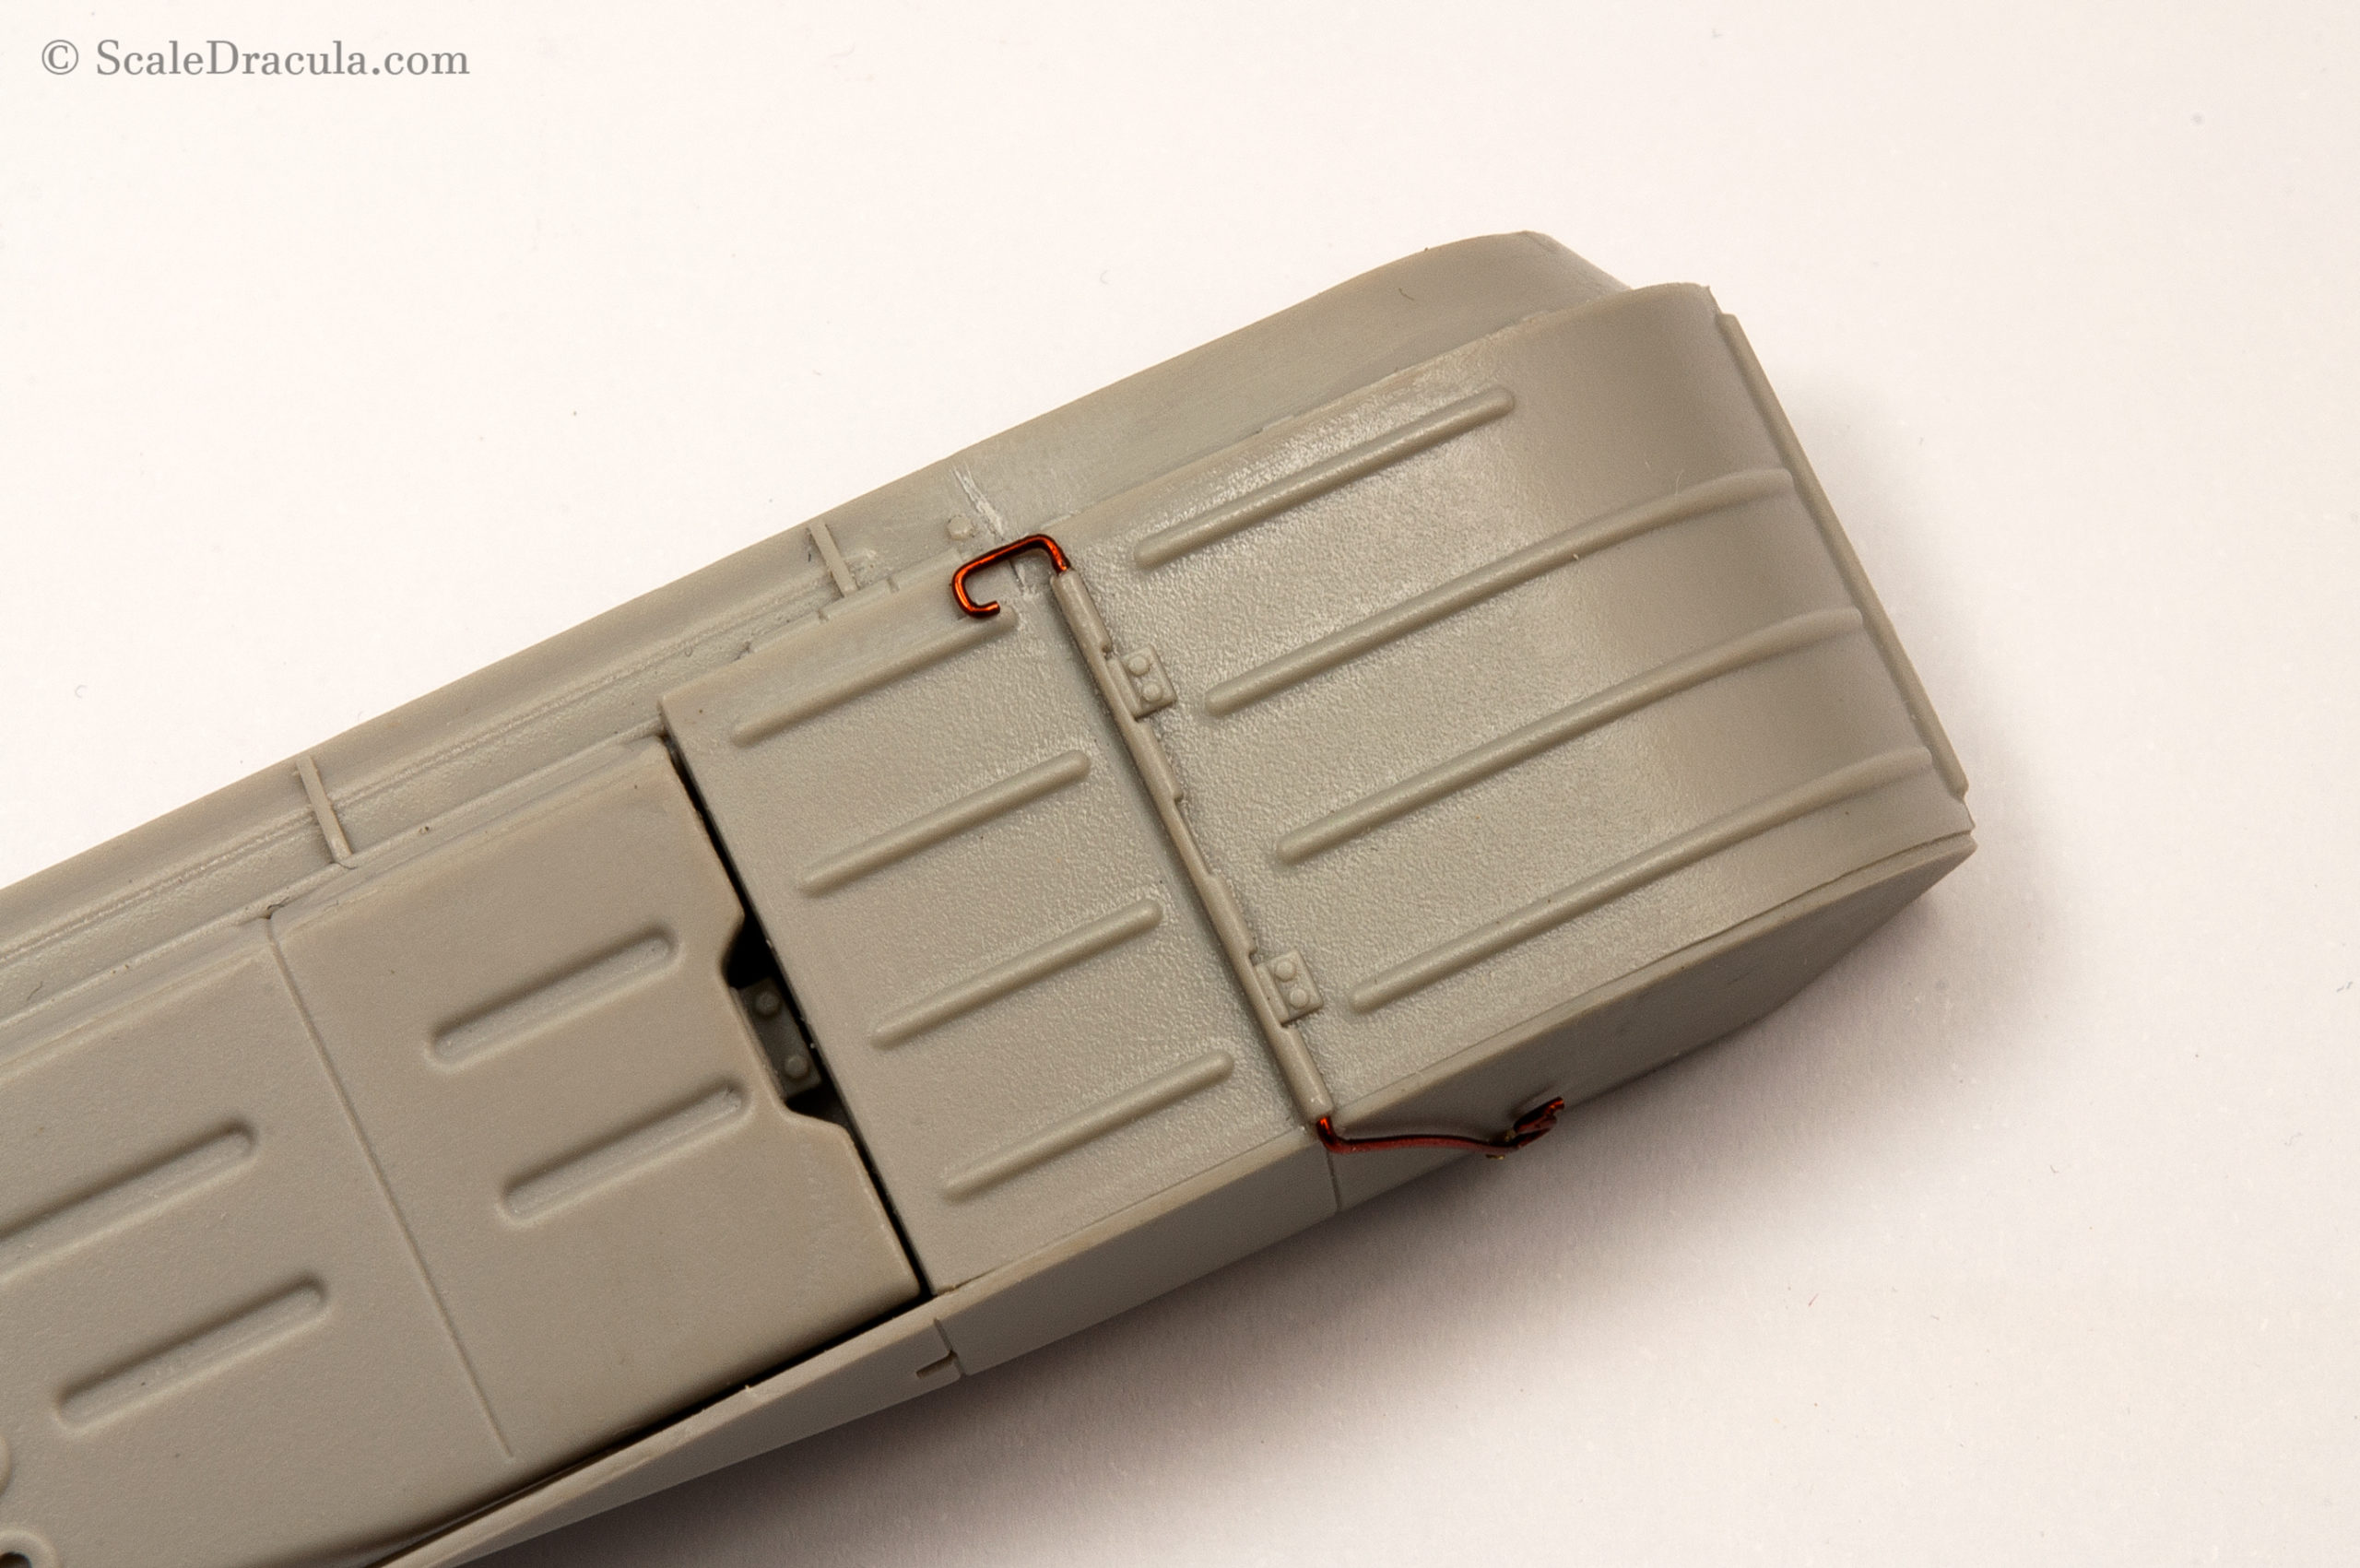
Let’s start with the fenders. On many photos I saw the front fenders missing so I cut one of them off with a hobby saw. The edges were then polished and thinned down. Check out my ZSU-57-2 project where I explained that with more details.
The wire was used to replace the original details of the fender. It always makes sense to use wire for things like that as the styrene details usually look flat and unrealistic.
I decided to leave the original hinge which had pretty nice details. I only cleaned and replaced both ends of the wire.
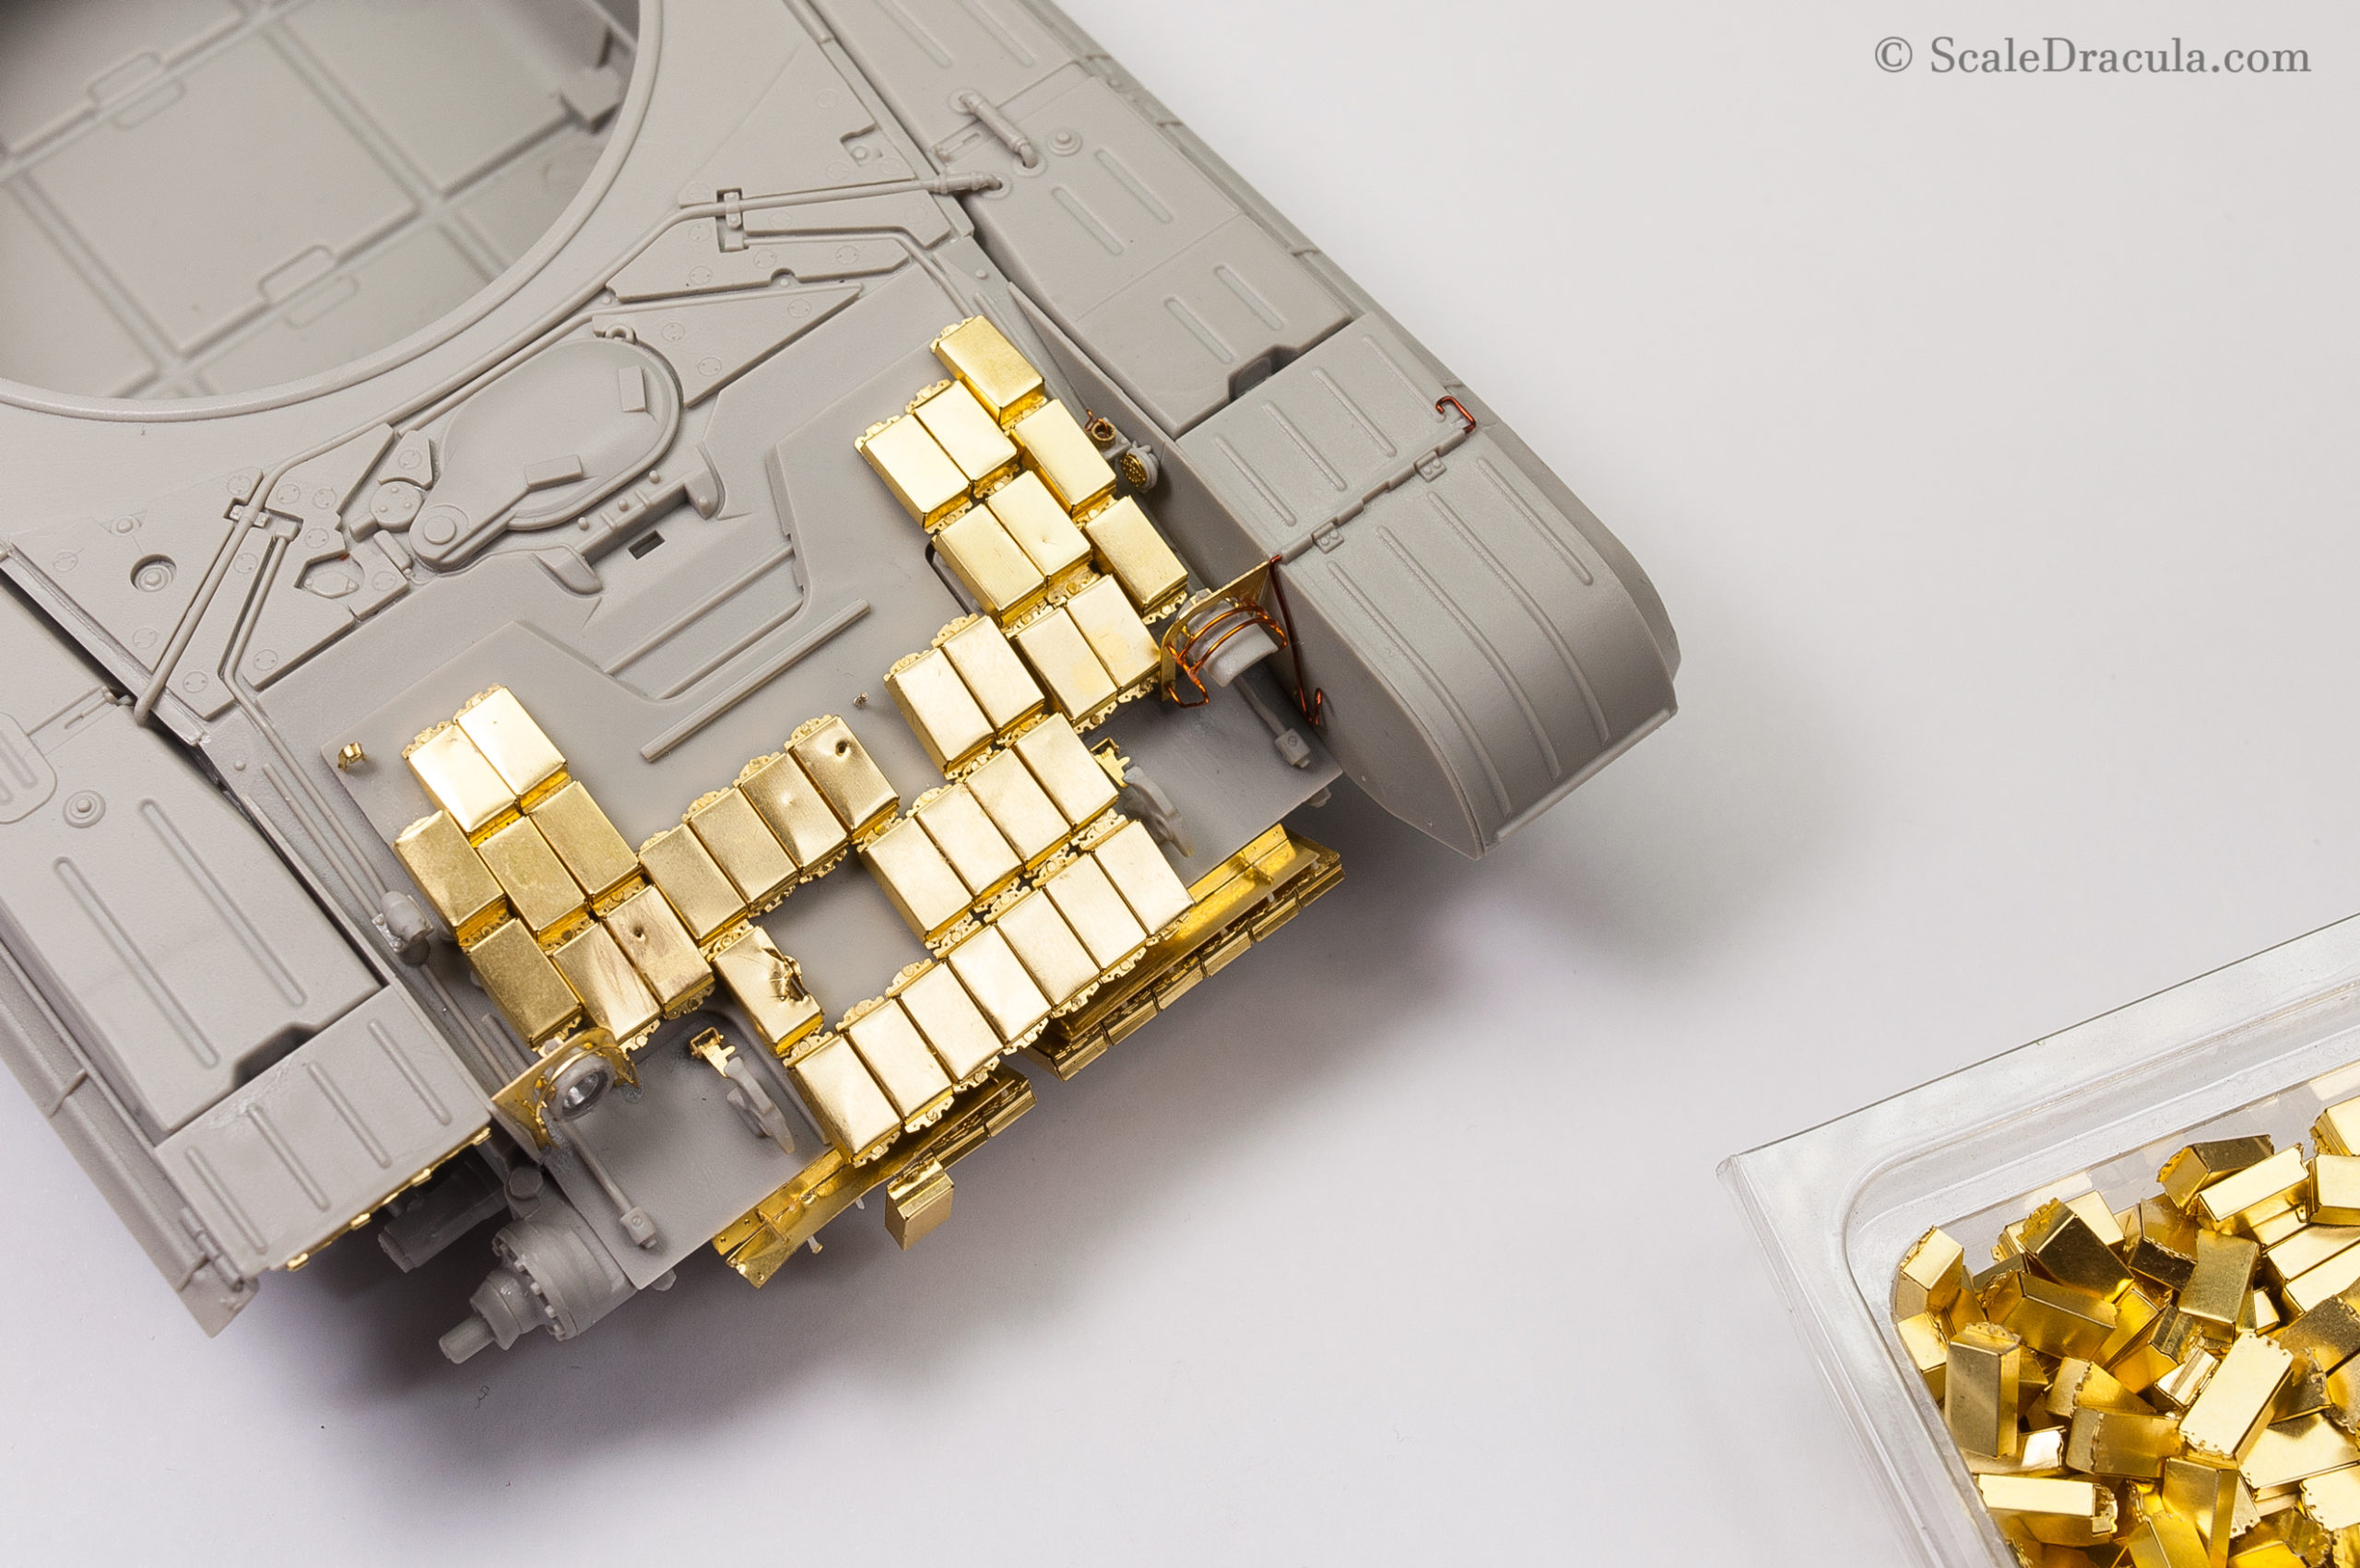
Ok, it’s high time we addressed the elefant in the room. And it’s rather a big hairy mammoth if you ask me. I’m referring to the reactive armour that covers a good part of the T-64BV.
The Voyager kit lets you recreate every single ERA brick on this tank from photo-etched parts. We’re talking about around 150 to 200 pieces depending on the version. Each brick consists of the base, the bendable top and two bolt heads. This is pretty much how the actual thing is constructed so you can recreate those bricks very realistically.
So… Let’s just say it took me quite a while to assemble all of them. As always with repetitive jobs like that, I work like a factory production line – first I prepare components and then I fit them together. Also, I divided the work into a couple of session to respect my mental health…
The good thing about this torture is that you can recreate all the damage in a very cool and realistic way. I did some dents and bullet holes using hobby knife and tweezers.
Putting the bricks together is one thing. Attaching them to the model is a whole different problem. And Voyager’s got you covered all the way except the front glacis. Here you have to figure it out by yourself.
I decided to glue the bricks together in segments and then reinforce them on the bottom with styrene stips and beams.
The strips will also provide a necessary distance between the bricks and the main hull. And it will be easier to align and fix them using an ordinary modelling glue.
It goes without saying that the plastic parts shouldn’t me visible on the finished model. It’s kind of tricky but it can be done with some good planning.
When the little segments were ready I started to attach them to the model. But soon enough I had to take a brake to correct the headlight covers. Some scratch-building was needed as neither Trumpeter nor Voyager gives them justice.
Here’s the front glacis all covered with reactive armour. I left some of the bricks missing to make the thing look more interesting. Some minor damage was done as well.
The next step of the construction is the side skirts and here I also decided to upgrade the kit a little bit. The styrene parts are too thick. The photo-etched skirts on the other hand are thin but it’s really hard to make stiff metal look like flexible rubber. Any damage would just look wrong and unrealistic. But there’s an easy way around this.
Magnetic rubber is a fantastic material that proves to be really useful in the hobby. I talked about it in detail on my ZSU-57-2 project so check it out if you’ve missed it.
Long story short: it’s just real rubber so it acts like one and that is obviously what we want.
It was super easy to cut pieces of rubber using metal parts as template.
The magnetic rubber is also extremely easy to damage. A hobby knife and some sandpaper is all you need to make it look old and worn. Just use reference photos to decide what kind of damage would look right.
I’ve talked about it before but here we go again: whenever you introduce any custom built elements, make sure they are attached properly. Loosing them later during painting will result in a lot of mess.
I glued wide styrene strips under the fenders as a support for the custom side skirts. It is especially important here as the rubber parts will be flexible and prone to damage.
Now the side shirt are attached without problems. Some more PE details are necessary to finish this stage.
Ok, I think it’s quite enough for one post. Here’s what I have right now: the main hull of the tank almost ready for painting. This is probably the easiest part of the build though. I expect much more problems with the turret and the side ERA panels. I’ll take care of them next time.


5 Comments
Sam
10 February 2021 at 14:17Amazing work – glad to see a new post up, keep it coming 🙂
Michael Tabone
4 June 2021 at 07:13Great stuff, and I think I will add your method of the rubber side skirts to my box of tricks.
Firs
22 June 2021 at 16:01Expecting new post!
Steve
5 January 2023 at 19:23I have to say that without doubt this is the best armour model site i’ve come across and you sir are one if not the best modeller i’ve seen.
ScaleDracula
6 January 2023 at 20:39Not sure about that but thanks a lot anyway!